
Hello blog readers I am back! Some of you may not know this but my blog has been gone for nearly 3 weeks. I had a notification of a comment from a reader and when I went to respond poof… my blog had disappeared! I’ll keep this brief because nobody wants to read a novel but after a week of scratching our heads we had to call in professionals to look into some deep coding details. Basically I had reached a data limit with my old hosting company. Without any notice they pulled the plug and tech support offered no help in solving the problem. I’m happy to say we’re back up and running, we’ve switched hosting companies and this shouldn’t ever happen again. My apologies to everyone… ok so let’s move along here and make a fall apple wreath!
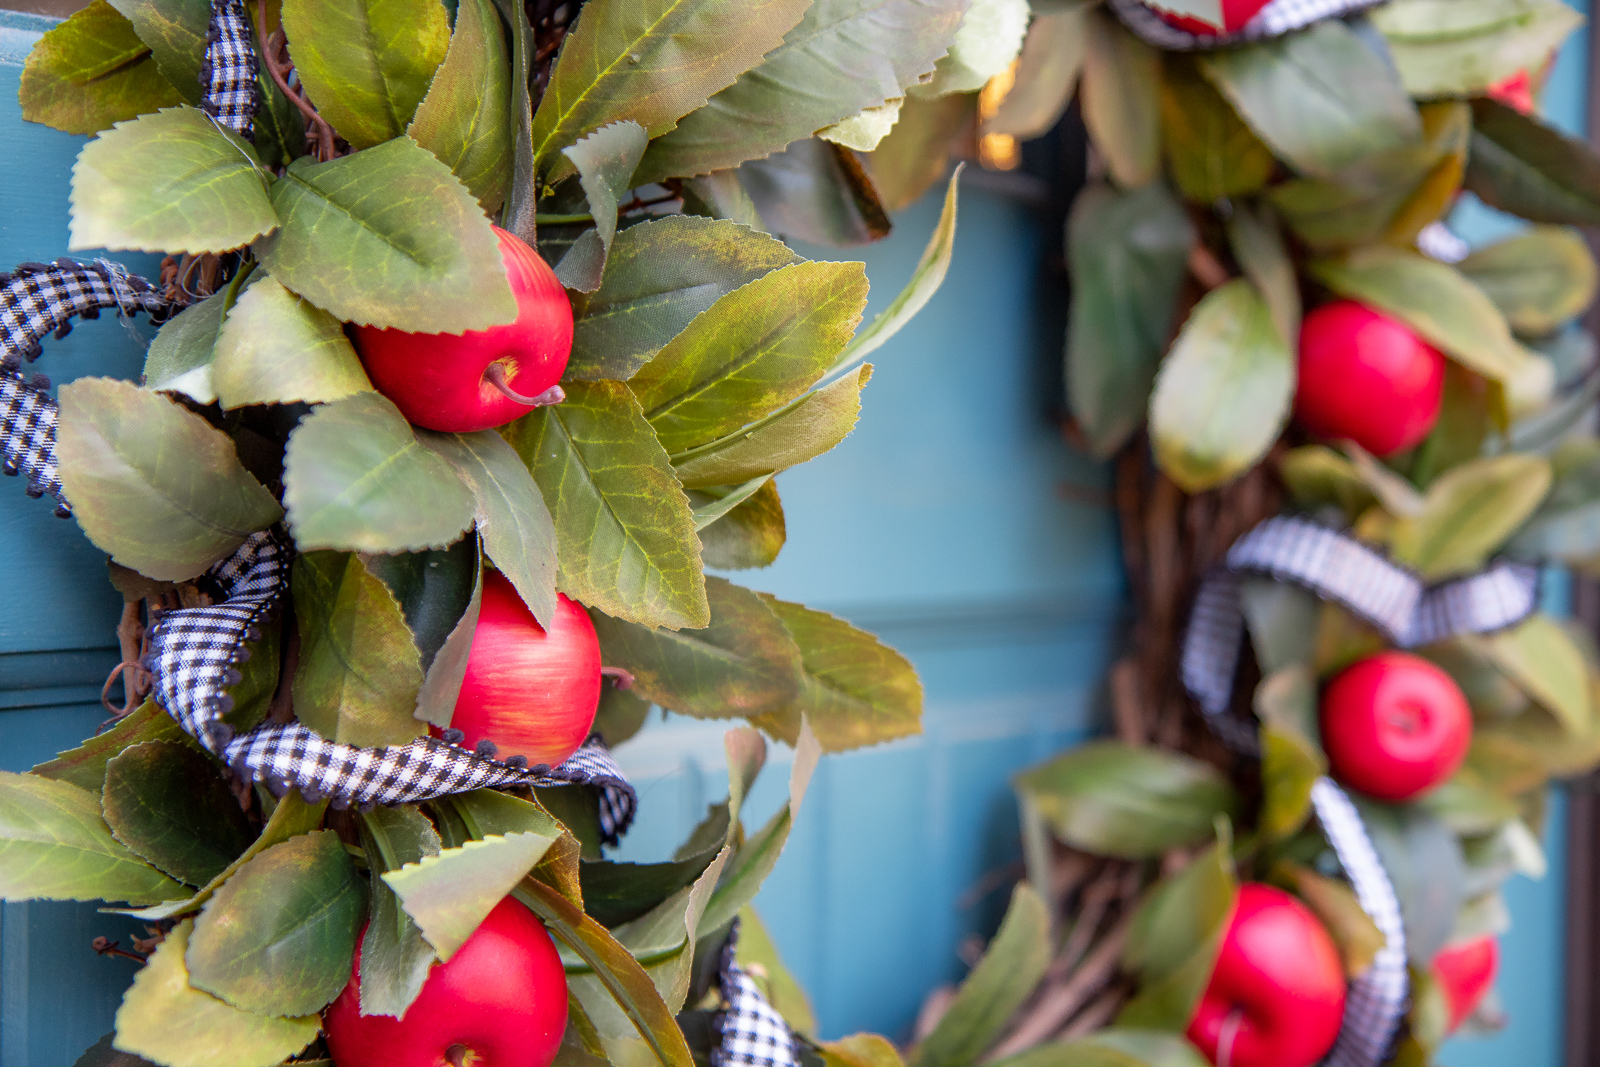
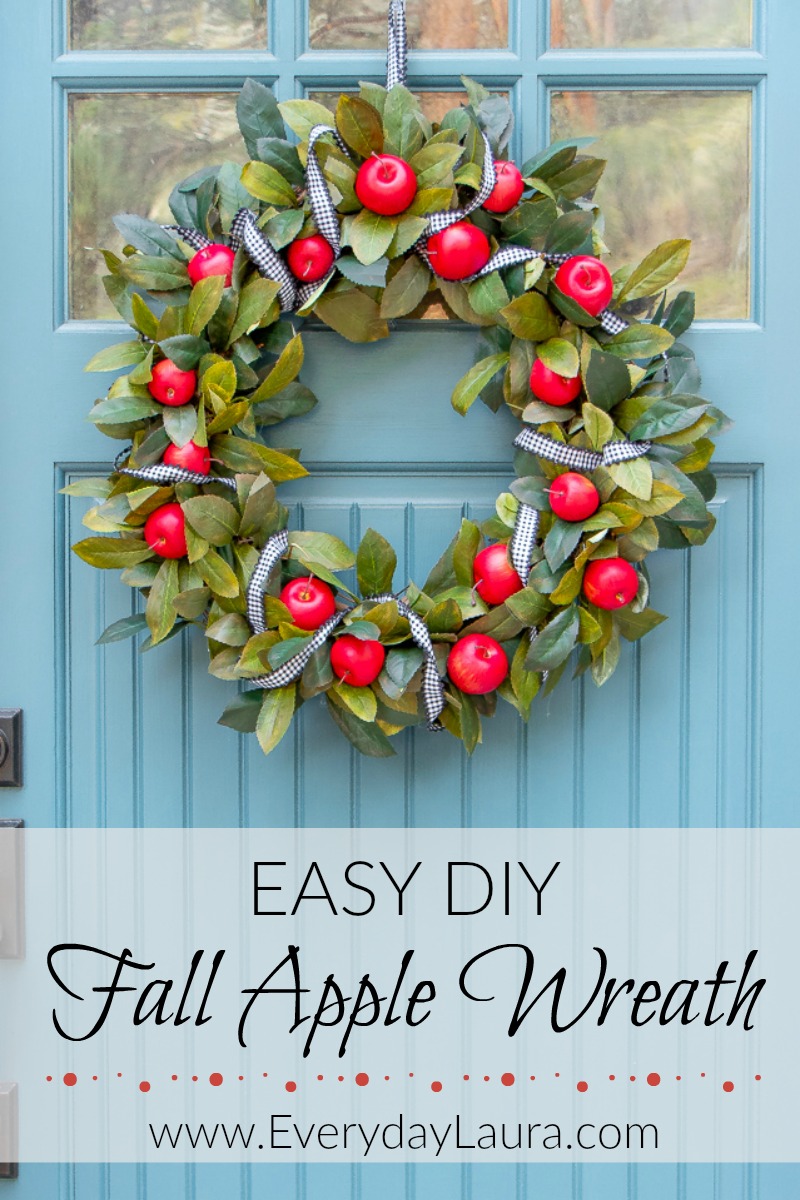
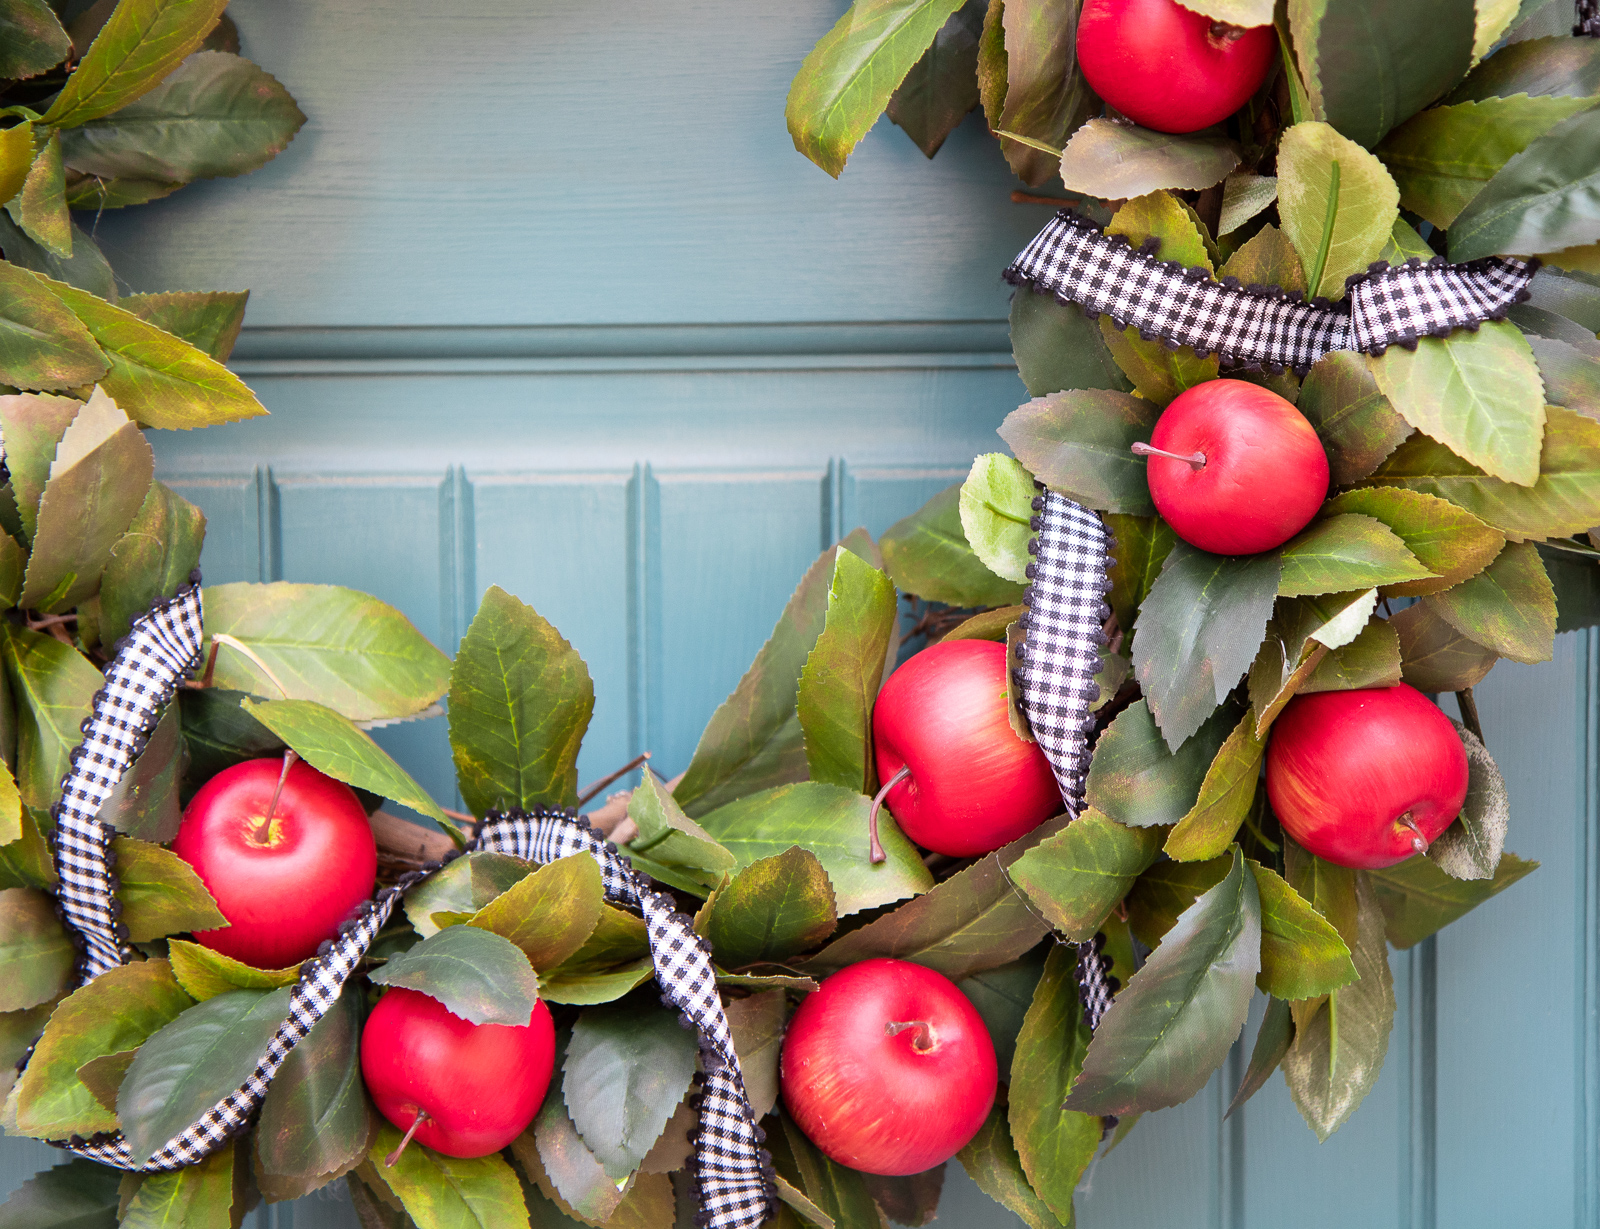
First off you may be thinking why apples? I’m a pumpkin loving nut just like everyone else but this fall I was craving something a little different so I went with apples. I must say I’m happy with how it turned out and I love the cute pop of color from the apples.
Instead of floral stems I went with a garland for the greenery because that’s what was on sale. A great bonus about using garland is I didn’t need to dig out my wire cutters… just pull the leaves off and you’re good to go!
SUPPLIES NEEDED
18 inch grapevine wreath form $4.99
2 basic leaf garlands 17.99 at 50% off= $17.99
1 bundle of small plastic apples 6.99 @40% off =4.19
Ribbon 3.99 at 50% off= $1.99
Scissors
Hot glue gun
2-3 hot glue sticks
Total cost: $29.16

INSTRUCTIONS
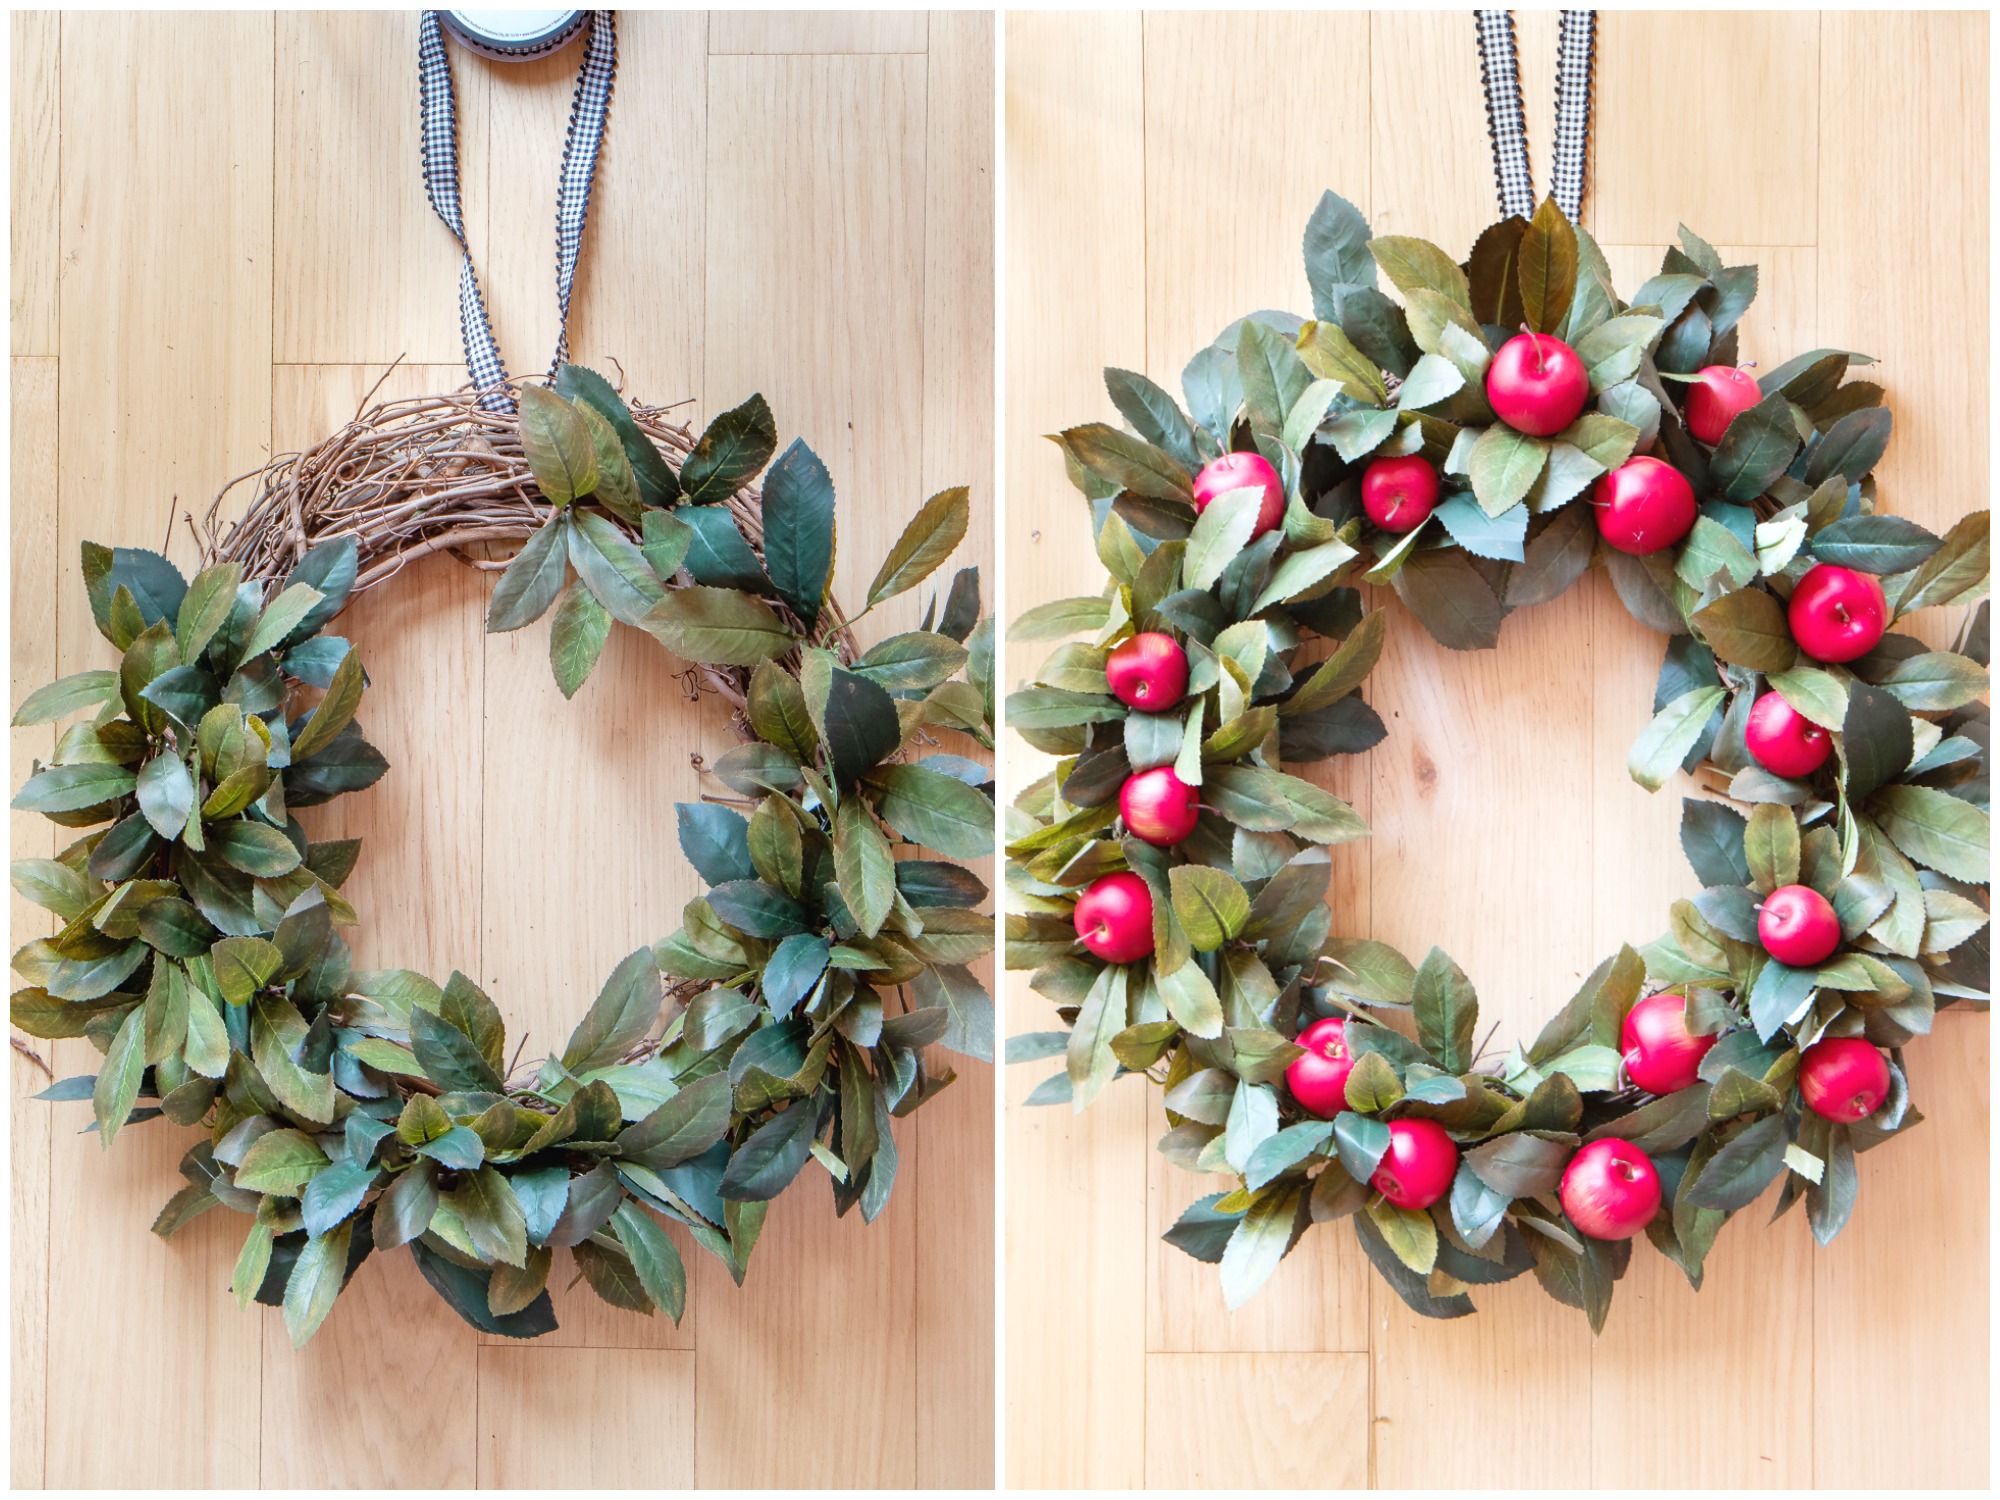
1. Begin by threading a piece of ribbon through the top of the wreath and set aside. Pull the leaves off the floral garland and hot glue. Be sure to glue the leaves in different directions so it looks extra fluffy.
2. Once you’ve glued all the leaves on begin gluing the apples. I know… it’s complicated.
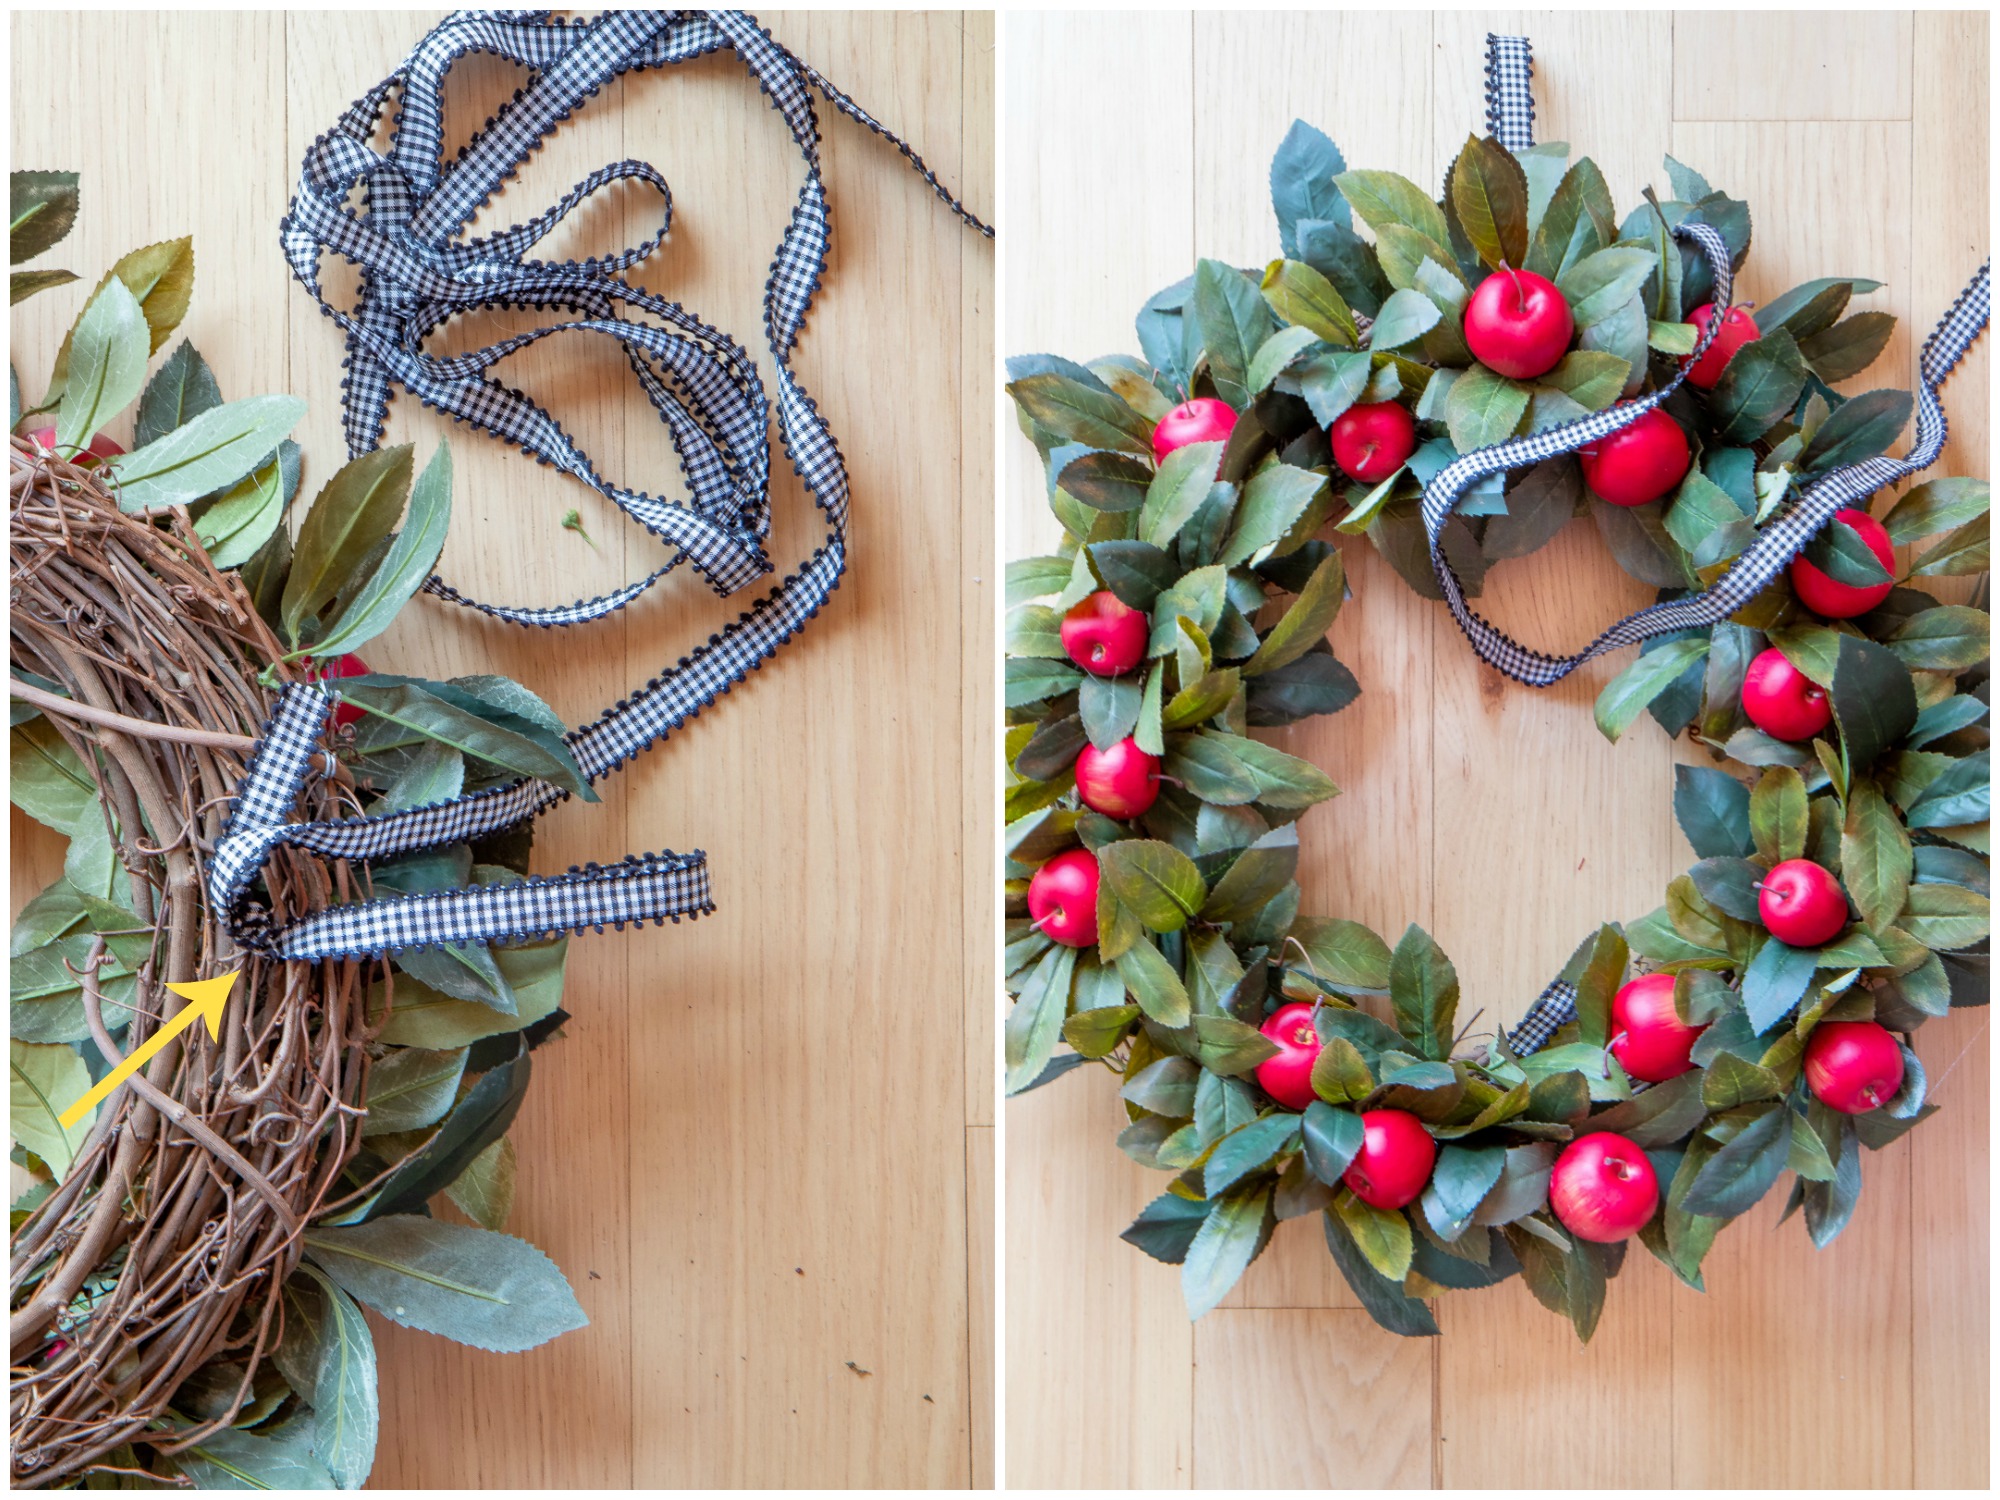
3. Turn the wreath over and make a knot to create a hanging loop. Pull the loop to the back of the wreath and secure with hot glue.
4. Arrange the remaining ribbon around the wreath and secure in random places with hot glue. Poof all done! I kept my ribbon connected with the loop in the back and just pulled the ribbon to the front, feel free to cut it if that’s more convenient. I had a hard time deciding if I wanted to add the ribbon or not. I loved both looks but in the end I decided the ribbon gave a bit of pizazz, but it’s your choice.

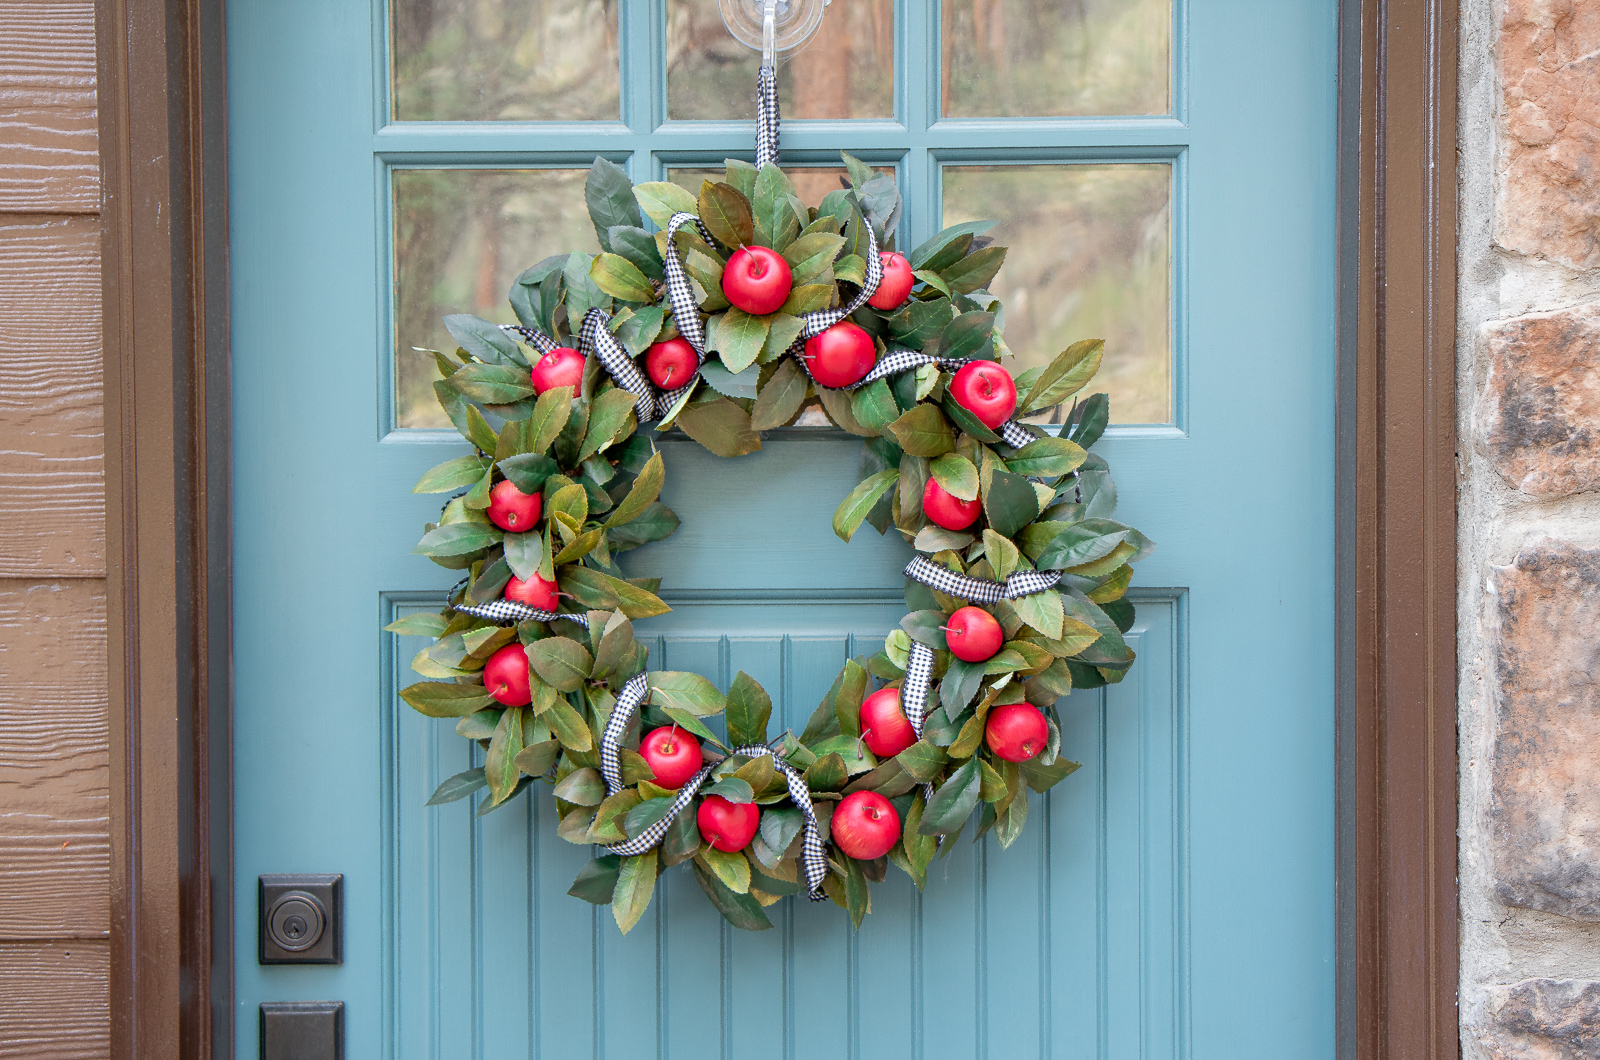
I love the homey comfort of apples this time of year and I can’t get over how cute and realistic these apples look. This wreath costing under $30 and the fact that I only had one hot glue burn is what I call success my friends!
Be sure to check out my holidays category for some of other fall projects and decor, including my favorite fall potpourri and how to bleach pinecones. Take care!

2 thoughts on “DIY APPLE WREATH”