DECOR

HOW TO DECORATE YOUR HOME ON A BUDGET

Home decorating can seem overwhelming to people in many ways, and let’s be honest, budget is a big factor for most of us.  Have you ever thought about how just a few simple changes can have a huge impact on your home?  With a little thought and patience you can easily transform your home into a dreamy spot full of character.  Decorating feels challenging at times… trust me I know, but I’m here to show you some simple and affordable ways to tackle the design process.

Over the years I’ve learned some simple, effective, and affordable ways to easily add style.  So today I’m excited to share with you my 12 simple ways to decorate your home on a budget.  I’ve been wanting to share these tips with my readers for the longest time, and I’m thrilled to finally do so.  Decorating is my passion, so let’s get started!

Paint budget decorating tips

EXPRESS YOUR STYLE WITH PAINT

When it comes to home decor and style it all starts with paint, the possibilities are endless.  It’s amazing what a can of paint can do for a room, and the mood it can create.  Open a can of paint and suddenly you have a new room, and it’s not just for walls.  With so many paint stores now offering samples, deciding on a color isn’t nearly as stressful as it used to be.

UPGRADE YOUR LIGHTS

When it comes to decorating on a budget paint is #1 in my book, but upgrading your lighting is definitely #2.  I think of ceiling lights as jewelry for you home.  I did a blog post very early on this topic, and it’s the perfect way to get a wow factor.  Now, I have been known to buy some pricey chandeliers and other light fixtures, but this doesn’t always need to be the case.  It’s so easy to find affordable lights with style.  This light looks very close to my kitchen table one and it’s a fraction of the price!   Older outdated lights can get a fresh new look with a bit of paint and magnetic crystals, I love magnetic crystals!

How to decorate your home on a budget

ADD MIRRORS 

Mirrors reflect light, add sparkle, and can be used nearly anywhere.  You can find a wide variety of styles that suit any taste, and it’s especially easy to find great deals at garage sales and thrift stores.   When you find a great mirror style or shape never let it go, sometimes all it needs is paint for a whole new look!  Large floor mirrors have a wow impact, but it’s also fun to collect them and have a grouping of smaller mirrors.  Every time I go into thrift shops I usually see a great mirrors.

ADD RUGS

Want to quickly add style to a room?  Try a large inexpensive area rug.  It’s easier than ever to find great styles and patterns at an affordable price.  IKEA is always a winner, but I’m also a huge fan of indoor/outdoor rugs.  They may not be as soft as some rugs but they’re so affordable, kid and pet friendly too!  On a warm summer day you can just hose them off in the driveway!  I’m especially a fan of the outdoor rugs at Ballard Designs and they frequently have sales too.  We have this chevron indoor/outdoor rug in our bedroom and it’s been so easy to keep clean.  I frequently spill coffee on it and you can’t even tell!

How to decorate by using spray paint

TRY SPRAY PAINT

Yes, I added paint again, because in the decor world spray paint is a gift from God.  What can I say…  this girl loves spray paint.  You can take pretty much anything ugly and spray paint will make it look better.  I’m especially fond of gold and bronze spray paint, anything dull or outdated spray paint it for fresh new life, and don’t forget about furniture.  Yes you can spray paint furniture, it’s such a fun and fast way to refinish furniture.  Be sure to check out my tutorial on how to spray paint furniture.

How to decorate your home on a budget

USE WHAT YOU ALREADY HAVE

A lot of us already have instant decor at our fingertips we just don’t realize it!  Who’s to say a gorgeous pair of shoes can’t be on display?  Those wine corks or seashells you’ve been saving?  Put them on display in a bowl.  Old cards can easily be framed too.  Those apples you eat every morning can easily be decor in an elegant bowl.  Walk around your home and find inspiration.

ADD LAMPS

There is an old school decorating rule that every room should have 3 sources of light.  Layering light is such an effective way to add ambience to a room, plus lamps add interest and style!  It’s now easier than ever to find affordable lamps to create your own look, and don’t forget you can spray paint or switch out lamp shades.  So the next time you have a blank spot consider a table or floor lamp for a great day or night look.

How to decorate your home on a budget

MIX IN BLACK & WHITE PHOTOS

Black and white photos are so classic and timeless, they go with all decor.  This is a favorite budget trick of mine, camera phones are now so high quality, and with apps and filters you can easily black and white your own photos creating endless style.  Even Walgreens can add a black and white filter giving your photos such a classic style, and almost always have a coupon code making prints in a variety of sizes super affordable.

GO BOLD WITH COLOR AND PATTERN

A little bit of color and pattern can take a dull room from drab to fab in minutes!  Add a colorful throw or some patterned items to any room for visual interest.  Bed and sofa pillow covers can be made or purchased on sale for great prices, and don’t forget about paint!  Paint is a huge answer to many decor issues.  That drab bookshelf might look fabulous painted turquoise, and how about new striped and floral pillow covers for your sofa?

Budget decorating tips

LET YOUR WINDOWS TALK

Window treatments add pizazz and personality to any room.  It’s becoming much easier to find amazing and affordable window treatments, you can often find great selections at places like Pier One or Target in an incredible variety of colors and patterns.  Also when light or privacy is not an issue consider removing window treatments altogether.  You can’t get any more affordable than that, and the beautiful natural light will brighten and enhance any room.

MIX UP FURNITURE

Thank goodness the days of boring matchy-matchy furniture are over!  Pulling in different furniture colors and textures adds personality to a room.  This also gives you the opportunity to buy pre-owned, watch for major furniture sales and test out your DIY painting skills.  This allows you to develop your own individual style and for a fraction of the cost.
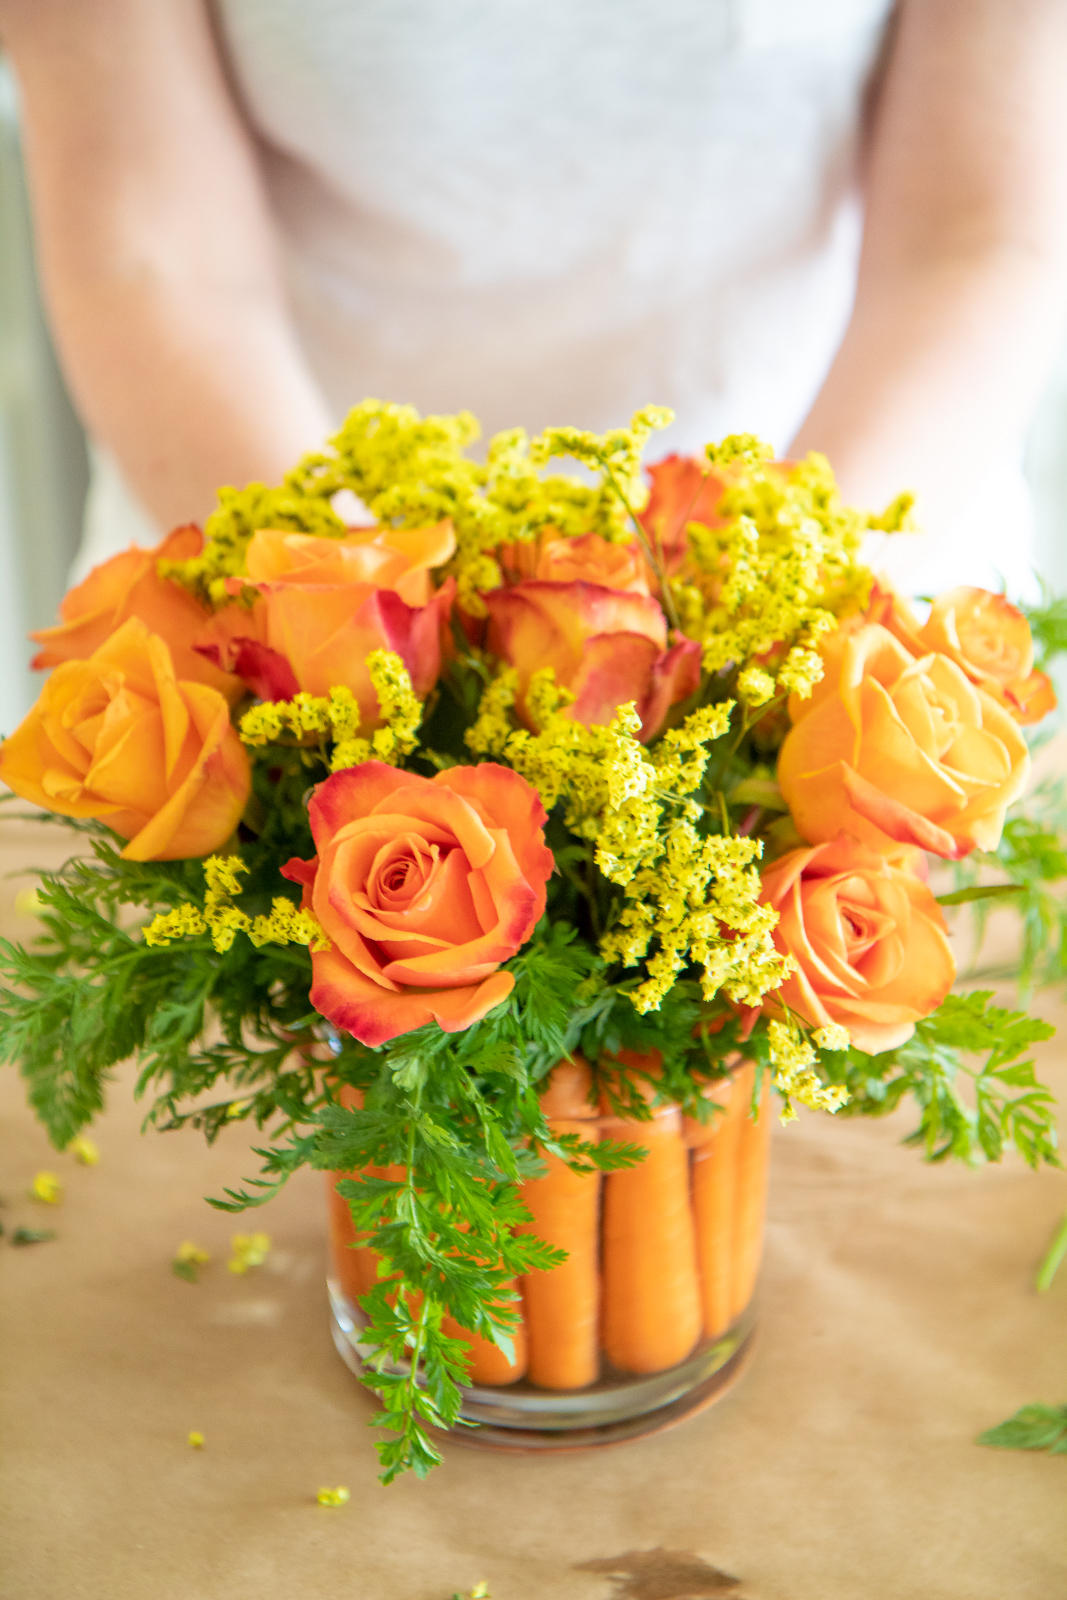
Budget decorating tips

ADD SOME PLANTS

Every room needs a splash of green.  Plants are an affordable way to add life and texture to a room.  There are so many varieties of plants that are easy to care for, so have no fear if you have a brown thumb.  It’s kind of hit or miss when it comes to me keeping indoor plants alive, but I find snake plants extremely easy to care for as well as cheerful succulents.

Budget decorating tricks

Everyone deserves a well decorated home and that doesn’t mean breaking the bank.  With a little creativity you can have a home that is YOU and within your budget.

Laura

Everything Else

10 FREEZER HACKS EVERYONE SHOULD KNOW

10 Freezer Hacks Everyone Should Know

Last week I was drinking my morning coffee and planning my blog posts.  I use my emotions, the seasons, and my life at home for inspiration, and that’s when it hit me…my freezer tips!  Having a fully stocked freezer with the ingredients I commonly need is such a good feeling for me!  Especially when I know busy stressful days are coming up, it calms me to feel freezer ready.  Sometimes I feel like Mama squirrel burying nuts in the yard, except I’m using my freezer.

I have 10 of my favorite tips to share, ones that I’ve been doing for years.  Not only do they help save time, they help save MONEY.  Some of these you may already know about and some you may not, but I find all of them so incredibly useful!

10 Freezer Hacks Everyone Should Know

1.  KEEP A VEGGIE SCRAP BAG

Saving vegetable scraps is one of my favorite tips!  I’ve been doing this so long that I can’t remember how it all started.  I keep a large freezer bag in the freezer, and any time I have leftover onions or celery they go into my veggie bag.  I save anything that could be used for making vegetable or chicken stock.  Whenever I dice up an onion I save the peel, the ends, and any leftovers for the veggie bag.  Limp celery and leaves all get thrown in the bag too.  Sometimes I’ll save a piece of garlic or fresh thyme, basically anything that works well to make a savory broth.  As I collect scraps I’ll throw them into the bag with the existing frozen ones.  Then when I’m ready to make stock I dump the frozen ingredients into a pot with water.  It’s free and tastes delicious!  I reuse my veggie freezer bag many times until I start a new one, so once it’s empty it waits in the freezer for new scraps.

2.  KEEP YOUR CHICKEN BONES

Every week I roast a few chickens for dinner soups or sandwiches, and we make sure to always save all the chicken bones.  After every bit of meat has been picked off the bones I either immediately start making chicken stock or we freeze the bones in a freezer bag.  I save all the bones, even the little ones.  Be sure to save the spine and cartilage, those are the essential parts – sorry to all the vegetarians reading this!!  Then when you’re ready to make a batch of stock, grab your veggie bag with leftover onion and celery and you’re good to go.  You have free chicken stock!  Sometimes I’ll save up several batches of chicken bones and make a huge batch of stock.  One of these days I’ll get around to posting how I make chicken stock I promise!  We can’t live without homemade chicken stock, we use it in everything.

Freezing chicken bones

3.  FREEZE RIPE BANANAS

Please don’t ever throw away over ripe black bananas… you’ll make me cry.  As scary as they look on the outside the flavor inside is amazing!  You’ve never had truly amazing banana cake or bread unless it’s been made with black bananas.  As long as your bananas aren’t moldy keep them and put them into the freezer until you’re ready to use them.  They usually thaw within 3-4 hours and the watery liquid you can just mash up with the bananas.

Slow cooker freezer meals

4.  FREEZE MEALS FLAT

I can’t believe back in the old days I would throw a frozen meal upright in the freezer.  Geez what a freezer space killer!  It was one day I saw this tip in a magazine and I had this “why didn’t I think of that” moment.  When you freeze meals flat your freezer storage space quadruples, and it’s so much easier to find what you need.

5.  FREEZE MEAL BUILDERS

Freezing entire meals is great, but don’t forget about freezing individual meal building ingredients.  Sometimes I like to cook a fresh meal in the kitchen, but I also want some time-saving meal builders.  Meal builders should be versatile ones that could be used in a variety of meals.  Some of our favorite meal builders to freeze are cooked shredded pulled pork and chicken, cooked ground beef, rice, and my marinara sauce.  Any food that you use often that freezes well should work.  We hate the way pre-shredded cheese tastes, so sometimes I’ll even shred a block of cheese and freeze it.  The texture gets a little crumbly but it cooks great and works excellent in casseroles.   Cauliflower and regular pizza crust is especially helpful to us.  I’ll line the pan with parchment paper, freeze the crust into the pan, and once frozen wrap it in foil.  This works great for last minute pizza.

10 Freezer Hacks Everyone Should Know

6.  FREEZE TOMATO PASTE

Most of my recipes never call for a full can of tomato paste.  Seriously, so many recipes call for a few tablespoons of tomato paste!  In the past I would save leftovers in the refrigerator, and usually when I needed more tomato paste my leftovers would be old and moldy.  The solution is to freeze tablespoon sized portions on wax paper, and once solid store them in a freezer bag.  When I’m cooking on the stove I’ll add my tomato paste blobs to the pan frozen and they thaw out really fast.

10 Freezer Hacks Everyone Should Know

7.  FREEZE BROTH INTO ICE CUBES

We all need some frozen broth ice cubes on hand.  This is such a handy way to quickly thaw out broth or stock.  I do freeze larger quantities for soups and things, but so many recipes call for small amounts of broth.  Measure out your ice cube trays, I found mine to be about an ounce each, so if I need 1/2 cup of broth I just grab 4 ice cubes and thaw.  This is a great money and time saver whether you use homemade or store bought broth.  It can be frustrating when you open a can of broth for a small portion, you refrigerate the leftovers, and they expire before you can use them.  Instead try the ice cube trick.

10 Freezer Hacks Everyone Should Know

8.  FLASH FREEZING

Flash freezing is where you take individual items and freeze them solid on a baking sheet, then simply store them in a freezer bag.  This prevents foods from sticking together and lets you use amounts as needed.  Some of our favorite items to flash freeze are my homemade sausage balls, our own healthy chicken nuggets, and cookie dough rolled out into balls.  This is a great trick for kid snacks or last minute house guests.  We cook our items frozen and just increase the baking time by a few minutes.

9.  FREEZE SLOW COOKER MEALS

Everyone needs a few frozen slow cooker meals on hand for hectic days!  You can find tons of recipes online with just a simple search.  The concept is to freeze the mixed ingredients in a bag.  Then when you’re ready for an easy meal you just thaw overnight and throw them into a slow cooker.  Sometimes the meals are still partially frozen, but as long as you can break up the chunks and fit them into a slow cooker you’re good to go.  Soups are some of my favorite slow cooker freezer meals, my Grilled Rosemary Balsamic Chicken can also be thrown in the slow cooker on low 6-7 hours and served with rice.

10 Freezer Hacks Everyone Should Know

10.  FREEZE CLOTHING

Not food related but this is also an amazing tip!  I recently blogged about how to properly store your fall & winter scarves but this works for so many clothing items.  Freezing fabrics such as silk, wool, and cashmere is great for killing moth eggs and larvae keeping your clothes in tip top shape.  The freezer trick also works to eliminate bacteria and odors from smelly clothing or shoes.  It also prevents sweaters and scarves from shedding and works great for dark denim.  Washing dark denim too often can cause fading quickly so a great trick is place your jeans in the freezer to freshen them up.  I recommending wrapping clothing in a bag for protection and freezing for 24-48 hours.

I hope you find these tips helpful, I know I do!  Friday on the blog I’ll be sharing some of my favorite budget decorating tips.


Laura

RECIPES

ROASTED CARROTS WITH PARSLEY & THYME

Roasted Carrots with parsley and thyme

I’ll be honest I’ve never been much of a fan when it comes to cooked carrots.  I always found the texture too mushy and the flavor lacking.  Then one day I learned you could roast them and my world changed.  This roasted carrots with parsley and thyme recipe is delicious and a total game changer when it comes to cooking carrots!

One of the things I love most about carrots is we always seem to have them in the refrigerator.  Go look in your refrigerator… you probably have a bag you forgot about.  Oh, carrots, I love you… you’re cheap and last forever in the refrigerator!

Roasted Carrots with parsley and thyme

You’ll want to start with 2 pounds of carrots.  I weigh mine after they are peeled and chopped.  Kitchen scales are so useful but if you don’t have one, you can weigh your carrots in the grocery store, just buy a little over 2 pounds to account for peeling and chopping the ends off.

After peeling I slice my carrots in half or sometimes thirds and depending on size I slice in halves or quarters.  Now for the best part, the olive oil and herbs.  Fresh thyme is what really makes this recipe sing!  Thyme is probably one of my most favorite all time herbs, and it’s so easy to grow.

ways to cook carrots

I place some olive oil, dried oregano (you can use fresh if you have it), and chopped up fresh thyme, along with a generous dose of freshly ground salt and pepper in a mixing bowl and I mix together with my hands. Then I spread them onto my favorite large baking sheet, it’s about 13 x 18. You’ll want to use a large baking sheet and place the carrots in a single layer.  Then I cover with foil and bake until soft.

Once the carrots are soft I crank up the broiler on high… I really get excited about this part, it’s my favorite.  I broil about 10 minutes until the carrots start to wrinkle and get slightly brown.  Sometimes I go up to 15 minutes.  I never really know, my carrots are slightly different sizes every time and it does vary.  You really need to keep an eye on them, nobody likes burnt carrots.

Once out of the oven I top them with freshly chopped Italian flat leaf parsley, don’t skip this part!  Fresh herbs make food come to life!  Add any additional salt and pepper and serve immediately.

Perfect delicious roasted carrots

Roasted Carrots with Parsley and Thyme

Servings: 4

Ingredients

  • 2 pounds carrots, peeled & chopped
  • 3 tbs olive oil
  • 1 tbs fresh thyme, chopped
  • 1/2 tsp oregano
  • freshly ground salt and pepper to taste
  • 3 tbs flat leaf Italian parsley, finely chopped

Instructions

  • Preheat oven to 400°  
  • Spray a large baking sheet with cooking spray or use parchment paper.  
  • In a large size bowl add carrots, olive oil, salt, pepper, thyme, and oregano and mix well.  
  • Spread carrots in an even layer onto the prepared pan.  Cover with foil and bake in the oven for 30 minutes, until carrots feel tender.
  • Remove the foil and broil on high for 10 minutes up to 15 if needed.  Remove from the oven and sprinkle with fresh parsley.  Add extra salt and pepper to taste.

Roasted Carrots with parsley and thyme

These are so delicious, I hope you see carrots in a whole new way now!


Laura

HOLIDAYS

HOW TO CREATE A CUTE EASTER CARROT FLOWER ARRANGEMENT

How to create a cute Easter carrot flower arrangement in just minutes.

I can’t believe it’s already April, time is really flying by!  I love spring and the new beginnings it always brings, it’s a perfect time to freshen up your home with a cheerful flower arrangement.  So today I thought I’d show you how I made this quick carrot Easter Bunny flower arrangement!  It’s so cute and really simple to make.

SUPPLIES NEEDED

1-2 bundles of carrots with green tops

A knife and scissors

A glass vase – any size or clear shape you like

Wet floral tape – optional but recommended

1 or 2 types of different flowers of your choice

How to create a cute Easter carrot flower arrangement.

Start by removing the green carrot tops and set aside.  Place a carrot next to the vase of your choice and cut one to length.  You can use that carrot as a guide for cutting the rest to length.

How to use carrots in a flower arrangement

Because the sides of my vase are straight and carrots naturally taper I turned some upside down for a tighter fit.  I highly recommend using wet floral tape, it’s only a few dollars at any craft store.  Floral tape is water proof and adds structure to your vase, making it a lot easier to arrange flowers.  I cut my tape to overlap the vase by about 1/4 to 1/2 of an inch.  As long as you really press and secure the ends own it’s pretty strong and flexible.

How to use carrots in a flower arrangement

Now place your carrots around the sides of your vase.  The first couple might be a little hard to stay up but it will they start staying up once you get more in there.  My carrots were just slightly taller than the top of the vase so the floral tape helped them stay up.  Use little carrot ends if needed to ensure a nice tight fit and fill in any gaps.  This will also help if you’re using a square or rectangle vase.

How to use carrots in a flower arrangement

Don’t worry about those ugly ends or if your carrots are perfect in height, this will be covered up.  Now add water to the vase about 3/4 of the way up.  Make sure you use flower food to prolong the life of your arrangement!  Grocery store flowers almost always come with a packet, but I make so many flower arrangements that I use Floralife, for floral arrangements.  It’s liquid and dissolves quick and it’s just faster and easier for me, plus a bottle lasts me a long time.

Easter decoration ideas

Now take the green carrot tops and cut them into manageable pieces to fill in the arrangement.  I think if you had a taller vase you could perhaps keep some entire bundles intact, but mine were too long and floppy.

Easter decoration ideas

Now it’s time to add some flowers!  I used these pretty orange coral colored roses.  I always have fun with my arrangements, there is no right or wrong way to arrange them!

Easter flower arrangement ideas

Springtime flower arrangement ideas

I decided to add a little splash of yellow limonium flowers.  You can use any flowers you like, have fun playing around with sizes textures and colors.

How to use carrots in a flower centerpiece

Any exposed carrot tops or you can fill in and cover up with any extra carrot greenery.  Just make sure the ends of the greenery are fully submerged in water.

Easter decor ideas

Keep an eye on the water level and keep the flowers out of direct sunlight to preserve the life of your arrangement.  Some flowers are thirstier that others so add additional water if needed.  Flowers also love to be misted, so I keep a spray bottle filled with water and give them a light spray once or twice a day.

Spring flower arrangement ideas

Easter table centerpiece ideas

It’s been 5 days and we’re still looking good here!  I did lose a green piece because the end wasn’t fully submerged in water.  I am full of shame.  Really watch the water level, by day 3 half of my water was gone!  If your wondering, when I do water refills I don’t add flower food, I probably should (it would be better) but I never want to take the time to mix it.  Either route is good.

Spring time flower arrangements

Roses are probably my favorite flower, but tulips are a close second… this would be another gorgeous look!  This is my first time using carrots or tops in a flower arrangement, I just got the quirky idea the other day to try it.  I keep wondering if the carrots or green tops will sprout?  Haha… if they do I’ll update.  Happy spring!


Laura

HOLIDAYS

THE SIMPLEST WAY TO DYE EASTER EGGS

The simplest way to dye gorgeous Easter eggs

I feel the weight of the world has been lifted since my last blog post.  So how about we get back to some fun Easter eggs!  There are lots of new ways floating around the internet on how to dye eggs.  Yep, no longer do Moms have to suffer with the messy old fashioned version of boiled water, food coloring, and vinegar!  There is a much simpler way and I’m excited to show you.  You still need food coloring, but we’ve replaced the water and vinegar with a dry simple ingredient – rice!  That’s right no more drippy colored mess!  This is by far the simplest way to dye Easter eggs!  Another benefit of using the rice method is being able to layer pretty colors and create cool effects.

Using rice to dye Easter eggs

You’ll want to start with white hard boiled eggs.  If you’ve had bad luck boiling eggs before without over cooking them, be sure and read my blog post how to make perfect hard boiled eggs.  White eggs are ideal of course to maximize color results, but with brown eggs being more popular now days we did experiment and I’ll show you those results at the end of this blog post.

ITEMS NEEDED

Boiled eggs

Basic food coloring

Rice

Several plastic containers with lids

Start by placing rice into each plastic container.  The amount of rice you need will vary on the size of container you use.  We used about 1/2 cup per container.  Squeeze the color of food coloring you want to use in each rice container.  The amount of food coloring you use is kind of tricky, it depends if you want a subtle or dramatic effect.  We started with 20 drops and some of the colors we ended up adding a lot more coloring.  Just make sure your bottles are 1/2 full if they’ve already been used.  We love the neon food coloring colors too!

Then simply add the lid and shake the rice to distribute the color.  Now for the fun part!

Using rice to dye Easter eggs

Place the hard boiled egg into the colored rice, add the lid and shake again.  I was worried our eggs might break, I was gentle at first and then we got pretty rough and our egg didn’t crack.  You’ll want to shake a good 30-60 seconds, even longer if you want.  The longer you shake and the more food coloring you have in the rice the darker the egg will be.  After shaking the egg should be completely dry to lift with your fingers, brush off any remaining rice with your fingers.  If you used a lot of food coloring it may be just barely wet and you can scoop it out with a spoon, it should dry very quickly.  Place the eggs directly into a bowl, that’s it!

We had so much fun experimenting that we ended up making up even more colors!

Using rice to dye Easter eggs

Our first purple egg had less food coloring in the rice and had a very pretty look, it felt completely dry and the coloring left no marks on our fingers.  Then we added more food coloring to see what would happen.  We definitely got a darker dramatic effect, the eggs felt just slightly wet removing and it did leave a very faint color on our finger tips.  It was dry in about a minute though.

How to dye Easter eggs

It’s really fun, Ashley loved doing this and she’s 15 so I know smaller kids would have a blast doing this.  I love the pretty speckled effect the rice method creates!  Then we decided to get creative and layer some colors.  We lightly shook each egg in 2-3 different colors.  I love how the pink and blue egg turned out!  It’s my favorite.

How to dye Easter eggs

The easy no mess way to dye eggs

Ashley did a combination of purple and orange for this really neat effect.  She called them dragon eggs, this is for all the boy Moms out there.  Make dragon eggs for Easter!  This would be really fun for a themed birthday party too!

How to make dragon eggs

Another favorite of using the rice method is easy clean up.  Just throw the colored rice in the trash and simply rinse the containers out in the sink.  There were no food coloring stains left in our plastic containers, even in our darkest blue and purple.  I’m telling ya, this is the easy way to go!

The easy no mess way to dye eggs

We had so much fun and ran out of white eggs, and used our brown eggs.  Ever wonder how brown eggs take dye?  The green, yellow and red didn’t turn out as great as I hoped but the blue and purple looked great.  Blue was the prettiest with the brown eggs, but we also went heavier on the food coloring too.

How to dye brown Easter eggs

How to dye Easter eggs with rice

These were just so fun and pretty to make!  Dying eggs is such a fun family project, we’re going to be making several more batches before Easter.  Spring is here… and I’m just so happy!


Laura

Everything Else

PERFECT HARD BOILED EGGS

The simple way to make perfect hard boiled eggs in minutes.

Hey friends I’m back!  I really needed some time to decompress over Spring Break.  We have some huge changes coming into our life, but I’m not quite ready to discuss them on the blog because we’re still working out some kinks.  I’ll announce soon what’s been going on with us, I promise.  As for now I’m ready to jump back into the blog, and since today is the first day of Spring why not talk about making perfect hard boiled eggs?  This goes hand and hand with Easter and also my love for low carb.  A perfect hard boiled egg is the perfect high protein snack that curbs my hunger!

How to make perfect hard boiled eggs the easy way

The perfect hard boiled egg can be different to everyone, but one thing remains clear…. there should not be a green/gray colored ring around the yolk.  That’s right, hard boiled eggs can be overcooked!  That colored ring is a sign you’ve got an overcooked, rubbery egg on your hands.  But have no fear, boiling the perfect egg is easy as can be!  I’ve tried the oven method but I’m just an old fashioned girl who prefers to boil.

If you’ve ever had trouble peeling a boiled egg hang tight… I’ve got some tips to help you out!

How to make perfect hard boiled eggs the easy way

You want to start with placing your eggs in a pot with cold water.  Make sure you use a pot deep enough so the eggs can be topped with a good 1-2 inches of water.  You also want to make sure the eggs are in a single layer and not overcrowded.  Yeah I probably could have fit another egg in the pot, but I get the best results when I give them a little breathing room.

How to make perfect hard boiled eggs the easy way

Now simply bring the pot to a boil, waiting on this pot can be a little tedious.  Ever watched a pot waiting for it to boil?  It takes forever but odds are if you walk off they will boil too long and you’ll risk overcooking.

Once the water comes to a full boil turn the heat off and immediately place the lid on the pot and set a timer for 12 minutes.  Let the pot remain on the stove so the eggs retain the heat.

How to make perfect hard boiled eggs the easy way

Now don’t skip that cold water bath!  This is very important to stop the cooking process and it helps the eggs peel easier.  Once you set the timer to let the eggs finish cooking prepare a bowl with ice and water.  Any size will work as long as the eggs fit and you can use multiple bowls if needed.  Use a slotted spoon and place the cooked eggs fully into the ice water for 5 minutes.

How to make perfect hard boiled eggs the easy way

After about 5 minutes the eggs should feel much cooler, similar to room temperature.  I recommend 12 minutes with the lid on and the heat off, but keep in mind results can vary with your cookware, stove top, and also personal taste.  Those who like like their eggs on the softer side you can try 8-10 minutes.

How to peel hard boiled eggs

Now the real drama starts… let’s talk about peeling the eggs!  Those who love eating hard boiled eggs we’ve all peeled an egg and had it look shredded full of craters, but fear not I have some tips that will help!

We’ve all been trained when cooking to use the freshest eggs, however eggs that are about a week old are a lot easier to peel, so just keep that in mind.  Another trick is to peel the eggs before you place them in the refrigerator, room temperature boiled eggs peel much easier than cold eggs.

To start peeling an egg I gently tap the bottom and then under cool running water I slowly start to peel away the shell making sure to remove that tricky membrane.  Once you feel the smooth egg texture you know you’ve got it and you can start to peel larger chunks, and that’s it, you’re good to go.  It’s time for some yummy delicious snacks!

How to make perfect hard boiled eggs the easy way

Perfect Hard Boiled Eggs

Ingredients

  • eggs
  • water

Instructions

  • Place eggs in a single layer in a pot and fill with 1-2 inches of cold water above the eggs.  
  • Heat on high until the water comes to a full boil.  Once the water starts boiling turn off the heat and immediately cover with a lid.  Let the pot remain on the stove and set the timer for 12 minutes.  
  • Meanwhile, prepare a a bowl with ice and water.  After 12 minutes carefully remove the eggs with a slotted spoon and place in the cold water bath for about 5 minutes, then remove the eggs.  The eggs will be cool to the touch and will peel best when done immediately.
  •  To peel, gently tap the the bottom edge and peel under running water.

How to make perfect hard boiled eggs the easy way

I love adding just a dash of salt and pepper and when available some fresh herbs.  Nothing beats this clean healthy snack!  Our family is getting excited for Easter and very soon I’ll be blogging our favorite way to dye easter eggs.  Not only is our method budget friendly it’s super fun and you can come up with so many unique variations.  Talk to you soon!


Laura

DIY

HOW TO MAKE A FESTIVE TASSEL GARLAND

How to make tassel garland with yarn and straws.

I’m back today with more birthday fun to share!  Right after Valentine’s Day we start gearing up for Ashley’s birthday… she loves it when I find cute ways to decorate for her birthday.  I love making garland for our fireplace mantel, and I’m going to show you how I made this fun festive garland out of just yarn and straws!  You can play around with colors and variations to make this fun garland work for any occasion.

I found making these tassels to be really fun, there are some tutorials using objects such as books, but I found sliding the yarn off to be difficult, and it made my tassels longer than I wanted.  I began looking around the house for other objects to use while wrapping the yarn and… we ended up with a toilet paper roller!  I mean 3 girls live in this house… there is always an empty toilet paper roller hanging around.

How to make tassel garland with yarn and straws.

SUPPLIES NEEDED

Yarn

Scissors

Decorative straws

A flattened toilet paper roller

How to make yarn tassel garland.

You can find decorative cardboard straws at craft stores, party stores, at some grocery stores, and online of course!  You can find a variety of patterns and colors.  Not only are they perfect for this garland but so cute for parties and entertaining.

How to make yarn tassel garland.

Start by wrapping the yarn around the flattened toilet paper roller.  I wrapped all mine around 30 times, then cut the yarn.  You could wrap them even more if you would like fuller tassels.

Now cut 2 more strips of yarn to finish the tassels.  Take a strip of yarn, thread it under the yarn at the top of the roller, and tie in a knot.  Then simply slide it off the roller.  The flexibility of the cardboard makes this much easier.

How to make yarn tassel garland.

You’ll be left with a large loop, simply cut down the center.  At this point if any ends look off center you can pull one side gently to adjust.  The yarn strings that we used to tie off you can keep separate so you can tie your tassels on to the object of your choice or tuck the strings in if you’re attaching the tassels a different way.

That’s confusing… I’ll show you below what I mean.  But first let’s finish the tassel.  Tie another cut strip of yarn around the tassel to finish it.  You’ll want the yarn strip long enough that it will blend in with the other yarn pieces.  Once tied in a knot cut the strings if they’re too long.

How to make yarn tassel garland.

Now for that confusing part, see in the bottom left photo, for the right tassel I left my original knotted ends out so I could tie it onto my garland or any object.  For the left one I tucked the strings down with the other strings.  The reason I started doing this is because I noticed I could just slide the straws through the center to attach to the garland, and this created a cleaner look.  You can absolutely tie it on though, it’s just a preference.

You can cut the straws to any size, I cut mine in half.  I was worried that cutting the straws would crush them because they were cardboard, but that wasn’t an issue.  Regular scissors should work just fine.

How to make yarn tassel garland.

Take your yarn, measure, and cut to the length that you would like your garland to be.  Remember to leave enough yarn so your garland can be attached.

Above I’m showing all 3 examples.  You can tie the tassel ends onto the garland in a knot, or a bow.  If the knot is tight and secure you can also cut it off at the top, like I did in the center.  The last tassel I slid through the top tassel center.  For this project I did a mix of cut and tied with ends tucked down.  For this specific project I like the tucked in look, but it just depends on what you’re doing really.

How to make yarn tassel garland.

Keep tying or threading the tassels and straws through the yarn.  I ended with a tassel so I could create a knot with the last tassel.   This garland is so light weight it can be taped up, or you can tie a loop at the end for a hook or nail.

How to make a yarn tassels for a present.

I tied 3 tassels together to make a festive birthday bow!

How to make yarn tassel garland.

I think different colors and straw patterns would be adorable to make, I especially think a patriotic or Halloween colored one would be really fun.  You could even leave out the straws and just tie a bunch of yarn tassels together to create a fun garland look.

I had a lot of fun making this garland, you can always make longer tassels by cutting a paper towel roller and experiment with using ribbons.  These tassels are just so great to play around with and they’re a very forgiving craft… hahaha!  Sometimes I botch my crafts.  See you soon!


Laura

Birthdays

BIRTHDAY CAKE BODY SCRUB

Birthday Cake DIY Body Scrub

We have a birthday in our house this week so we are gearing up for a fun week filled with birthday treats!  My girl Ash is turning 15 at the end of the week, but we like to find fun ways to celebrate all week long.  To combine our love of the spa and birthday fun we’re making a simple birthday cake body scrub.  It’s a perfect way to indulge in some birthday cake without all the calories, and it’s incredibly easy to make too!

To get that delicious birthday cake smell I used basic vanilla essential oil, I found it in the soap making aisle at a craft store, you can also buy this version from Amazon.  You can use any brand of coconut oil… I love Trader Joe’s organic coconut oil.  You can use just regular food coloring and sprinkles from the grocery store.

DIY Coconut Body Scrub Recipe

It’s important not to melt the coconut oil, this will create a light fluffy texture and not dissolve the sugar.  This body scrub smells like birthday cake heaven!

Coconut oil body scrub recipe

You can absolutely leave out the drop of red food coloring, but we have white towels and I can tell you this tiny drop of food coloring will not stain your skin or leave color on white towels.  It’s so much more birthday fun having a pink body scrub though.  Just stick with 1 drop and you’re good to go!

Birthday Cake Body Scrub

Ingredients

Instructions

  • In a medium size bowl add coconut oil and mix with a spoon until it softens up.  DO NOT MELT THE OIL or the texture will not be light and fluffy.
  • Add vanilla essential oil (and food coloring if using) to the coconut oil, stir to blend.  
  • Pour in sugar and mix well, add the sprinkles and mix again.
  • Store in a clean storage container and use within 2-3 weeks.

Birthday Cake Body Scrub

We love how amazingly soft our skin feels using this body scrub!  It also makes a great hand scrub at the sink to beat winter dry hands.

As with all our homemade body scrubs, it’s best to store in a cool, dry location and use within 2-3 weeks. You’ll want to be careful that water stays out of they jar while in the shower, or the scrub could start to dissolve.

Birthday Cake Body Scrub

Updated 2/7/22  This one one of my most popular body scrub recipes and I thought it would be helpful to answer some questions I always get asked.

Question: Will the sprinkles bleed?

Answer:  I guess that depends on what type of sprinkles you use.  I used basic rainbow sprinkles from the grocery store and they have never bled color into the mixture.

Question:  Do the sprinkles spoil?

Answer:  I recommend using homemade scrubs within 2-3 weeks but life happens and occasionally I’ll find a scrub in the cabinet that’s several months old.  It’s never spoiled or changed in odor but it’s a little drier.  Still usable though.

Question:  Will this attract ants?

Answer:  If you have ants already in your house and the container doesn’t have the lid on tight then maybe.  Ants do love sugar after all.  Make sure the lid is on tight and rinse off any sugar residue outside the container or in your shower when you’re done.  Also get liquid ant baits from Home Depot, they really work!

Looking for more scrubs to make?  Try my Coconut Lime Body Scrub, enjoy!


Laura

LIFESTYLE

BEAUTY DEVICES REVIEWED – PART 2

Best at home anti-aging and beauty gadgets

Happy Friday loves!  I’m finally back with Part 2 of my Beauty Devices Reviewed.  I tried to get this out sooner but I’ve had a very hyper squirrel outside my window distracting me.  I know that sounds made up, but it’s totally true!  Ok, if you don’t follow my blog and you stumbled upon this page let me say that I LOVE collecting beauty gadgets, it’s fun to play at-home spa, and when you find beauty devices that actually work for you the results are incredible!

If you haven’t read Beauty Devices Part 1 be sure and give that a read, I talk about my favorite light therapy devices.  In this blog post were talking about even more beauty toys and an honest review of what I’ve loved and hated… a few items even got returned to the store.  So, let’s get started drumroll please……


NUFACE TRINITY & MINI

Best at home anti-aging and beauty gadgets

I love Nuface, at one point I wasn’t sure if it was working so I returned it, only to buy it again a few weeks later!  The thing with these at-home devices is you might think they’re not working but when you suddenly stop you realize they were working.  Nuface is a micro current device that lifts and sculpts the face.  I especially love it for the areas along my mouth and jaw.  The Nuface Trinity is the most expensive with a removable head that allows you to buy attachments for other areas such as around the eyes and there is also a red light attachment.  Then there is the mini version which is a little smaller, and little cheaper, but it won’t work with the attachments.  I have so many toys already that I don’t need the trinity version and I’m happy with the mini… which is what I’m holding in the photo.

Best at home anti-aging and beauty gadgets

One thing that has always been a downer with using Nuface is you need the prime gel, it’s a hassle, it gets expensive, and you need to wash it off.  The newer gel primer is a hydrating leave-on gel which is much better, it does get expensive though.  Another trick is using aloe gel, but that dries very quickly.  My favorite secret is to use Spectra 360 Electrode Gel as a conductor.  You’ll need to wash it off too, it’s basically sonogram gel but it’s cheap and it works!  I don’t use this device on my forehead because I’m lazy and I never saw forehead results so I just focus on my jaw and cheeks, and I definitely see results in those areas.  I don’t use this device on my neck either, I’m just paranoid about it bothering my thyroid.  I definitely recommend either the Nuface Trinity or Nuface Mini!


TRIA BEAUTY EYE WRINKLE CORRECTING LASER

Best at home anti-aging and beauty gadgets

An effective at home beauty laser sounded almost too good to be true… and for me it was.  This laser hurt, it’s bearable but it hurts enough to dread doing it.  I used it for a few weeks and it dried out my undereye skin out to the point it looked crusty and gross.  I tried to push through it waiting for glorious new skin to appear but I couldn’t get past the ugly phase of it.  It got to the point that I was looking older and I couldn’t ever wear concealer under my eyes.  I ended up returning it and it took about two weeks for the skin around my eyes to look normal again.  I just didn’t have a good experience so I do NOT recommend this device.


CLARISONIC

Best at home anti-aging and beauty gadgets

I’ve gone through 3 Clarisonic devices in the past 8 years.  Maybe I have bad luck or something I’m not sure, but it seems like they aren’t made to last.  I have a love hate relationship with this device.  I hate charging it, I hate keeping the brush head clean and dry, and I hate having to remember how to replace the brush heads.  Having said that, it’s excellent at cleansing the skin, I’ve always used the sensitive brush head and it feels really nice.  I can’t use it in the morning because it makes my skin look too shiny, almost like a polished stone, but it works well for me at night.  It’s an amazing device for cleansing and exfoliationing the skin, it’s just a high maintenance device.  If you’re in the market for a facial cleaning brush I do overall recommend the Clarisonic, but the PMD is also a good choice.


LUNA PLAY PLUS

Best at home anti-aging and beauty gadgets

My sister got the Luna Play Plus in one of her subscription boxes, she said she didn’t really care for it and gave it to me to try.  This vibrating facial brush is for cleansing and gentle exfoliation of the skin.  Honestly it reminds me of an awkward less effective version of the PMD Clean.  The silicone bristles are a little longer so it’s a little softer feeling on my face, but I find the shape of the device awkward feeling in my hand.  I also found it difficult to adjust the speed and turning it on and off in general.   I’ll give this to my girls to try out but overall I do NOT think I would recommend this device.


PMD CLEAN

Best at home anti-aging and beauty gadgets

Last year I did a full review of the PMD Clean so I won’t go into much detail again but I do like this device.  I find the handle comfortable to hold, and love the fact that it stands up on it’s own.  It takes batteries, but they last a very long time.  I love how it has two versatile heads to use, the cleaning scrub side has 3 vibration speeds and the other smooth side is for massaging in skincare products for better absorbtion with 3 pulsing vibration settings.  You won’t get that luxury brush feeling of the Clarisonic, but I love how you don’t need to buy replacement heads.  The brush head dries quickly, eliminating bacteria.  It’s a fun beauty gadget to have and it’s really gentle to the skin.  It doesn’t do a whole lot when it comes to anti-aging, but it does a good job cleaning the skin.  If your budget allows and you need a cleaning device I do recommend this product.


MASTERBLASTER CELLULITE MASSAGER

Best at home anti-aging and beauty gadgets

I love this anti cellulite toy but geez it is a workout using it!  There is a lot of information online how to use Ashley Black’s Cellulite devices, but basically with oil or lotion on the area you’re working on you grab both handles and massage the skin.  There are different techiniques and directions you can use to massage the skin and ways to use it on different body parts.  It definitely works, but it takes dedication to consistently use it.  While I’m using it my skin gets really red and itchy and it kind of hurts.  Sometimes I bruise, if you do bruise it’s important to let them heal before using it again… or you can work around the bruises I guess.  I also use this in the shower sometimes with body wash, I find that easier.  My only complaint it this device is big and awkward to deal with.  It will probably freak your husband out the first time he sees this in the bathroom.  I recommend this product for sure but I kind of like the mini version better below.

Best at home anti-aging and beauty gadgets


FACEBLASTER

Best at home anti-aging and beauty gadgets

The face version is much smaller and designed for smaller areas of the body like the face and arms.   I like this one because it is much smaller to hold, store, and travel with.  I can still use it on larger areas of my body it just takes a little longer.   I’ve actually never used this on my face but I really like using it on other areas of my body.  I like to use this while in the shower or right after taking a bath.  I definitely recommend this product.  If you’re wondering, I’ve never used the device with the pointy edges, it looks kinda scary though…. let me know how that works out!


PMD MICRODERMABRASION

Best at home anti-aging and beauty gadgets

I know a lot of women love at-home microdermabrasion devices but I’m not one of them.  The PMD Microderm has different discs that range in texture from course to sensitive.  This actually has great reviews but using this really scared me.  It reminds me of the spinning nail grinder the ladies use at the nail salon, it’s not a sensation I care for and I think it’s really easy to overdo it and injure your face.  I prefer using other methods to exfoliate my face, like the The Method Polish by Lancer, it’s expensive but the texture is amazing and a tube will last me more than a year.  I do NOT recommend this product and I returned it.


DERMAWAND

Best at home anti-aging and beauty gadgets

Years ago I once saw a DermaWand infomercial and it hooked me in.  This radio frequency device is pretty impressive, not only does it help firm and tighten the skin, it helps to smooth out wrinkles too.   It makes a funny little buzzing noise and zaps your skin a little but I wouldn’t consider it painful.  I dropped it once and the bulb broke and I was able to send it off to be repaired.  Just a word of caution always leave the protective cap over the bulb, it’s pretty fragile.  Treatments only take a few minutes and you can use the serum included or your own, I use my own.   I definitely recommend the DermaWand and I just noticed there is a newer stronger version I had no idea about… it costs $60 more than the regular version.  Let’s see how long I can hold out before I’m tempted to order the stronger version!


SAVE MY FACE BEAUTY PILLOW

Best at home anti-aging and beauty gadgets

I love this pillow, but not necessarily for eliminating face wrinkles.  Maybe it’s just me but I have a special talent when it comes to sleeping with my face smashed into the pillow.  Ever wake up with one of those creases on your cheek from a night of side sleeping?  It’s the worst, this pillow helps but doesn’t completely eliminate my cheek smashing up towards my eye.  I’m trying to train myself to sleep on my back, but it’s so hard!  Having said that, I suffer from neck pain and I find this pillow incredibly comfortable on my head and neck. I sleep with it on top of my regular pillow, and place it in the curve of my neck.  I’ve slept with it for years and I take it with me on every trip we take.  It has a satin cover and I throw it in the washer and dryer once a week.  I recommend this pillow for neck comfort while sleeping, not necessarily for wrinkle reduction.

Best at home anti-aging and beauty gadgets

Okay so that’s it for my beauty devices reviews!  Expect more to come in the future because I just can’t resist these fun little toys!  I’m experimenting with at-home gel polish, so when I see how durable it is and my thoughts on it I’ll be sure to update.  I’ll be back next week to celebrate birthday week.  We’ll be having a week of filled with pink, fun, deliciousness!  Have a great weekend!


Laura

TRAVEL

7 TIPS TO HELP BEAT ALTITUDE SICKNESS

7 Tips easy tips to help beat altitude sickness

Altitude sickness… you definitely can say we go way back.  I’ve had it in every form from mild to severe, and even while pregnant.  I love vacationing in the Rocky Mountains, but the beginning of every trip used to be miserable for me.  I’m so sensitive to altitude changes that I’ve felt altitude sickness in places just slightly higher in elevation like Las Vegas and sometimes even the Texas Panhandle, it’s crazy!  If you suffer you’re definitely not alone.  Many of you know we recently had a few trips to Estes Park, and the last few visits were the best I’ve ever felt because these tips really work for me.

I’ve never taken altitude sickness medication, but one day I was talking with a very helpful pharmacist.  He told me his family would get really sick going to Winter Park, Colorado.  Yeah… I’ve been really sick up there too, along with Vail and Pikes Peak.  Not fun!  He shared a few tips that I had no idea about, and they really do work!  So here are my 7 recommended tips to help beat altitude sickness.

Tips for beating altitude sickness

CLIMB SLOWLY IN ELEVATION AND LET YOUR BODY ACCLIMATE

We normally drive 12 long hours to our favorite mountain spot, you couldn’t pay me to fly up there.  Once we briefly had to switch flights at the Denver airport and sure enough in that short time I felt sick.  If you suffer from altitude sickness it’s crucial to climb in altitude slowly.  Driving instead of flying is a good way to acclimate as well as spending the night at a mid range altitude on the way.  It’s always recommended to stay a night in Estes Park before ascending high into Rocky Mountain National Park.  Time is what you need, so don’t rush if you want to feel your best.

WATER IS CRUCIAL

You knew I had to throw this in right?  Water seems to be the magic cure for everything, including altitude sickness.  Hydration is everything up in the mountains and drinking at least 2 liters of water a day is crucial to feeling good.  I recommend more if you’re going to be very active or drinking alcohol.  Any water will work but I’ve noticed Smartwater with the electrolytes makes me feel amazing, and with it being sold in 1 liter bottles it’s easy to keep track of your water intake.  Keep water on you at all times, the thirsties can creep up really quickly!

NO CARBONATION 3 DAYS BEFORE AND DURING YOUR TRIP

This trick I learned from a helpful pharmacist and I’m stunned how well it works.  Nothing carbonated at all at least 3 days before and also during your trip.   Skip all the soda pop & fizzy drinks, the goal is to reduce CO2 from your bloodstream.  Being a huge champagne, prosecco, and sparkling water drinker, this is a total bummer!  Spending New Years in the mountains and not having any bubbly was sad, but hey… I felt good so it was a good trade off.

LOAD UP ON VITAMIN C

I’ve never tried Altitude Rx, but at $35 a bottle I say try cheap vitamin C tablets first.  This was another pharmacist tip, starting a few days before and during my trip I make sure to increase my vitamin C.  I always pack loads of vitamin C, and if I happen to forget it I’ll stop and get some on the way.  Brian and the kids aren’t as sensitive to the altitude as I am, but this vitamin trick has even helped them.

LIMIT ALCOHOL

You can drink at a high altitude, you really need to be careful though.  You need to limit it, especially in the first day or two.  Make sure you’re properly hydrated and you’ve acclimated to the altitude first.   Alcohol hits you harder at high altitudes, so don’t overdo it!   Any time you feel symptoms of altitude sickness stay clear of alcohol though.  Don’t even consider drinking alcohol if you haven’t had at least 2 liters of water a day – that’s the minimum.

WATCH FOOD SENSITIVITIES

If you have food sensitivities I can promise you they’ll be worse at a high altitude.  Don’t ask me why that’s just the way it is.  I’m sensitive to gluten, I don’t have celiac and I can get away with eating it, I just don’t always like how I feel and I get side effects.  When it’s a holiday or celebration I can push through the side effects but at high altitude?  Forget about it, I won’t touch it.  Food sensitivities seem magnified at high altitude.  So keep that in mind!

TAKE IT EASY AT FIRST

High altitude usually means activity of some kind, and it’s best to let your body adapt and take it easy the first day or two when possible.  Recently we took a quick trip up to the mountains, I decided to go exploring and jogged up a steep hill.  Within minutes I was dizzy, unable to talk and starting to feel unwell.  This is where as cheesy as it sounds a can of oxygen can help.  Almost immediately I started to feel better.  When resting and acclimating isn’t an option before strenuous activity, consider keeping a can of oxygen nearby.

Tips for beating altitude sickness

Clearly I am not in the medical field, but as I mentioned above with the helpful advice of a pharmacist and through my own trial and error I’ve found these tips to be extremely helpful and to drastically if not eliminate my altitude sickness.  Of course what works for one person doesn’t work for everyone.   Hopefully these tips can help you on your journey, best of luck!  If you discover any helpful tips leave them in the comments below!

Laura

LIFESTYLE

BEAUTY DEVICES REVIEWED – PART 1

Ok, let’s talk about at-home beauty devices!  I mentioned in my February Loves blog post that I was thinking about putting together a post about all my favorite beauty devices, gadgets, toys…. whatever you want to call them.  Women love to feel pretty, whether at the spa, at a doctor’s office, or even at home.  With all the dreams and promises to look like a Disney princess how can we resist getting sucked into these amazing little beauty gadgets??  Some of the ones I have are amazing, and others I’ve downright hated… oh the list is long!

Red Light Therapy Devices Reviewed

I started to create an entire blog post on all of my favorite home beauty devices, but the list got long very fast and I had a lot to say about each item so I thought it would be best if I split up the post.  Occasionally I’ll review beauty devices on their own like the PMD Clean but because I’m a busy Mama/Wifey/DIY/Decorator/Blogger I quickly run out of time, so I see more combined beauty posts in my blogging future.

Red Light Therapy Devices Reviewed

It takes a while to see if I really like these gadgets, and also new ones are always coming out.  So while I am already planning at least a 2 part series on this beauty device blog post, I’m thinking parts 3 and 4 aren’t that far away because they’re always coming out with new amazing devices and HELLO… I’m an addict remember??

Haha.. sometimes I feel like a beauty gadget addict for real though.  I’m always asking my awesome esthetician Linda if she’s heard of any new skincare devices coming out, and I cruise websites in the dark hours of the night looking for the newest “at-home anti-aging beauty devices”.  So here I am world.. my name is Laura and I’m addicted to at-home skincare gadgets.  Those who are curious, I’m here to help, I mean why not try things out?  It’s cheaper than plastic surgery right?

Red Light Therapy Devices Reviewed

At the present moment none of these blog posts have been sponsored.  Sponsored meaning I’m gifted a product for an honest review.  Although I do put in my affiliate links in blog posts (dude…I make only a few bucks I promise) everything was bought with my own money and I’m honest with my reviews.  I don’t abuse store return policies but if a product doesn’t work for me occasionally I will make a store return and I’ll let you know in the review when that’s happened.


Red Light Therapy Devices Reviewed

In honor of today… Valentine’s Day I thought I should start with my skincare love of red light therapy.  I’ll be mentioning a few other light therapy devices later, but let’s start with my true love of red light and how we first met.  It’s all a blur now, but red light therapy was my first ever skincare gadget, even before the ever so popular Clarisonic!

When I was 32 I had a sudden panic attack that I was about to be 40…. in 8 years.  I know try not to laugh, but I suddenly started freaking out and knew it was time to step up my skincare game if I wanted to age well.  After some research I discovered the wonderful benefits of red light therapy and my first beauty gadget addiction started with the red light LED panel below.

I feel like this blog post will get way too long if I go into all the science and benefits of red light therapy.  I’m going to give you an extremely abbreviated version if you are unfamiliar.  Basically red light therapy was discovered by NASA, it works to improve the skin from within stimulating collagen, reversing sun damage, and improving skin texture.  There are numerous articles you can read online about the benefits, but 9 years later I must say I’m a true believer that it works.  Red light is supposed to be used on clean skin, free of makeup and sunscreen.  After washing my face I do red light therapy and afterwards apply my normal skincare.  It can be used day or night and it contains no UV rays.

REVIVE LIGHT DPL RED LIGHT THERAPY $399Red Light Therapy Devices Reviewed

I actually have the older DPL light version that isn’t hinged like the newer version as you can see above in the photo, but it’s still the same device.  Every day or every other day I would hold this device over my face for about 18 minutes a day.  After a few weeks I saw definite results.  The lines around my mouth had completely softened, my skin looked plumper, had much better skin tone and more of a natural glow.  After months of using this device I was hooked.  I used this device on other parts of my body and also saw a huge improvement in my skin.  I was so thrilled that years ago I convinced my mom to buy one.  I’ve worked this baby hard over the years and she’s done me well.  The newer hinged version looks amazing and I love the DPL so much I have a feeling I’ll be rebuying the entire newer version in the near future.  I love how large this red light panel is and how it covers the entire face and you can use it on other body parts like the chest or legs easily.  Those who suffer from acne, this device improved my breakouts but didn’t eliminate it. I definitely recommend this product. 

QUASAR MD PLUS $595

Red Light Therapy Devices Reviewed

I actually cried when I bought this.  Because I was so hooked on red light therapy I had known about the Quasar MD Plus for years but never wanted to pay the price.  Luckily it’s dropped a bit in price, at one point it was over $700!  It’s supposed to be the strongest red light therapy device on the market and I lusted after it for years.  I bought it when I turned 40 and I cried from happiness I finally bought it and cried also from the fact I bought such an expensive device.  This light is definitely stronger than the face panel above, but it also takes a little more work.  The light stays on for 3 minutes while you move it around sections of your face.  There are instructions on how to section off areas of your face and how long to use it.  I’m definitely impressed with the results, I glide the area over my entire face several times a week and also hold the device over trouble areas, which are around my mouth and the eyes.  Occasionally I’ll over use it and my skin gets a bit dry so I’ll take some time off but I always go right back to it.  I think it came with goggles but I’ve never worn them or had issues with eye sensitivity.  It comes with a nice long cord, and I find it easy to travel with.  I definitely recommend this product. 

TANDA ZAP ACNE CLEARING DEVICE $16

Blue light therapy works to eliminate acne by killing bacteria beneath the skin.  For years I suffered from bad acne and looking for a cure I discovered the benefits of blue light therapy.  Blue light therapy absolutely works but run from this device.  First off it constantly ate through batteries, and the light head is also really small, only meant for one blemish at a time.  So if you’ve got a lot of breakouts it’s pretty time consuming, blue light can be used as a preventative for acne so a larger surface is ideal.  If you suffer from acne definitely give blue light a chance but I’d go with the Lightstim or the Baby Quasar Blue, both are larger and have charging cords.  I don’t even know what happened to this, I either threw it away or it’s under Haley’s bed.  I do NOT recommend this device. 

LIGHT LED COLOR FACE MASK $89Red Light Therapy Devices Reviewed

This is a quirky one, you full on look like a freak while you use it, but it didn’t stop me from buying it!  This device is a mixed bag for me, I bought it for a few reasons.  I could watch TV while using it, and I can but towards the end the light bothers my eyes, closing helps but then I can’t watch TV.  Another reason that appealed to me was that I could change the light to be red, green, or blue.  Red light is best for anti aging, blue light is great for acne, and green light is supposed to be good for pigmentation in the skin.  I say “supposed” just because there isn’t as much information on green light out there as there is for blue or red.  I’ve been very curious on green light therapy but I’m not sold quite yet like red and blue, just from lack of knowledge.  I think this light is great for those curious about light therapy, and under $100 it’s very affordable for what you get.  Clearly it’s not one of the stronger lights out there, but I still think you’ll get benefits.  The mask feels slightly heavy but tolerable over your face and you can set the lights to a timer.  Overall I do recommend this product for those on a budget wanting the most bang for your buck.  What I don’t like is how the mask didn’t properly fit over my face.  If my mouth is closed and my face is relaxed the mouth part comes up to my nose.  To get the mask light to fully fit my face I must hold my mouth and jaw open in an awkward position and it gets tiring, but it’s not a deal breaker.  NOTE: I have the 3 color light version, the newer one has 7 colors.  I have not studied or reviewed the benefits of the 4 other light colors.

GLOPRO MICRONEEDLING REGENERATION TOOL $199

Red Light Therapy Devices Reviewed

The first time you use an at home micro needling device it’s definitely a little scary, it gets easier I promise!  Because this roller has a built in red light I decided to include it in this review.  Yes, you can buy cheaper basic version without LED red light, but I’m a light addict remember?  What microneedling does is create a tiny controlled injury to the skin, triggering the skin’s natural healing process and stimulating collagen production.  It also helps skincare absorb into the skin 200 times more effectively, and the addition of red light is pure genius.  Honestly this device doesn’t hurt, it just feels strange at first.  Immediately afterwards my skin looks a little flushed and sometimes just a little itchy afterwards so you’ll want to use gentle skincare.  I’d skip retinol and any other strong exfoliants.  Separate attachments are available for the body, lips, and around the eyes.  Another bonus is that the device can be used with a battery or plugged in.  The only negative is you will need to buy replacement heads depending on how often you use it.  I definitely recommend this product.  

GLO BRILLIANT TEETH WHITENING DEVICE $199

Teeth whitening devices reviewed

This device delivers excellent teeth whitening results, but it’s expensive and I have a hard time remembering to charge it.  I do like how comfortable the mouth tray is and how even the LED lighting is.  The Glo Smile teeth whitening gel is sold separately but I discovered any and I mean any teeth whitening gel will work with it.  Unfortunately mine stopped working after 2 years, I mean it’s dead, I even bought a new $85 mouth piece and it still wouldn’t work.   I do NOT recommend this device anymore, I just don’t think it’s worth the high price.  I’ve founded a much cheaper alternative for you that works below!

AURA GLOW TEETH WHITENING LIGHT $18.99Teeth whitening devices reviewed

At under $20 this teeth whitening light is my new favorite!  It takes a battery so there is no charging, making it perfect for travel and quick teeth whitening anytime you need it.  You can use your own favorite teeth whitener with this light so it’s definitely budget friendly.  I’ve used it for months and the battery is still going strong.  The mouth piece is just one whole device and your lips hold it in place.  It’s pretty light weight and not a burden, the only down side is the mouth piece isn’t quite as comfortable as the Glo Brilliant but I can overlook that considering the huge difference in price.  I definitely recommend this device. 

I’ve tried to give the most honest reviews possible, if you have any questions leave them below and I’ll try to answer them.  I honestly believe all light therapy has amazing benefits, especially red light.  When it comes to purchasing a device you really need to look at your budget and your skincare needs.

I definitely love skincare but I’m not an expert by any means.  Being over 40 I’m a definite believer in the benefits of high quality skincare and at-home devices.  I’ll soon be adding Part 2 of my skin care device review, where I’ll dive into Nuface, at-home microdermabrasion, and a few other nifty devices.  So stay tuned, and if you find any new life changing beauty devices contact me immediately… I’m serious.


Laura

Desserts

PORT WINE CHOCOLATE PECAN PARFAITS

Port Wine Ice Cream dessert

Hello loves, I’m sharing my favorite dessert today!  I actually meant to get this recipe out sooner, but wow it is hard to photograph ice cream.  I mean everything will look good, and I’ll blink and it’s a melted puddle!  I think we finally got it though.  I made these for my sister and brother in law before Christmas and they loved these yummy port wine chocolate pecan parfaits just as much as we do.  I just really get a kick out of eating ice cream in a wine or parfait glass, it makes me feel fancy.  By just adding a few ingredients you transform regular ice cream into a gourmet luxury experience.

Port Wine Ice Cream dessert

If you’re wondering how this recipe came to be, we went to a wine bar once that had port wine and ice cream for dessert.  Brian and I tried it and were instantly hooked.  Around Christmas I had lots of my brown sugar cinnamon spiced nuts and one day I threw some on my port wine & ice cream and added chocolate syrup, and an even more amazing dessert was born!  Not only does this taste incredible it’s so easy to throw together!

port wine dessert

Those of you unfamiliar with port wine, it’s considered a sweet dessert wine meant for sipping.  You can use any port wine you like but I recommend the Kopke 20-year Tawny port.  It’s amazing!  For the pecan topping you can buy store bought, but why not try my recipe?  It’s devine and you can make it in minutes.

easy gourmet desserts

I’ve listed the ingredients below, in no certain quantities.  It’s up to you, add a little or a lot of the wine and toppings.  I say a lot though!

Port Wine Chocolate Pecan Parfaits

Ingredients

  • Vanilla ice cream
  • port wine
  • candied pecans - I recommend using my brown sugar cinnamon spiced nuts from the blog
  • Chocolate syrup

Instructions

  • Scoop vanilla ice cream into wine or parfait glasses.
  • Pour port wine over ice cream, drizzle with chocolate syrup, and top with pecans.

what to do with port wine

If you love wine and ice cream then try this recipe and tell me you’re not hooked!  You can shop some of my favorite kitchen items below.


Laura