

Have you ever run out of gift bags at the worst possible time? This easy trick shows you how to make a gift bag out of wrapping paper using just a few basic supplies.
It’s perfect when you don’t have the right-size bag, want all your gifts to coordinate, or simply want to use wrapping paper you already have. And yes, Virgo here—I love when all my presents match!
Once you make your first bag, the process is surprisingly quick. You can make them in almost any size, customize them with ribbon, and even add a handle for lightweight gifts.

SUPPLIES
- Wrapping paper
- Tape
- Scissors
- Stapler – optional
- Ribbon for decorating – optional
- Tulle ribbon to create a handle – optional
How to Make a Gift Bag From Wrapping Paper

1. Cut your wrapping paper to size.
Measure enough paper to wrap around your gift, leaving a little extra room at the top. Cut the paper.
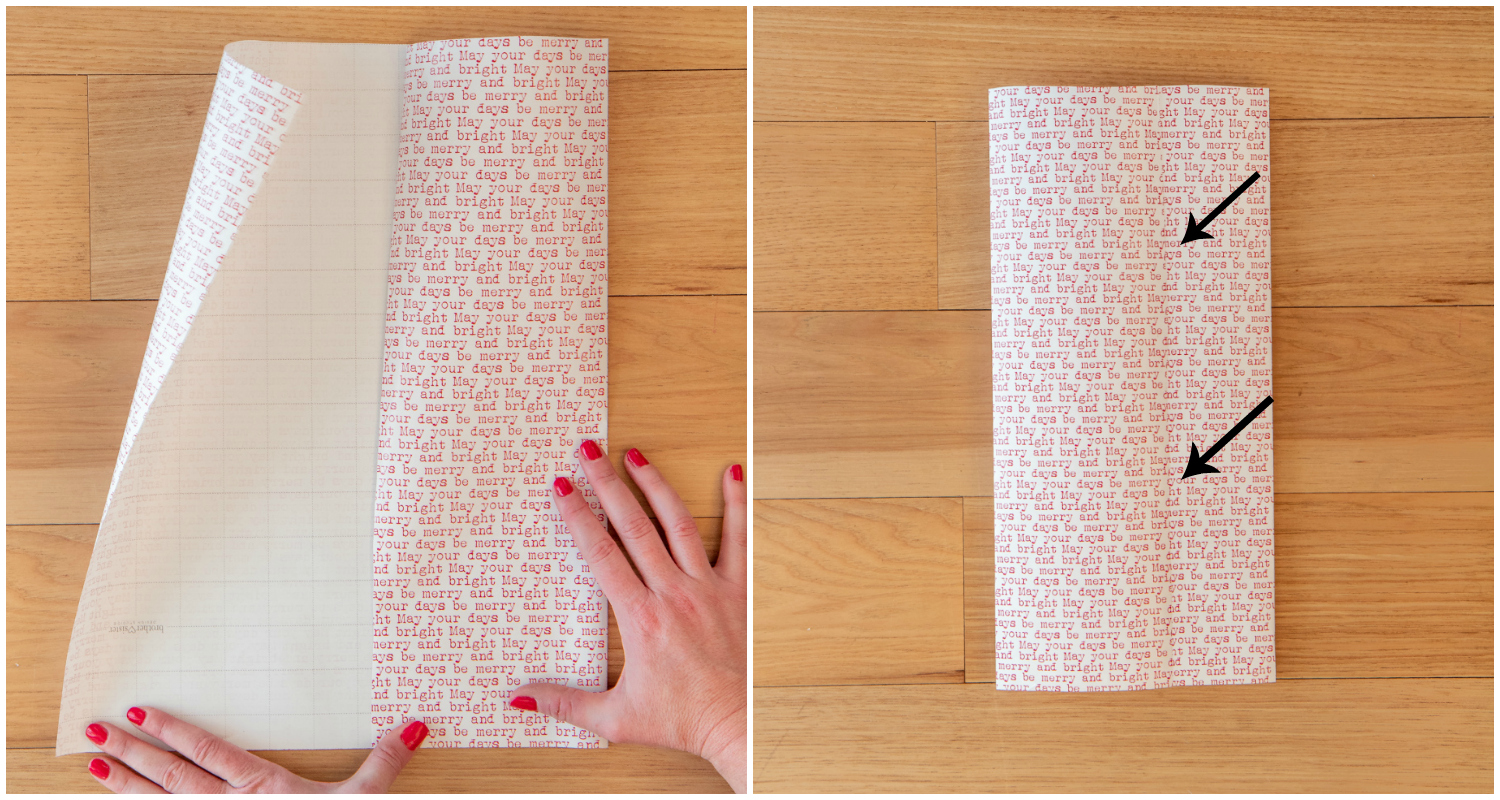
2. Fold and tape the sides.
>Fold one side toward the center and crease it. Fold the opposite side over it slightly, then tape the seam closed.

3. Create the bottom of the bag.
Fold the bottom edge upward and crease it. The size of this fold will determine the depth of the finished bag.

4. Open and fold the bottom.
Open the folded section and press the side edges inward to create a diamond shape. Crease the edges well.

5. Seal the bottom.
Fold the top and bottom points of the diamond toward the center, overlapping slightly, and secure them well with tape.

6. Open the bag.
Gently open the bag and shape the sides and bottom with your hands.
7. Add your gift.
>Place the gift inside, then fold the top of the bag down. Seal it with tape or staples.

8. Decorate.
Add ribbon, a bow, or any other embellishments you like, and you’re done!

How to Add a Handle

To add a handle, punch holes near the top of the sealed bag and thread ribbon or tulle through them. Choose your desired length, tie the ends securely, and adjust the knot so it sits neatly to one side. Tulle works especially well because it’s lightweight, soft, and easy to work with.

Tips for Making Wrapping Paper Gift Bags
- Use thicker wrapping paper whenever possible. Very thin paper can tear easily.
- For extra structure, cut a small piece of cardboard and place it inside the bottom of the bag.
- If your wrapping paper has a directional print, check the pattern before folding so it ends up right-side up.
- Only add handles to lightweight gifts. Heavy items can tear the paper.
- Reinforce the handle holes with a small piece of clear tape before punching them if the wrapping paper feels delicate.
- Making several bags? Fold a few ahead of time and store them flat until you need them

I hope this gift wrapping hack helps you! I’m officially signing off to enjoy this week of Christmas with my family. Wishing you the Merriest Christmas and a Happy New Year!
This post may contain affiliate links. I may earn a small commission at no additional cost to you.
My Favorite Gift Wrapping Supplies


Gift wrapping is a delightful art that adds an extra layer of thoughtfulness and surprise to any present. It transforms a simple gift into a beautifully presented package, enhancing the anticipation and excitement of the recipient. Whether it’s through intricate designs, elegant ribbons, or personalized touches, gift wrapping showcases the giver’s care and creativity, making the moment of unwrapping a truly special experience.
This post is a life saver!
I’m so glad you found it helpful!
Im in saint thomas. If you’ve never been here, things like gift boxes and bags are SCARCE. This saved our Christmas for a family of 7! Thank you so much! So easy! Looks beautiful even without ribbons and bows. No wasting of paper or tons of scraps to contend with. The first one went slow, but in the end took me about 1 minute per bag and could even get faster with a little more gine tuning! Truely a blessing!!!
I’m so glad this helped you during the holidays!