
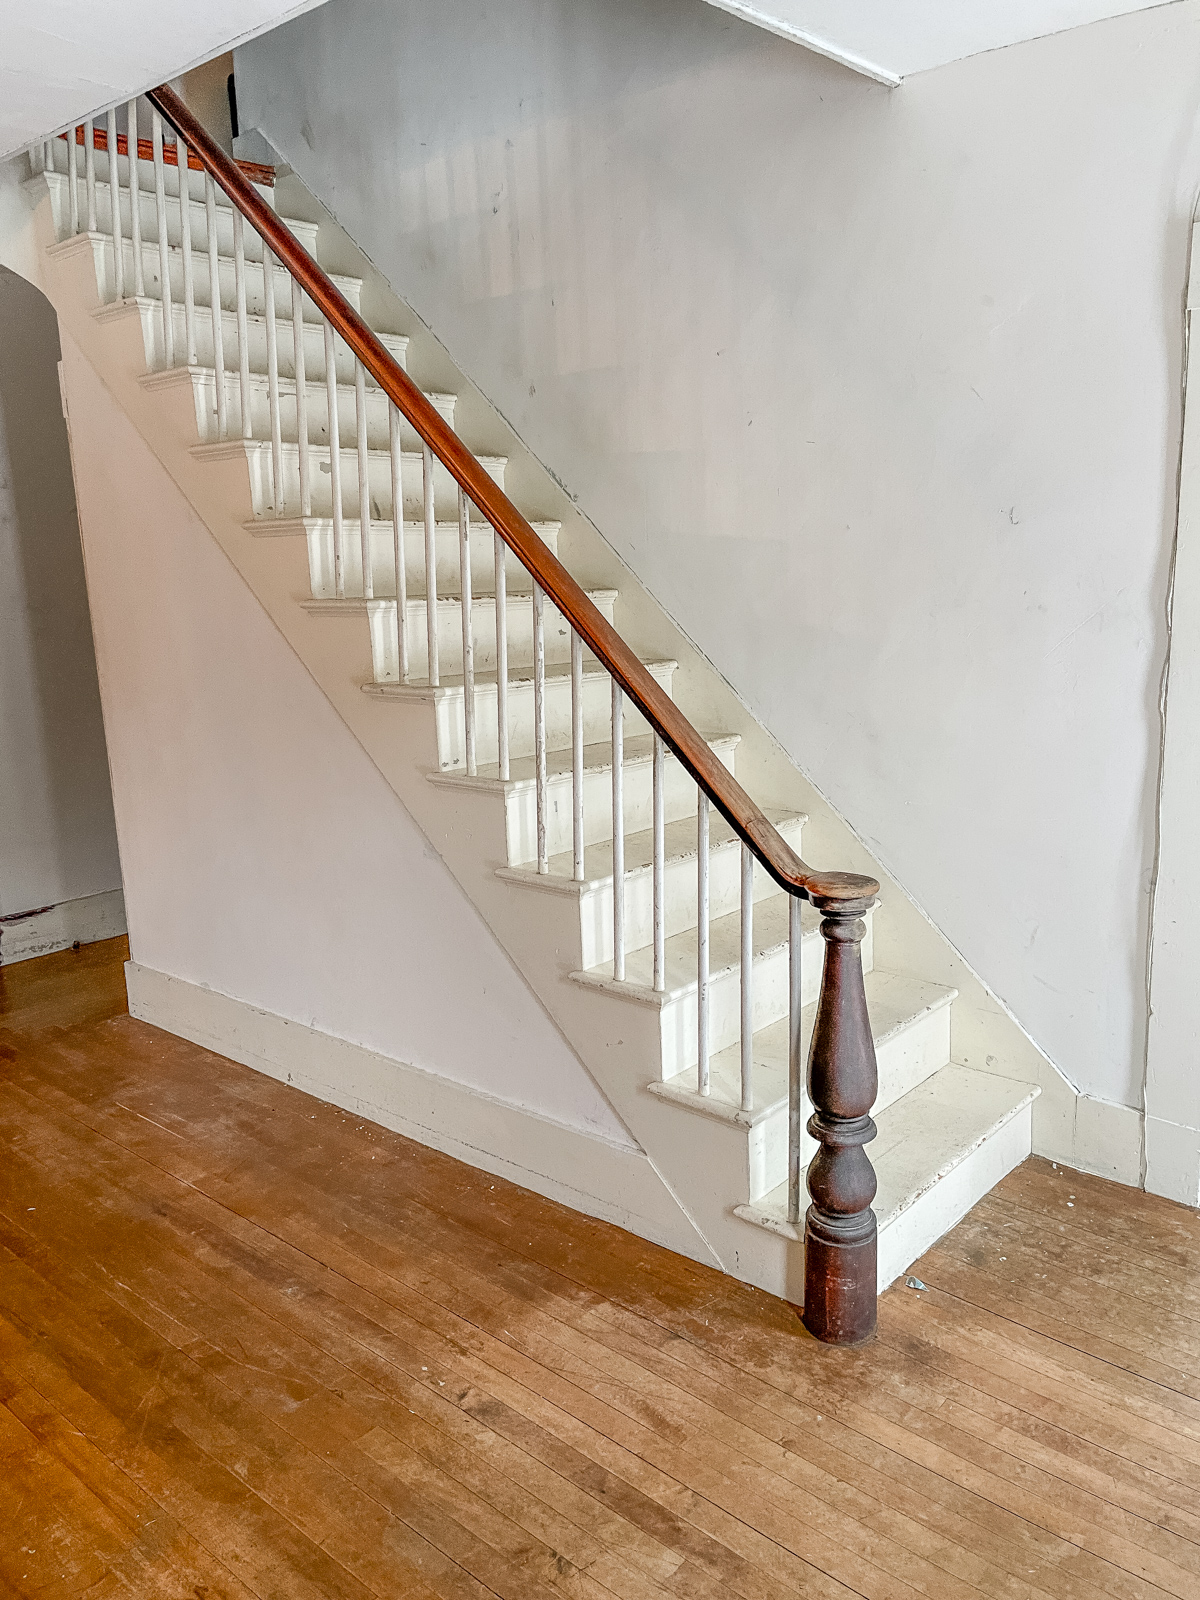
I’m so excited to share our dramatic staircase makeover with you! It’s our first DIY project in our Colonial New England home, and we are thrilled with the results! I just love stair makeovers don’t you? As I have mentioned before, I think stairs really set the tone of your home, fireplaces too, but that’s a much more complicated and not so DIY project later in our future.
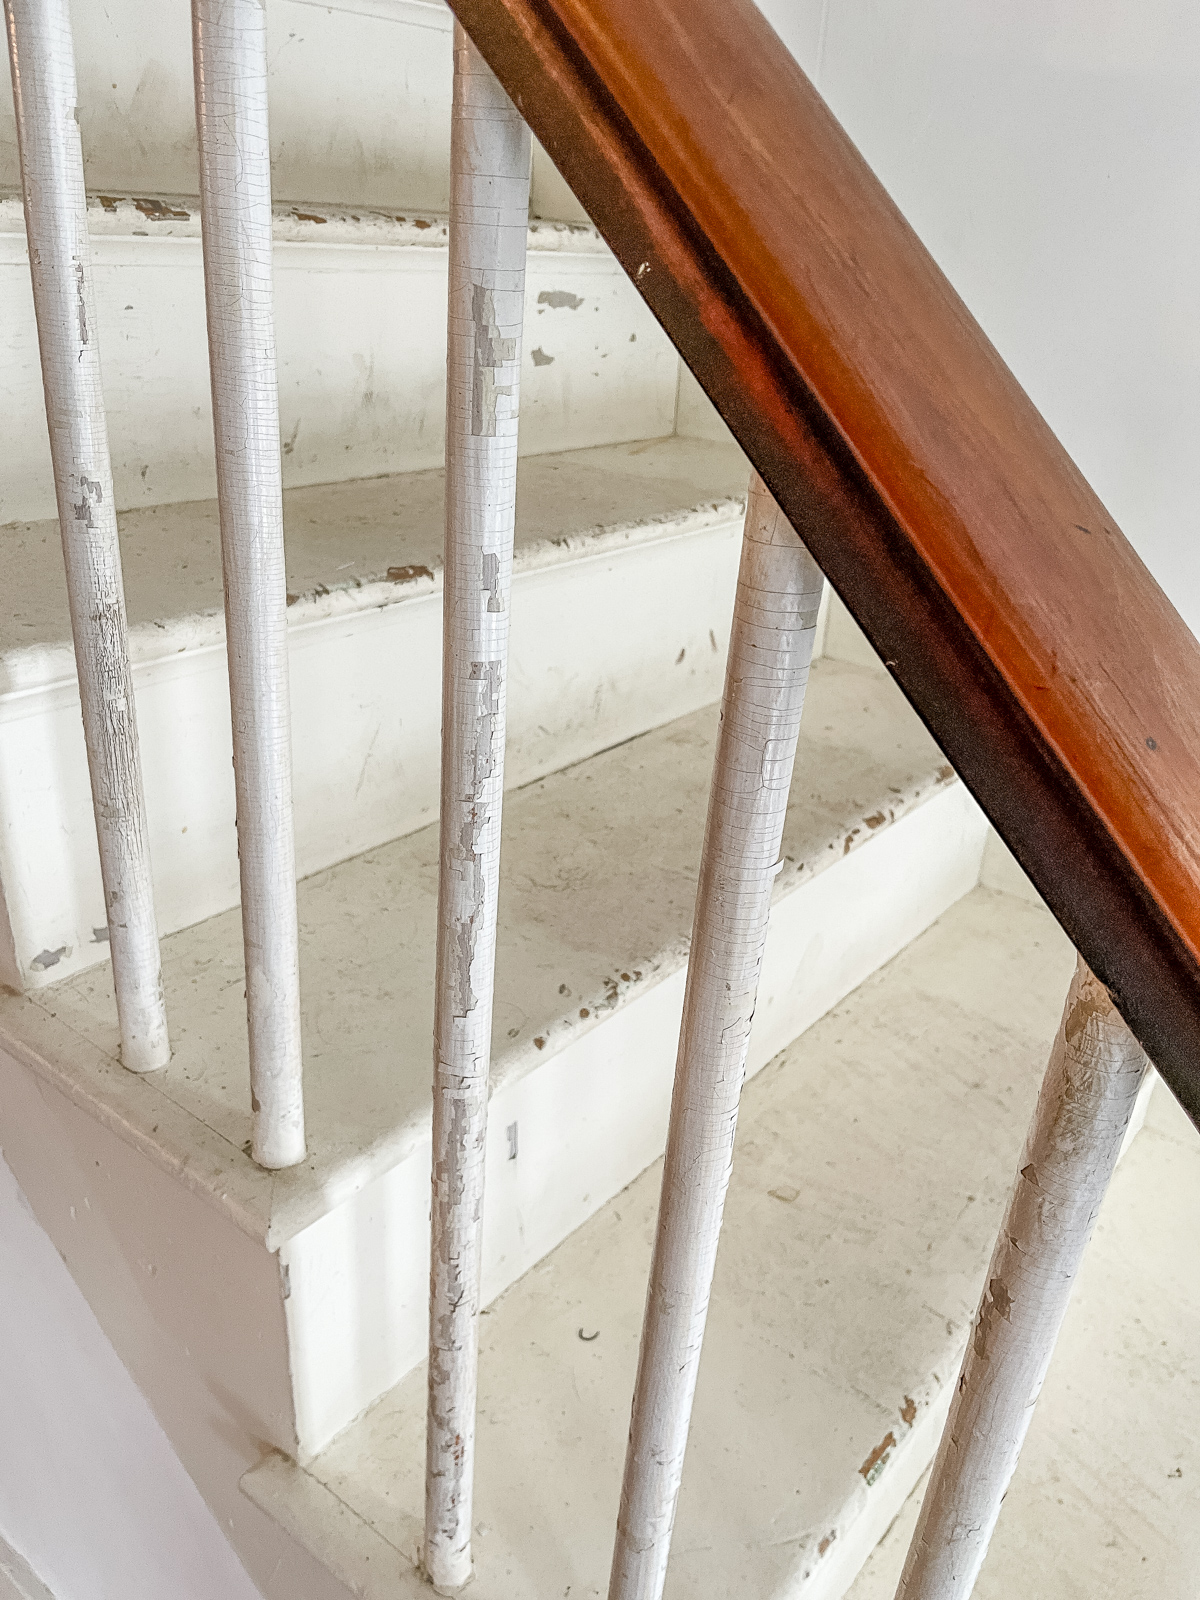
These poor stairs were in sad shape, they are original with the house, making them 122 years old. Not only were they in sad shape but the stair rails and balusters were very wobbly and unsafe, and with what I’m assuming is lead paint that was peeling. Brian and I spent hours each day working on them for 3 weeks. It was exhausting but we did it and it was totally worth it!
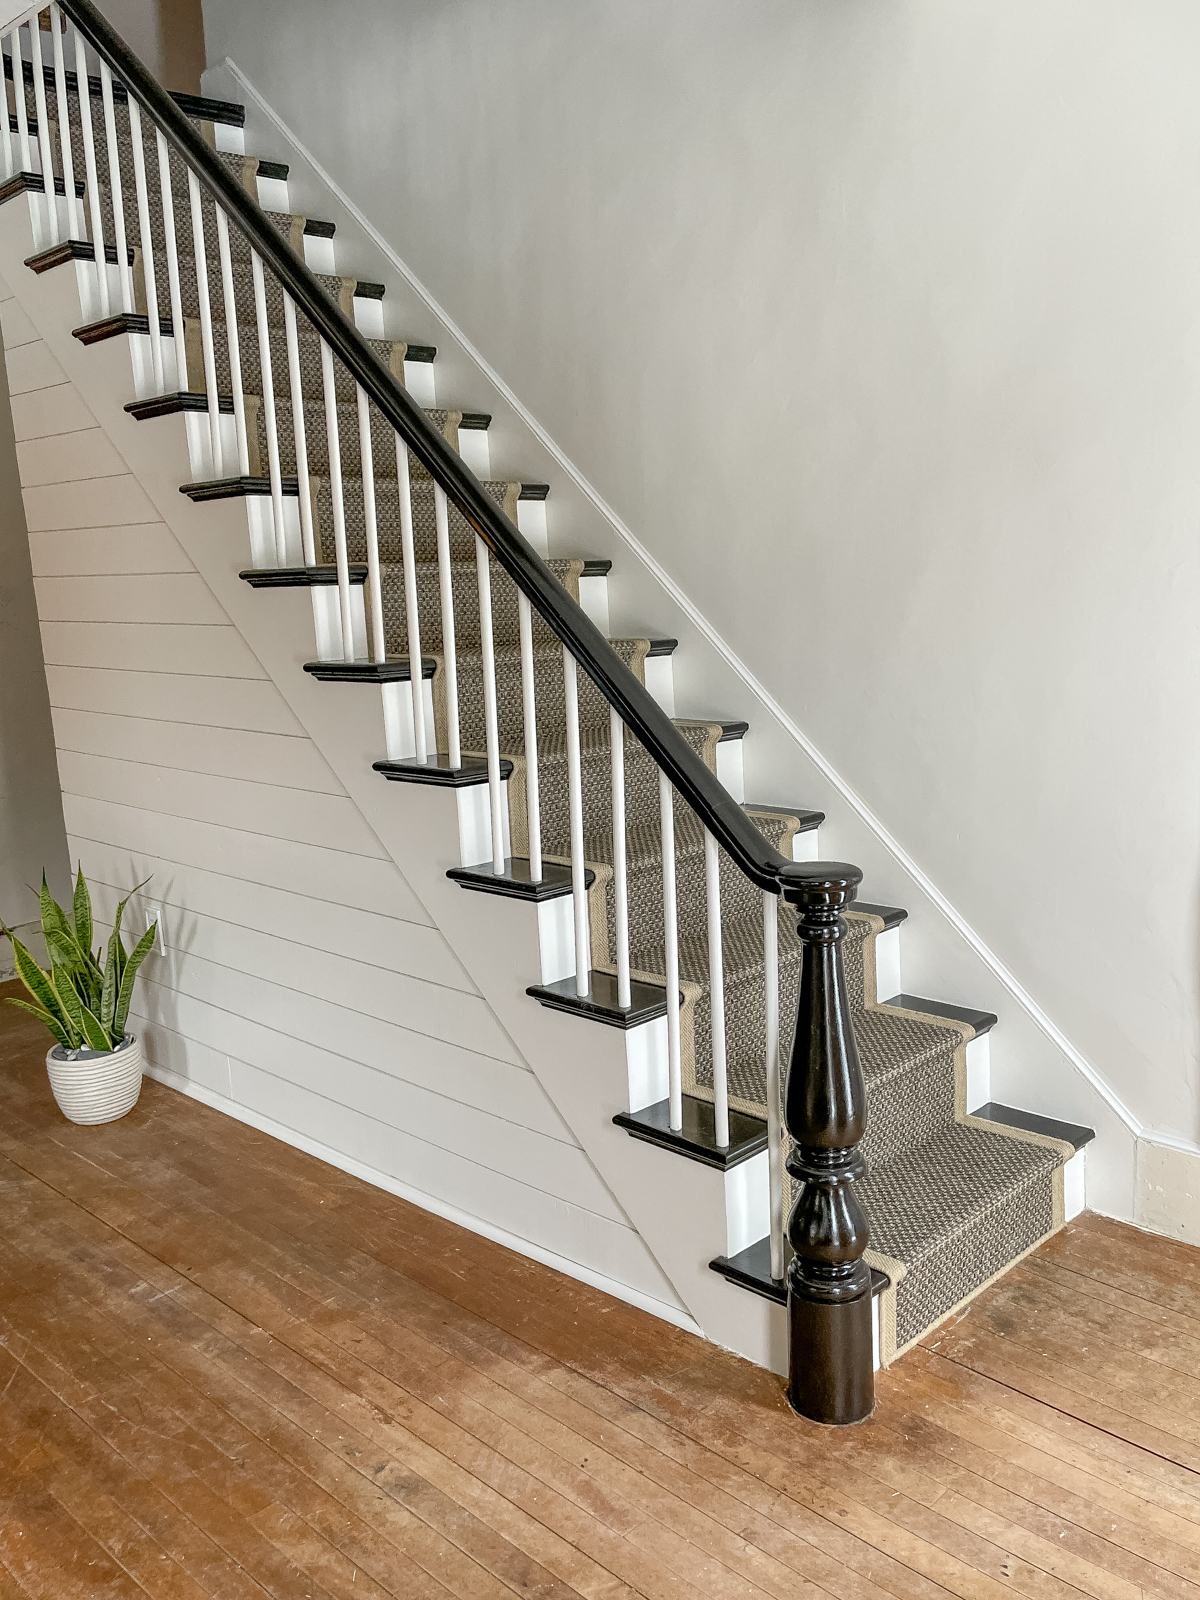
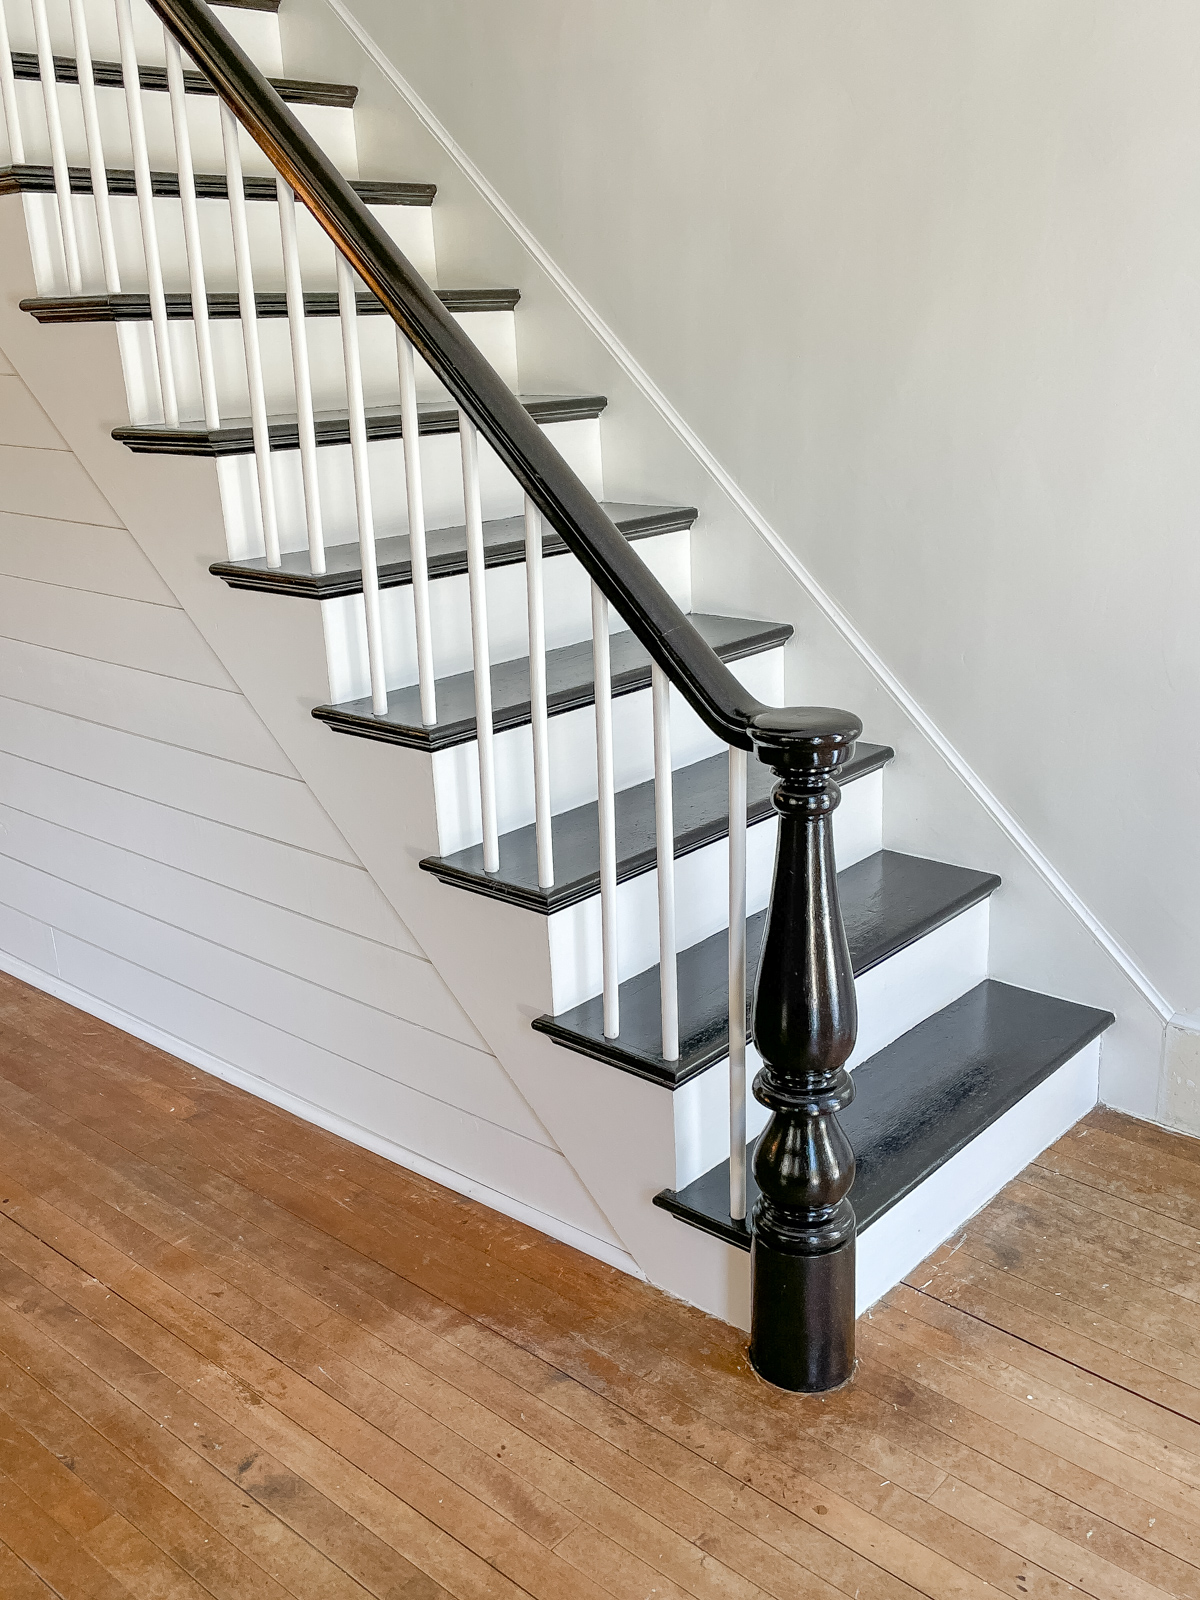
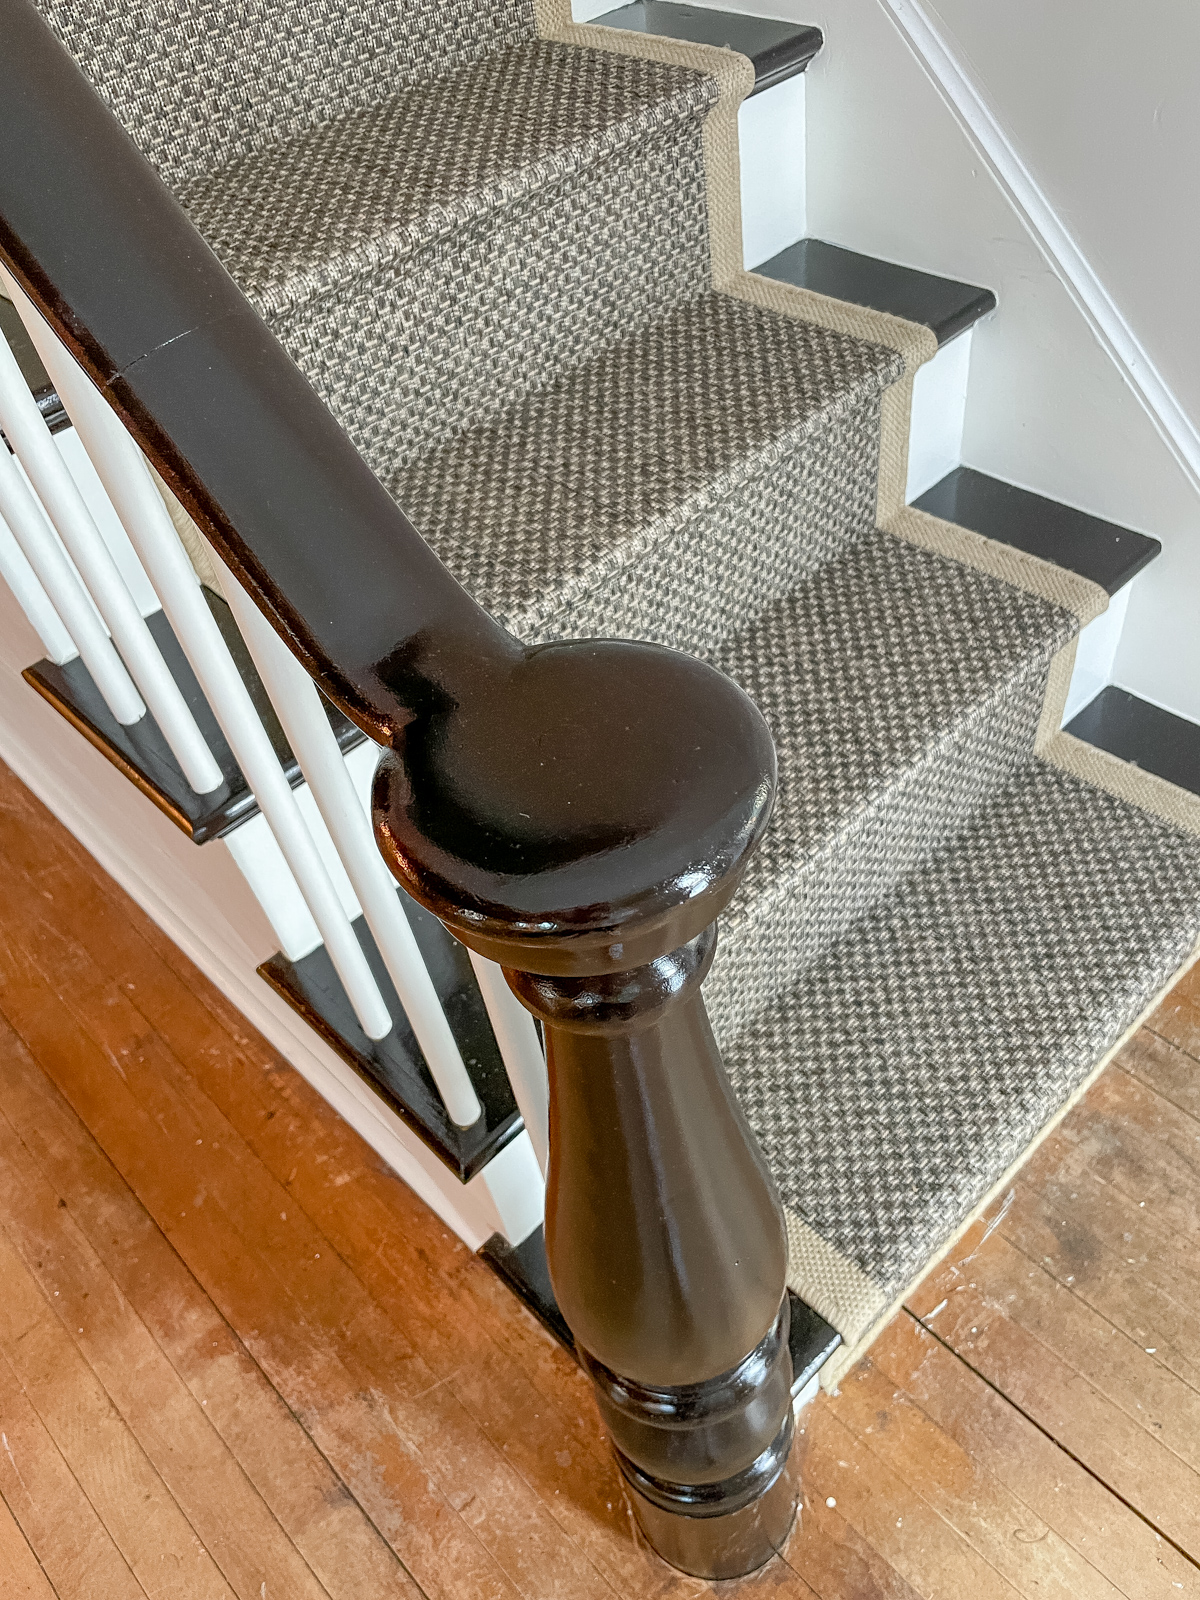
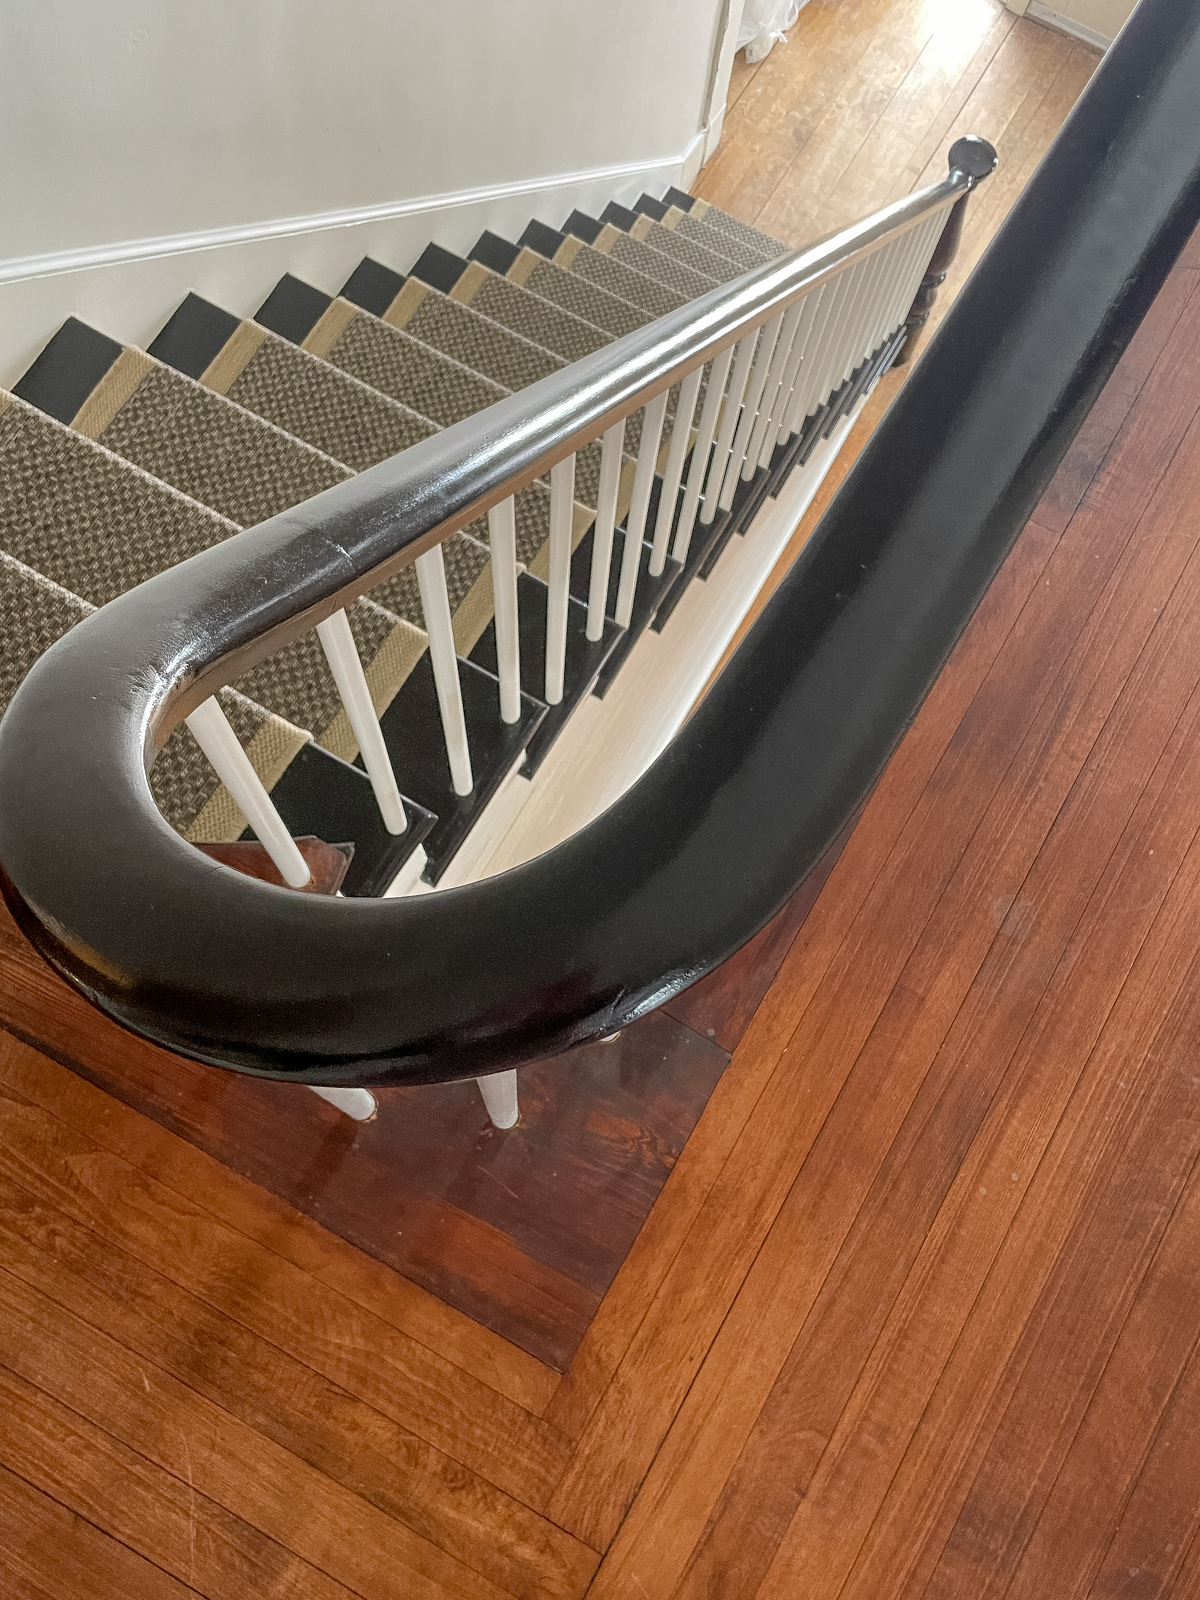
I’ve always loved black and white stairs, they’re elegant and dramatic. So I decided to go with General Finishes Gel Stain in Java because it has an almost black look and gel stain is so easy to work with. I used a blend of Java and Antique Walnut gel stain on our Texas stairs if you want to read more about that, but this time I decided to go with the full Java color.

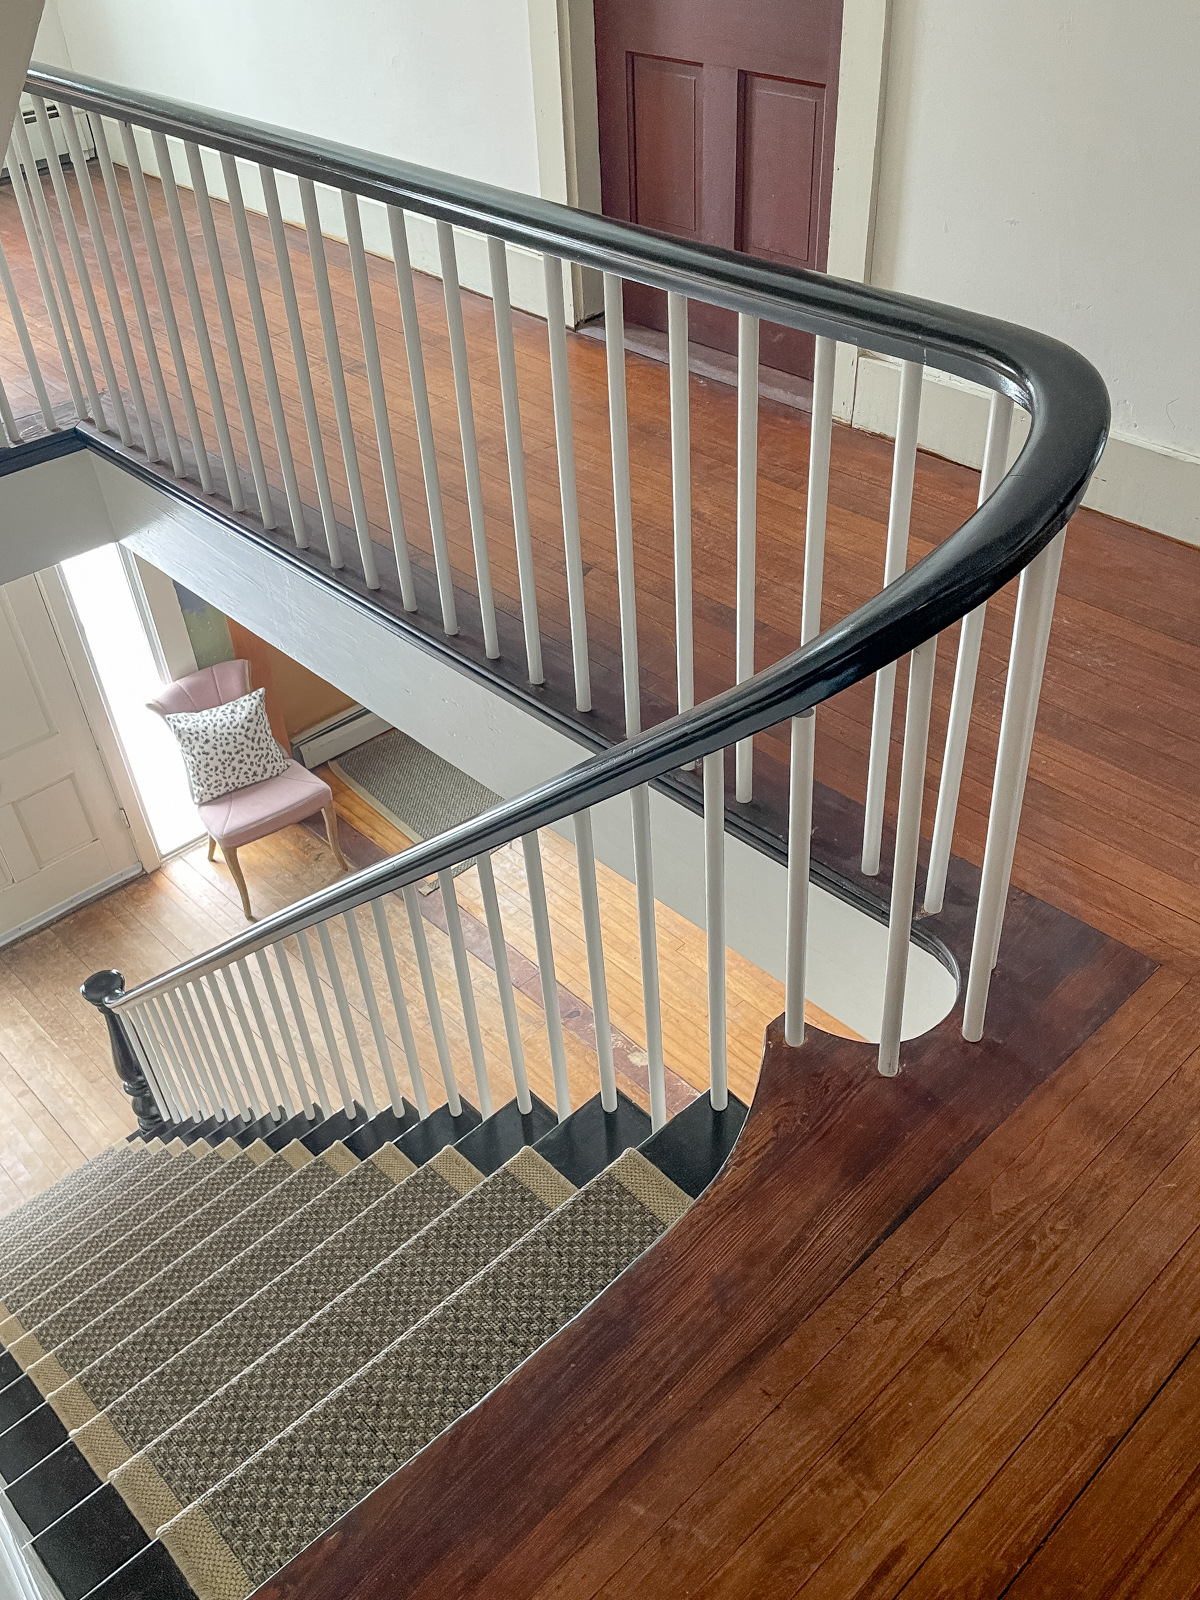
The balusters were peeling badly and very unstable so we decided to toss them and replace them with new 7/8-inch wooden dowel rods. I was really upset that the end of the newel post was broken and I was going to try to mold it with wood putty until one day we found the end piece in a different room. Score!
You only need to lightly sand or degloss areas where you’re using gel stain, but I was a little more aggressive sanding the stain off because it had a rough almost orange peel texture.
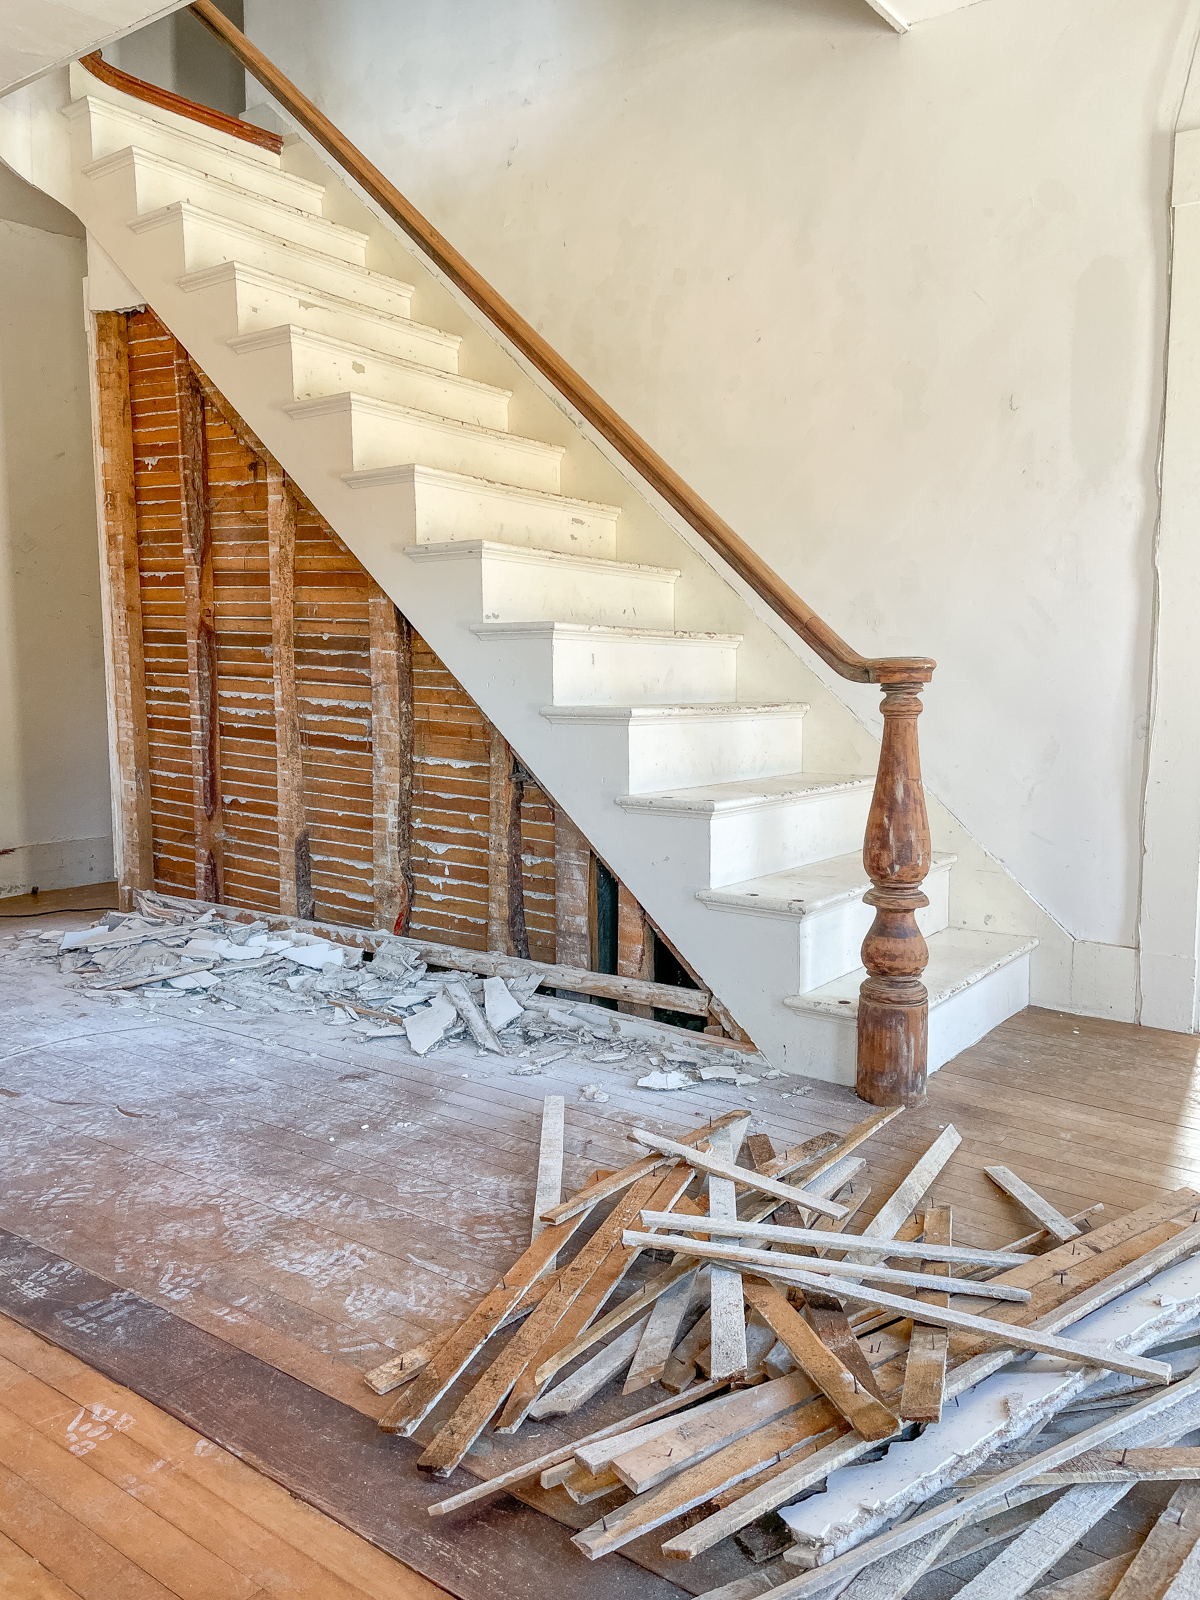
I knew I wanted some kind of accent wall on the stairs with a table and lamp so we ripped out the wall and Brian installed a plug. Our stair rail is one long curved piece so Brian built an X bracket at the top to stabilize the rail while the balusters were off.
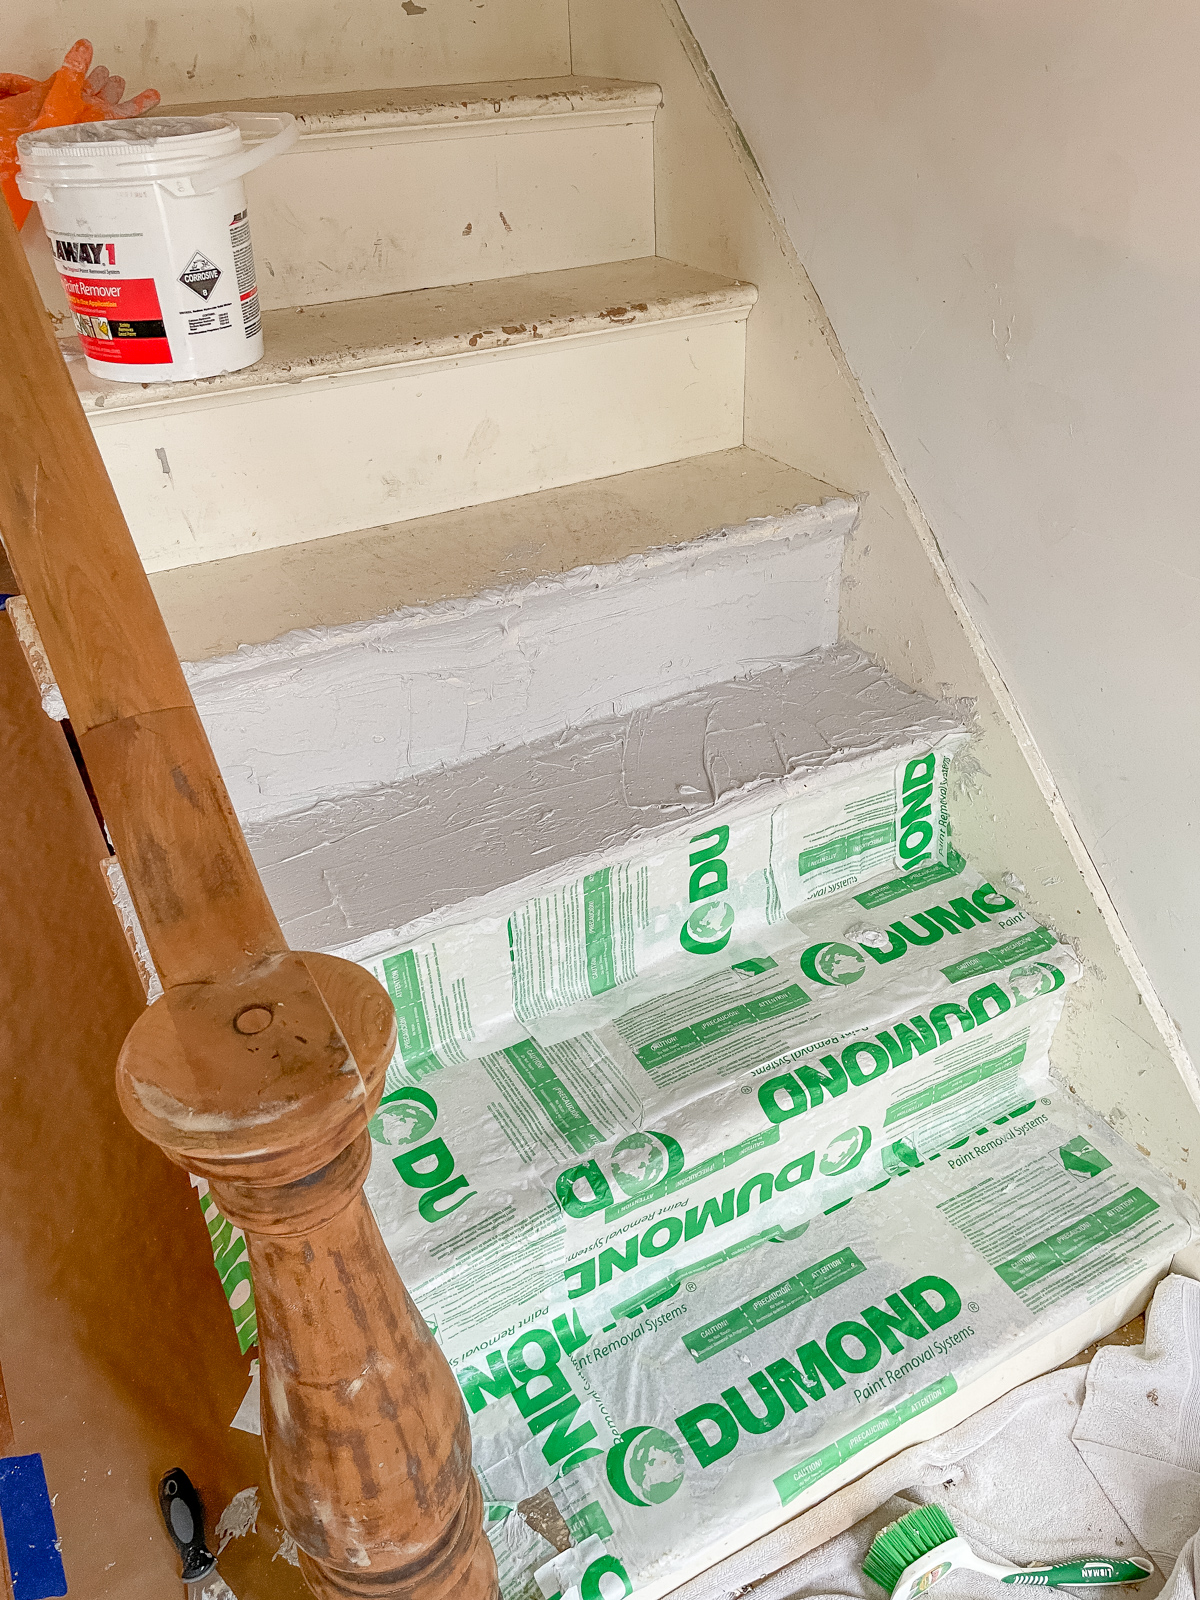
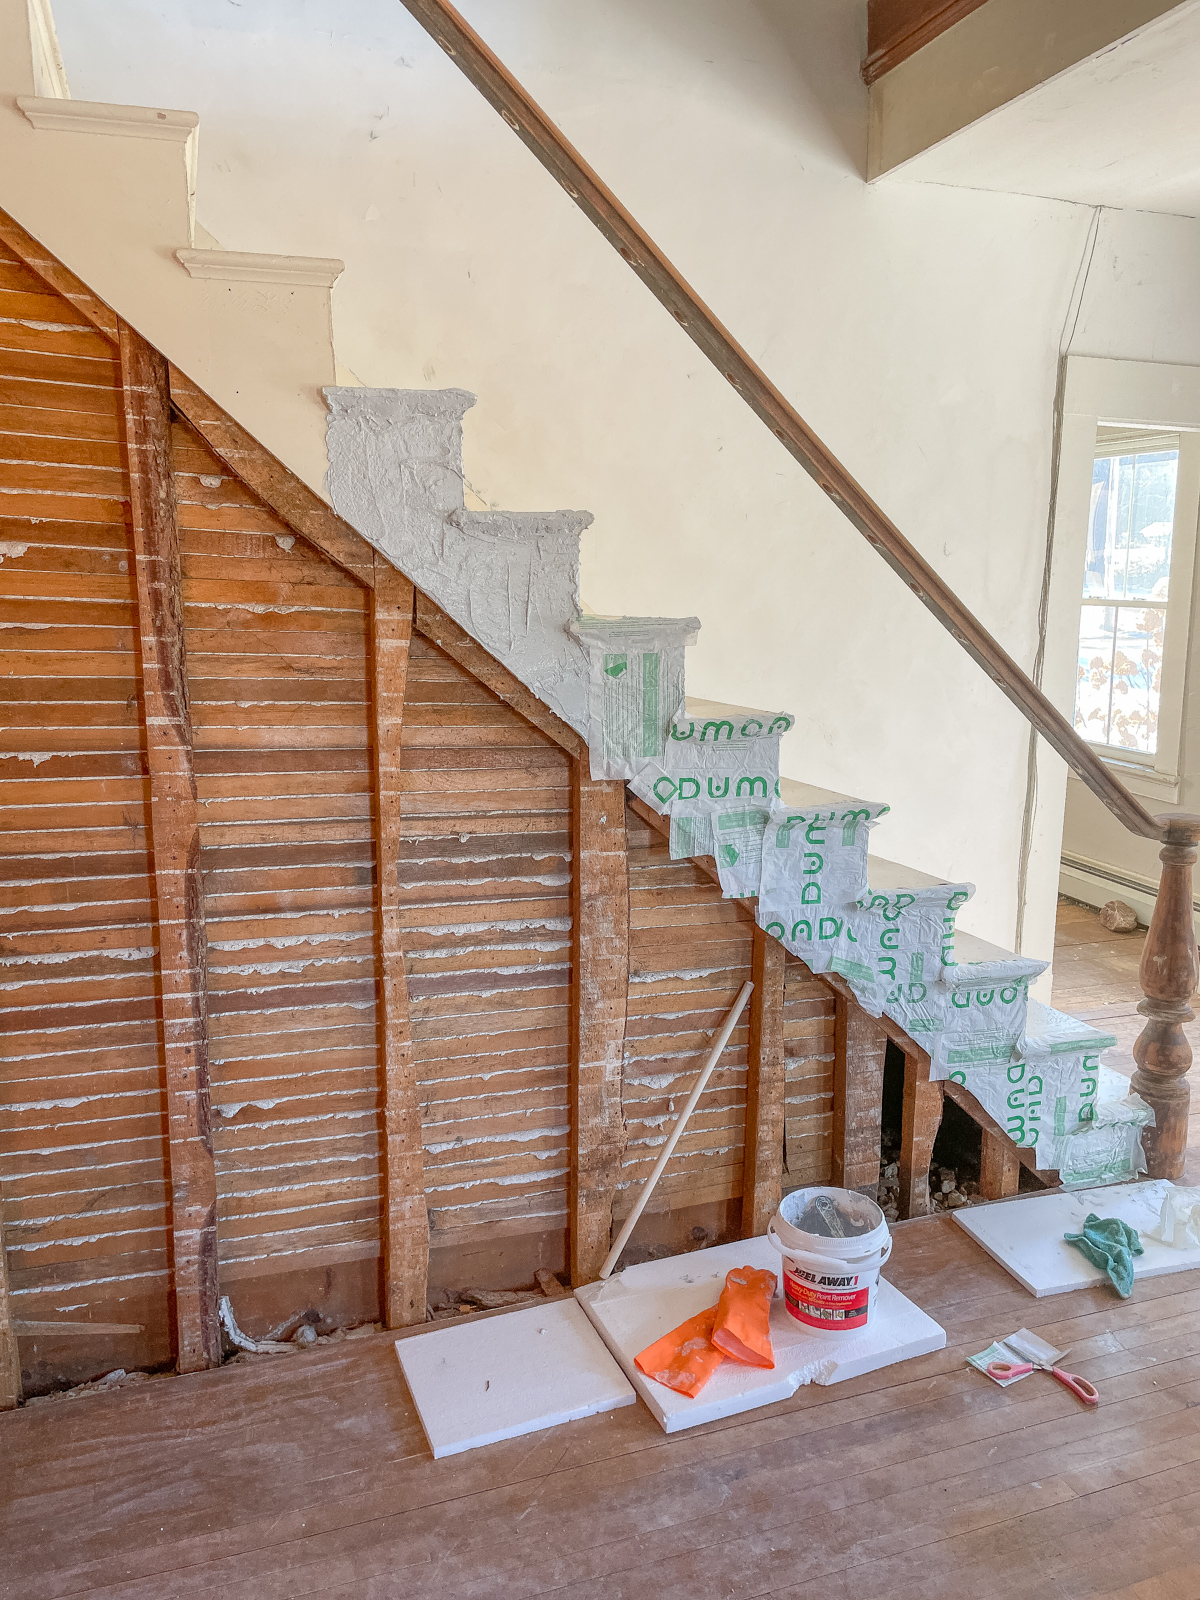
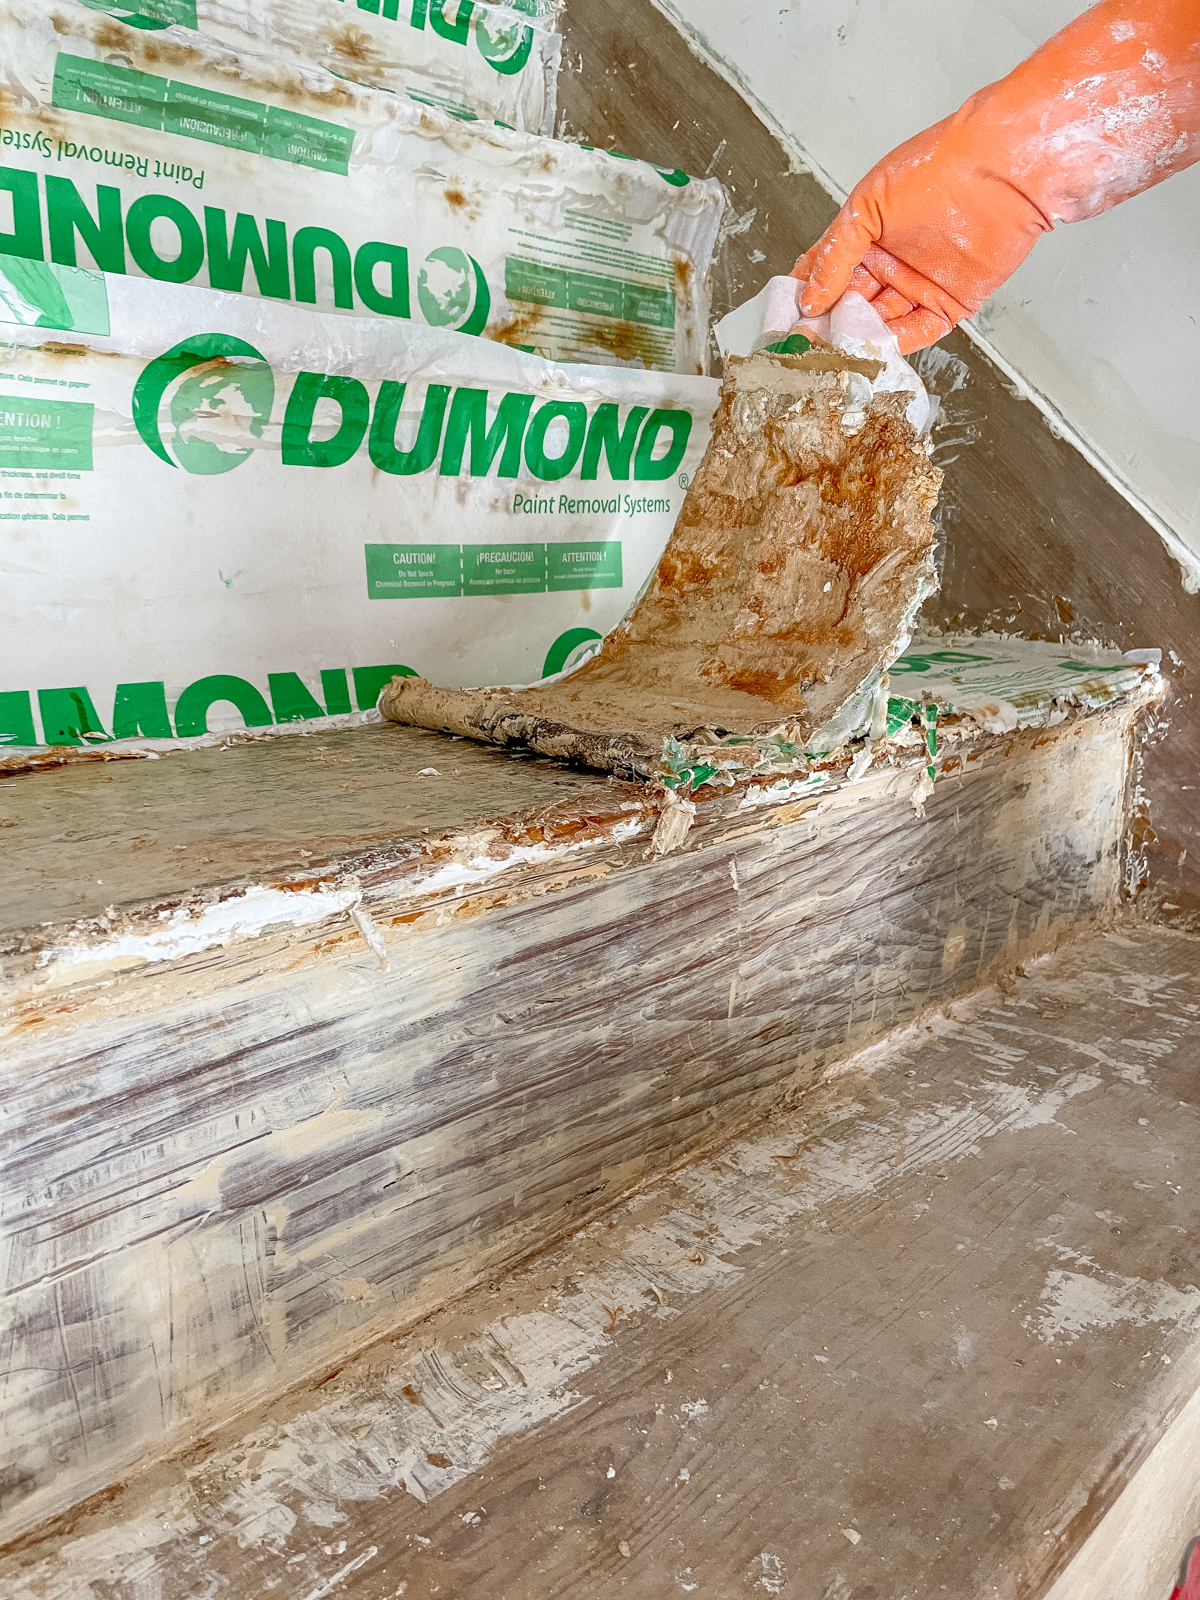
Now we we’re on to the miserable part, removing 122 years of old crunchy peeling paint. You shouldn’t sand off lead paint so stripping was the only way to go. After lots of research we went with Peel Away 1. We thickly applied the product, covered with paper and waited. It took 2 days of soaking before the paint was stripped. We went through 4 containers and worked in sections. It was a slow process but the paint came off in thick strips stuck to the paper. Any residue was easily scraped off. It’s really the easiest and safest way to remove thick old layers of paint.
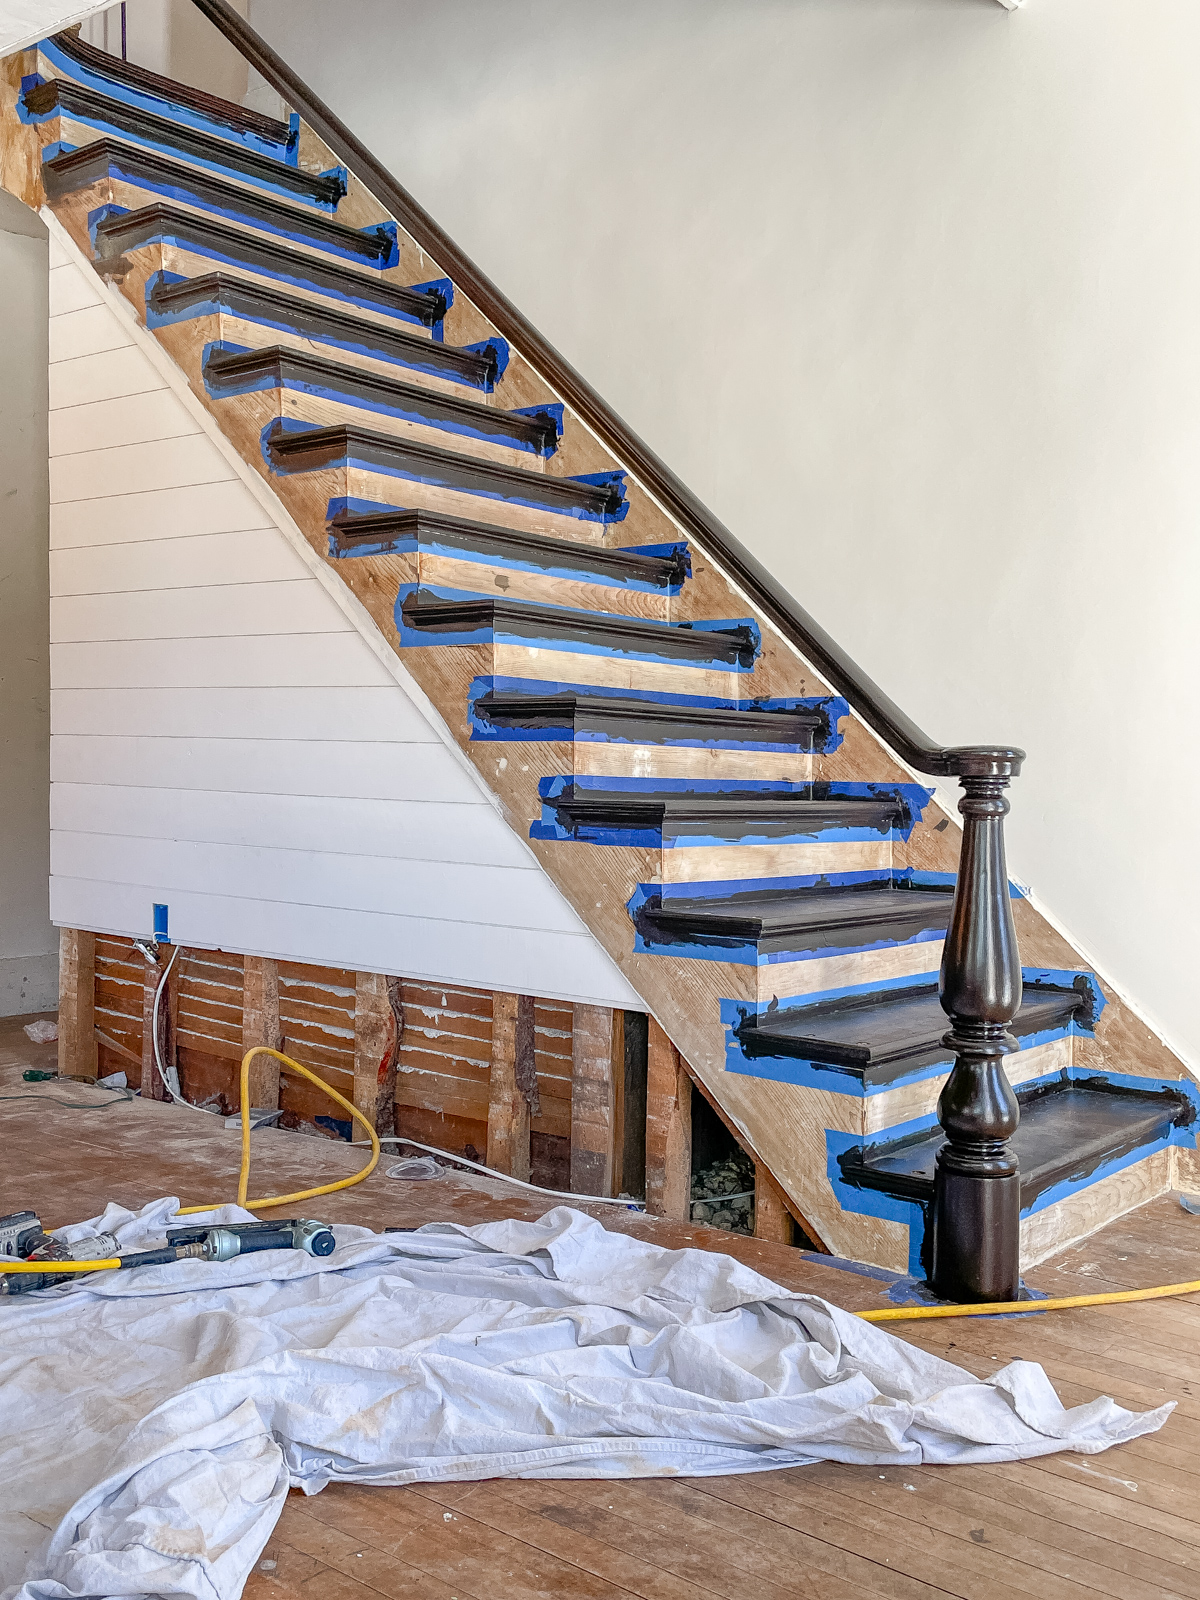
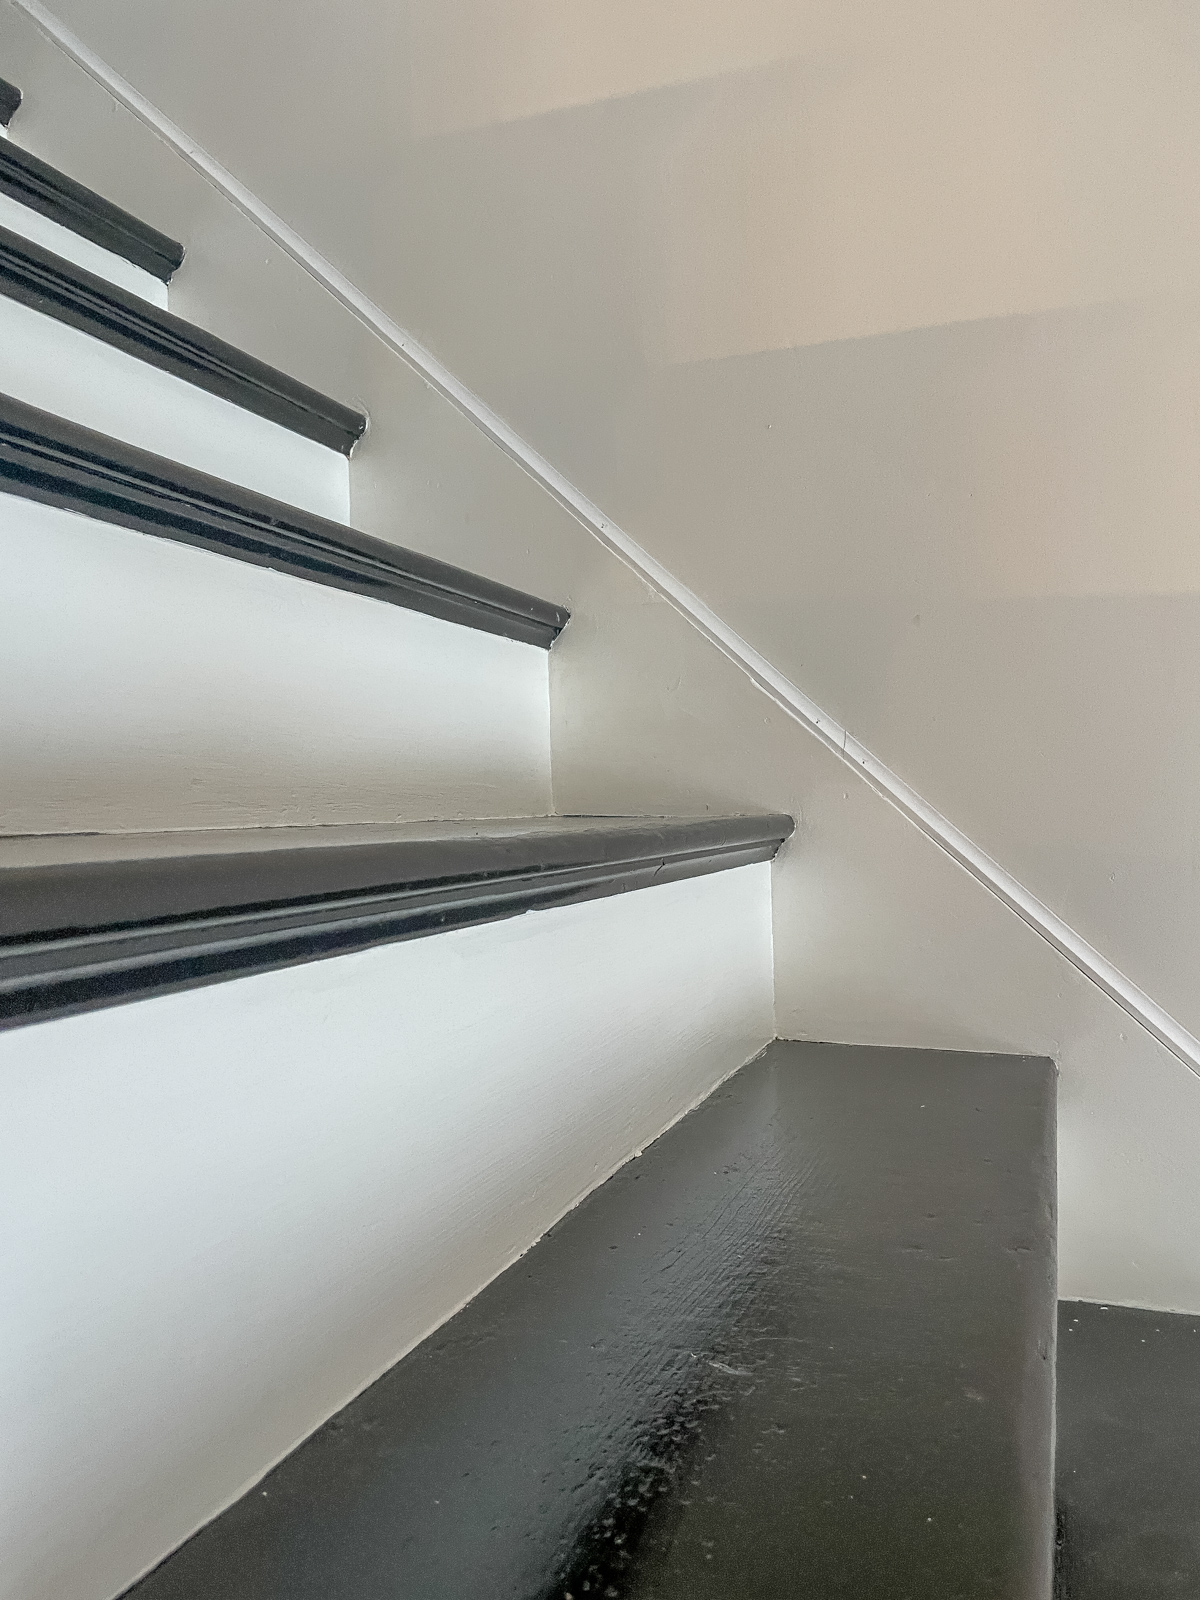
Once the paint was stripped I applied 3 coats of gel stain, letting each coat dry a good 24 hours in between. There are many ways to apply gel stain but like our last stair project I used the sock method with a glove underneath and I did not wipe any stain off. Starting at the top I used long smooth strokes to apply the stain and it applied flawlessly.
In between dry time we worked on other projects like the painting the balusters and installing the shiplap. If you’re installing shiplap I highly recommend you paint the boards on sawhorses first! Otherwise the paint gunks up between the boards.
After adding 3 coats of gel stain, when it was completely dry I added 3 layers of General Finishes Oil Based Top Coat in Satin. This is where the gel stain comes to life and shines!
I used the same sock method above and let each coat dry 24 hours, some areas needed even longer than 24 hours. I didn’t sand between coats because I was just so tired and I didn’t feel like it needed it. (I have this all summarized below)
Luckily we have a back staircase we can take otherwise I guess we would have had to sleep downstairs.

After the treads were done I primed with Kilz 3 and painted with Benjamin Moore Simply White. We also added a top trim piece along the stair baseboard for a more finished look.
No matter how well I tape off areas I always get some leakage! I’ve tried every brand and it’s always the same. So my trick is to fix little spots with a craft brush.
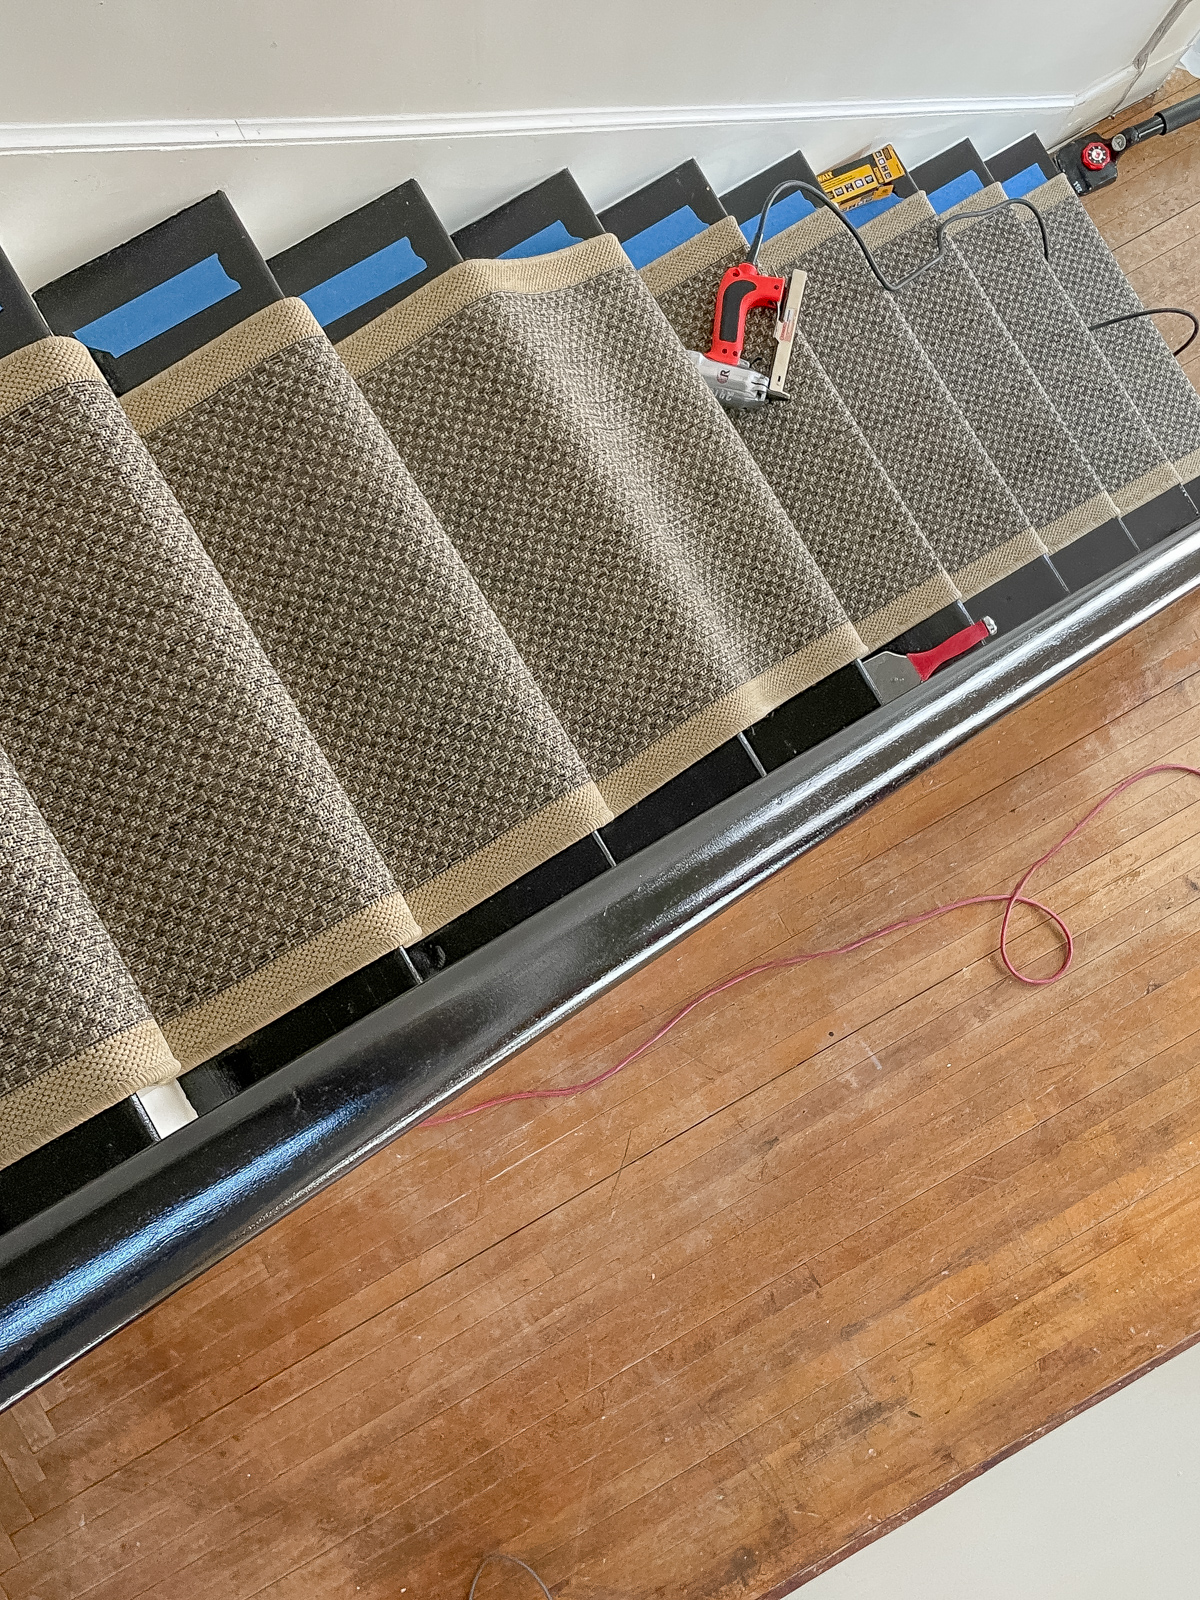
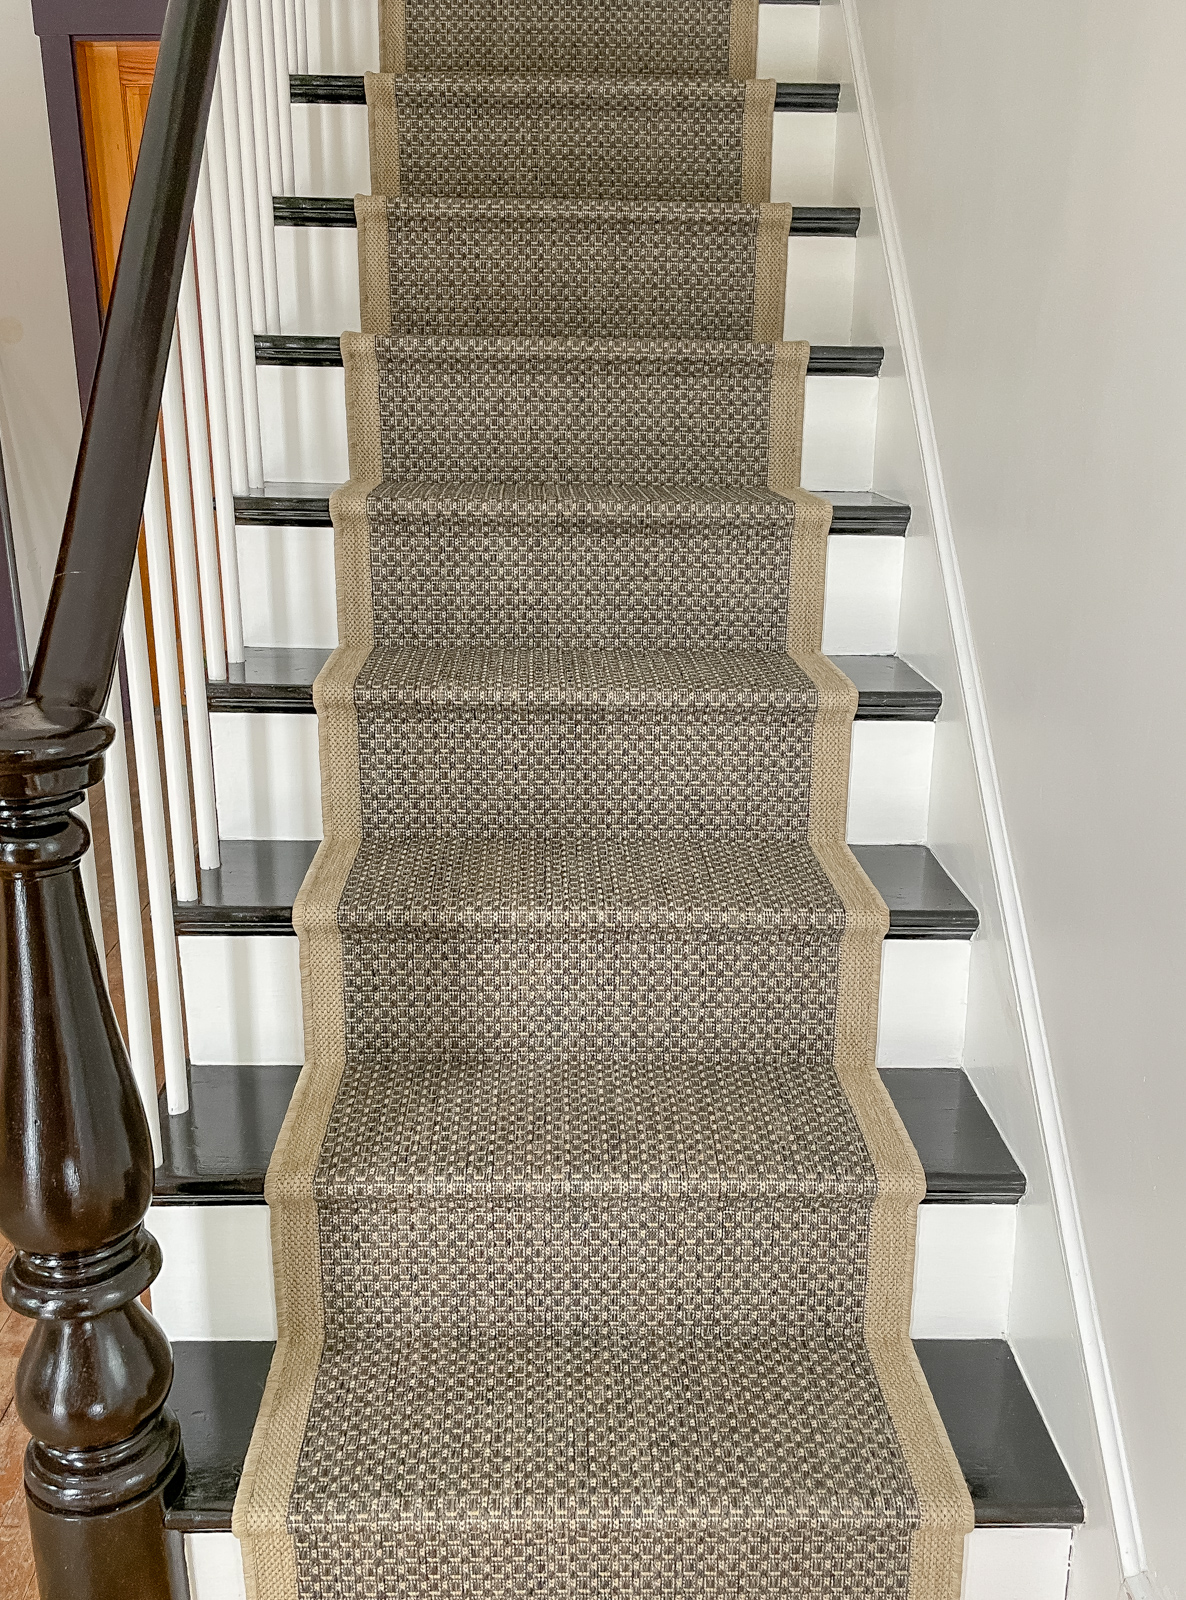
Now it was time for a runner! Not just for aesthetics but to protect the wood and prevent slipping. Our runner is from Run Rug in Gingham Tweed Beige.
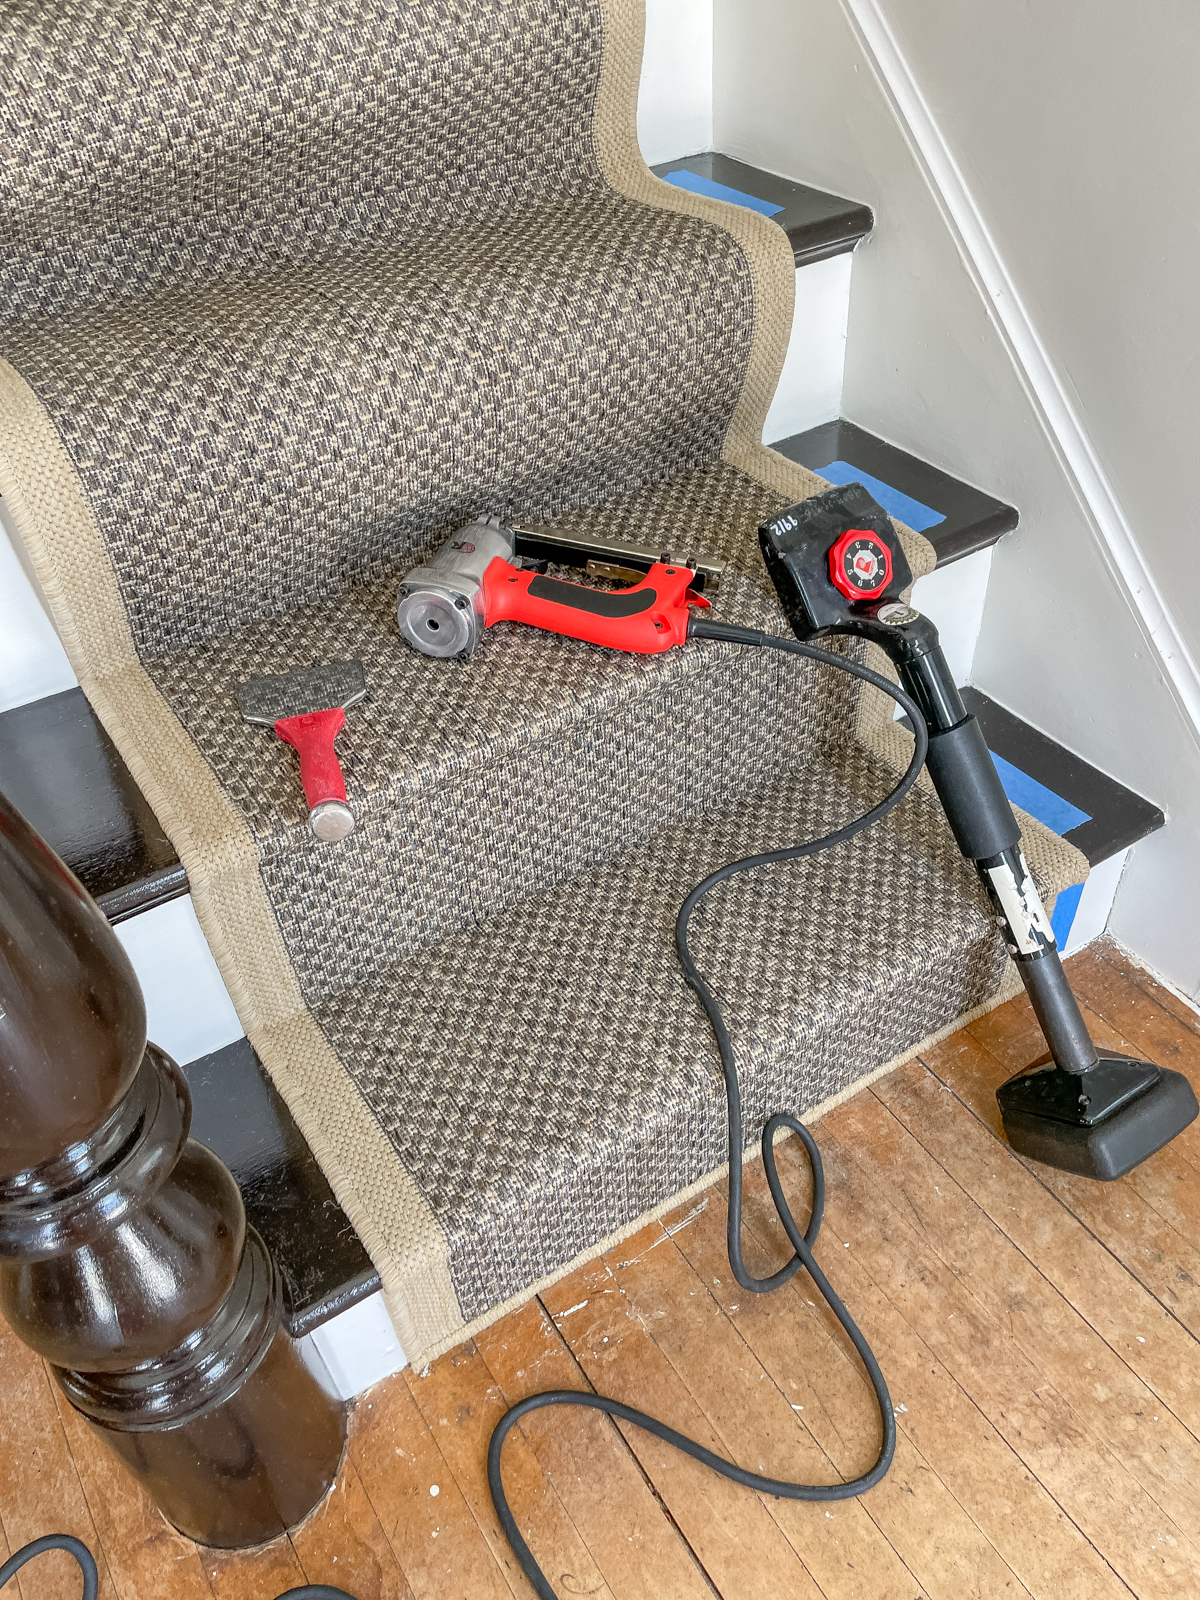
We rented a carpet installation kit from Home Depot for about $60 and it made installation a breeze! We watched several Youtube videos to get comfortable but it really was an easy process. Some people added carpet padding but I didn’t feel it was necessary and I didn’t want the runner to look puffy. Another thing we noticed on Youtube was that some would start at the top and others the bottom for runner installation.
We knew we had to cut at least one end of the carpet and I wanted the hemmed edge on the floor for durability. Plus we have a small curved edge at the very top that we needed to cut to fit so it made more sense to start from the bottom up.
Like I said we are thrilled with how our stairs turned out, but we’re so relieved to be done! Now if I can just get the courage and the energy to refinish our hardwood floors!
Oftentimes I’ll read someone’s DIY blog post and it’s so long that I find it hard to see their exact steps. So I thought I’d do a condensed version below that’s quick and easy.
OUR STAIR REFINISHING STEPS
- Sanded the handrail and newel post.
- Striped the steps using Peelaway 1.
- Final stair clean and taped off the risers.
- Working quickly I used a sock over a gloved hand and applied 3 layers of General Finishes Gel Stain in Java to the handrail, treads, and newel post letting each application dry 24 hours. I started at the top and used smooth long strokes with the sock going in one direction. I let the stain dry and did not wipe any off.
- In between dry times I painted the balusters with 3 coats of Benjamin Moore Simply White in a pearl finish with a 1 inch craft brush. I did lightly sand with a 320 grit after the first coat of paint.
- Working quickly again I used a sock over a gloved hand and applied 3 layers of General Finishes Oil Based Gel Top Coat in Satin letting each coat dry 24-36 hours each. I started at the top and used smooth long strokes with the sock going in one direction. I did not sand between coats.
- Primed the risers, molding, and trim with Kilz 3, let dry 4 hours.
- Painted the risers, molding, and trim with Benjamin Moore Simply White in a pearl finish with a 3 inch angled brush.
- Touched up small areas with a craft brush.
- 48 hours later we installed the carpet runner with a staple gun starting from the bottom working our way up to the top. We rented a carpet installation kit from Home Depot.
Our runner is from Run Rug in Gingham Tweed Beige and the back wall of the stairs is painted Benjamin Moore Cloud Cover. Hope this helps with any questions you may have but feel free to ask me anything else in the comments below.


Wow, wow, wow. !!! Your black & white staircase is stunning, your yellow house is a dream, and you write in such a easy-going, straightforward, informative, enthusiastic, fun manner that I actually read entire posts or pages. The pictures combined with your words are just so much easier to digest and understand the whole process. Your blog is so good, after reading only 2 posts, that I’m amazed you have the energy to document anything… To me that seems almost as gargantuan a task as each of your renovation projects. Truly kudos and thanks to you for sharing! Invaluable and so so so inspirational. Drool-worthy pics!!