Crafts

HOW TO CREATE A SIMPLE FLOWER BOUQUET

February is quickly approaching and nothing says love and thoughtfulness like gifting flowers!  This year we’re doing more of a handmade Valentine’s Day when it comes to gift giving and decorating so I thought sharing my trick for gifting flowers would be perfect.  I mean who doesn’t love a cheerful bouquet of flowers?  Not only is it a sweet gift for Valentine’s Day, but also for other occasions as well.

Handmade flower bouquet

Because of all of my girls’ theatre performances and Ashley’s violin I learned how to make a pretty flower bouquet on a budget!  It’s all in the presentation!  So if you’re a regular reader you know that I have a thing for kraft paper.  It’s only a dollar from the Dollar Tree and kraft paper has a zillion uses!  I’m thinking one of these days I should put together a blog post on all the ways that I use this magical, cheap, brown paper.

Budget flower bouquet

You can use any flower you like, roses would be gorgeous, however I’m using carnations for this bouquet for two reasons.  Hello, they’re cheap and also sturdy!  I’ve had carnations left in the car that I’ve forgotten about for days and when I found them they still looked great.  Tough little flowers!

SUPPLIES NEEDED

Flowers

Kraft paper

Scissors

Saran Wrap

Paper towels

Water

Twine or ribbon

Decorative paper embellishments or gift tag (optional)

Handmade flower bouquet

Start with a nice sized cut square of kraft paper, mine was about 22 inches.  You can go a little smaller or bigger based off your needs.  Turn the square so that it’s diamond-shaped and position the flowers along one of the points.  Now place a smaller square of saran wrap with a wet paper towel on top of the kraft paper.  Fold the bottom of the paper towel and saran wrap up over the cut flower ends.

FYI- I did not wring out my paper towel much so it was pretty wet.

Handmade flower bouquet

Wrap the saran wrap around the flower ends to secure the wet paper towel.  Now take the bottom right edge of the kraft paper and fold it up a few inches.

Grab the left pointy edge of the paper and bring it across over the top of the flowers to the right.  Now fold the bottom of the paper up.

How to make an affordable flower bouquet

Tuck the top right corner inside to create a nice clean look.  Then fold the right side back over to the left, and continue wrapping all the way around to the back.

How to gift flowers

Fold or cut any leftover paper and secure with tape on the back side.

How to make an affordable flower bouquet

Decorate the paper bouquet by wrapping with twine or ribbon and tying into a bow.  It looks pretty just as it is, but feel free to add a paper heart or gift tag.  I used my favorite heart punch, the same ones I used to make my paper Valentine’s Day ornaments.  Make sure you check out my Valentines’s Day decor from last week!

Make a valentine's day bouquet

There are so many pretty flower combinations you can come up with.  How pretty are these red carnations?  Haha.. they’re like cheap knock off roses.

Handmade flower bouquet

You can slide the flowers out of the paper and add a little bit of water here and there in you want to keep them wrapped in paper or they can later be added to a vase.   I’ve had mine on my coffee table for days and they still look gorgeous.  I just love the charm of a handmade bouquet, and I know you will too.


Laura

RECIPES

BAKED SPINACH ARTICHOKE DIP

We had a party over the weekend, well kinda… I made my favorite spinach artichoke dip,  we drank some wine, and did our taxes.  Hey, when you’re over 40 that’s a party!  I’m not sure what I’m more excited about, the fact that we finished our taxes or that I got to devour this delisih dip.  This is an old recipe from my file that’s probably 10 years old.  I can’t remember but odds are it’s adapted from an old church cookbook… aren’t those old church cookbooks just the best?

Baked spinach artichoke dip recipe

I’m not the only spinach artichoke dip fan in this household, Haley goes nuts for it.  She loves anything that combines cream cheese and spinach, and she loves it when I make this recipe.  Once the spinach is thawed and drained and the cream cheese is room temperature it’s really easy to throw together!

I like to buy a loaf of French bread, mostly for dipping, but also for making a delicious bread crumb topping with my food processor.  You can skip this step or always use store bought bread crumbs if you want.  I just love the texture of homemade bread crumbs.

Baked spinach artichoke dip recipe

Baked in a 7×9 pan, this recipe is the perfect size for a small gathering.  If you’re expecting a crowd you can easily double the recipe and bake it in a larger pan.

Easy appetizers

Those who are watching carbs or are gluten free you can eliminate the bread crumbs.  I usually eat this dip with sliced veggies to save carbs, my favorite combination is with sliced red bell peppers and celery, it’s so yummy!  Tortilla chips are also a win.

low carb appetizers

Spinach Artichoke Dip

Servings: 4 cups

Ingredients

  • 1 12 oz package of frozen chopped spinach, thawed
  • 2 6 1/2 oz jars of marinated artichoke hearts, drained & chopped
  • 12 oz cream cheese, softened
  • 1 cup freshly shredded parmesan cheese
  • 2/3 cup sour cream
  • 2 tsp garlic powder
  • 2 tbs fresh lemon juice
  • 1 loaf French bread, to make bread crumbs and for dipping
  • 1 cup freshly made bread crumbs
  • 1 tbs melted butter

Instructions

  • Preheat oven to 375°
  • Drain spinach and press between layers of paper towels to remove excess moisture.  Combine spinach, artichoke hearts, cream cheese, parmesan cheese, sour cream, garlic, and lemon juice and mix well. Spoon into an 8x8 or 7x9 casserole dish.  
  • Tear off a piece of French bread and pulse in food processor to make course crumbs.  Continue the process until you have 1 cup of bread crumbs, mix well with melted butter and sprinkle over the dip.
  • Bake uncovered for about 25 minutes or until heated through and bread crumbs are toasted.  
  • Serve with remaining toasted french bread, tortilla chips, or vegetables for dipping.

Easy appetizers

This is a great recipe to make ahead and just pop into the oven right before guests arrive.  Be sure to check out some of my other recipes, my Roasted Bell Pepper and Basil Salsa is another entertaining favorite of ours.  Happy eats!

Shop some of my favorite kitchen items below!


Laura

HOLIDAYS

VALENTINE’S DAY DECOR

Valentine's day decor

Happy Saturday my Valentine Lovebugs!  I’m all happy because I’ve finished decorating for Valentine’s Day!  I only decorated a few rooms, but I still love our decor this year.  I just wasn’t ready to let go of our Christmas tree, it was a new purchase this year and I’m head over heels in love with it still.  The more I started thinking about our Christmas tree the more I realized it makes for perfectly acceptable Valentine’s Day decor.  It’s a winter holiday so why not?  January is sometimes a let down after the boom of Christmas so why not keep the holiday cheer going with the love of Valentines’s Day?

This year I tried to make things a bit more DIY and crafty, so let me show you around and I’ll tell you exactly what I did.

blogger valentine's day decor

Valentine's Day Christmas Tree

Those who read my blog often know that I just love tablescapes!  It combines my 2 favorite loves, decorating and eating!  I kept things pretty simple for our kitchen table.  I left my striped table runner, it looks fabulous with everything!  Then pulled out my very favorite charger plates combined with these pretty pink and red napkins.

Valentine's Day tablescape

Table | Chairs | Tablerunner | Charger Plates | Napkins | Chandelier 

valentines day tablescape

I love buying cloth napkins, y’all should see my collection, it’s getting big!  Then I simply tied a bow and sprinkled a few candy hearts.

Valentines Day tablescape

I love red roses in our house every day of the year so of course during the season of love I’ll have a few extra around the house.  For my centerpiece I filled 3 mason jars with roses and Israeli ruscus for a pop of green.

Valentines Day table

I love my fireplace, it’s my pride and joy.  I love how our mirror reflects light and adds sparkle to our family room, but another benefit is that it’s great for layering a wreath.  This heart wreath is on its second year, last year it was on my front door and it’s holding up amazingly well.  I attached it to the mirror with a suction cup.  I left our frame up from Christmas, it’s really fun and easy to switch out art, I just threw something together in photoshop.

Valentine's Day fireplace decor

Black Candleholders | Mirror | Heart Wreath | Fireplace Screen | Faux Fur Ottomans | Gold Knot

Valentine's Day Christmas tree

I love our sweet Valentine’s Day tree, It probably cost me $10 to decorate.  I made salt dough heart shaped ornaments and painted them pink, then cut out paper hearts, and added roses from the Dollar Tree.  I also have a lot of pink and red flower napkin rings that I bought last year from Pier One so hey… I put them on the tree too.  You can’t even tell they’re napkin rings!

salt dough ornaments

For the heart ornaments, I used my gingerbread salt dough recipe but instead of the 1 cup of cinnamon I replaced that with an extra cup of flour.  I let them dry and painted.

heart paper garland

The girls and I had a lot of fun making paper garland together.  It’s so cheerful and cost just a few dollars to make.

valentine's day fireplace decor

decorate with roses

No sew heart pillow

If you haven’t read my tutorial on how to make a no sew heart pillow be sure and check it out!  You can use any color or pattern!

Living room decor

Lamps | Coffee Table | Tealight Centerpiece | Deer Head | Cheetah Rug | Sofa | Fur Throw

Valentine's Day decor

I can never have enough roses!  I love these little paper sacks I found in the candy aisle at Hobby Lobby.  I added a small cup filled with water for the roses, the paper sack adds such a charming touch.

Valentines Day decor

I love mixing extreme elements together, so I added some sparkly jewelry to our pinecones on the coffee table.  It’s rustic and girly at the same time.

Valentine's Day decor

Horse Sculpture | Mirror | Chandelier | Paris Book

Blogger Valentine's Day decor

I’m not ready to pack away the buffalo plaid just yet, I’m going to let it cruise well into Valentine’s Day!  For my dining room tablescape I pulled out my favorite leopard accent plates combined with gold charger plates, I love the combo.

I decided to make my own table runner so I took a roll of 18 inch wide white paper and hand painted it.  My sweet Haley Bears helped me punch out hearts with our leftover cardstock.

leopard dishes

It’s so easy to make these rose napkin flowers, I’ll show you below.

how to fold rose napkins

Take a napkin and starting with the pointy end roll it up, then simply wrap it around in a circle to look like a cinnamon roll.  Then take the end and tuck it in underneath.  Adjust and fluff the center if needed and add some leaves. I pulled some off a shrub in my backyard.

Rose folder napkin

Placemats | Leopard Dishes | Red Napkins

I found when I was painting the table runner the sloppier I got the better it looked.  So there is no need for perfection here!

Valentine's day tablescape

Brian and I usually have a date night either on Valentine’s Day or the day before, then we have a family Valentine’s Day dinner at home with the kids.  I can’t wait to celebrate!

Valentine's day tablescape

Valentine's Day Flowers

Here’s a little sneak peak at my next blog post that will be up in the next few days, how to wrap pretty flowers for gifting.  I hope you enjoyed our cheery red Valentine’s Day decor, and you should think about leaving your Christmas tree up next year and decorating it for Valentine’s Day.  Our entire family loves having it up still after Christmas.  Brian asked me if I was leaving it up for Easter too… yeah I think not.   Something about the Easter Bunny and a Christmas tree just doesn’t work for me.  Maybe one day…. haha.

Laura

HOLIDAYS

HOW TO MAKE A NO SEW HEART PILLOW

How to make a no sew heart shaped pillow for Valentine's Day.

Cheers to Friday!  Who has Valentine’s Day on the brain?  I certainly do.  I’m determined to have a fun handcrafted Valentine’s Day this year, but saying handcrafted shouldn’t equal difficult or hard.  No… I’m all about easy to do crafts and this no sew heart pillow is the perfect craft to get ready for Valentine’s Day.  With a few basic supplies you’ll have your own heart pillow in an hour or less.

How to make a DIY budget no sew heart pillow.

How to make a no sew heart shaped pillow.

You’ll need 2 pieces of fabric, and something to draw with on the fabric.  A piece of chalk is ideal because you can wipe it off with a damp rag, but a pencil can also work.  I just used plain red fabric, but the possibilities with textures and patterns are endless.   One more thing, the better the scissors the faster this project will go.  Fabric scissors are ideal, if you have old dull scissors you can still proceed it will just take longer to cut.

Supplies for a no sew heart pillow.

SUPPLIES NEEDED

Fabric

Chalk

Scissors

Pillow fluff

Trace or freehand a heart onto the fabric with chalk for the no sew heart pillow.

Start by placing 2 pieces of fabric together, if the fabric has a pattern or texture make sure one side is facing down and the other up.

Now lightly trace or freehand a heart with chalk.  The beauty of chalk is you can wipe it off and start over if needed.  If you’re drawing one freehand don’t worry it doesn’t need to be perfect. Once the pillow is stuffed any asymmetry won’t be that noticeable.

Mark outside the heart to make a cut line for the no sew heart pillow.

Trace another 2 to 3 inches around the heart, this will be where you will cut.  Feel free to make it even larger if you have the extra fabric space and you want a longer fringe.

Mark outside the heart to make a cut line for the no sew pillow.

You’ll want to cut at least 2 inches outside the heart, other wise it might be too hard to tie it closed.

Cut around the no sew heart pillow.

Now simply cut around the second line.

To start make a cut at the top & the bottom of the no sew heart pillow.

It’s important you make the first fabric cuts at the top and the bottom.  Once you complete that continue cutting strips all the way around the heart.  The size is up to you, mine we’re about 1/4 of an inch.  As you cut around the curves of the heart some fabric strips might look a little triangle shaped, that’s ok and you can always trim it straight later if you like.

Once you finish making cuts all the way around the heart you can take a damp rag and wipe the chalk off.  Then simply tie the fabric strips together in a knot.  Again I recommend starting with the center top cut and bottom cut.  Once you tie those it anchors the pillow a bit and makes tying easier.  Tie knots all the way around the pillow but leave a space open for stuffing.

Tie the fabric scraps together, but leave a space to stuff the no sew heart pillow.

Now it’s time to add the fluff!  Once you’re finished stuffing and arranging the pillow fluff simply finish tying the fabric together.  I love how the fabric started to frey when I tied the strips together, it just added charm.

Finish tying the fabric scraps to close the no sew heart pillow.

Voila!  All done… how quick and simple was that?  Now it’s time to find the perfect spot in my house…

Budget DIY Valentine's Day decor.

How fun would it be to make different sized hearts, colors, and patterns?  It’s a great craft for kids to help with and these pillows would make a sweet gift.  I’ll definitely be making a few more of these cuties, they’re just so fun to make and make the perfect cheer for Valentine’s Day.  Have a great weekend and I’ll see you soon. XOXO


Laura

TRAVEL

A PEEK AT OUR ESTES PARK GETAWAY

Have you ever felt so inspired and creative, like your brain is just full of ideas to the point that you’re so overwhelmed with thoughts and ideas that you get absolutely nothing done?  Thanks to our Estes Park trip I feel completely refreshed and filled with blog ideas… but I haven’t been able to execute any of them!  Since my brain is overloaded right now (in a good way) I thought I’d just show you some behind the scenes from our Estes Park trip.  My bathrobe and Uggs were my official cabin uniform by the way!


We’ve visited Estes Park many times, but this was the first time it was just me and Brian, just the two of us and it was amazing…let’s start with our cabin.  I’ve talked about it before from previous Estes Park blog posts, and it’s still a favorite.  Not only does it have gorgeous views it has special meaning to us.  This was the cabin we rented for Christmas the last year my Father in Law was with us.  We brought our own Christmas tree and everything.  It was perfect, so we feel attached to this cabin.

Here’s a view of the Continental Divide from the cabin deck.  It’s a gorgeous clear view when it’s not actively snowing.

We originally were in Estes Park to celebrate the New Year at the Stanley Hotel, but we just love the hotel so much we decided to stop in for dinner at the Cascades the night before.  It was after dinner and I was lounging by the fire when I made eye contact with the man across from me.  I told him I liked his scarf and asked him if he was staying in the hotel for New Years.  He replied no that he was visiting from Denver to see his longtime friend Arsenio Hall perform at the Stanley.  I loved watching Arsenio growing up!  We were able to get last minute tickets and it was a blast.  We told our kids and they were like who’s Arsenio Hall…. hahaha.

We had a great time at the Stanley Hotel New Years Eve Crystal Ball, we took these photos outside in the earlier part of the day, but if you’re wondering why you didn’t see anything from the party or inside it was just too dark for the photos to come out.  Normally iPhone pics do good in a dark environment but even those were grainy and blurry.  So sorry no photos for you!  You can see me outside the Stanley in the dress I wore HERE.

The next day snowed all day and night and it was just like being inside a snow globe.  I played with the snow non-stop, it was so fun!  Rocky Mountain National Park was technically closed with the government shutdown, but we made it as far as we could on the roads and had a great time exploring.  Here was a favorite deep snow spot of ours.

Normally Brian is always behind the camera but he couldn’t resist his own cheesy photo in the snow…. haha.  That spot was so fun, the snow was up to my knees in some spots.

Here are a few more gorgeous photos from Rocky Mountain National Park.

After a few days of searching we found the Elk herd.  You’ll always find a few of the bucks wandering around town, but there is always a large friendly herd that’s fun to find.  Sometimes they’re out in the country, sometimes at the Stanley Hotel, and sometimes there in the parking lot of the Safeway.  I love being surrounded by elk, they make the cutest little squeeky noises, at times it sounds dolphin like.

I love how friendly the elk are, once years ago we saw one while driving.  We pulled over and unrolled the window and he let me pet his face.

It wasn’t just elk we saw either, lots of wildlife was out.  We also saw lots of birds, rabbits, and deer.  This deer photo was taken along the creek of our favorite coffee shop Kind Coffee.

We ate most meals out, but we did stay in the cabin one day and I made my slow cooker sweet potato turkey chili, and we used the oppourtiity to take better photos.  It turned out pretty well considering I only had staging props that were in the cabin.  We’ve learned so much about food photography since then, so my goal is to go back and redo our earlier food photos.  But back to the chili recipe, I was excited to see our cabin had a slow cooker, this recipe is so yummy… especially topped with lots of sour cream and cilantro.

And just for fun here’s a snowy pinecone photo… you know I have a thing for pinecones!

It doesn’t always snow in Estes Park, some years we’ve visited it doesn’t happen, but when it does it’s magical.  Estes Park is typically quieter in the winter, and we love it that way.  You won’t find any skiing or snowboarding in Estes Park, but that’s just fine with us.  Due to injuries I can’t participate in any of those things anyway, but I still love getting away to this cute little mountain town in the winter.  We definitely have a lot of history and feel drawn to this area.

I already miss you Estes Park and hoping to see you a lot more in the future any time of year!


Laura

TRAVEL

NEW YEARS EVE AT THE STANLEY HOTEL

Hello 2019!  We rang in the New Year at the Stanley Hotel’s Crystal Ball and it was absolutely amazing!  It’s always cold this time of year in Estes Park, Colorado, but this year was exceptionally cold.  New Years Eve it was -1 outside!  I wanted to dress up pretty for the event but one thing I refused was to be cold.  I recently blogged about wearing a caplet and I wish I could have worn my pink one, but I needed something much thicker and larger to keep me warm.

I ended up going with this faux fur cape from Amazon, and it was only $40!  However, when it arrived it was an absolute wrinkled mess.  I had to spend about 30 minutes steaming the lining and fluffing the fur, so if you order it just keep that in mind.  There is a hook at the top so you can wear it open or closed.  It kept me so warm and made me feel pretty.  It comes in other colors too.

As for the dress, I scored it 40% off at the Nordstrom sale, I looked for the warmest dress I could find last minute and luckily this beauty arrived in the nick of time.  It comes in burgundy and a pretty purple color too.  Reviews say the dress runs large, but then again so am I right now so I just ordered my regular size… haha.

I think this would be a gorgeous dress for Valentines Day, a wedding, or any event in cold weather.  It’s really comfortable too!  If you like it and need a cold weather black dress act quickly before it sells out.

My Mama bears gave me these earrings at Thanksgiving.  She is always giving me earrings, I can’t complain… I love earrings.  I have no idea where they came from but I found a pair almost identical for an incredible price.  They were the prefect statement earrings for New Years Eve and really gave my dress a fun party vibe.  Thanks Mom!

The Stanley was absolutely gorgeous with the snow, we had to come early before the sun set and take in the beauty.  I’m a huge Champagne and prosecco drinker but sadly I had to stick with white wine.  It’s an altitude thing, and eliminating carbonation helps.  If I’m not careful I can get really sick at high altitudes and over the years I’ve learned some tricks to help.  I’ll put a blog post together soon with some helpful tips if you suffer too.

Dress | Faux Fur Cape | Shoes -similar | Earrings -similar

If you’ve never experienced the Stanley Hotel you should definitely plan a visit.  We aren’t into snow sports so Estes Park is the perfect quiet place for us in the winter.  Summers are beautiful too but it definitely gets crowded!  Be sure to check out some of my other Estes Park in the winter blog posts HERE and HERE.  Wishing you a happy and healthy New Year.  Let’s make it the best year possible!

Laura

RECIPES

DETOX PUREED VEGETABLE SOUP

I’m so excited to ring in the New Year at the Stanley Hotel New Year’s Eve Ball tonight.  Hopefully we’ll get some good photos I can put up on the blog soon, but for now let’s talk DETOX…it’s not even January 1st yet and I’m so ready to get healthy.  I really overdid it, food and drink wise, this holiday season, but hey it’s the holidays so I have no regrets!  As a result though I haven’t been feeling my best.  Like a lot of you I’m ready to transition back to a healthy diet again.  This simple vegetable soup is a great way to detox and help you lose a few of those extra holiday pounds. Those of you who hate vegetable soups, let me explain why this one’s a winner.

It’s all about the pureed texture.  I can’t say I’m really a fan of plain chunky low calorie vegetable soups, I’ve just never found them satisfying.  When you puree this vegetable soup the flavors blend and create a comforting, satisfying texture.  Plus it’s incredibly simple to prepare.  This soup is packed full of vitamins and minerals and is the perfect way to sneak more veggies into your diet, even my kids like it!

I use a small amount of coconut oil to sauté the onions, but feel free to omit that and use olive oil or even a bit of cooking spray.  I also use homemade chicken stock, but feel free to use store bought, just look for the healthiest kind available.  One of these days I will get around to blogging about exactly how I make my chicken stock, or broth.  I have several methods to make it, I’ll try to make that a January or February blog goal.

In the ingredients below I’ve listed 5-6 cups chicken broth.  I typically do 6 cups but it makes the soup a little on the thinner side, it’s thin enough to drink from a cup.  However, if you’d like the soup a little thicker just reduce the broth, you can always add more later if you want to thin it out.  You can also up the veggies a little if you want.

How do you puree it? The easiest way is with an immersion blender, if you don’t have one you can still make the soup.  Just let it cool slightly and carefully transfer it to a blender.  If the soup is hot you MUST VENT THE TOP OF THE BLENDER otherwise the heat will pop the top off and make a huge mess.  It’s a mistake you’ll only make once!  I usually lift the lid and place a paper towel over the top.  The immersion blender method is definitely quicker with less mess.

Once the soup is finished we add a nice squeeze of lemon and top with some fresh herbs for extra vitamins and flavor.  My favorites are cilantro or Italian flat leaf parsley.  I bet chives or green onions would taste great too!

Detox Vegetable Soup

Servings: 6

Ingredients

  • 1 tablespoon coconut oil or olive oil
  • 1 red onion, chopped
  • 1/2 cup celery, chopped
  • 1/2 cup carrot, chopped
  • 3 cups chopped broccoli and cauliflower combined
  • 5-6 cups chicken stock or broth
  • salt and pepper to taste
  • juice of half a lemon
  • Italian flat leaf parlsley or cilantro for garnish

Instructions

  • Heat oil in large soup or sauté pan over high heat.  
  • Add onions cooking 3-4 minutes until slightly soft.  Add chicken stock, the remaining vegetables, salt, and pepper.  Simmer until vegetables are soft.  
  • Turn off heat and with a hand immersion blender puree until smooth.  Add the lemon juice and any additional salt and pepper if needed.  
  • Ladle into a mug or bowl and garnish with herbs before serving.

Any leftovers should keep for several days in the refrigerator, I’m kind of weird about reheating this soup though.  I will not microwave it, I’m always worried the microwave will destroy the nutrients.  What do you think, will it?  I just always insist on heating leftovers on the stove top.  I’ve also had good success with freezing small size portions of this soup.  Wishing you a happy and healthy New Year and I’ll be back soon with some Colorado updates.  Take care!

Shop some of my favorite kitchen items below!


Laura

LIFESTYLE

8 REASONS TO DRINK WARM WATER WITH LEMON

With a fresh new year just days away it’s time to start making healthy changes.  Most of us overdo it around the holidays with treats and cocktails, but I have a simple way for you to take charge of your health, warm water with lemon!  This one is a simple change that you can start right now, warm lemon water is so simple to prepare and tastes delicious.  So let’s talk about 8 reasons to drink lemon water and I’ll tell you exactly how I prepare mine.

1 FLUSHES TOXINS FROM THE BODY – Lemon juice is similar to our stomach’s digestive juices, it stimulates the liver’s bile production helping to eliminate toxins.

2 AIDS IN WEIGHT LOSS – Lemons are a natural diuretic which can reduce water weight, and they are high in pectin which can suppress the appetite and aid in weight loss.

3 STRENGTHENS THE IMMUNE SYSTEM –  Lemons are packed full of vitamins that strengthen the immune system and fight off infections and colds.

4 REDUCES JOINT & MUSCLE PAIN – Lemons are natural anti-inflammatory agents and can help reduce muscle and joint pain by dissolving uric acid.

5 IMPROVES SKIN – High in anti-oxidants, lemons can slow down the aging process by removing free radicals from the body, and the high dose of vitamin C helps clears acne and gives a nice glow to the skin.

6 BALANCES PH LEVELS – Lemons are acidic but alkaline inside the body so they balance the pH levels in our body which in turn helps fight cancer and other diseases.

7 ENHANCES MOOD – The scent and taste of lemons has been proven to lower anxiety, energize us, and boost our mood.

8 LOWERS BLOOD PRESSURE – Lemons are a great remedy for hypertension.  They make blood vessels soft and pliable, thereby helping to lower blood pressure.

So what’s the best way to make a warm lemon water?  It’s simple, take 8 ounces of warm water with half a squeezed lemon.  I usually warm my water in the microwave, but you can use the stove top, always add the lemon after heating the water.  Why warm water you ask? Cold lemon water is still great for you, but if you aim to improve your metabolism, lose weight, or clear digestion issues warm water has been shown to be more effective.  Vitamin C is sensitive to temperature so the water should be warm to slightly hot but not boiling.  Add a splash of honey or stevia if you desire, but I like the plain tartness of the lemon.

I always look forward to my lemon water, I find it really soothing.  You can drink lemon water any time of day, but it’s especially helpful first thing in the morning on an empty stomach to kickstart our bodies for the day.  Make sure to always pick up a bag of lemons from the grocery store so you can enjoy a few delicious cups a day.

Did you realize that such a small change each day can have such a great impact on your overall health?  Let’s see how many small changes we can make in 2019 that improve our health and well being!


Laura

HOLIDAYS

SLOW COOKER HOT CHOCOLATE PUDDING

It’s winter time, and who doesn’t love a good cup of rich hot chocolate?  Did you know it can get even better though?  How about the richness of chocolate in a warm pudding texture topped with some marshmallow gooey goodness?  Are you sold yet?  What if I said you could easily make this recipe using just a few ingredients in the slow cooker…. yeah baby!  That’s what I’m talking about.

We love this recipe, and even though it doesn’t necessarily scream Christmas Haley was insistent that I blog about it immediately.  She cares about everyone’s chocolate dreams… she’s sweet like that.  Seriously though this recipe is a breeze to make, I use this Cuisinart Slow Cooker, and I’ve added my recipe times but we all know some slow cookers can cook a little faster or slower than others, so the first time just keep an eye on everything.  Other than that everything’s a breeze!

One thing that irritates me, though, is I’ve yet to find a bag of chocolate chips the proper size I need, it seems they’re either too small or too large.  If you find a 16 ounce bag of semi-sweet chocolate chips grab it and run!  This recipe calls for room temperature eggs and heavy cream to help give the pudding a creamy temperature but also speed up cooking time.  If you’re in a hurry, put your eggs in a bowl of warm water and divide the cream into cups to help speed the warming process.

I grated a Hershey’s bar for the topping but there are endless possibilities.  How about crushed candy canes, Health bars, or some fun sprinkles?

Once the pudding is done I set the slow cooker to warm, it tastes wonderful served warm but don’t let that stop you from eating it cold, it’s still yummers!  We all agree it tastes most decadent served warm though!

Slow Cooker Hot Chocolate Pudding

Ingredients

  • 6 eggs, at room temperature
  • 4 cups heavy cream, at room temperature
  • 1/2 tsp salt
  • 3 cups (16 oz) semi-sweet chocolate chips
  • 1 7 oz jar of marshmallow cream
  • Grated chocolate for garnishing

Instructions

  • In a slow cooker, whisk together eggs, cream, and salt until blended.  
  • Add the chocolate chips, stir, and then cover with lid.  Turn the slow cooker on high to melt the chocolate about 30 minutes, then whisk until completely blended.
  • Turn the slow cooker down to low heat and cook for another 30 minutes.  Scrape the sides down of the slow cooker and whisk until smooth.
  • Cook another hour, the edges will be slightly set but the center will be a soft pudding consistency.
  • Serve warm and just before serving whisk the pudding again smooth.  Spoon into cups or mugs and top with a generous amount of marshmallow cream and garnish.

I don’t know about y’all but I just love marshmallow cream, feel free to layer it up just remember with the warm temperature of the pudding it will melt and spread a little.  This is winter dessert happiness in a cup, plus it’s simple to prepare!  Enjoy!

Shop some of my favorite kitchen items below!


Laura

HOLIDAYS

DOUBLE CHOCOLATE CANDY CANE BROWNIES

It’s a week until Christmas and I hope it’s not just me freaking out!  Just when I think I have everything covered all these last minute to do things pop up, and one of those things, it always seems, involves baking.  I enjoy spending time in the kitchen and baking holiday treats.  I try to eat healthy all year long but this time of year I’m known to definitely let the diet slide, and for good reason.  I have so many favorite baked treats but one of ours is these Double Chocolate Candy Cane Brownies.  I know peppermint can be an acquired taste, but we happen to love it, especially Haley.  There’s just something about mixing rich chocolate with peppermint that is so satisfying this time of year.

I’m actually not surprised Haley loves and craves these peppermint brownies so much, I ate tons of peppermint patties while I was pregnant wth her.  It was literally the only thing that calmed my stomach, so naturally she craves peppermint and chocolate but has no idea why.  Really, these brownies have such a dense fudge like texture with a double dose of chocolate and crushed up peppermint it’s better than any peppermint patty I’ve had!

I’ve made these with every kind of peppermint candy you can imagine, my favorite is to use mini candy canes, especially Brach’s.  I find mini candy canes are much easier to crush up, but you can absolutely use full size ones too.

To crush up the candy canes I place them in a ziplock bag, then with a coffee mug I smash the bag.  I try not to have really large chunks but I do like to have a little variety in texture, it’s up to you.  Once baked, cooled, and cut I love to sift a bit of powdered sugar over the brownies.  This makes them look so pretty, like a true christmas wonderland treat!

Double Chocolate Candy Cane Brownies

Ingredients

  • 1 cup butter
  • 4 1 oz unsweetened chocolate squares
  • 4 eggs
  • 2 cups sugar
  • 1 1/2 cups flour
  • 1/2 tsp salt
  • 1 tbs vanilla extract
  • 1 tsp peppermint extract
  • 1 cup milk chocolate chips
  • 1/2 cup crushed & chopped candy canes
  • 1/4 cup powdered sugar

Instructions

  • Preheat oven to 350°
  • Melt butter and chocolate in a sauce pan over medium to low heat, stir until smooth, then let cool.
  • Beat eggs at medium speed with an electric mixer 2 minutes, gradually add the 2 cups sugar and mix well.  
  • Add melted chocolate, flour, salt, vanilla, and peppermint extract, and mix well.  Stir in chocolate chips and crushed candy canes.  
  • Pour batter into a greased and floured metal 9x13 pan. Bake for about 30 minutes, and then cool on a wire rack.  
  • Cut into squares, sprinkle with powdered sugar, and garnish with extra crushed candy canes if desired.

I hope you enjoy this recipe!  It’s such a win for those who crave peppermint and chocolate.  It’s a great Christmas recipe, but also great for after the holidays.  I mean what else are you doing to do with all those leftover candy canes?

Shop some of my favorite kitchen items below!


Laura

Breakfast

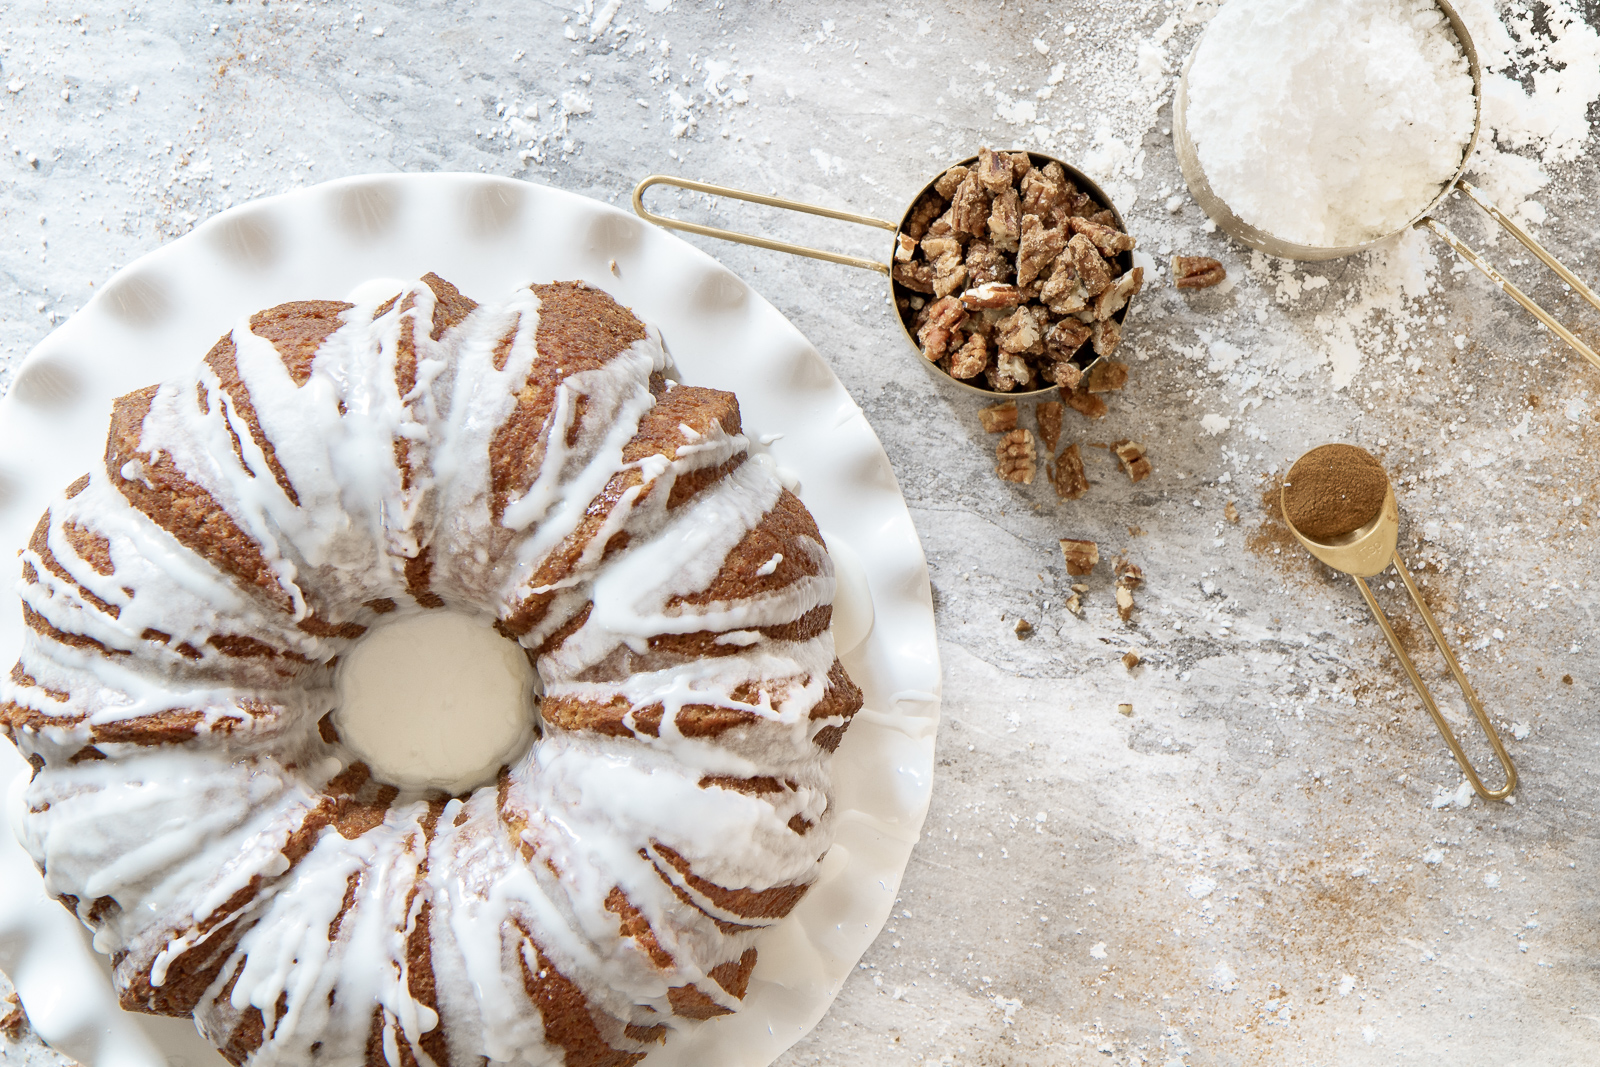
BANANA STREUSEL COFFEE CAKE

Any banana bread fans out there?  I’m thinking probably so, this is the best time of year for baking and if you like banana bread you will absolutely LOVE this banana streusel coffee cake.  I’ve been making this delicious cake for years, almost my entire marriage, and it’s always been a favorite!  I’ve made it for weekend breakfasts, neighbors, and bake sales, you name it!

Since Christmas is less than 2 weeks away I thought this would be a great recipe to put out there.  It makes a great Christmas breakfast and it freezes wonderfully.  We’re going to be so busy on Christmas Eve that I won’t have much time to make food, so I’m going to freeze this entire cake and simply thaw it overnight Christmas Eve.  How simple is that?  If you don’t have any bananas go buy some right now!!  This cake tastes seriously amazing IF you use extremely ripe bananas.  No I’m not talking about yellow freckled bananas, I’m talking freakin solid black bananas!  That right there is the secret to this coffee cake having an incredible flavor.

Black bananas have a softer texture due to enzymes breaking the sugars down, which results in a rich almost buttery like flavor.  If baking with black bananas weirds you out, don’t let it.  My kids all grew up eating my baked black banana goods and they’re incredibly smart, great kids.  Maybe that’s the secret to having smart kids… it’s not breastfeeding, routines, or reading to your child that makes them smart… it’s feeding them black bananas!  Hmm…

If you have perfectly black bananas but don’t feel like baking with them yet,  throw them in the freezer, yes I’m talking the entire banana with the peel on.  When you’re ready to use just thaw them out and you’re ready to go.  I’ve done this for years.  Sometimes this causes a little liquid to form around the banana, it’s fine.  Don’t drain it, just mash it up, it’s all good.   My black bananas always smell so rich and fragrant!

I prefer to let my bananas ripen the old fashioned way – that’s forgetting about them on the counter.  You can hurry up the ripening process by placing them in a closed paper bag and storing them in a warm place.  The oven can help with this process too.  When my bananas start to heavily freckle and look ugly, yet aren’t black I place them on a cookie sheet and bake at my ovens lowest setting (170) until they are black or for about 60-90 minutes.  Just keep an eye on them, I’ve never tried this method with unripe bananas.

As for making the cake itself I recommend this bundt cake pan, it’s currently on sale too!  I’ve had plenty of bundt cake drama in my life and this is by far, hands down, my favorite!  Also be sure to grease and flour your pan, I have great results using Bakers Joy since it has flour in it, it helps when I’m feeling lazy.  Once out of the oven I let the pan cool on a cooling rack for 10 minutes.  Then to remove I place another cooling rack on top and gently flip it over.

Banana Streusel Coffee Cake

Ingredients

For the cake:

  • 1 cup butter, softened
  • 1 1/2 cups sugar
  • 2 large eggs
  • 4 very ripe bananas
  • 1 tsp vanilla extract
  • 2 1/4 cups flour
  • 1 1/2 tsp baking powder
  • 1/2 tsp baking soda
  • 1/8 tsp salt
  • 1 cup sour cream

For the streusel filling:

  • 3/4 cup chopped pecans
  • 1 tsp cinnamon
  • 2 tbs sugar

For the glaze:

  • 1 1/2 cups sifted powdered sugar
  • 1 1/2 tbs milk or water

Instructions

  • Preheat oven to 350°
  • In a medium sized bowl combine flour, baking soda, baking powder, and salt, whisk together until all dry ingredients are blended.
  • In a separate large bowl beat butter at medium speed with an electric mixer until creamy; gradually add 1 1/2 cups sugar, beating well.  Add eggs one at a time, beating well after each addition.  Stir in banana and vanilla.
  • Add the flour mixture to the butter mixture working in small batches, alternating with the sour cream, beginning and ending with the flour first.  Beat on low speed after each addition.
  • In a separate small bowl combine chopped pecans, 2 tablespoons sugar, and cinnamon.  Stir until combined. Pour half the batter or slightly less into a greased and floured bundt pan.  Sprinkle with pecan mixture and then pour the remaining batter over the pecan layer.  
  • Bake for 50-60 minutes. Cool 10 minutes on a wire rack, then remove from pan. Let the cake cool until it’s slightly warm or room temperature.
  • Combine sifted powdered sugar and water or milk in a medium sized bowl.  With a spoon drizzle glaze over the cake.

This cake freezes wonderfully, I freeze it with the glaze on it and everything.  For those who have nut allergies or just don’t like pecans feel free to leave them out, I’m sure it would still taste great.  Now go buy some bananas… go!

Shop some of my favorite kitchen favorites below!

Laura

HOLIDAYS

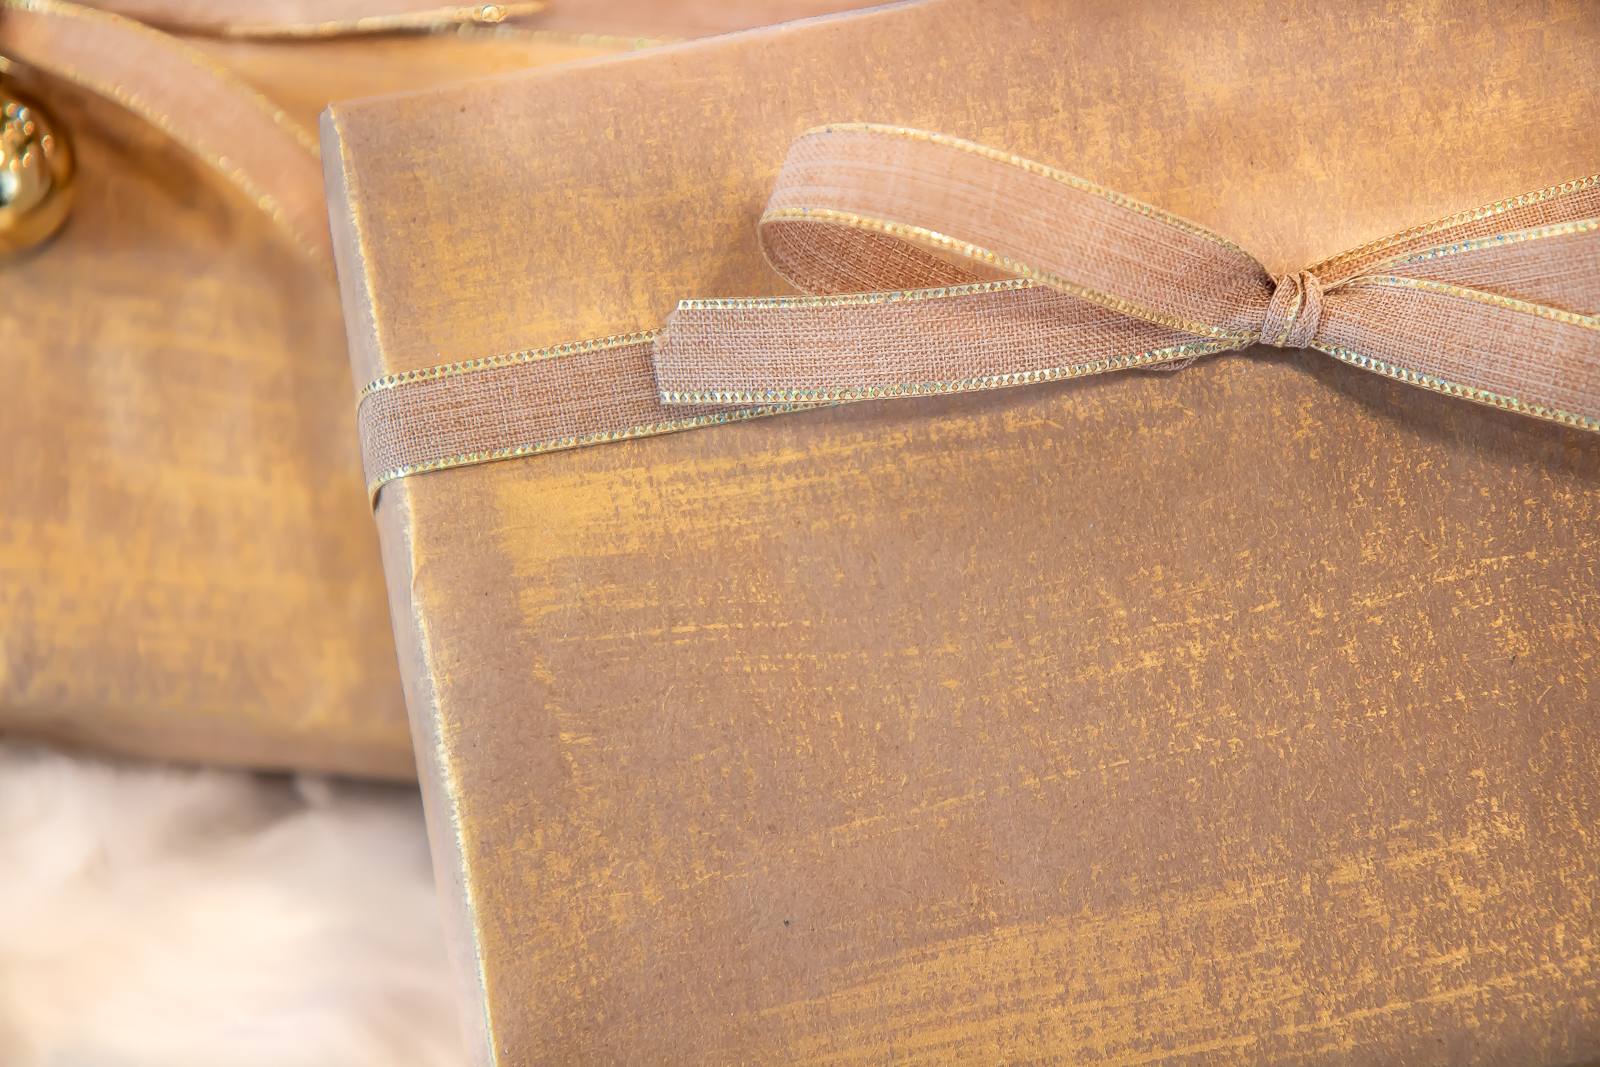
GOLD PAINTED GIFT WRAP

Hello Christmas loves, you didn’t think I was done with Christmas did you?  The truth is I am starting to wind down in terms of Christmas projects on the blog, but I have another awesome one for you today.  I hope you still have some gifts left to wrap.  Today I’m turning cheap brown kraft paper into gorgeous gold painted gift wrap.  You can use this any time of the year for a gorgeous wrapped present, but I think it really shines during the Holidays.

Y’all must think I work on commission for the Dollar Tree, no I don’t I just have one really close to my house.  You can buy kraft paper at tons of places, from office supply to craft stores but hey, it’s just a buck at Dollar Tree so total win!

What I love about painting kraft paper with gold is it creates a high end look for an incredible low price.  Plus I promise you this is the simplest painted gift wrap you’ll ever make.  I just bought cheap gold craft paint, it was either bought at Hobby Lobby or Walmart, I honestly can’t remember.  It’s just under $2 a bottle. You’ll also need a wide paint brush.  You can buy those really cheap bad paint brushes for a few dollars at Home Depot, you know those ones you shouldn’t be buying to paint your walls with because they’re gross, or just use an old house painting brush, that will work too.

You have a choice of painting the paper before you wrap the gift or after.  I’ve tried both and I prefer painting after the gift is wrapped, not only was it easier but the paint naturally went along with the shape of the gift creating a cool effect.  I experimented with lots of paint colors and designs, but in the end – hands down – the dry brush method won me over and of course, in gold.

To achieve this look, wrap the gift in brown kraft paper.  Take a paper plate and squeeze out a bit of gold paint.  Take a clean dry paint brush and dip it in the gold paint.  Wipe it back and forth along the paper plate to ensure you don’t have too much paint on the brush.  You want a dry effect on the paper and you want to minimize warping from too much paint.  Remember you can add more paint layers but you can’t take off excess!

Because you’re using such little paint it should dry very quickly.  I paint the front side first, then pretty much immediately turn and do the sides.  It’s up to you if you want to paint the back, sometimes I do and sometimes I don’t.  You might might get a little bit of warping on the paper immediately after painting.  Most of this goes away soon when the paper is fully dried, but remember you can minimize this by not using too much paint at once.  Wipe the extra paint off before you brush, and work in layers if needed.

Now simply decorate the package with a coordinating bow and you’ve created a gorgeous gold shimmery gift wrap for just a pennies.  How cool is that?  I’ve also used this technique on inexpensive brown paper gift bags and it gives them a high end look too.  Remember this is a gorgeous look for the holidays, but you can do this all year long for gifting.  Happy gift wrapping!

Laura