Colorado Home

CHRISTMAS 2020 HOME TOUR

Blogger Christmas Home Tour 2020

It’s December and you know what that means… it’s time for the Christmas 2020 home tour!  Obviously this has been a hard year for everyone, not a single person has been exempt from the stress of 2020, which is why it’s so important to cherish and celebrate what we do have.  We all find comfort in different ways, I find mine in creating a well dressed home, and this year my home has been more comforting than I could ever imagine.

Every year I find so much joy in decorating our home for Christmas.  I very much enjoy surprising my family by adding new decorations and switching things around, so our Christmas home is a little bit different every year.  I think it adds a bit of spontaneous fun.

During this month we we snuggle by the fire watching Christmas movies, baking cookies and treats while listening to Christmas music.  We will laugh, we will cry for our loved ones no longer with us, we will open presents, and we will give thanks to our Savior who is born.  It all happens here inside our home and I love sharing it with you.

Outdoor Bench | Doormat | Faux Trees | Outdoor Plaid Pillows | Merry & Bright Top

Last Christmas this room was an huge, unfinished mess.  It gives me so much joy that the media room is finished and gets to join our 2020 Christmas tour.  You can read about our media room before and after HERE.  Our next winter project is to remodel the loft space, so look forward to that joining the 2021 tour.

Sofa | Media Console | Wreaths | Lamp | Christmas Pillows | Birch Trees | Art TV

Blogger Christmas Home Tour 2020

Brian and I joke that we have the hardest living room to photograph ever, but it’s honestly true!  It’s a bright room full of backlit windows and sun glares, we usually wake up at 6 am just to get a few photos before the light gets crazy.  Those big windows and gorgeous views come with a price.  This year we upgraded to a 10 foot tree and we really love it.

Blogger Christmas Home Tour 2020

Every Christmas home needs festive garland and this ornament garland was incredibly simple and fun to make.  You can find the tutorial HERE.

Blogger Christmas Home Tour 2020

Blogger Christmas Home Tour 2020

Blogger Christmas Home Tour 2020

We’re making spirits bright in our house!

Little Christmas Trees | Coffee Table | Leather Chair | Bar Cabinet | Wood Wine Rack | Wine Bottle Opener | Tree Skirt | Bear Footstool | Burlap Sack | Metal Sleigh

Blogger Christmas Home Tour 2020

Our kitchen makeover was finished just in time for the holiday season.  You can read about our mini kitchen makeover click HERE.

Blogger Christmas Home Tour 2020

Christmas Plates | Le Creuset Skillet | Le Creuset 3.5 French Oven

Christmas centerpiece ideas

I recently created this Christmas present centerpiece made out of wrapped up boxed food.  It’s the perfect low waste decoration, and after Christmas unwrap the food and keep it, or even better donate it.  You can view the tutorial HERE.

Christmas decor ideas

Table | Chairs | Mirror | Sconce Lights | Sofa | Wreath

Blogger Christmas Home Tour 2020

Blogger Christmas Home Tour 2020

Can you guess what one of my favorite Christmas movies might be? Hmm.

Blogger Christmas Home Tour 2020|

Red Velvet Quilt | Buffalo Pillows | Merry Christmas Ya Filthy Animal Pillow | Buffalo Plaid Throw | Santa Mugs | Upholstered Bed | Pendant Lights | Nightstands

Merry Christmas blog friends and family!  Thank you for visiting my 2020 Christmas home tour.  I wish you nothing but peace and happiness this month.


Laura

HOLIDAYS

HOW TO MAKE A CHRISTMAS PRESENT CENTERPIECE

December is here and I couldn’t be happier!  The Christmas home tour should be up by the end of the week, but today I want to share with you one of my favorite ways to decorate using little wrapped boxes!  This Christmas present centerpiece is the perfect way to decorate a table top, coffee table, or any other surface that needs some holiday cheer.

Christmas centerpiece ideas

I’m no stranger when it comes to wrapping up little boxes, I find that it makes really cute affordable holiday decor, but this year I decided to take it a step further and turn it into a centerpiece.  Not only is this centerpiece festive, it’s also extremely practical and budget friendly.  Why, you say?  Because we’re wrapping up food boxes!  We all eat food so why not first turn it into a Christmas centerpiece?

How to make a Christmas present centerpiece out of food boxes

SUPPLIES NEEDED

Lots and lots of food boxes!

3-4 rolls of coordinating wrapping paper

Tape & ribbon

Various bows & curly ribbon

How to make a Christmas present centerpiece out of food boxes

What are the best food boxes to wrap?

Walmart and Dollar Tree are great places to find affordable box food in a variety of sizes.  I usually go around finding boxes I like, stacking them together to see if the sizes work.  Some of my favorite food boxes to wrap are Pop Tarts, large food boxes such as hamburger helper or scalloped potatoes, macaroni and cheese boxes, large and small candy boxes, Jiffy cornbread, little boxes of raisins, and jello and pudding boxes.

How to make a Christmas present centerpiece out of food boxes

I want to make this centerpiece, but what if I want to eat the food first?

No worries!  I generally prefer to keep the food in the boxes because it’s easier and I like my boxes to have some weight.  However many times I’ve gently opened the boxes removed the food and taped or hot glued the boxes back shut.  You can always take a photo of the cooking instructions with your phone for later.  If you do remove the food before wrapping you can toss the boxes after Christmas if you like.

How to make a Christmas present centerpiece out of food boxes

INSTRUCTIONS

Start by wrapping all the food boxes in various wrapping paper.  Crank up some music, sip some tea, or have a glass of wine… this is the most time consuming part.

I used regular tape for the gift wrapping but if you want to a cleaner look for the ends you can use double sided tape, and I’ve even used hot glue before to secure the edges.

How to make a Christmas present centerpiece out of food boxes

Create a base using the largest size boxes, then continue stacking the boxes in a random pattern.  Once I finished this step I realized I could use a few more boxes so I went off to the pantry for more cornbread and pudding boxes to wrap.

Once you’re finished with the layout it’s time to start adding bows.  Old bows work great for this so be sure to save them for next year.

How to make a Christmas present centerpiece out of food boxes

Naturally no matter how well you arrange the boxes you’ll end up with a few gaps,  so I like to fill them in with curly ribbon.

Christmas centerpiece ideas

Christmas centerpiece ideas

Christmas centerpiece ideas

Once the Christmas season is over simply unwrap the food and stock it back in your pantry for a later day.  Better yet put a smile on someones face and donate the unopened unwrapped food boxes to a food bank for a family in need!

If you took the food out before you wrapped them you can toss them or keep the boxes for next year.  I hope you enjoy creating your own Christmas present centerpiece, if you do be sure to tag me on Instagram or leave me a photo in my Pinterest pin.


Laura

HOLIDAYS

DIY FROSTED GLITTER CHRISTMAS ORNAMENTS

How to make frosted glitter ornaments

Every January I hit the Christmas sales and I always end up with several boxes of clear craft ornaments.  Over the years my collection of crafting ornaments has grown and grown, yet I never did anything with them.  Recently when I was cleaning out our attic space and I came across all my boxed ornaments I thought ok this is the year… I have got to do something with these.

I’ve been playing around with lots of ways to decorate these ornaments, I came up with several ideas, but I must say these frosted glitter ornaments are so far my favorite!  Plus they’re so easy to make.  I know I throw around the word easy a lot, that’s because I’m not a fan of complicated crafts!  Cheap glue, basic salt, and a little glitter is all you need to make these gorgeous ornaments.   They’re so pretty I’d say they’re gift worthy!

How to make frosted glitter ornaments

SUPPLIES NEEDED

Plain table salt

White or clear glue

Glitter (I used iridescent and fine silver glitter)

Clear glass or plastic ball ornaments

Disposable plates

Craft brush

How to make frosted glitter ornaments

INSTRUCTIONS

How to make frosted glitter ornaments

Grab the bottom of the ornament and starting at the top of the ornament paint on an even layer of glue on half of the ornament.

How to make frosted glitter ornaments

Flip the ornament and gently holding on to the hook paint glue on the bottom half of the ornament.

How to make frosted glitter ornaments

Immediately sprinkle on the salt until you reach your desired frosted look.

How to make frosted glitter ornaments

Then quickly sprinkle on the glitter and let dry.  I carefully put hooks on to let the ornaments dry while they’re hanging on our Christmas tree.  I did however place a few on the table and they dried without any smudges.  The salt stays on amazing well once dried, glitter’s always a pain but it’s just so pretty.

How to make frosted glitter ornaments

How to make frosted glitter ornaments

I did make a batch of these frosted ornaments without glitter, just the salt frost.  I had them hanging on the tree to dry when I looked over and saw my 19 year old daughter licking them.  That’s my Haley Bears… good thing the glue is non-toxic.  Overall I much prefer these ornaments with glitter added.  Not only do they sparkle more in the light like actual frost, it keeps my daughter from licking them!


Laura

Fall

THANKSGIVING LEFTOVER STUFFED MUSHROOMS

Thanksgiving leftover stuffed mushrooms

Let’s hope you still have some Thanksgiving leftovers hanging around because I MUST share this amazing Thanksgiving leftover stuffed mushroom recipe with you!  I really wish I would have shared this delicious recipe with you sooner, but I just created it last night.  Part of my Thanksgiving joy is having lots of leftovers, not just to eat but to play around with in the kitchen.

As I took my first bite of these stuffed mushrooms last night I knew I had a winner.  Brian very willingly went to the store to get more mushrooms… it was that good.  So today while making my second batch I thought I would share this delicious recipe with you.

Thanksgiving leftover stuffed mushrooms

It’s pretty easy to figure out what to do with leftover turkey, but what about the rest of the sides that you tire of quickly?  Leftover dressing dries out, and the leftover cranberries and gravy probably get shoved to the back of the refrigerator where you find them weeks later.   Being an extreme stuffed mushroom lover I decided to go to work and find a creative way to use leftover dressing or stuffing, cranberries, and gravy.  Not only is this recipe delicious it couldn’t be easier!

Thanksgiving leftover recipes

The ingredients are simple and there is no pre-cooking!  My cornbread dressing dries out quickly so I added a few tablespoons of milk to make the mixture pliable, and then blended it in a mini-food processor.  I also pureed the cranberries and added a little water to those and the gravy to thin them out.  If you don’t have a food processor no worries just mix it by hand.  This should be a fun stress-free recipe.

How to clean mushrooms

Proper cleaning of mushrooms is essential for any good stuffed mushroom recipe.  You see, mushrooms are extremely porous and soak up water like a sponge, so I don’t rinse them in a colander.  After removing the stem I use a damp rag or paper towel to clean the top and sides.  I prefer a rag because the texture helps remove dirt.  From there I scoop out the gills with a spoon or strawberry huller to make room for lots of delicious filling.

Thanksgiving leftover stuffed mushrooms

Once my mushrooms are stuffed I top them with a dollap of gravy and then they’re off to the oven.  By the way I used Tyler Florence’s Carmelized Onion and Cornbread Stuffing recipe (cooked separately with a lot more liquid) along with Ina Garten’s Homemade Gravy.  It’s a heavenly stuffed mushroom combination, but I believe any recipe would make a delicious combination.

Find the detailed recipe below.

Thanksgiving leftover stuffed mushrooms

Thanksgiving Leftover Stuffed Mushrooms

Ingredients

  • 2 8 oz pkgs whole white button mushrooms
  • 1 1/2 cups leftover dressing or stuffing
  • 2 tbs milk
  • 1/4 cup shredded parmesan cheese
  • 1/3 cup leftover gravy
  • 1/3 cup leftover cranberries, pureed
  • 2-3 tbs water, to thin the cranberries and gravy
  • 1 tbs olive oil

Instructions

  • Pre-heat oven to 400°.
  • Remove mushroom stems and with a wet paper towel or rag clean the tops and sides of the mushrooms. With a spoon or strawberry huller scoop out the mushroom gills.
  • Place mushrooms in a greased baking dish and drizzle with olive oil.
  • In a bowl or small food processor blend together dressing and milk. If your dressing is really wet you can skip this step. If your dressing is really dry add more milk until its sticks together.
  • Add parmesan cheese and mix together by hand or food processer.
  • Scoop heaping spoonfulls of dressing mixture onto the mushrooms.
  • Thin the gravy with a little water and spoon a little on top of each mushroom.
  • Bake for 20 minutes or until mushrooms are browned and the dressing mixture is hot.
  • While the mushrooms are baking, thin the cranberries with water.
  • Remove from oven, drizzle with cranberry sauce, and serve immediately.

Thanksgiving leftover stuffed mushrooms

Thanksgiving leftover stuffed mushrooms

Can we all agree stuffed mushrooms of any kind are just devine?  Every year I play with leftovers, but this recipe is hands down my favorite, and it makes a fresh side to serve along with leftover turkey too.  Up next I’ll be making a turkey and dressing quiche and a turkey bolognese.  If you have your own fun ways to use Thanksgiving leftovers please do share!


Laura

HOLIDAYS

HOW TO MAKE CHRISTMAS ORNAMENT GARLAND

How to make Christmas ornament garland

Happy Friday!  I hope everyone had a wonderful Thanksgiving, but it’s time to put the fork down and get our Christmas game on.  Soon I’ll have the 2020 Christmas home tour on the blog, but for now I’m still having fun making festive decorations.  Today I’m sharing how to make this Christmas ornament garland, I love how it turned out, but best of all it was crazy easy to make!

How to make Christmas ornament garland

SUPPLIES NEEDED

Craft wire

Christmas ornament balls in various sizes

Yep… that’s all you need, easy right?

How to make Christmas ornament garland

I picked up the majority of my ornaments from The Dollar Tree, you just can’t beat 12 ornaments for a dollar!  Some of my larger ornaments and textured ones came from my ornament graveyard.  I have boxes and boxes of old ornaments that I like to save for crafts.

How to make Christmas ornament garland

INSTRUCTIONS

Measure out the length of wire needed for your space, be sure to measure out a little more than you need so you have extra wire for tying the ends off.  Then simply string the ornaments along the wire using various sizes or colors.

I wanted to let the garland drape off the mantel, so I did need to adjust a few ornaments to the back or the front to lay smoothly.  But what if you want to hang your garland?  No problem!   Simply twist off some wire loops in the back and you’re good to hang.

How to make Christmas ornament garland

Push the ornaments along the wire to ensure there are no gaps and then simply tie each end off.  That’s pretty much it, it’s such an easy Christmas decoration to make that really makes the room pop.

How to make Christmas ornament garland

How to make Christmas ornament garland

I’m partial to red but there are so many fun color combinations you could come up with!  I use a combination of plastic and glass balls, and I prefer the plastic ones because I don’t worry about breaking them.  Plastic is definitely less stress, you can throw it around a bit more.

How to make Christmas ornament garland

Gorgeous, budget friendly, and easy to make!  That’s my kind of Christmas craft right there.  I can’t wait to share some more festive ideas and the home tour with you soon!  Until then stay safe, and I hope you find some great online sales.


Laura

Colorado Home

BUDGET KITCHEN MAKEOVER

Teal kitchen cabinets white subway tile Giani marble countertop

I’m so excited to share our kitchen mini makeover with you!  This is just a temporary makeover until we can do a full remodel when the time is right.  A few weeks ago I decided to give our kitchen a mini makeover, and we are thrilled with the results!

It all started with ordering our new gas range.  Not only was our old electric range falling apart, it was a huge eye sore.  We waited several  months for a sale and then another two months for it to be delivered due to Covid.  I kept thinking about this new amazing gas double oven range sitting in my hideous kitchen.  Some of our other upgrades happened over the last year, like when the microwave stopped working, the larger sink upgrade, building a larger pantry, and the new lighting, but still our new range deserved better so a few weeks before it was delivered I went to serious work!

I spend a TON of time in the kitchen so why not make it pretty even if it is temporary?  I say if it makes you happy then it’s worth it!  Ok, ready to see some before photos?

Budget kitchen makeover

Budget kitchen makeover

Budget kitchen makeover

First up on my list was to do something about the countertop and backsplash.  I debated about using marble contact paper on the countertops, lots of people are doing it and it looks pretty good.  However we use our kitchen hard, so I was convinced it wouldn’t hold up at all.  After a lot of searching I decided to go with the Giani Carrara white marble countertop kit.  Everything you need is included in the kit and there are lots of video tutorials online to help.

Giani Carrara White Marble Epoxy Countertop Kit

Prep work was minimal, just clean with a brillo pad and rinse.  Then you roll on a few coats of the white primer paint and let it dry.  To create the marble veins you simply paint on the grey lines, spray with water, and smudge with a brush until you get the desired effect you’re after.  Last you apply the epoxy, I wasn’t sure that my marble veining looked good but once we applied the glossy epoxy it brought it to life!  The entire countertop process took about 3 days and it was so worth it!

Giani Carrara White Marble Epoxy Countertop Kit

Red Le Creuset pans on wall

For the backsplash I went with a peel and stick subway tile, and it was incredibly easy.  Just measure, cut to size, peel, and stick.  The back is nice and sticky so you can reposition the tiles a few times if needed.  Initially when I opened the package I didn’t think it looked very realistic but now that it’s up I think it looks amazing!  The only downside is that the tiles are really reflective and hard to photograph.

Peel and stick subway tile

The bamboo roman shade is from Lowe’s, I can’t remember the color but it was in stock and cut to size, and the pendant light was an amazing steal for under $30!

Peel and stick subway tile review

Giani Carrara White Marble Epoxy Countertop Kit review

One thing we will definitely be doing in the full kitchen remodel is reconfiguring the cabinets to fit a dishwasher.  Until then I’ve made peace with hand washing dishes.  The small original kitchen sink was so hard to wash dishes in so we upgraded to a single basin work station sink.  It’s been a huge lifesaver!  It comes with a cutting board, a small drying rack, and a colander that fits over the sink.  I was able to toss our large clunky dish drainer, and I purchased an over the sink dish drainer to save space.

Giani Carrara White Marble Epoxy Countertop Kit review

I debated for a while if I should paint the cabinets or leave them alone, but you know I love a good DIY project so you bet I chose to paint them!  In our full kitchen remodel I have my heart set on custom alder cabinets to match our doors but until then I decided to have a bit of fun and paint the cabinets teal.

I experimented with chalk paint because of the low prep work but I wasn’t happy with the color and after a few days the chalk paint looked rough.  Spur of the moment I used our old front door paint.  Yes, I used exterior paint on my cabinets, I had it on hand and it works.  I love the end result.

Teal kitchen cabinets white subway tile

mini kitchen makeover

You bet I love my new kitchen toy, I’ve cooked non-stop since receiving it!  Having a double oven and gas cooktop is a dream.

Kitchen makeover

Cabinets are Sophisticated Teal by the Home Depot Decorator Collection

Pendant Light | Julia Child Quote | Leopard Dishes | Marble Countertop Kit | Subway TilesDish Rack | Workstation Sink | FaucetRug | FloorOven | Le Creuset Dutch Oven | Le Creuset SkilletLe Creuset Square Skillet | Mug Tree Stand


It’s the same kitchen but suddenly it feels so bright and fun now!  Maybe we’ll delay the major kitchen remodel a little longer now and focus on other projects because other than a missing dishwasher I can honestly say I’m happy with the kitchen.

Like I mentioned we use our kitchen hard and I’m curious how the countertop and backsplash will hold up over time.  I’ll definitely be updating, until then feel free to ask me any questions.


Laura

Desserts

OLD FASHIONED APPLE CRISP

Old fashioned apple crisp

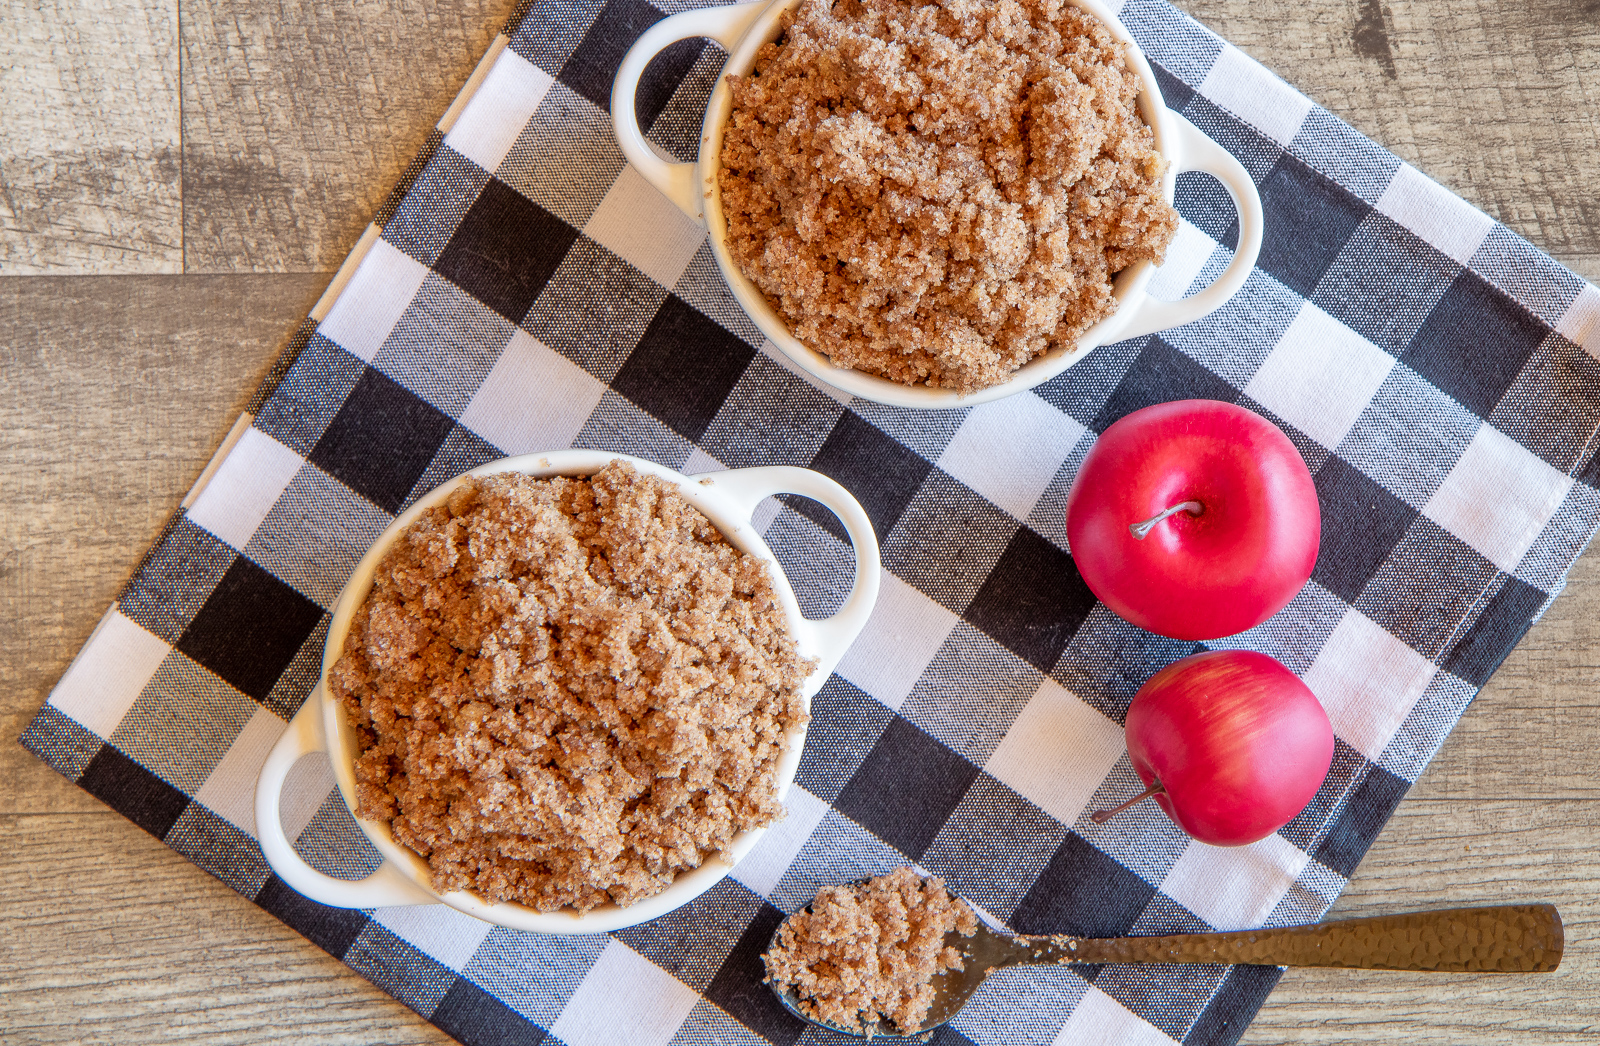
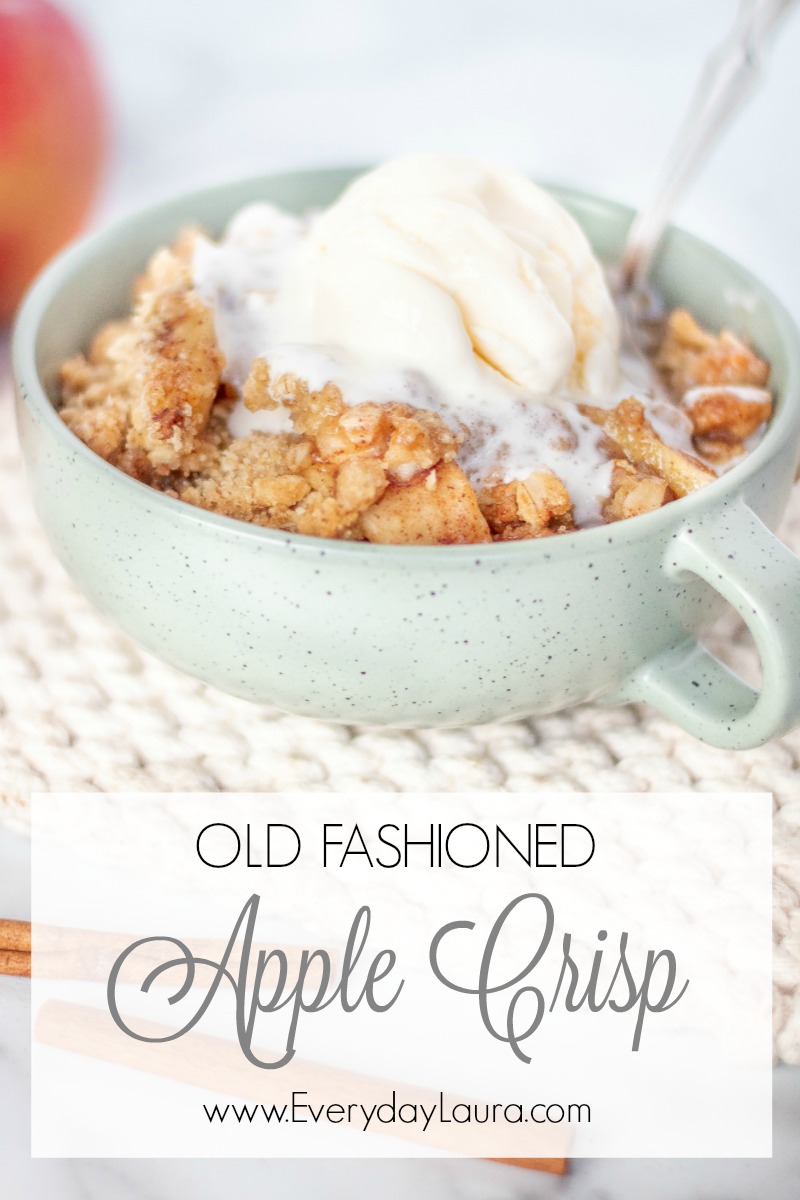
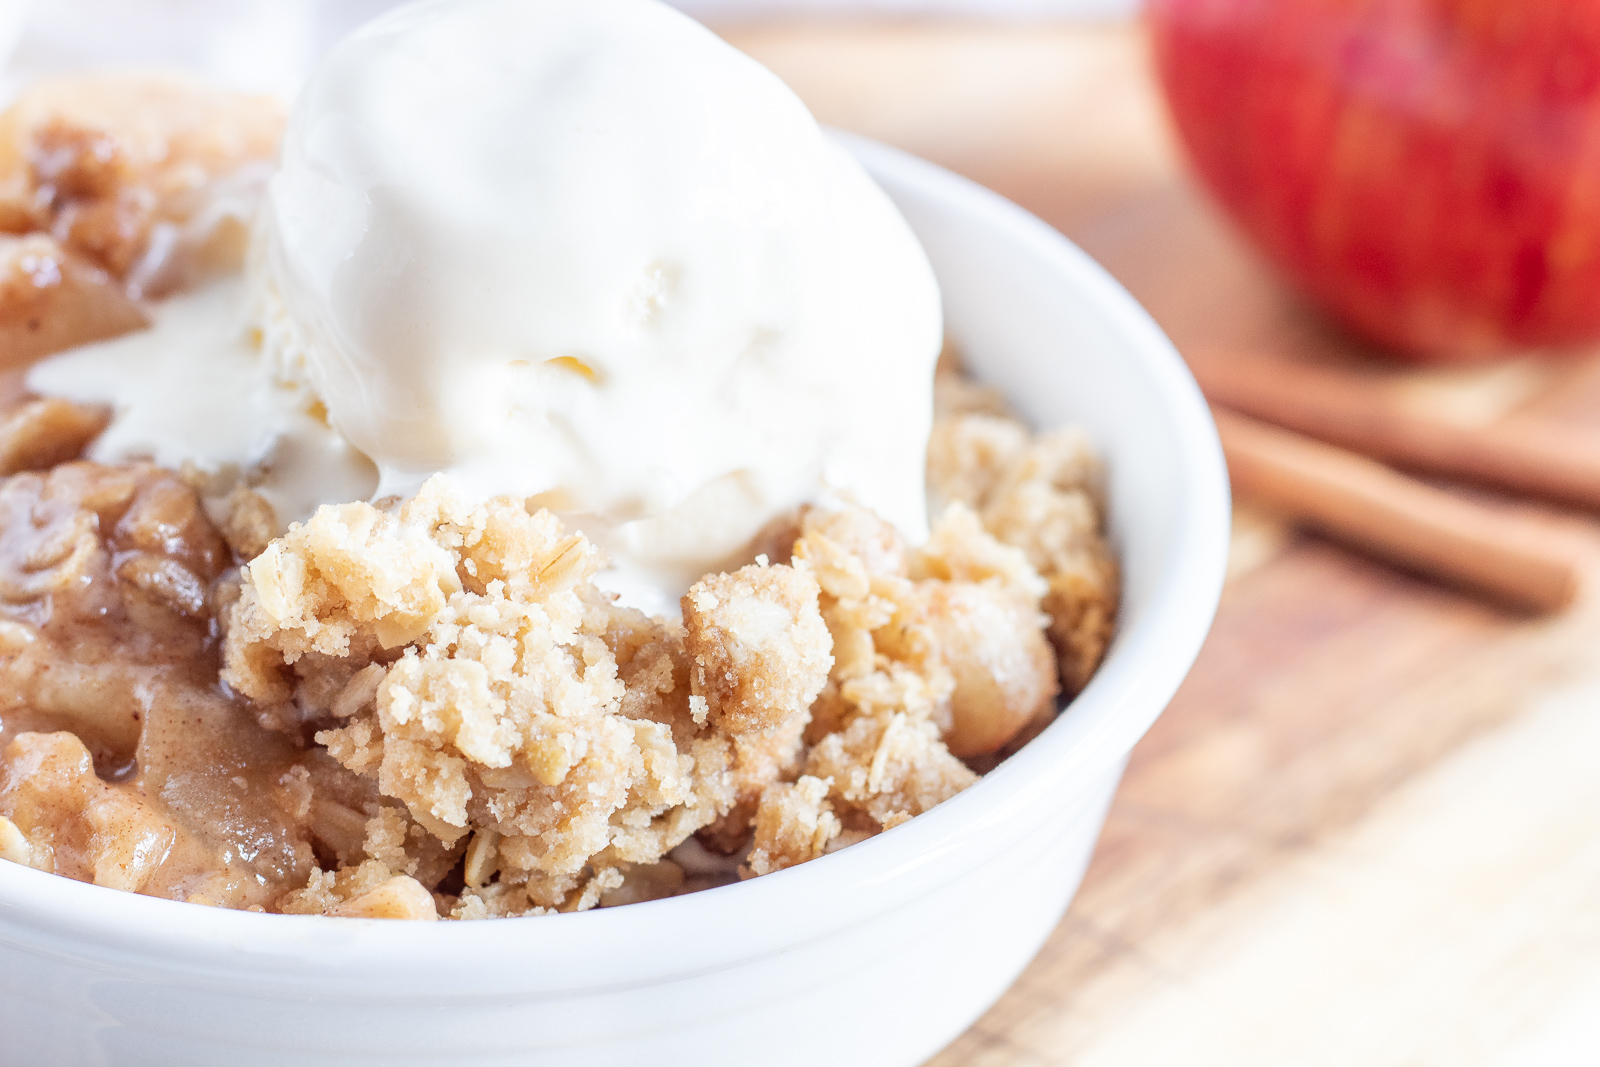
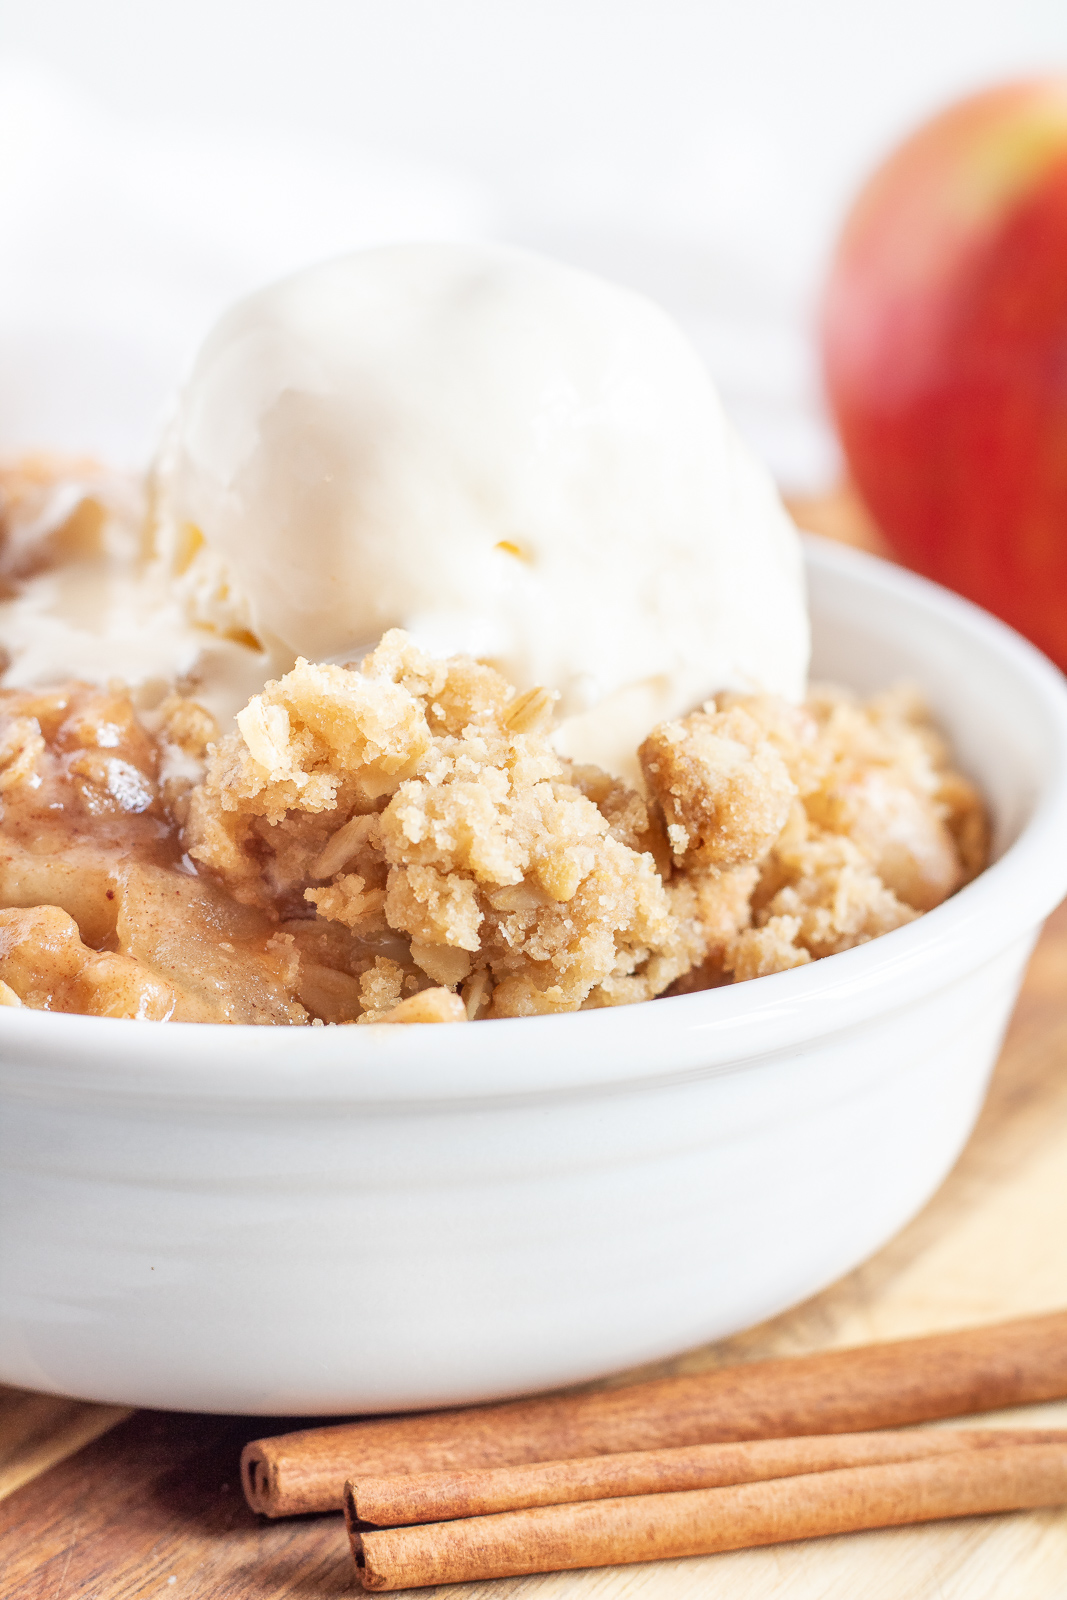
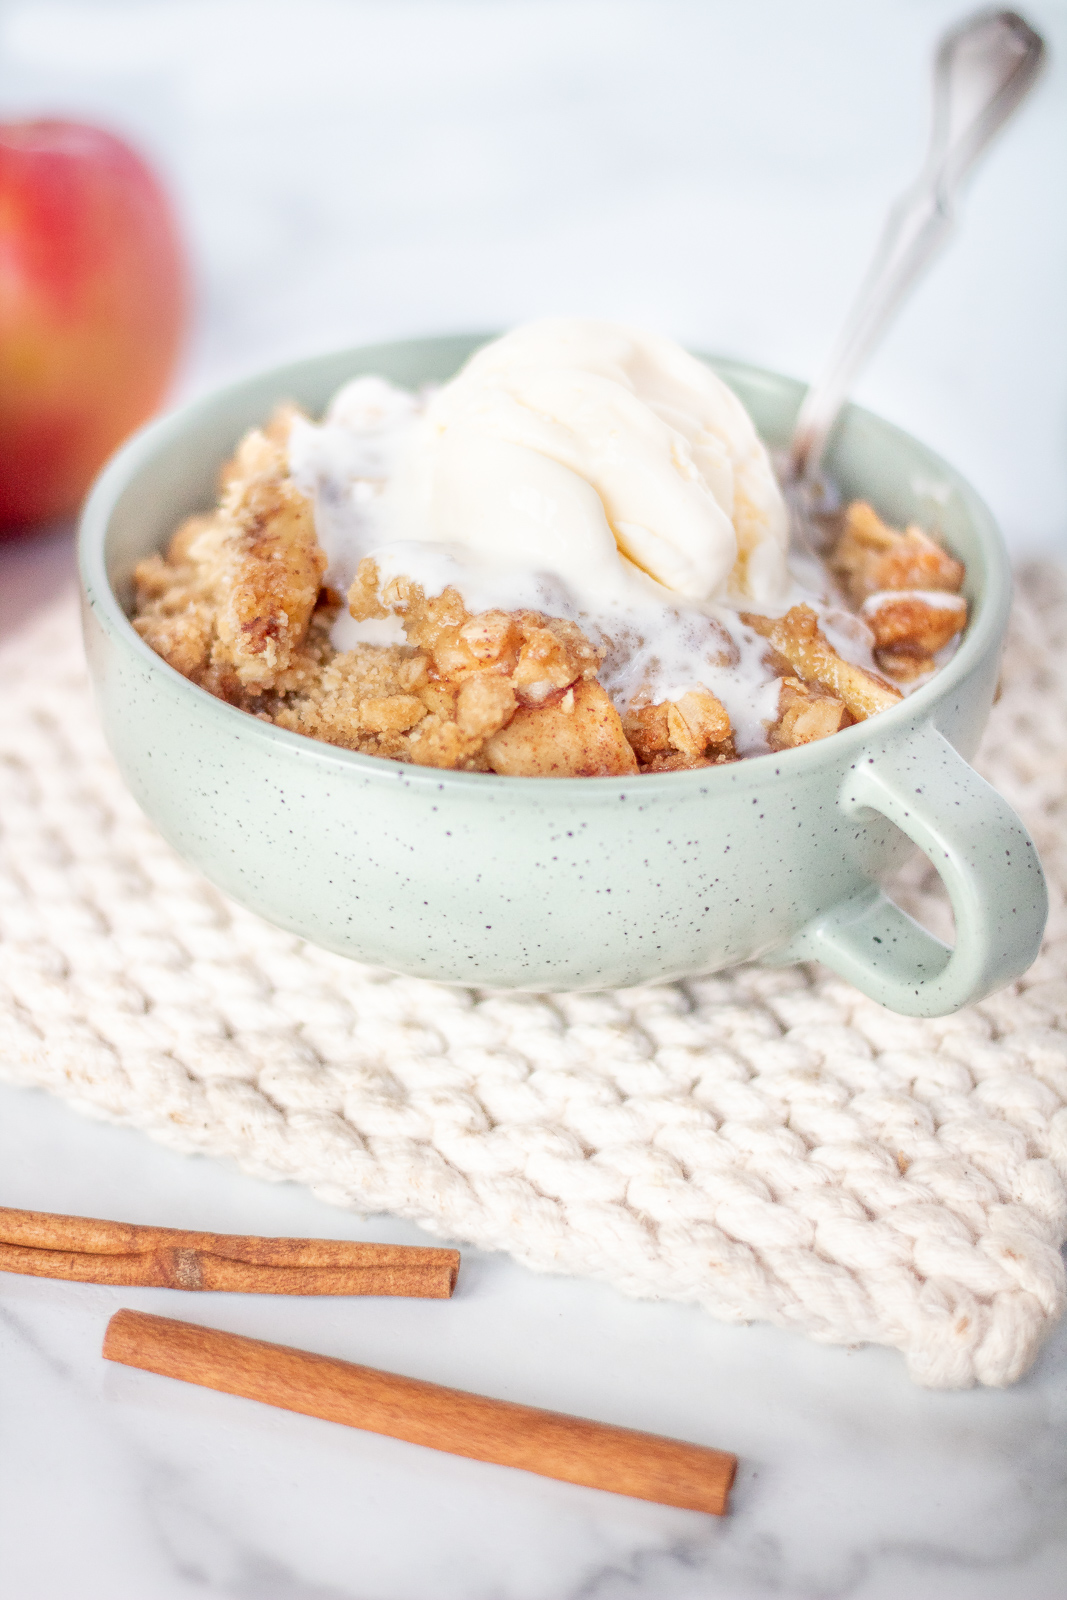
With Thanksgiving quickly approaching I thought I would share my favorite, most scrumptious old fashioned apple crisp recipe.  Honestly I can’t think of anything better than being curled up on the sofa with a warm bowl of apple crisp topped with vanilla ice cream.  It’s true happiness!

I love a good apple pie but let’s face it, pie crust isn’t exactly fun to make or work with.  To me, apple crisp will hands down always win because of how easy it is to throw together and the delicious crunchy chewy topping.  It’s happiness in a bowl.  Warm melty good happiness and so worth the calories.

the best apple crisp recipe

When it comes to baking with apples it’s crucial to use the right kind.  You’ll want to choose an apple that holds its texture in the oven and one that isn’t too sweet.  Many apples are great for baking, such as granny smith, braeburn, gala, and honey crisp to name a few.  I’m partial to honey crisp because of their crisp, juicy texture and versatility.  They cost more at the grocery store but they taste delicious, fresh or baked.

How to slice apples

For easy sliced apples start by peeling them and slice into four quarters.  Slice each quarter into slices about 1/4 inch thick.  Sometimes I’ll cut my apples a little thinner or thicker but 1/4 inch is a good rule of thumb.

the best apple crisp recipe

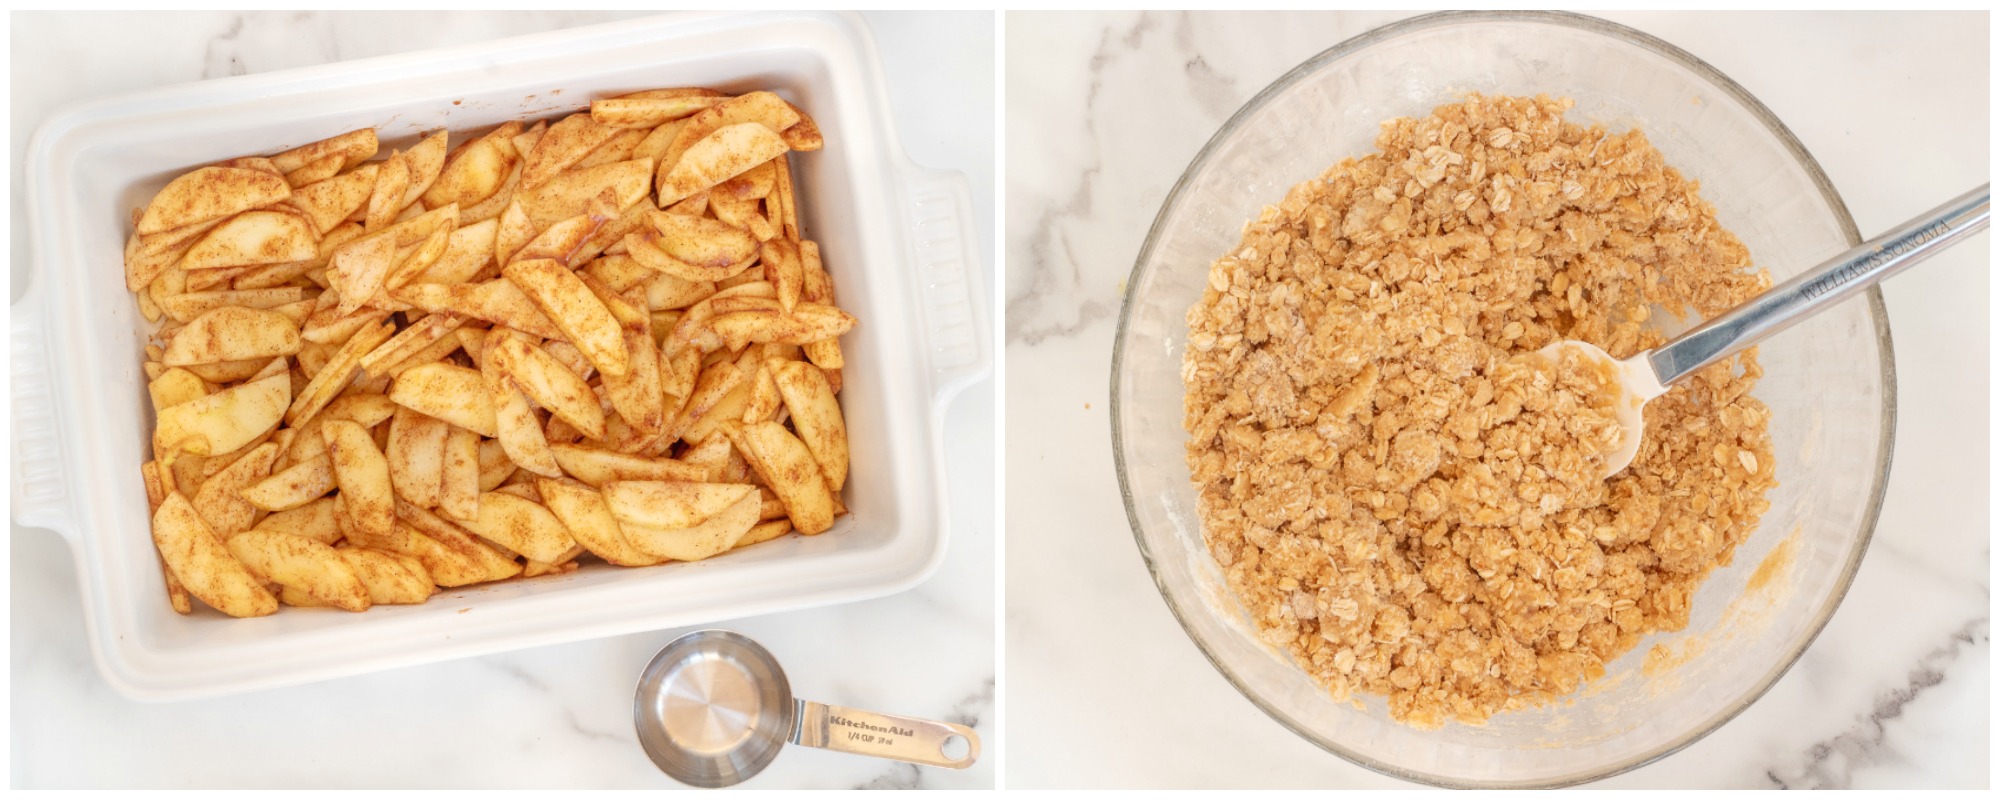
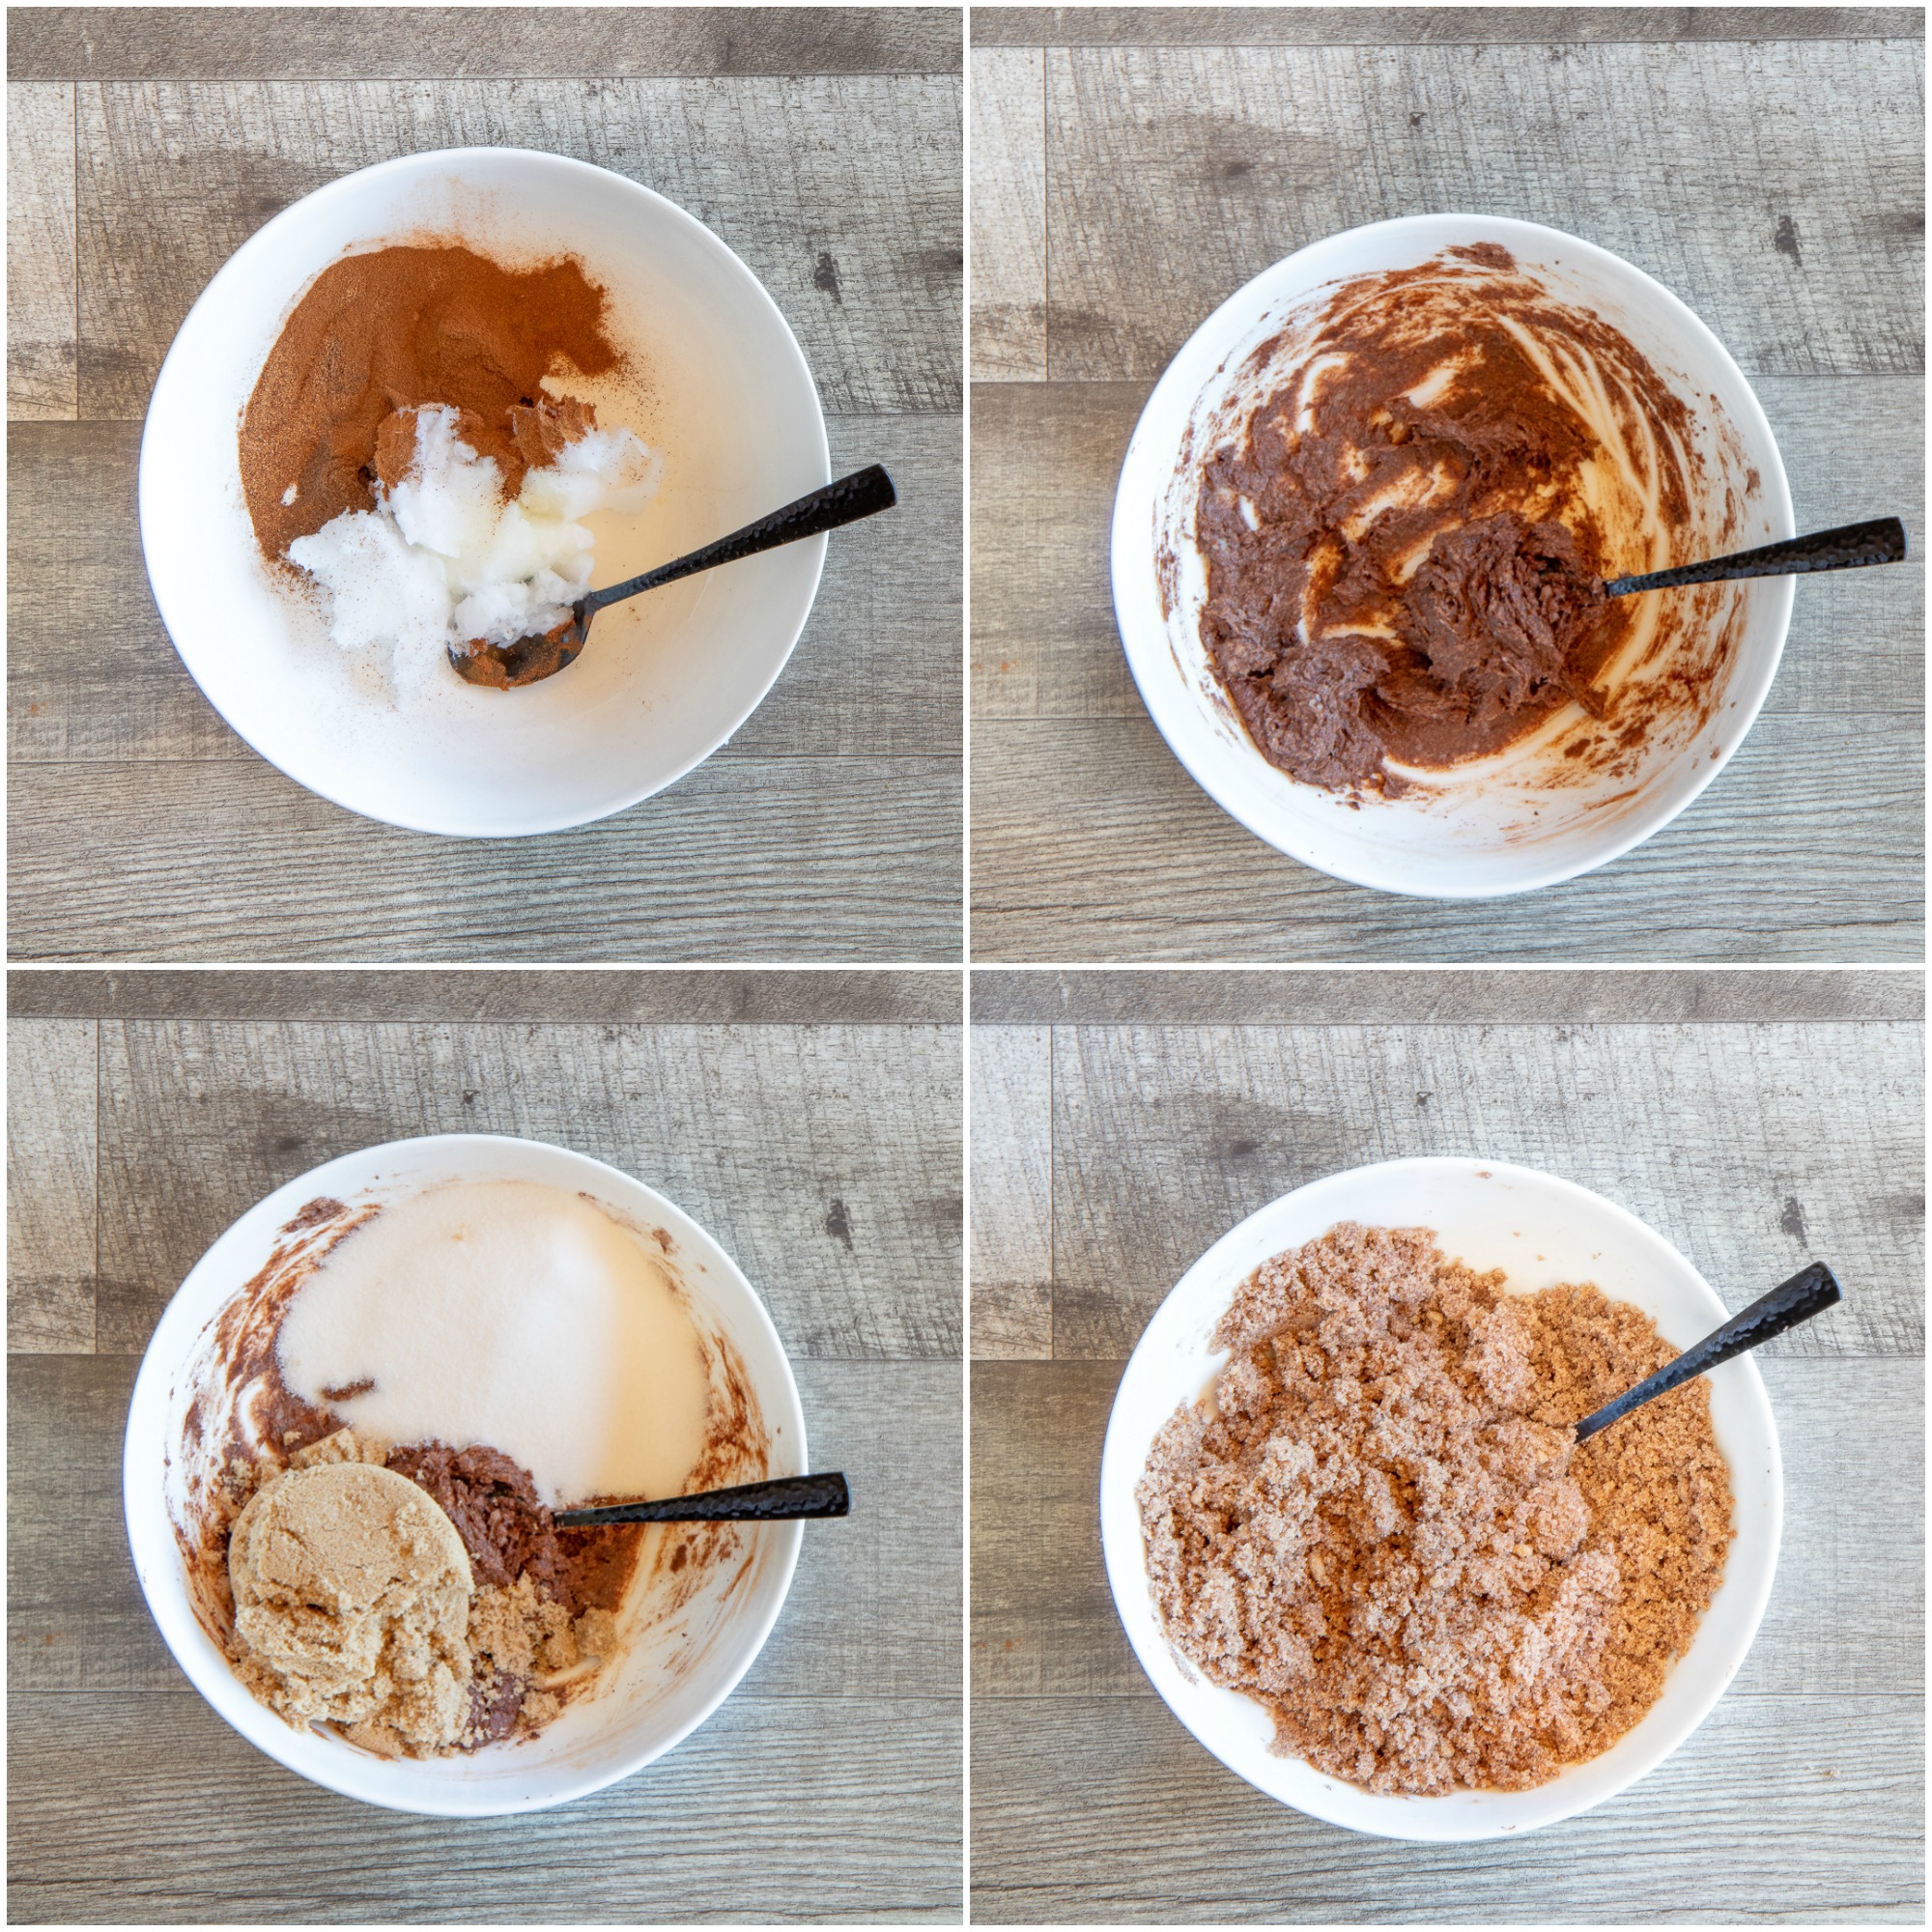
Slicing all the apples can feel tedious but once you’ve sliced all your apples everything comes together fast.  From there I mix the apples in a bowl with a little flour, sugar, and spices.  The crumb topping is also oh so easy because we add melted butter.  Yep, no cutting in cold butter.  Just melt it, pour it into the crumb mixture, and stir until combined.  You’ll know it’s done when the butter starts to clump together with the mixture.  Those clumpy bits taste so good out of the oven.

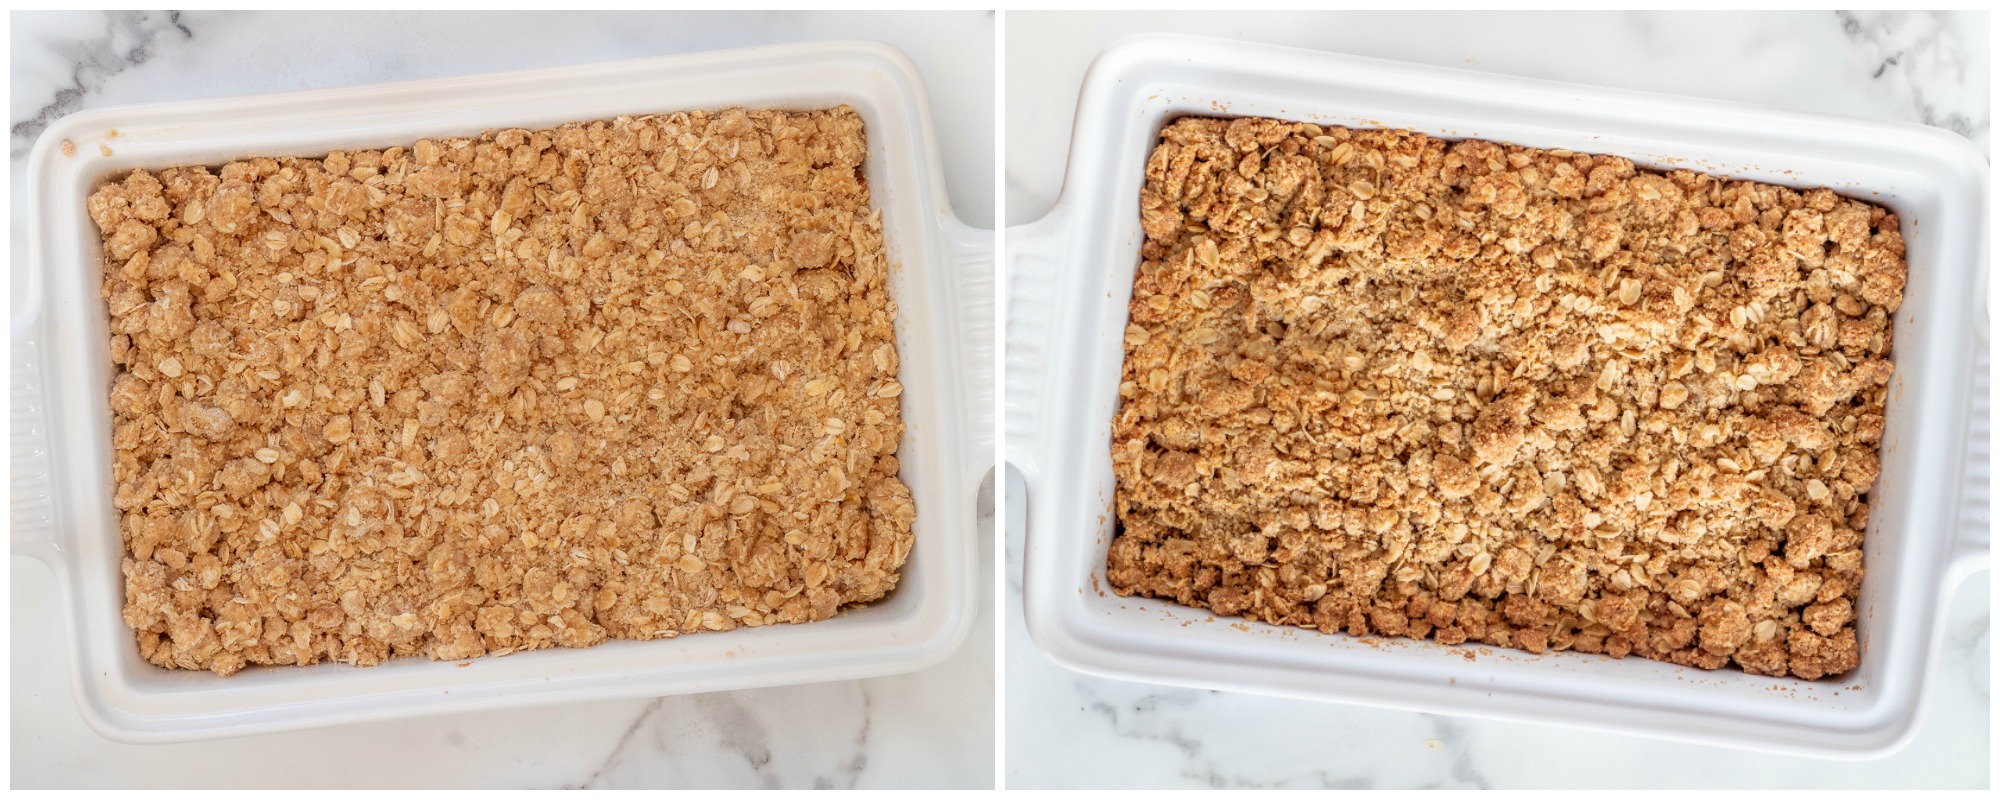
If you’re wondering why no baking powder or soda that’s a great question.   Many apple crisp recipes will call for baking soda or powder even though there is nothing to rise.  This has always baffled me, so I leave it out.  As I’ve researched why this is done it seems that baking powder or soda can raise the pH level of the topping which can enhance browning, but even that’s debatable.  So I’ve never used it.

Old fashioned apple crisp

Apple Crisp

Ingredients

For the apple filling:

  • 6-7 baking apples, I use honey crisp
  • 1/2 cup white sugar
  • 1 tablespoon flour
  • 2 tsp cinnamon
  • 1 tsp nutmeg
  • 1/4 tsp salt
  • 1/4 cup water

For the topping:

  • 2 cups quick cooking oats
  • 2 cups flour
  • cups brown sugar
  • 1 cup melted butter
  • a pinch of salt

Instructions

  • Preheat oven to 350°
  • Peel apples and slice into 4 quarters. Slice each quarter into thin slices.
  • In a bowl large enough to hold the apples, mix together white sugar, 1 tablespoon flour, cinnamon, and nutmeg. Add the apples and mix until the apples are coated in the mixture.
  • Place the apple mixture into a greased 4-quart baking dish or a deep 9x15 casserole dish.
  • In a seperate bowl combine 2 cups flour, brown sugar, and melted butter. Crumble evenly over the apple slices.
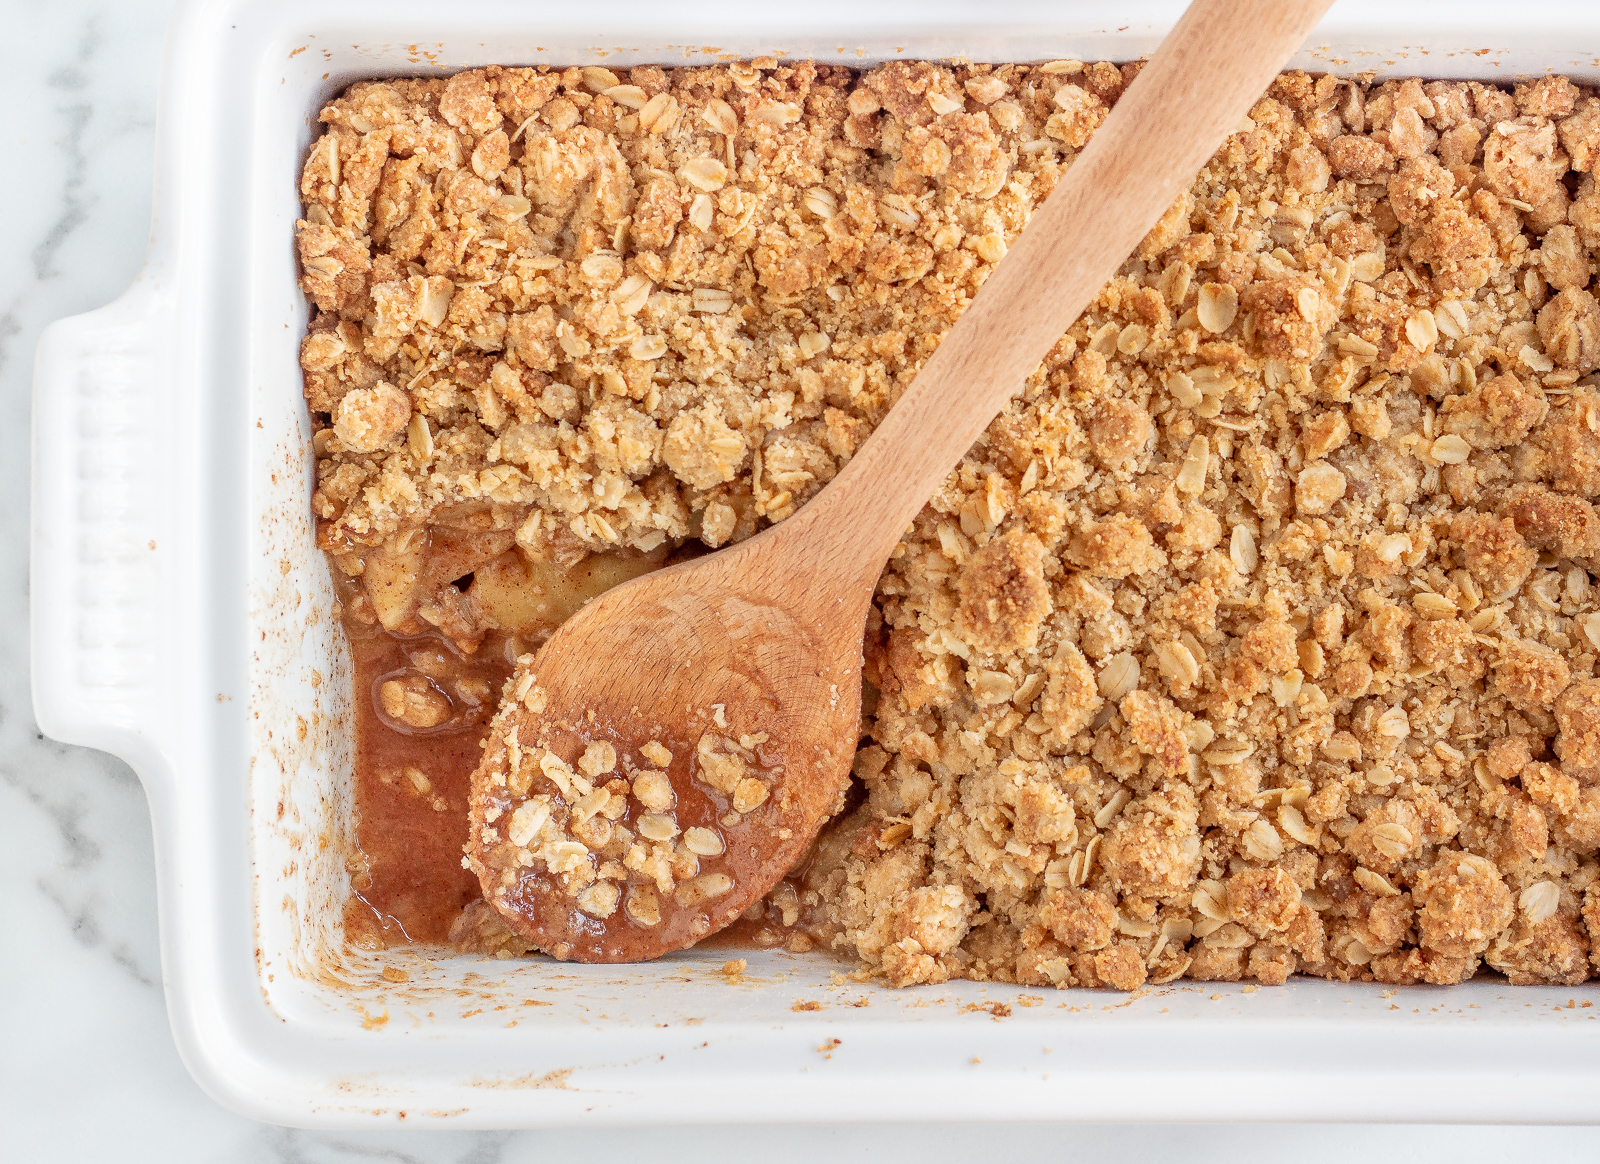
  • Bake for about 45 minutes and cool slightly. Serve warm with vanilla ice cream.

Old fashioned apple crisp

You can store the leftovers covered at room temperature for up to three days or in the refrigerator for up to a week.  If you do refrigerate your crisp you can reheat it in the oven, however you may loose a little crispness.  Cover with foil so the top won’t burn and reheat it for 15 minutes at 350.

the best apple crisp recipe

Funny story, a few months ago we had some perfect fall days, so of course I had to make the family an apple crisp.  Not long after the crisp was in the oven I started smelling something that reminded me of enchiladas.  As the apple crisp cooked the smell kept getting stronger and stronger.  To my horror I realized I had accidentally used cumin instead of cinnamon!

My husband the trooper ate a lot of it, but the rest of use couldn’t get past the strong cumin flavor.  So I guess I should say there isn’t anything better than a bowl of warm apple crisp topped with ice cream… unless you put cumin in it!


Laura

Colorado Home

OUR FALL DECK REVEAL + WILDFIRE UPDATE

Deck design before and after

I am thrilled to be home and back to working on my blog.  As some of you may know we were evacuated from our home for weeks because of the Cameron Peak fire.  Then we were evacuated from the place we were staying because of the East Troublesome fire.  Things have definitely been stressful!  The wildfire did come onto our property and burn some of our trees but our home is fine and so is our new back deck!

Brian finished the back deck in July but after a few weeks many of the boards shrunk despite us acclimating the wood.  We suddenly had dangerous wide gaps between the boards, so he had to unscrew each board and move it over, buy more wood and also let that acclimate. Then my patio furniture was on backorder for 10 weeks.  Once the patio furniture arrived and we put the finishing touches on the deck for the second time, then we were suddenly evacuated because of the fire.  Looking at the fire satellite map we knew the fire was on our property and we had accepted the fact that the new deck was cursed and might had been damaged or completely burned.  But I’m happy to say the deck was just fine… the deck curse is broken!

Ok let’s see some crazy before photos back when this area was a hideous looking sunroom.

Deck design before and afterDeck design before and after

I dismantled the interior and filled in nail holes while Brian removed the structure piece by piece.  We kept the back metal wall of the sunroom as a retaining wall and covered it with deck boards.  Brian did all the wood work while I painted the back of the house and the exterior metal stairs and stained the deck.

Deck design before and after

Deck design before and after

We love the final result and yes it was worth all the blood, sweat, and tears.  We have a front deck that we love with an incredible mountain view, however it gets very sunny and it’s not very private.  The back deck has a completely different feel from the front deck.  It’s isolated, cozy with trees and rocks, and is always shaded.  So now we have the best of both worlds.  Below you can see where the fire burned next to our house.

Deck design before and after

Tree face and string lights

Does anyone else love tree faces as much as me?  They’re so cute and look like tree people!

We went with Polywood Adirondack chairs again because of the durability.  We had them at our Texas home and they were very durable in the harsh summer sun and I felt confident they would survive Colorado winters.  I was also concerned with chipmunks and squirrels chewing things up so again I felt confident going with Polywood products.  Polywood is made in the USA and made from recycled plastics so it’s an overall win for me.  Plus they have a ton of colors and styles to choose from.

We did have a big rock roll down during the fire that broke the bottom of a chair you can see above but Polywood has a great warranty and replacement parts available.  Luckily nothing else was damaged.

Polywood black Adirondack chairs

Faux outdoor trees

Briefly we had some real potted plants on the deck and they were eaten instantly.  So I went with faux evergreen trees and shrubs.  They look very realistic from a distance and sort of real up close but hey… they’re animal and winter proof.  Plus no watering!

Tree Face and string lights

We’re no strangers to outdoor string lights, I’ve bought so many over the years from various places but these LED string lights are hands down the best we’ve ever bought.

Outdoor deck design

This is just phase 1 of our deck, you can see above how the boards just stop.  That’s where we plan to continue the deck into what I call mega-deck!  Mega-deck will extend off towards the area where the fire burned.  So I’m actually relieved we hadn’t started any deck work over there yet.  Mega-deck will extend around the trees, have a dining area, a bar counter, another lounge area and if I get my way with Brian some swings and a slide that goes from one level to the other.  It will be epic.

Cameron Peak fire damage

I love to change up my decor seasonally inside and out so I went with washable removable pillow covers to compliment the buffalo plaid pillows.  So once Christmas comes I’ll change the orange covers out to red.  Yes, we will be enjoying this patio in the winter, that’s what heaters and blankets are for!

Outdoor orange and buffalo plaid pillows

As for the fire you can see how it wrapped around our driveway, into our side yard, and in a small area went up on the hill behind our deck.  Firefighters had hoses and sprinklers around our house to prevent the fire from spreading.  We are extremely grateful for everything they did to save our home.

Cameron Peak wildfire

Cameron Peak fire damage

Cameron Peak fire damage

We did lose a few trees, and I’m worried about the trees that seem to be alive now but have charred trunks and branches.  Only time will tell I guess.  Hopefully this summer everything comes out nice and green again.

outdoor string lights at night

SHOP THE POST

Adirondack Chairs | Bench | Side Table | Plaid Pillows | Pillow Covers | Pillow Insert | Faux Tree – 36 in | Faux Shrub | String Lights | Tree Face 1 | Tree Face 2 | Sconce Light | Cheetah Door Mat | Berry Wreath

PAINT COLORS

Deck stain is Ready Seal in Natural Cedar

Exterior is Rockies Brown, by Benjamin Moore

Trim is Appalachian Brown, by Benjamin Moore

Door is Sophisticated Teal by the Home Depot Decorators Collection.

Such an improvement from a gross unusable smelly sunroom to a gorgeous outdoor living space.  I’m thrilled with the results, and fingers crossed we will start mega-deck soon.  Thanks for reading.


Laura

Fall

A VERY SPOOKTACULAR HALLOWEEN TABLESCAPE

DIY spooktacular Halloween tablescape

There’s nothing I love more than fall.  The weather is cool, the trees turn golden, pumpkins everywhere, and Christmas is just around the corner.  This is my happy time and probably it’s yours too.  I mentioned in my last Halloween wreath blog post that I normally don’t decorate a lot for Halloween.  I can’t do scary but really I’m just hyper focused on Thanksgiving and Christmas.  This is the year I’ve decided to change all that!  Yes, it’s the most wonderful time of the year, but since we’re in the middle of a pandemic I think we all could use a little more fun.  So I’m excited to share my first ever Halloween spooktacular tablescape!

DIY spooktacular Halloween tablescape

I’ve always been a big fan of black and white decor, especially when it comes to setting the table.  I’m a firm believer that we all need a set of basic white dishes and basic black dishes.  Nothing anchors a table like black or white, and the combinations you can create year round are endless.

DIY spooktacular Halloween tablescape

I love having a vivid contrast in my decor, and these black and white striped chargers were an amazing find, and on sale for $2!  Pair them with these orange buffalo plaid napkins (also on sale) and my heart sings!

DIY spooktacular Halloween tablescape

DIY spooktacular Halloween tablescape

I’m a Le Creuset fan all the way, but I can’t help but be totally obsessed with these Staub pumpkins.  They’re the perfect size for soups, side dishes, and individual desserts.  I have the black pumpkins and the orange ones… I’m already feeling like I NEED the white ones too!  They’re adorable, oven proof, and double as home decor, you can’t go wrong with these!

DIY spooktacular Halloween tablescape

The ghost centerpiece was a cute, last minute craft project I made.  We’re having a not so scary Halloween this year and these friendly ghosts fit the bill.  I love them especially paired with my super easy white washed pumpkins.

DIY spooktacular Halloween tablescape

DIY spooktacular Halloween tablescape

Black & White Chargers | Black Dishes | Flatware | Napkins | Black Pumpkins 

If you follow me on Instagram I gave you a sneak peak of our back deck.  I’m so happy with the way everything turned out, and I can’t wait to do a full reveal on the blog so stay tuned and again happy fall!  It’s been a rough year so soak up all this fall goodness and Halloween fun.


Laura

Fall

MAKE A SPOOKY-CHIC HALLOWEEN WREATH IN JUST 20 MINUTES

DIY Spooky-chic Halloween Wreath in 20 minutes or less

October is here and that means it’s time to decorate!  I love to decorate for every season, but some years Halloween gets left out.  Not by choice, I’m not against it or anything, it’s just that I’m usually already too focused on planning my Thanksgiving and Christmas decor and then it’s too late.  Since 2020 hasn’t exactly been an ideal year I decided if there’s ever a year I need to decorate the house for Halloween it’s this one.  I think we all could use some extra fun and playful joy right now!

I love to make wreaths, that is as long as they aren’t too complicated or time consuming.  Even though this is a Halloween wreath have no fear!  You can put this oh so easy spooky-chic wreath together in just 20 minutes or less.

DIY Spooky-chic Halloween Wreath in 20 minutes or less

When it comes to Halloween decorations I can’t do scary.  I’m a big baby and just can’t do it!  Luckily this wreath is the perfect balance of a little bit spooky and a whole lot of chic.  I’m definitely not a spider fan at all, in fact I have one trapped under a bowl in the living room right now for my dear hubby to take care of.  However, when you cover them in glitter or somehow make them cute suddenly I can deal.  I need something spooky right?

I’ve always loved making feather wreaths, especially around Halloween.  They’re just so festive and fun!  I’ve used purple feathers before, even lime green and all have turned out great.  So use this blog post as inspiration for your own unique wreath if that’s your jam.  Below I’ve listed where my items were purchased, some I had on hand from last year, but I’m sure you’ll be able to find similar Halloween embellishments pretty easily.

DIY Spooky-chic Halloween Wreath in 20 minutes or less

SUPPLIES NEEDED

18 inch straw or foam wreath ($4.99 from Hobby Lobby)

3 (6ft.) foot black feather boas ($3.99 each from Hobby Lobby)

Hot glue

A Halloween sign (Halloween clearance last year)

Black faux flowers ($2.99 from Hobby Lobby)

Glittery pumpkins (.99 from Wal-Mart)

Glittery spiders ($3 from The Dollar Tree last year)

DIY Spooky-chic Halloween Wreath in 20 minutes or less

INSTRUCTIONS

DIY Spooky-chic Halloween Wreath in 20 minutes or less

If you’re using a new straw wreath you’ll want to keep the plastic on to avoid a big mess.  Start by hot gluing the end of the feather boa on the back of the wreath.  Then wrap the boa all the way around the wreath and secure that end with hot glue.  Continue this with the next two feather boas, adjusting to avoid any bare spots.  I only glue the ends down so you won’t need much hot glue here.

TIP:  Feather boas shed like CRAZY!  You’ll definitely need to vacuum afterwards, but be sure to save the larger feathers that fall off.  They’re perfect for filling in any gaps or bare spots on the wreath should you need them.

DIY Spooky-chic Halloween Wreath in 20 minutes or less

Once the wreath is completely wrapped begin hot gluing the largest items first such as the flowers and Halloween sign.  Followed by the pumpkins and spiders.  The feathers can be a little floppy sometimes, so you might need to add several spots of hot glue until your items are secure.

How easy was that?  Once you gather your supplies you’ll have this spooky wreath done is 20 minutes, or possibly less!

DIY Spooky-chic Halloween Wreath in 20 minutes or less

DIY Spooky-chic Halloween Wreath in 20 minutes or less

Spooky?  No, we’re spooky-chic darling.  A little bit creepy and a whole lot of glam!  Now go grab that bag of candy you’ve been hiding and  start having some Halloween fun!  I’ve got a few more “not too scary” Halloween projects to share with you soon, my spooky friends, so check back soon!


Laura

Fall

HOW TO WHITEWASH REAL PUMPKINS

How to whitewash real pumpkins

Hello friends, if you haven’t already done so it’s time to break out the pumpkins!  I love decorating the house this time of year, and one of my favorite ways to do so is with whitewashed pumpkins.  If you’re unfamiliar with whitewashing pumpkins have no fear… it’s quick, cheap, and so easy to do!  I think we can all agree how adorable orange pumpkins are, but I love the effect whitewashing does to a pumpkin.  It slightly tones down the orange, enhances the natural character, and gives them a high end look.

When I decorate with pumpkins I prefer real over faux.  Not only do I prefer a more realistic look, but storage space is a major issue in our house.  I love the fact that I can simply toss my pumpkins after Thanksgiving and be done.  When whitewashing pumpkins, nearly any kind of paint will do.  I’ve used craft paint, wall paint (of all sheens), and even chalk paint… don’t worry it’s all good!  I seriously just use whatever, I recently used up all my Benjamin Moore white paint so for this blog post we’re using basic $2 craft paint.

Easy whitewashed pumpkins

SUPPLIES NEEDED

Pumpkins

White paint (craft paint, chalk paint, wall paint, any kind will do)

Foam or bristle brush

Paper towels

Disposable cup or bowl

Drop cloth or newspaper to protect your surface

Easy whitewashed pumpkins

INSTRUCTIONS

How to whitewash real pumpkins

1.  Lay newspaper or a drop cloth down to protect your surface.  Water down the paint by mixing equal portions of paint and water in a disposable cup or bowl.  I used 1/4 cup paint with 1/4 cup of water.  You can increase or decrease this mixture depending on the size and number of pumpkins you have, just keep it in equal portions.

2.  Brush the paint mixture evenly onto the pumpkin making sure the paint goes all the way into the grooves of the pumpkin.  Avoid getting paint on the stem for this step.

How to whitewash real pumpkins

3.  After the pumpkin is completely painted, wait about 30 seconds and wipe the paint off with a dry paper towel.  Be sure to wipe the paint off from the top to bottom for the best effect.  Let the pumpkin dry, it shouldn’t take very long about 10-15 minutes at most.

4.  Last, apply paint lightly to the stem and immediately wipe it off as you go.  The stems are very dry and porous so you want to use the paint sparingly here.  Now let the stem dry and you’re good to go.

How to whitewash real pumpkins

Once dry, feel free to repeat this process if you want a heavier whitewashed look.  Above you can see a lighter and a heavier whitewashing result.  I love them all, and it’s fun to experiment with different kinds of pumpkins.

Easy whitewashed pumpkins

You may be wondering if you can use this whitewashing technique on faux pumpkins, and the answer is yes.  Of course, you might need to adjust the amount of time you wait before wiping the paint off (more or less dry time), but the rest of the instructions should be the same.

I just love the effect that whitewashing adds to pumpkins.  It gives such a wow factor.  For the ultimate fall bowl filler try small whitewashed pumpkins with these bleached pinecones, it’s one of my favorite fall decorations. Happy fall!

Laura

Crafts

DIY APPLE WREATH

How to make an easy apple fall wreath

Hello blog readers I am back! Some of you may not know this but my blog has been gone for nearly 3 weeks.  I had a notification of a comment from a reader and when I went to respond poof… my blog had disappeared!  I’ll keep this brief because nobody wants to read a novel but after a week of scratching our heads we had to call in professionals to look into some deep coding details. Basically I had reached a data limit with my old hosting company.  Without any notice they pulled the plug and tech support offered no help in solving the problem.  I’m happy to say we’re back up and running, we’ve switched hosting companies and this shouldn’t ever happen again.  My apologies to everyone… ok so let’s move along here and make a fall apple wreath!

How to make an easy apple fall wreath

First off you may be thinking why apples? I’m a pumpkin loving nut just like everyone else but this fall I was craving something a little different so I went with apples.  I must say I’m happy with how it turned out and I love the cute pop of color from the apples.

Instead of floral stems I went with a garland for the greenery because that’s what was on sale.  A great bonus about using garland is I didn’t need to dig out my wire cutters… just pull the leaves off and you’re good to go!

Fall wreath ideas

SUPPLIES NEEDED

18 inch grapevine wreath form $4.99

2 basic leaf garlands 17.99 at 50% off= $17.99

1 bundle of small plastic apples 6.99 @40% off =4.19

Ribbon 3.99 at 50% off= $1.99

Scissors

Hot glue gun

2-3 hot glue sticks

Total cost: $29.16

INSTRUCTIONS

How to make an easy apple fall wreath steps

1.  Begin by threading a piece of ribbon through the top of the wreath and set aside.  Pull the leaves off the floral garland and hot glue.  Be sure to glue the leaves in different directions so it looks extra fluffy.

2.  Once you’ve glued all the leaves on begin gluing the apples.  I know… it’s complicated.

How to make an easy apple fall wreath steps

3.  Turn the wreath over and make a knot to create a hanging loop.  Pull the loop to the back of the wreath and secure with hot glue.

4.  Arrange the remaining ribbon around the wreath and secure in random places with hot glue.  Poof all done!  I kept my ribbon connected with the loop in the back and just pulled the ribbon to the front, feel free to cut it if that’s more convenient. I had a hard time deciding if I wanted to add the ribbon or not. I loved both looks but in the end I decided the ribbon gave a bit of pizazz, but it’s your choice.

fall apple decor

Fall apple decor

I love the homey comfort of apples this time of year and I can’t get over how cute and realistic these apples look.  This wreath costing under $30 and the fact that I only had one hot glue burn is what I call success my friends!

Be sure to check out my holidays category for some of other fall projects and decor, including my favorite fall potpourri and how to bleach pinecones.  Take care!


Laura