

October is here and that means it’s time to decorate! I love to decorate for every season, but some years Halloween gets left out. Not by choice, I’m not against it or anything, it’s just that I’m usually already too focused on planning my Thanksgiving and Christmas decor and then it’s too late. Since 2020 hasn’t exactly been an ideal year I decided if there’s ever a year I need to decorate the house for Halloween it’s this one. I think we all could use some extra fun and playful joy right now!
I love to make wreaths, that is as long as they aren’t too complicated or time consuming. Even though this is a Halloween wreath have no fear! You can put this oh so easy spooky-chic wreath together in just 20 minutes or less.
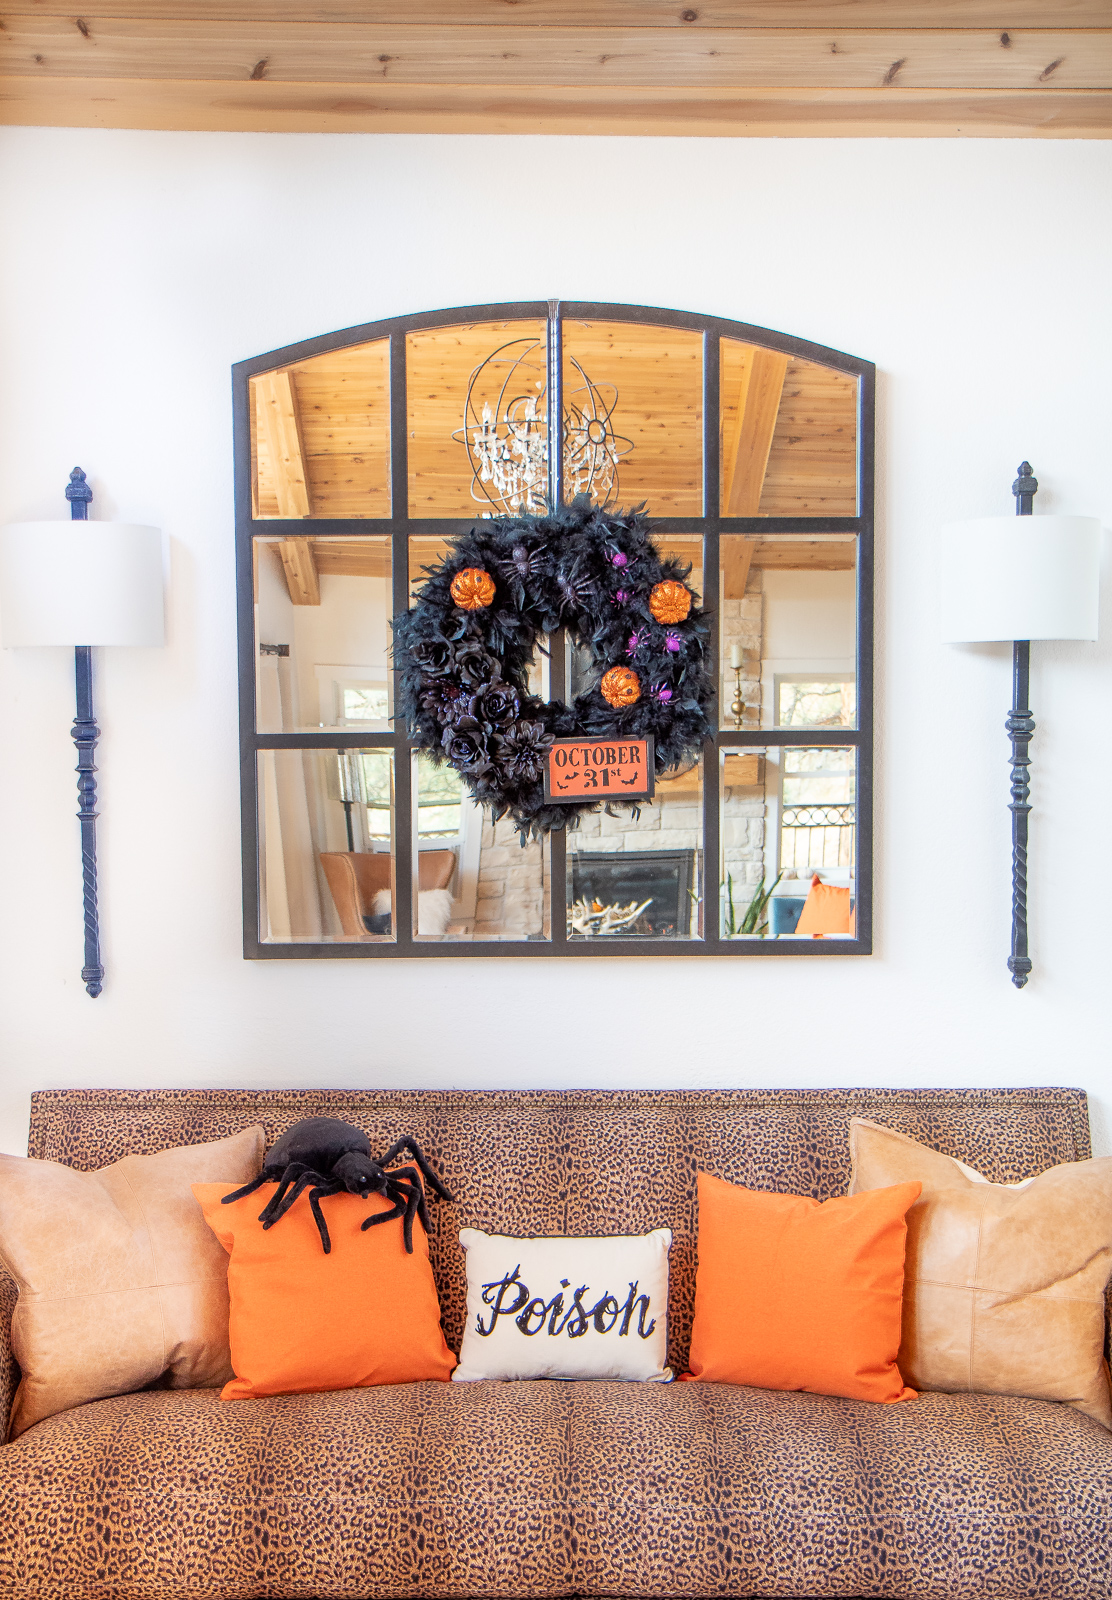
When it comes to Halloween decorations I can’t do scary. I’m a big baby and just can’t do it! Luckily this wreath is the perfect balance of a little bit spooky and a whole lot of chic. I’m definitely not a spider fan at all, in fact I have one trapped under a bowl in the living room right now for my dear hubby to take care of. However, when you cover them in glitter or somehow make them cute suddenly I can deal. I need something spooky right?
I’ve always loved making feather wreaths, especially around Halloween. They’re just so festive and fun! I’ve used purple feathers before, even lime green and all have turned out great. So use this blog post as inspiration for your own unique wreath if that’s your jam. Below I’ve listed where my items were purchased, some I had on hand from last year, but I’m sure you’ll be able to find similar Halloween embellishments pretty easily.
SUPPLIES NEEDED
18 inch straw or foam wreath ($4.99 from Hobby Lobby)
3 (6ft.) foot black feather boas ($3.99 each from Hobby Lobby)
Hot glue
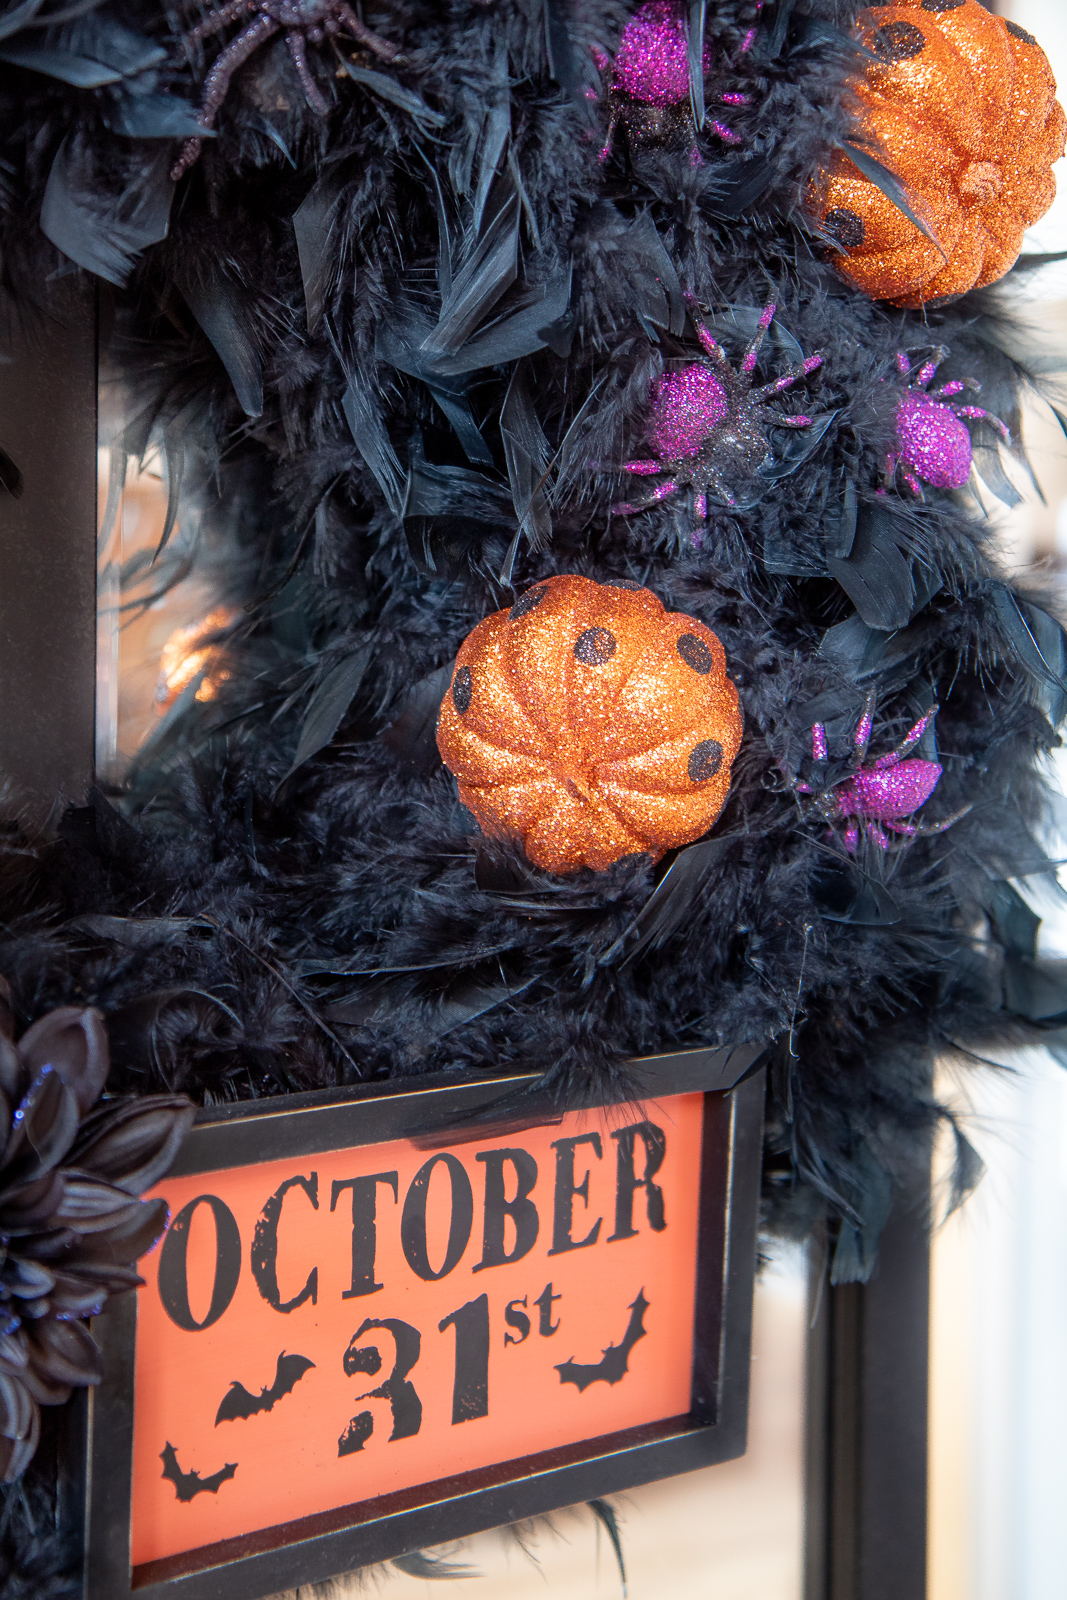
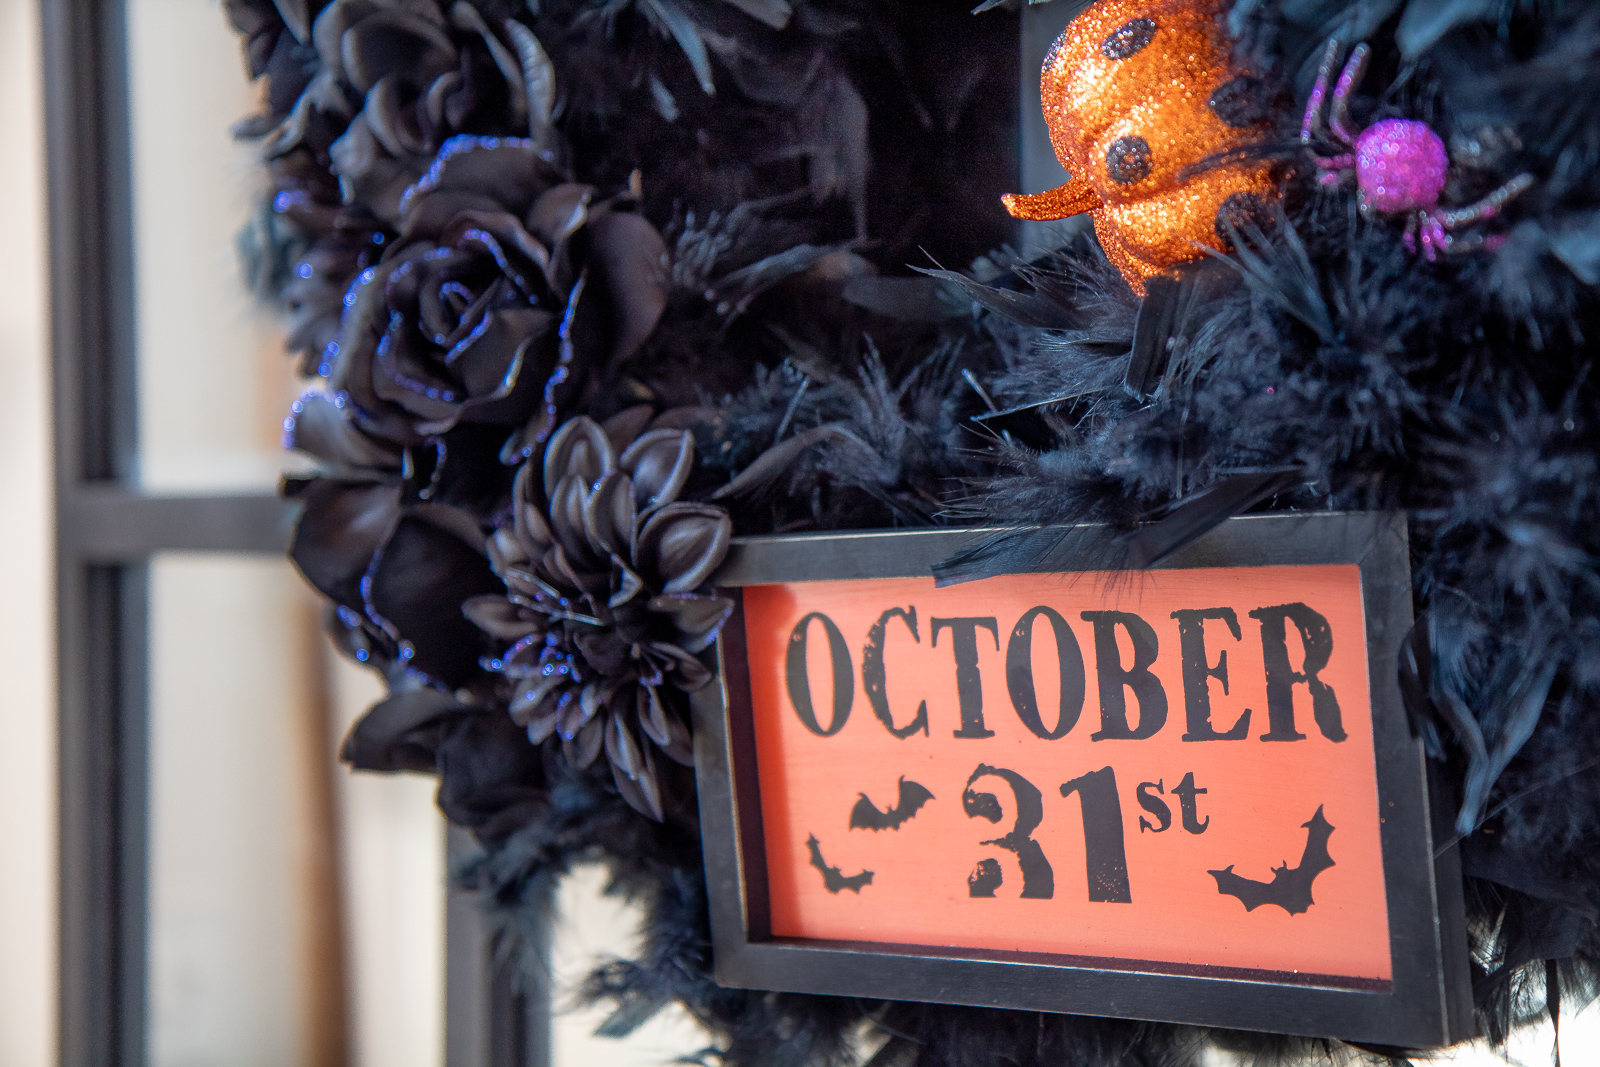
A Halloween sign (Halloween clearance last year)
Black faux flowers ($2.99 from Hobby Lobby)
Glittery pumpkins (.99 from Wal-Mart)
Glittery spiders ($3 from The Dollar Tree last year)
INSTRUCTIONS
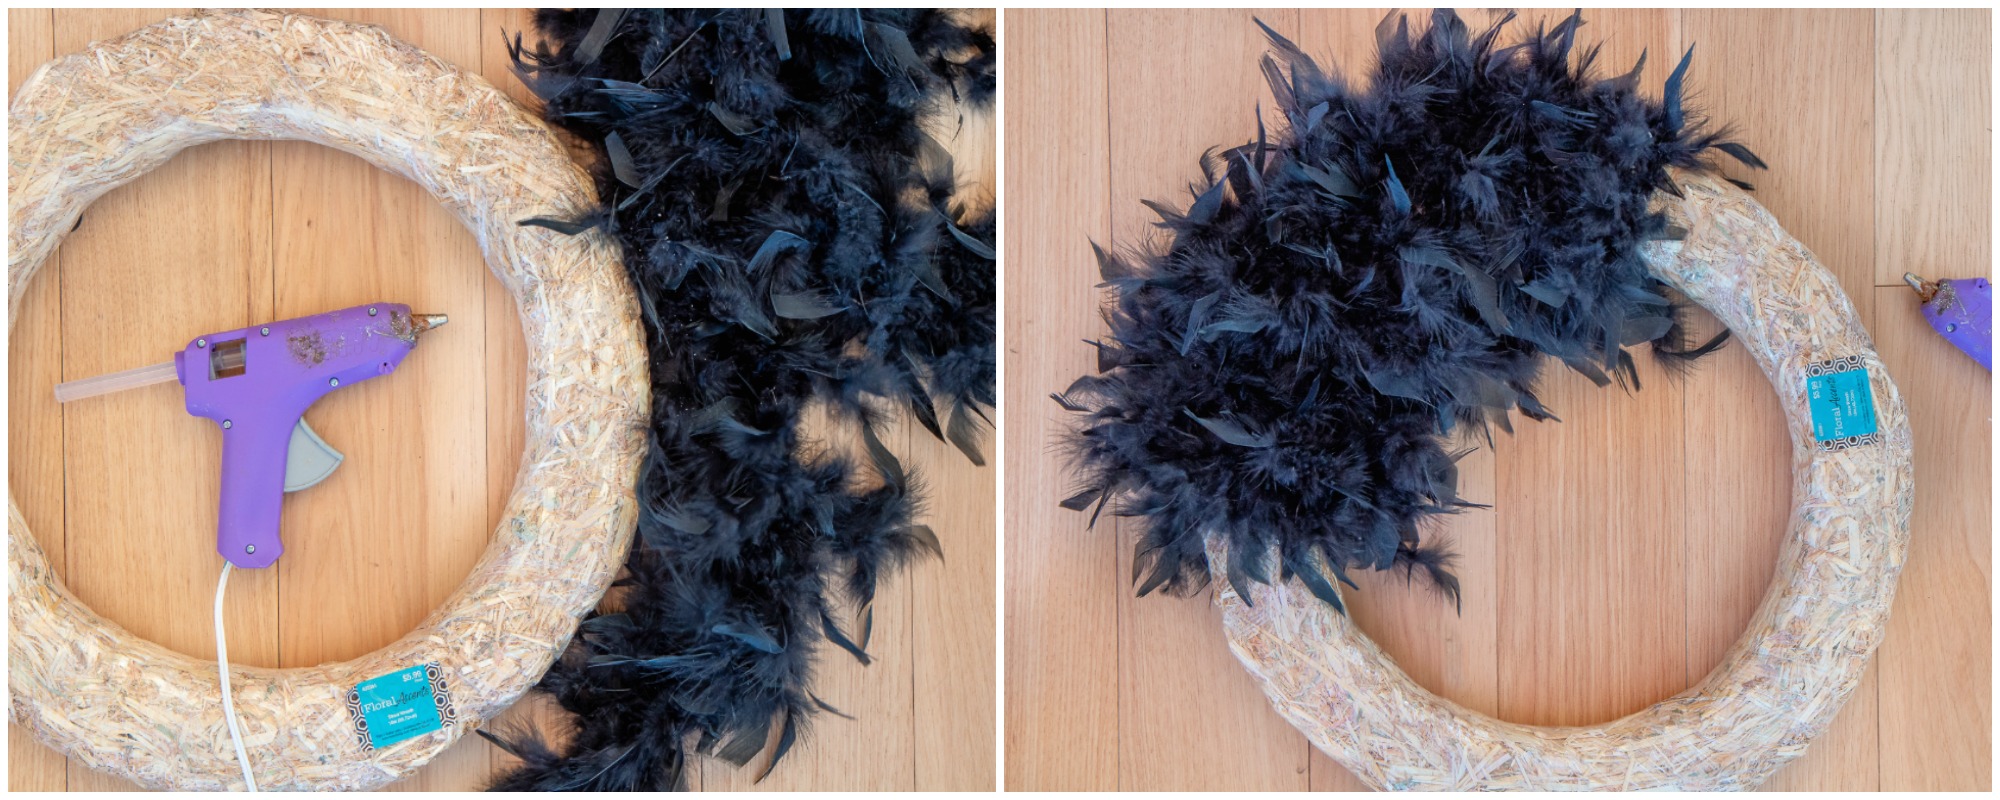
If you’re using a new straw wreath you’ll want to keep the plastic on to avoid a big mess. Start by hot gluing the end of the feather boa on the back of the wreath. Then wrap the boa all the way around the wreath and secure that end with hot glue. Continue this with the next two feather boas, adjusting to avoid any bare spots. I only glue the ends down so you won’t need much hot glue here.
TIP: Feather boas shed like CRAZY! You’ll definitely need to vacuum afterwards, but be sure to save the larger feathers that fall off. They’re perfect for filling in any gaps or bare spots on the wreath should you need them.
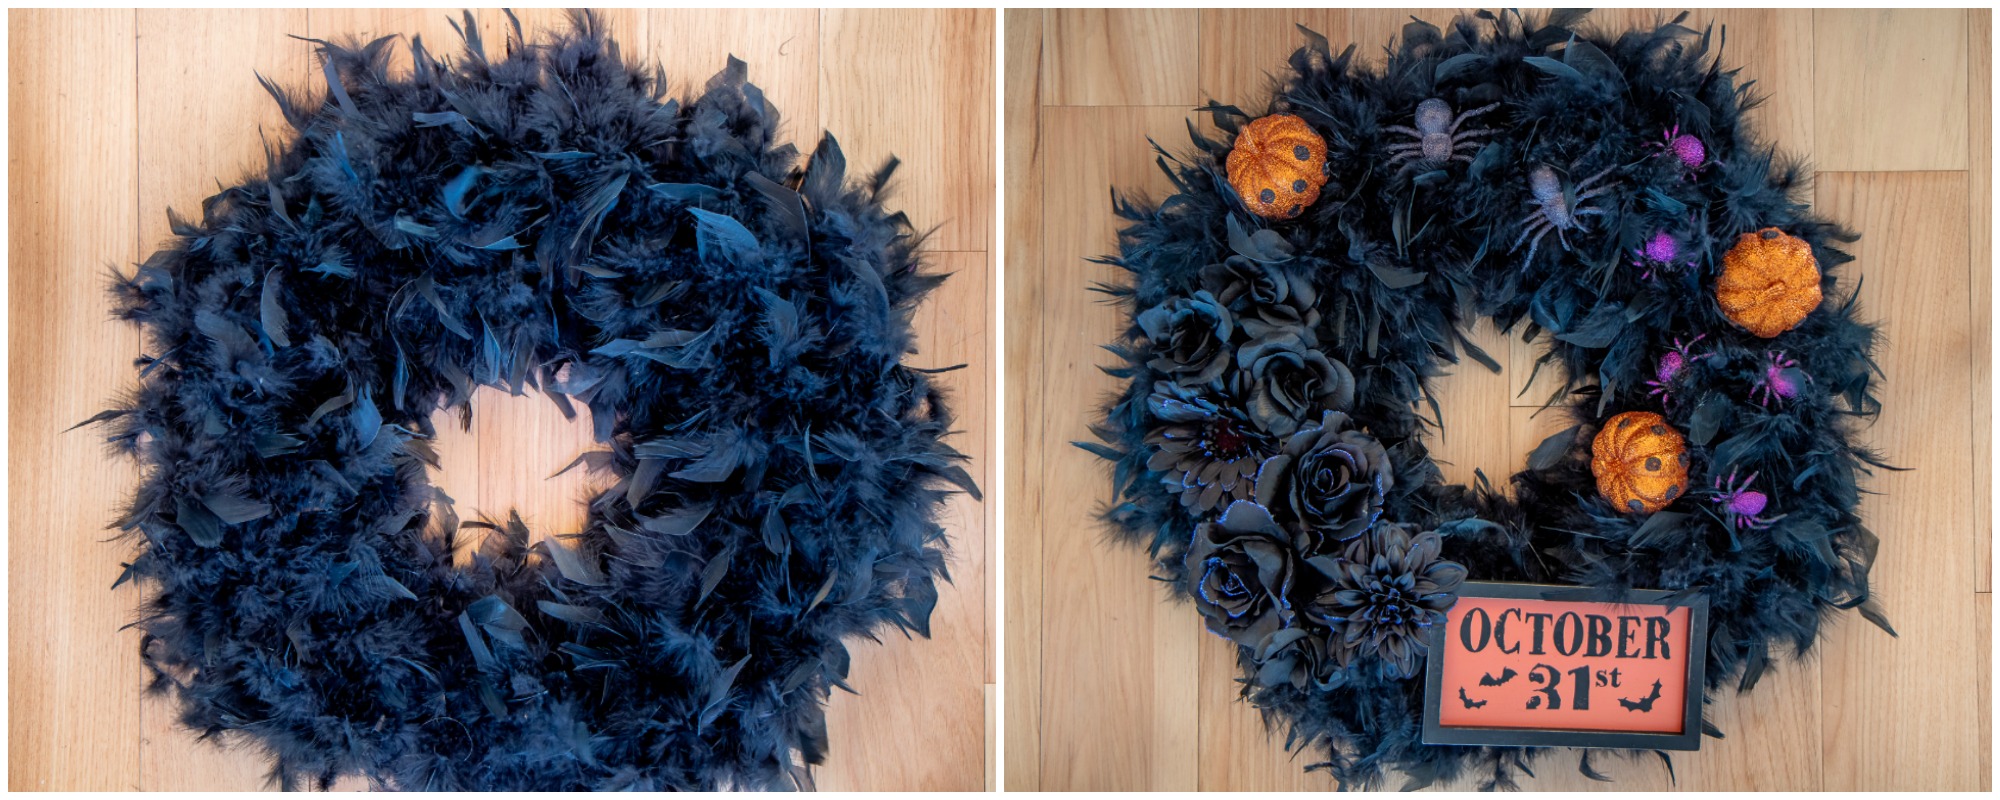
Once the wreath is completely wrapped begin hot gluing the largest items first such as the flowers and Halloween sign. Followed by the pumpkins and spiders. The feathers can be a little floppy sometimes, so you might need to add several spots of hot glue until your items are secure.
How easy was that? Once you gather your supplies you’ll have this spooky wreath done is 20 minutes, or possibly less!
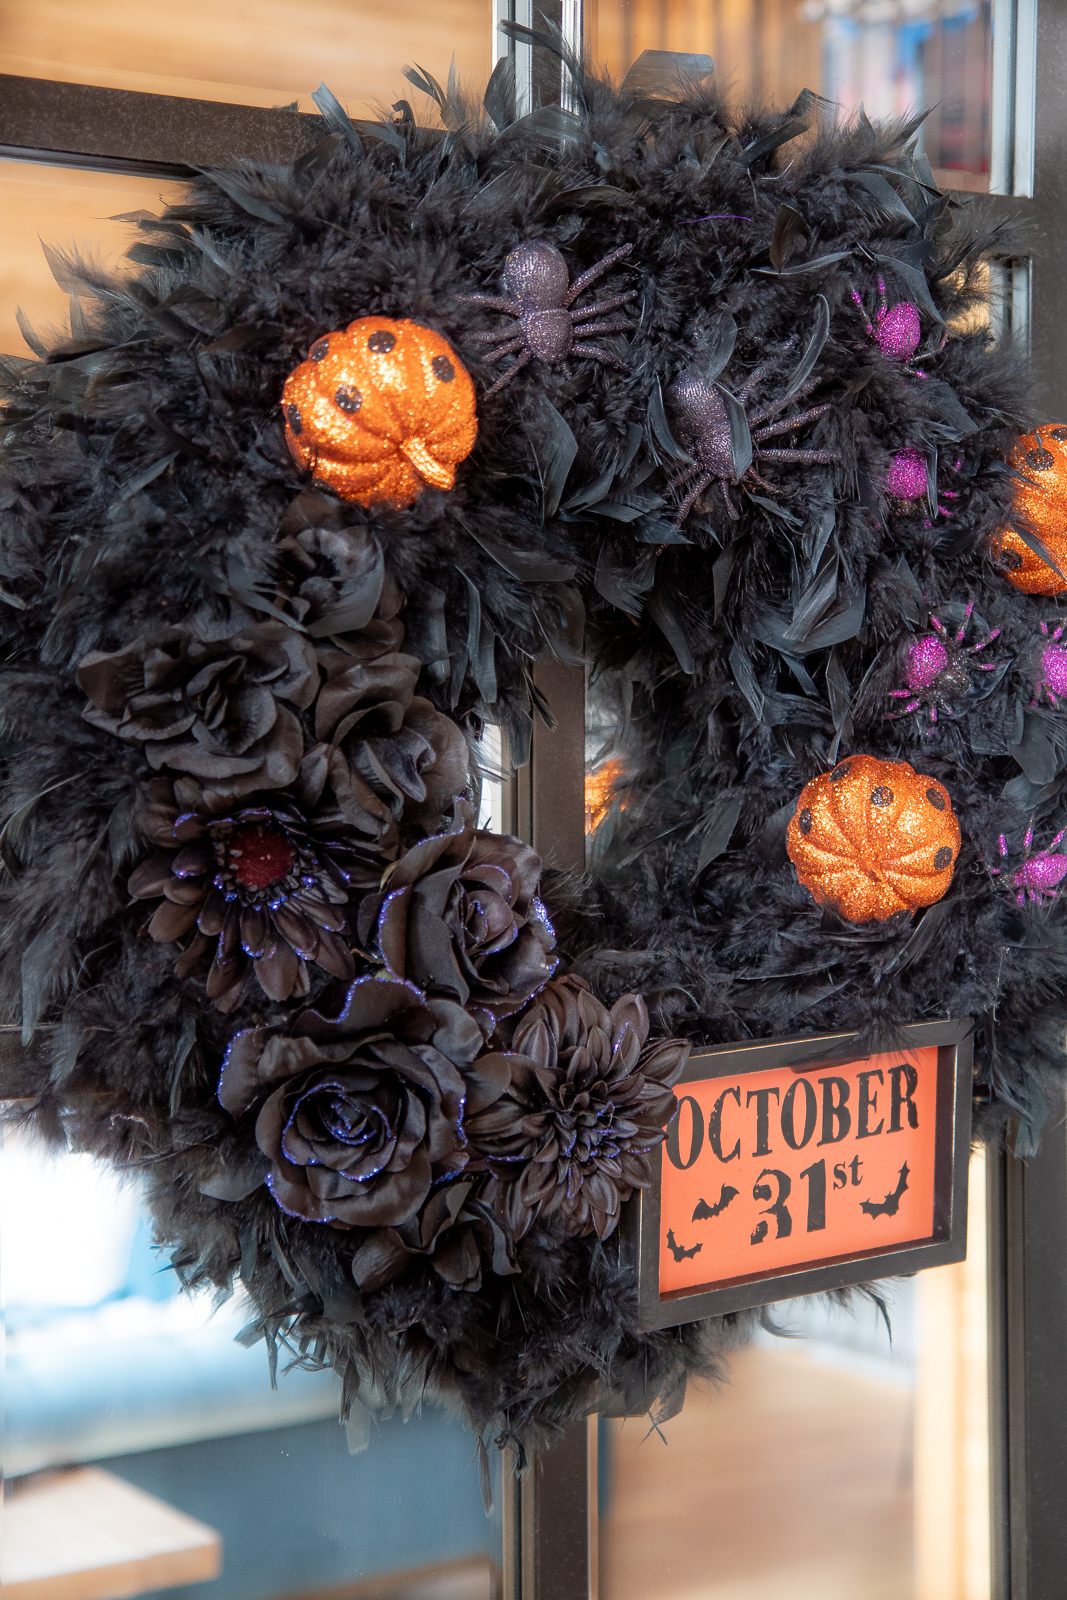
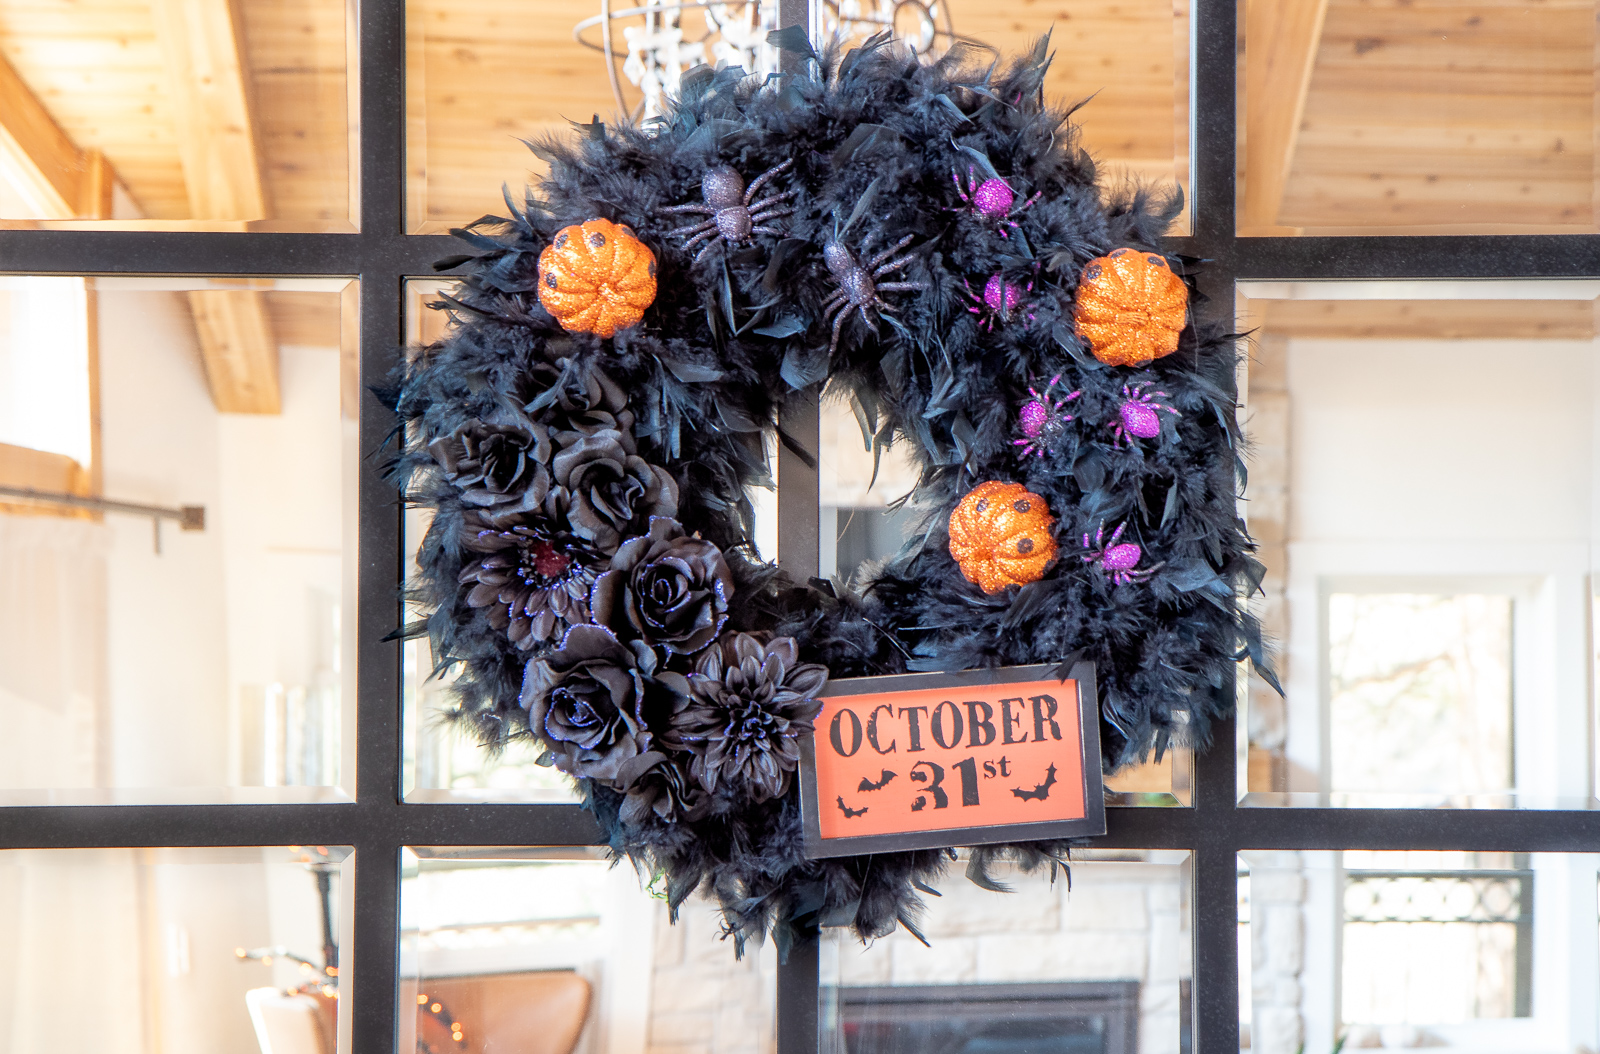
Spooky? No, we’re spooky-chic darling. A little bit creepy and a whole lot of glam! Now go grab that bag of candy you’ve been hiding and start having some Halloween fun! I’ve got a few more “not too scary” Halloween projects to share with you soon, my spooky friends, so check back soon!
