
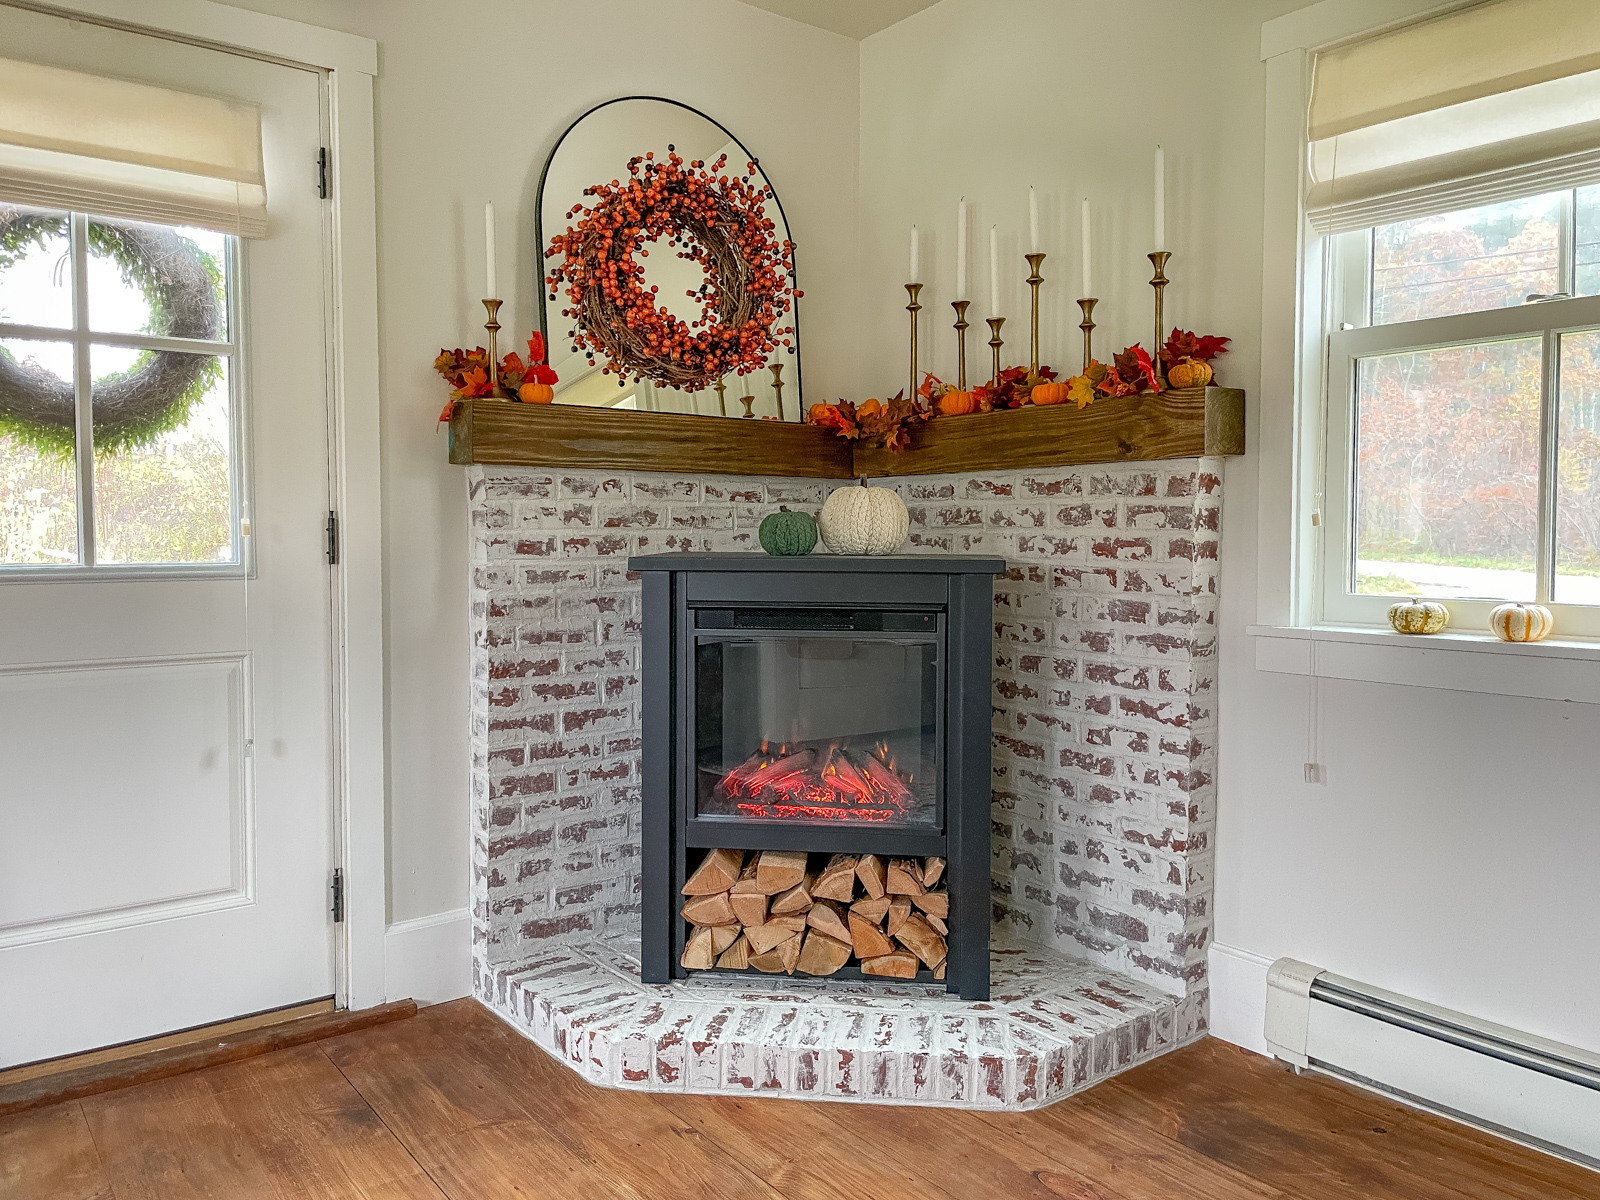
I’m so excited to share our DIY brick hearth we just built in our den along with a bit of our fall decor! Recently we decided to refinish the hardwood floors, and after that I thought it was time to finally get going on our brick hearth. It was a project we talked about for a good 6 months and I decided enough was enough, we were getting it done in time for the holidays!
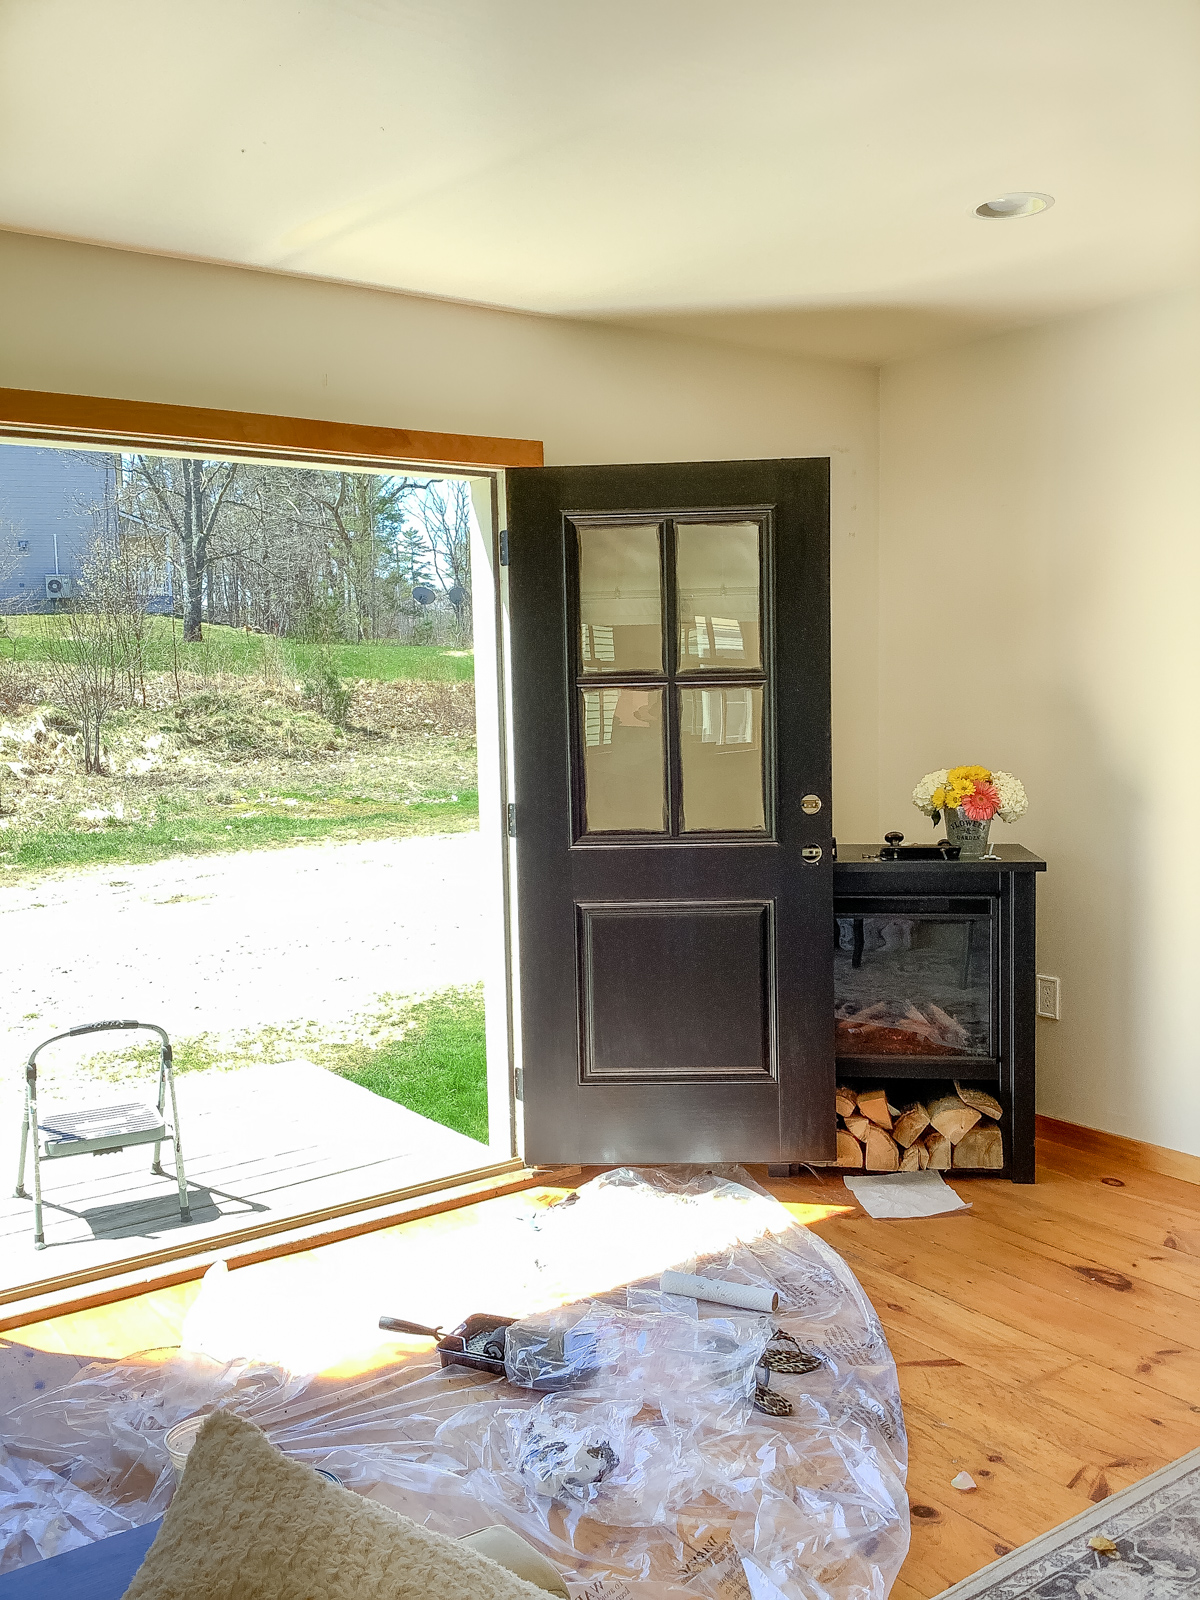
In our den I really wanted a gas fireplace stove but that meant adding an ugly vent to the front of the house. I thought about it, but in the end I just couldn’t do it, so we went with an electric fireplace. Because of strict fireplace codes in Maine our only alternatives have been electric ones. I plan on eventually doing a blog review on them but overall we’ve been really happy with them.
The only issue is how sad and lost our electric fireplace stove looked in the corner, and wouldn’t you know it I forgot to take a before photo. I did manage to find a photo from when I was painting the door, so you can get an idea of our electric fireplace stove in its sad little corner.
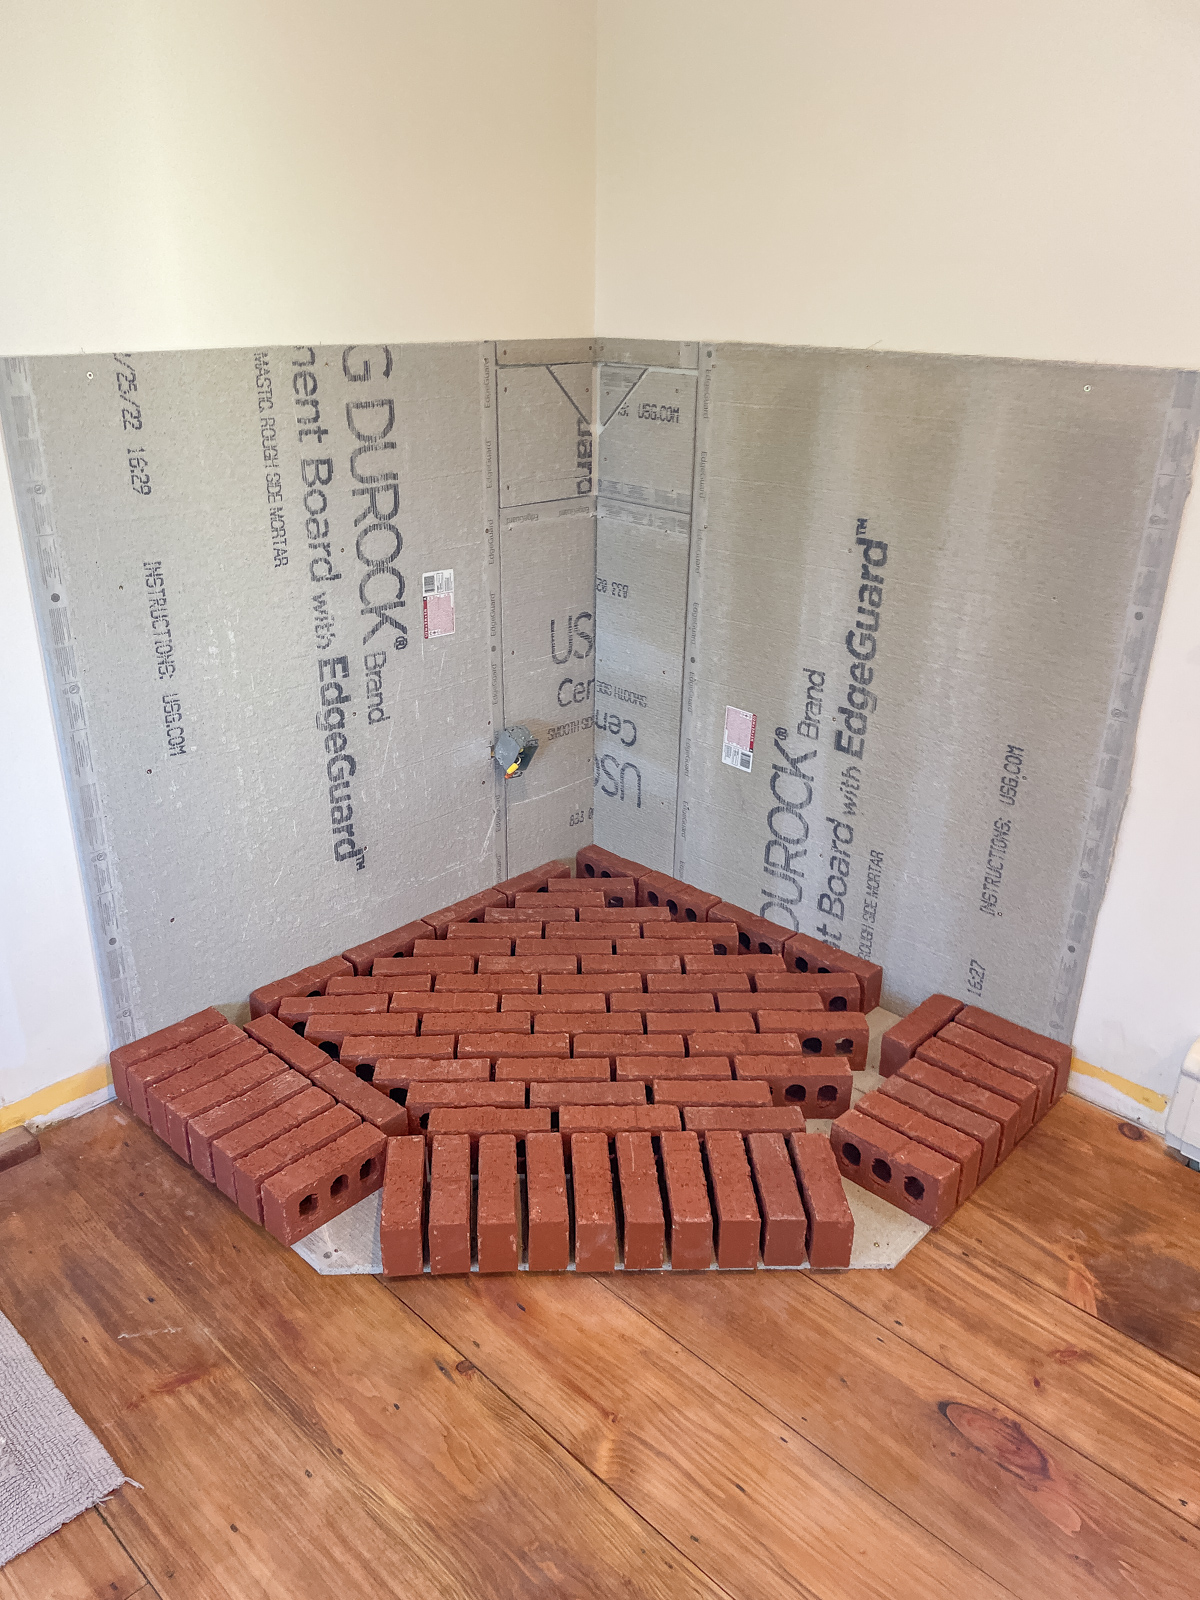
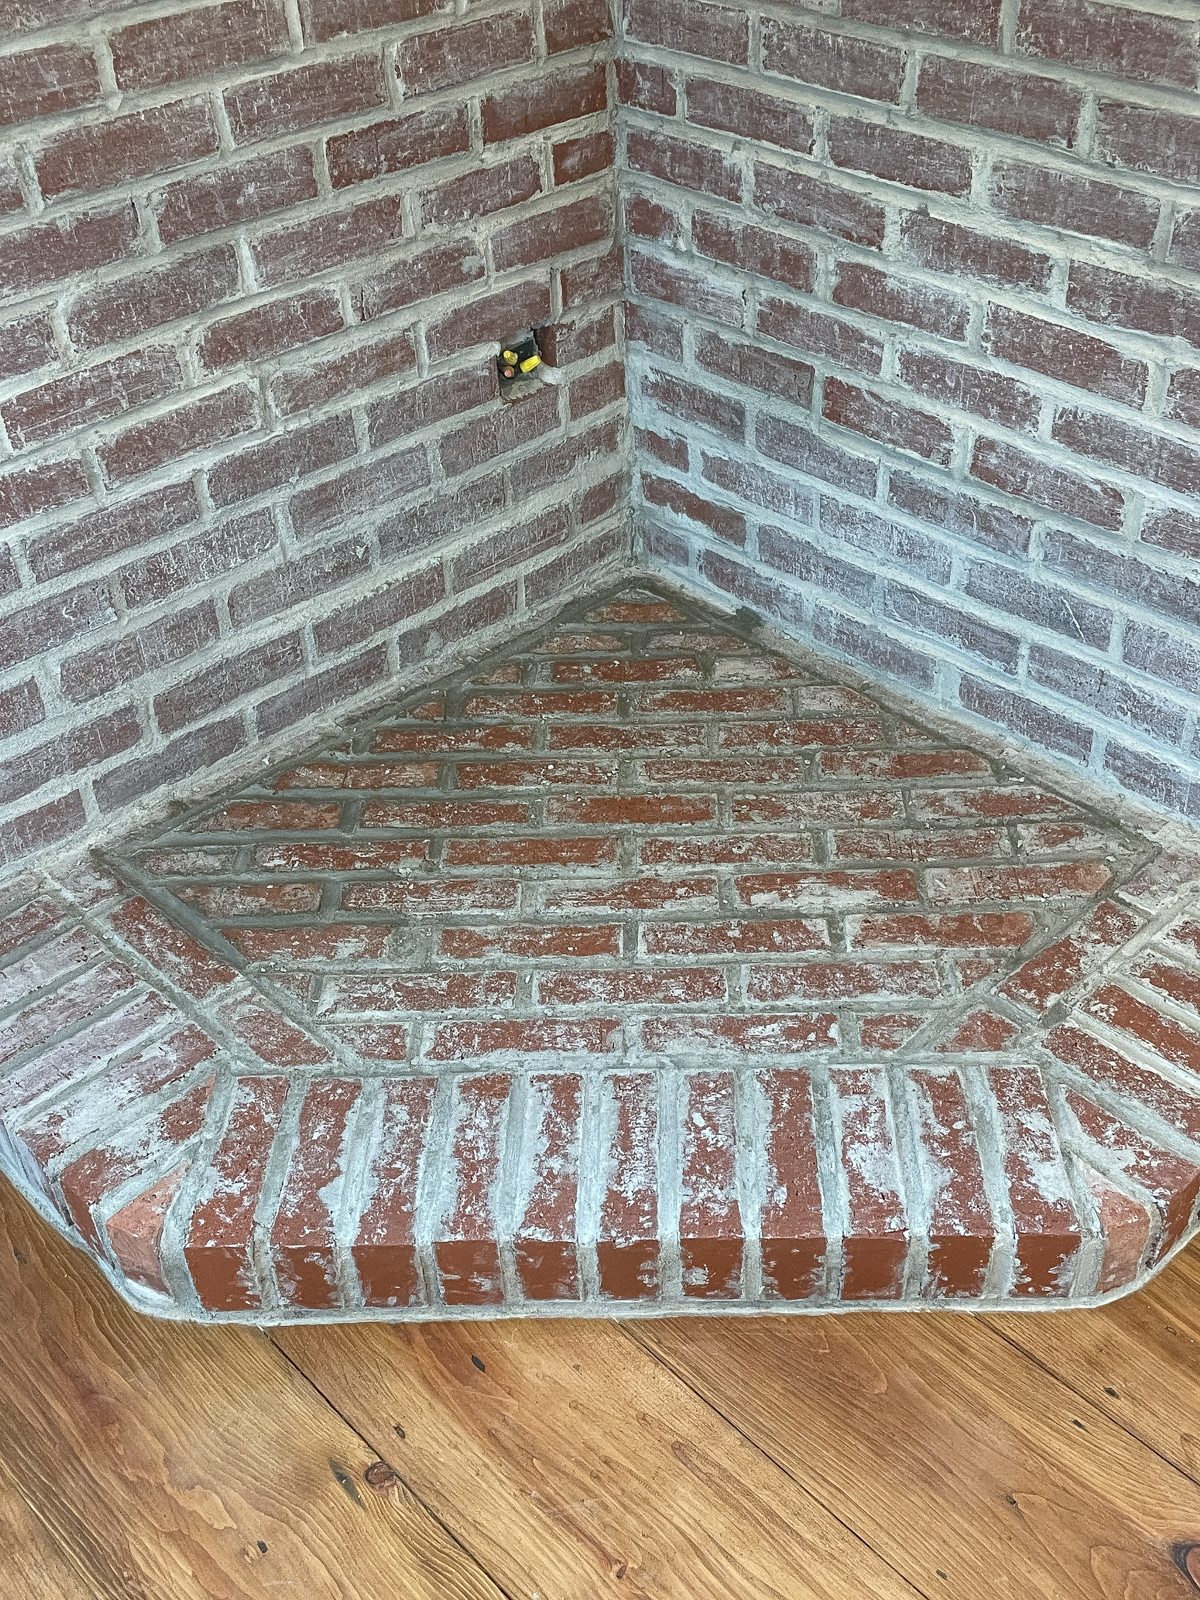
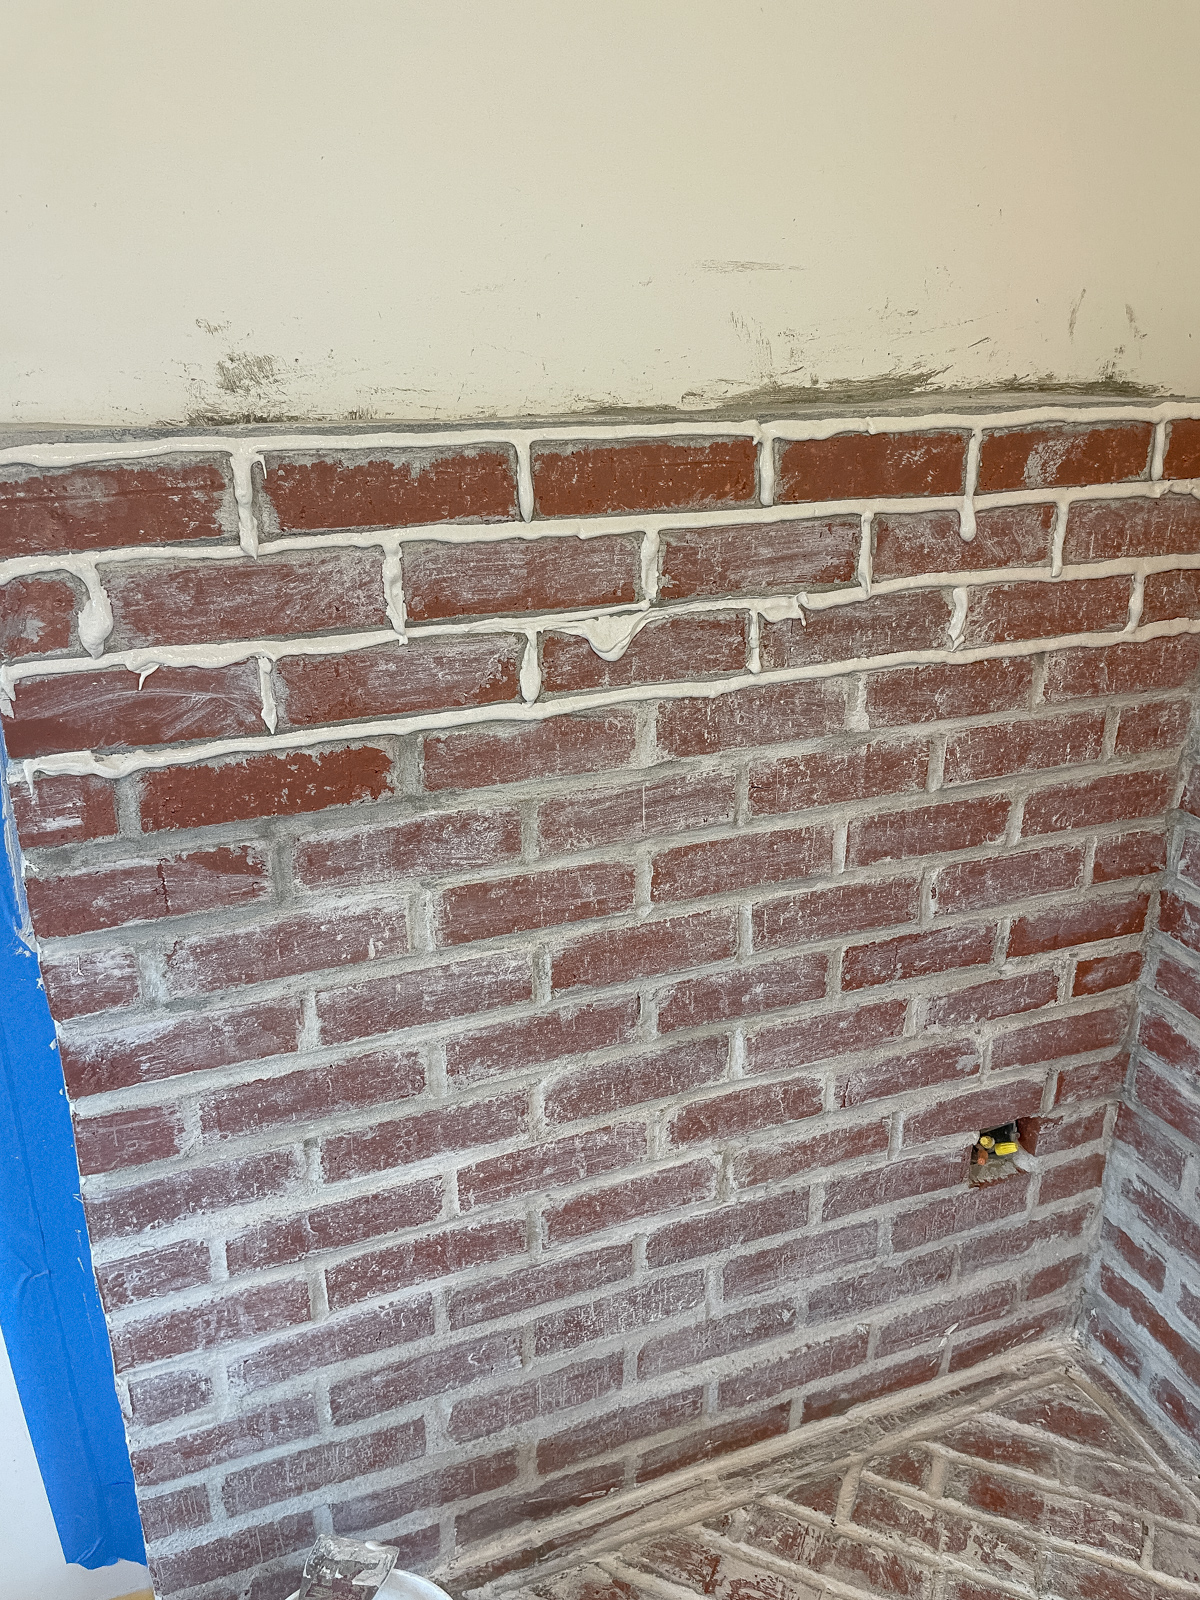
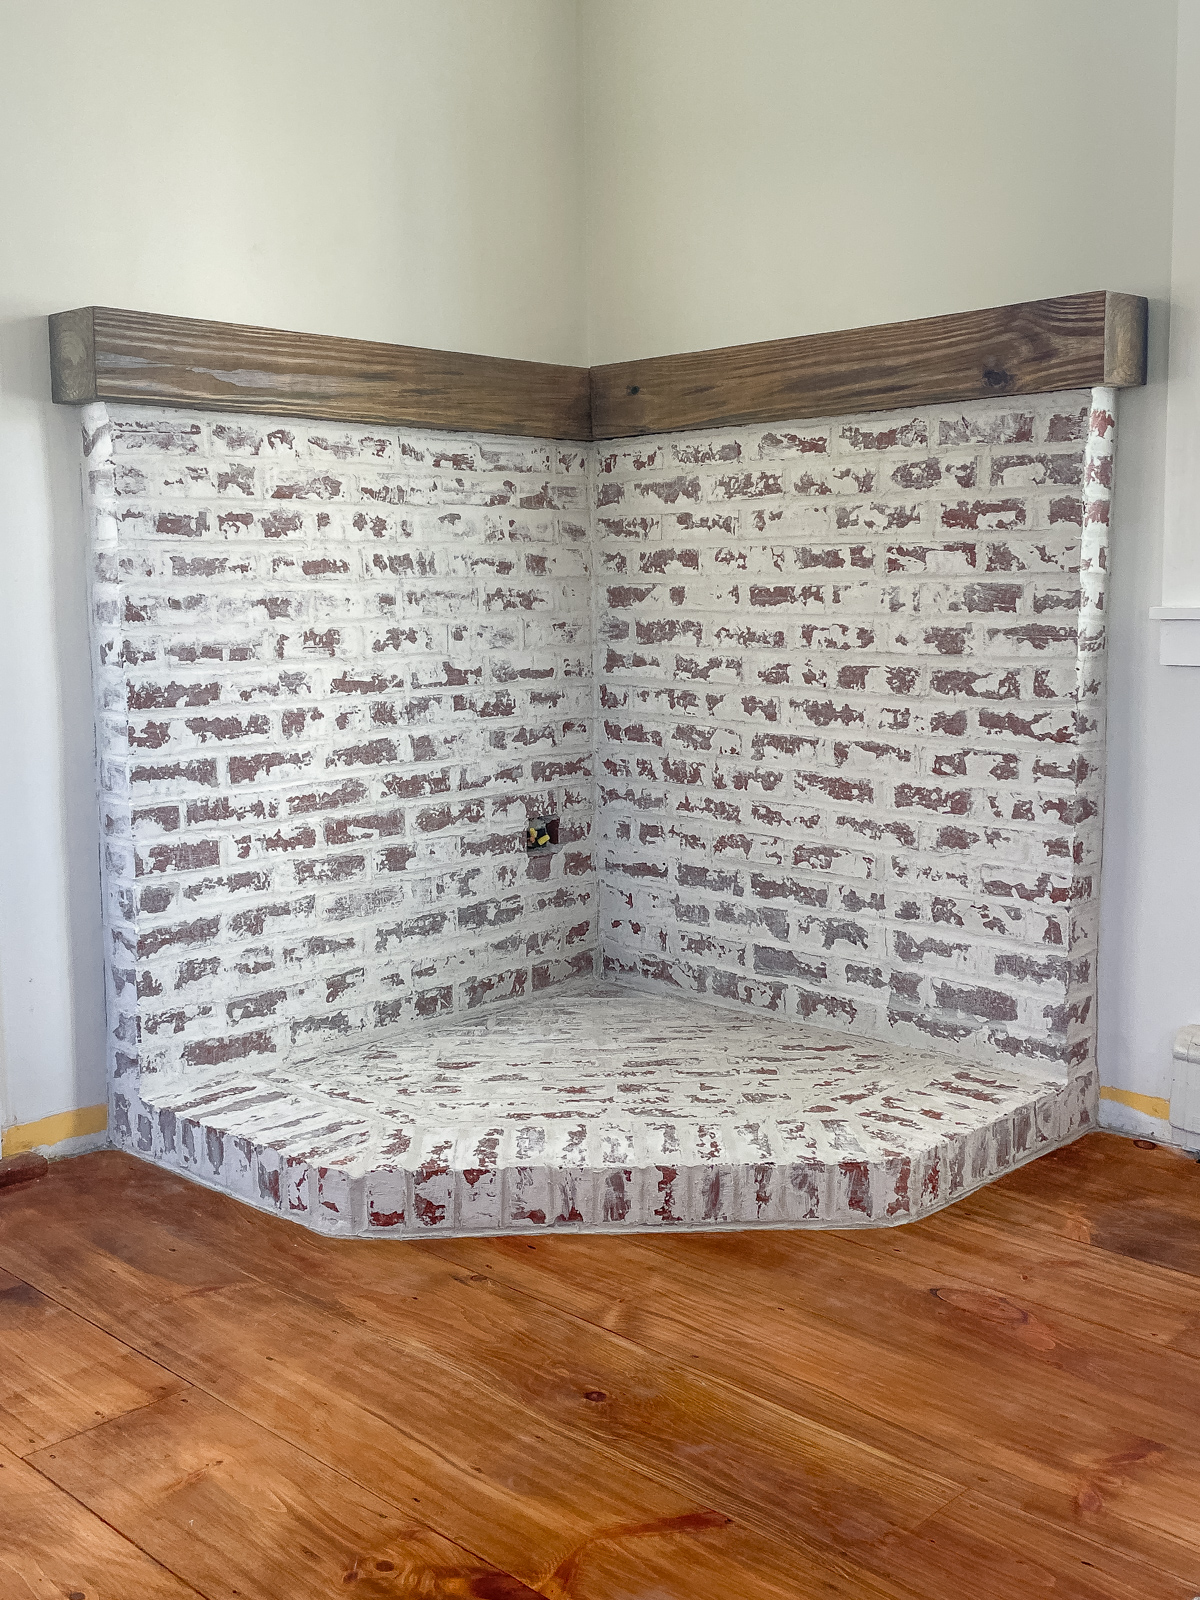
We started by removing the baseboards and installing dura rock on the floor and walls. The hardest part was trying to figure out the footprint and size, but we taped it off a few times and eventually got it right. I’ve always loved German Schmear, and knew I wanted to try it on our brick hearth so I wasn’t too concerned with what kind of brick we used. We used the cheapest we could find at Lowe’s. We played around with the brick pattern a bit, Brian watched a few how-to brick videos on Youtube and then he was off.
We should have done a better job taping off the plastic drop cloth but we managed to get any excess mortar off the floor in the end.
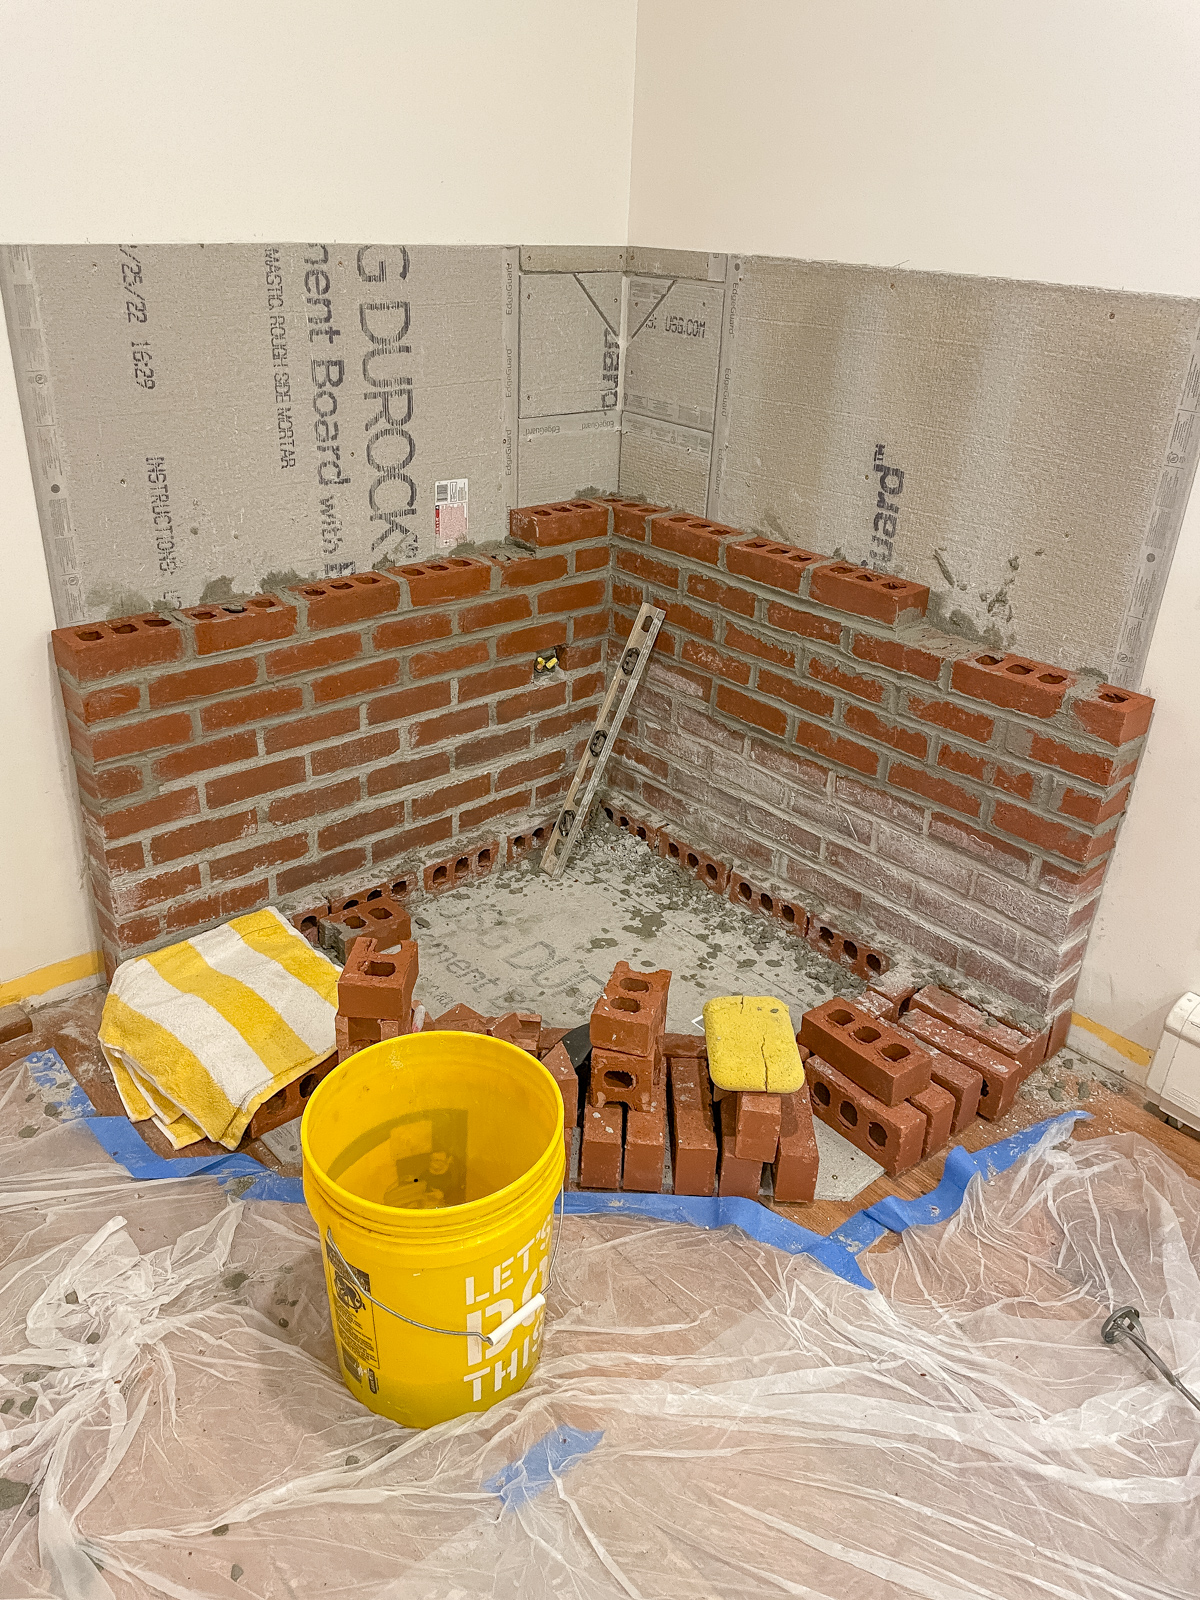
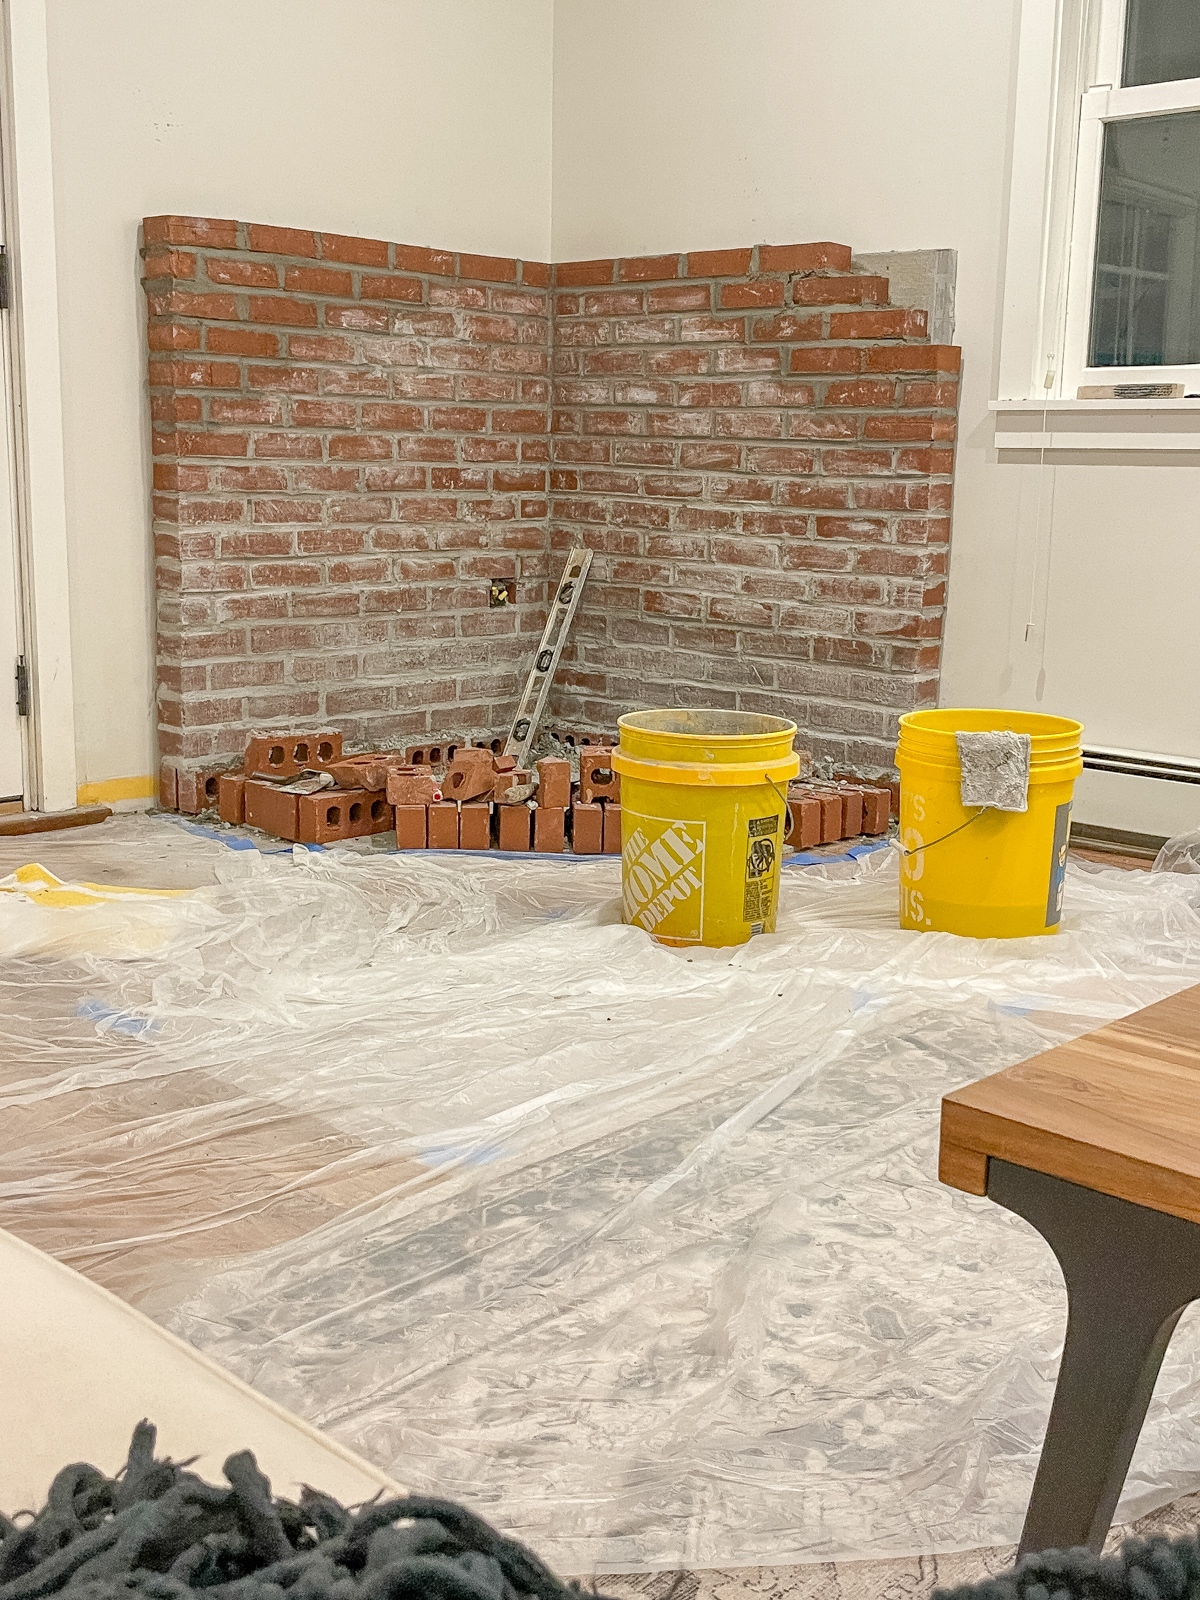
Bricking the hearth was definitely messy and it took longer than expected. One thing we didn’t do was wipe the excess mortar off enough before it dried. Once it dries you can try scraping it off some but it’s pretty much stuck on. I really wasn’t worried about this because of the German Schmear. If we ever brick something in the future we’ll get it 100% clean!
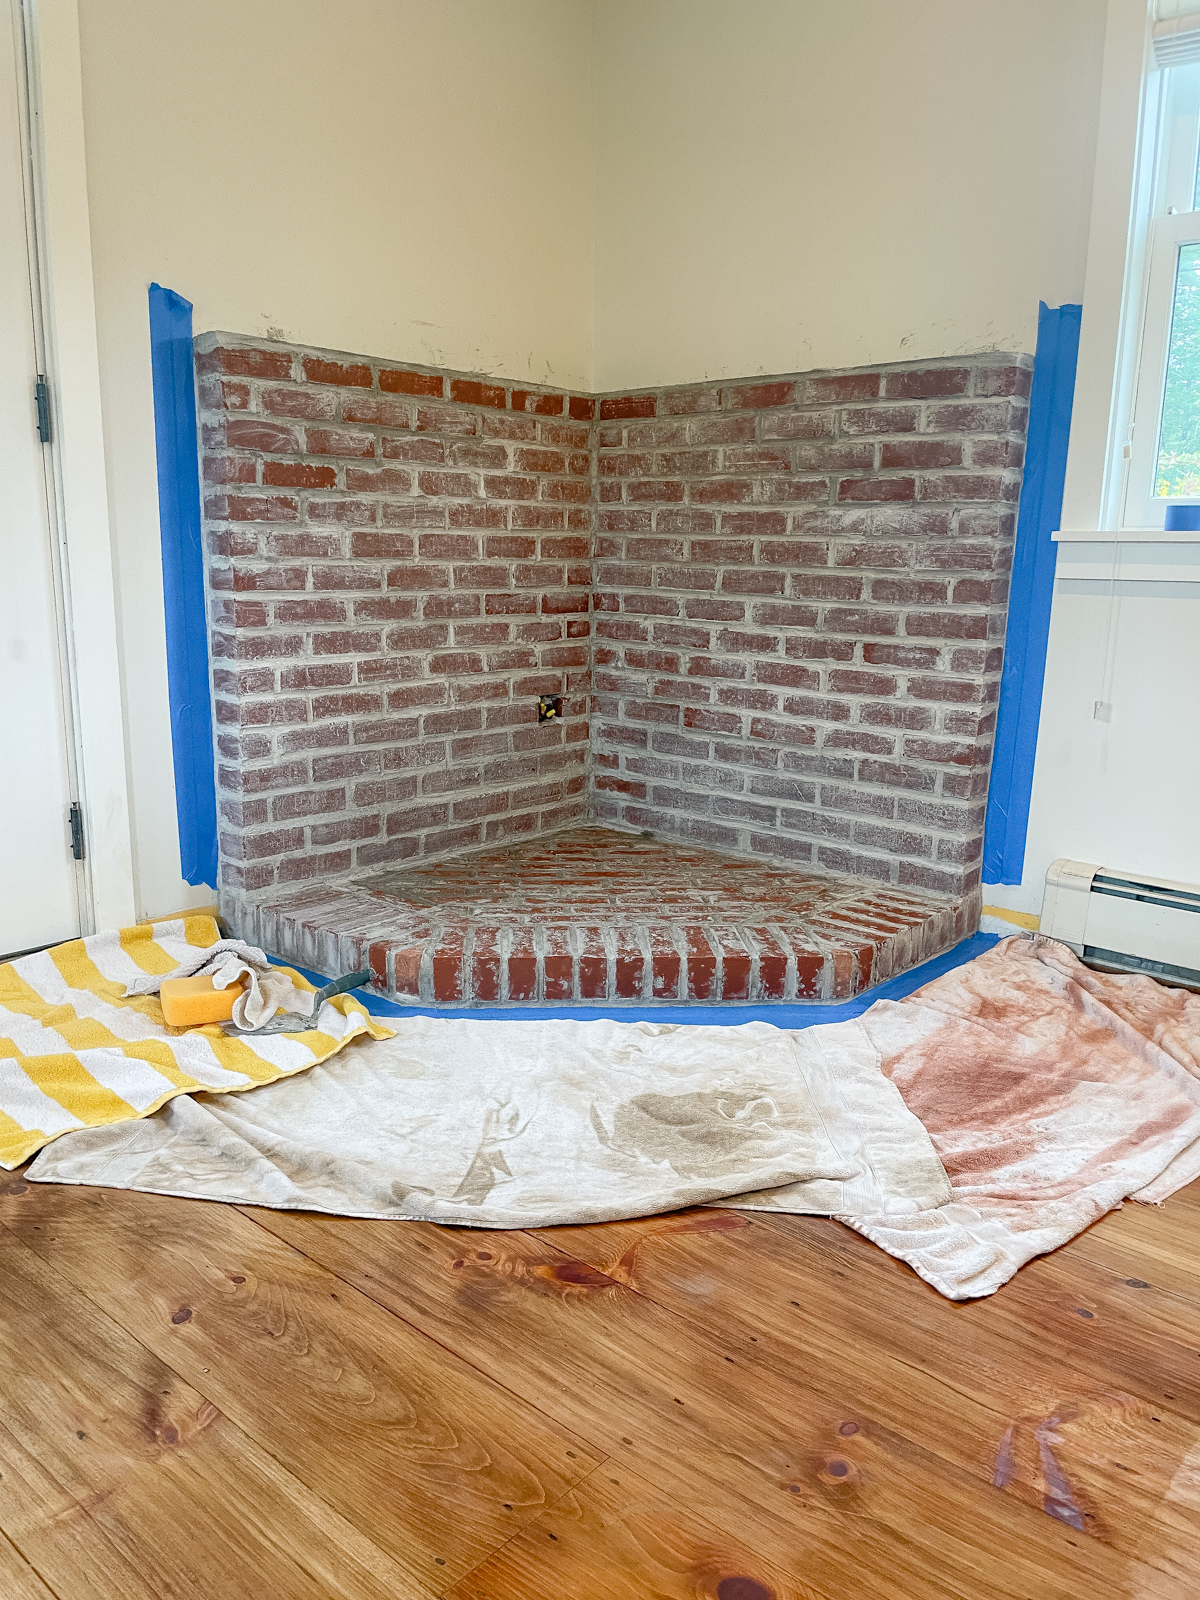
Brian thought it looked good as it was, it obviously had that bit of faux finish look I was after, but it was uneven and I wanted my schmear!
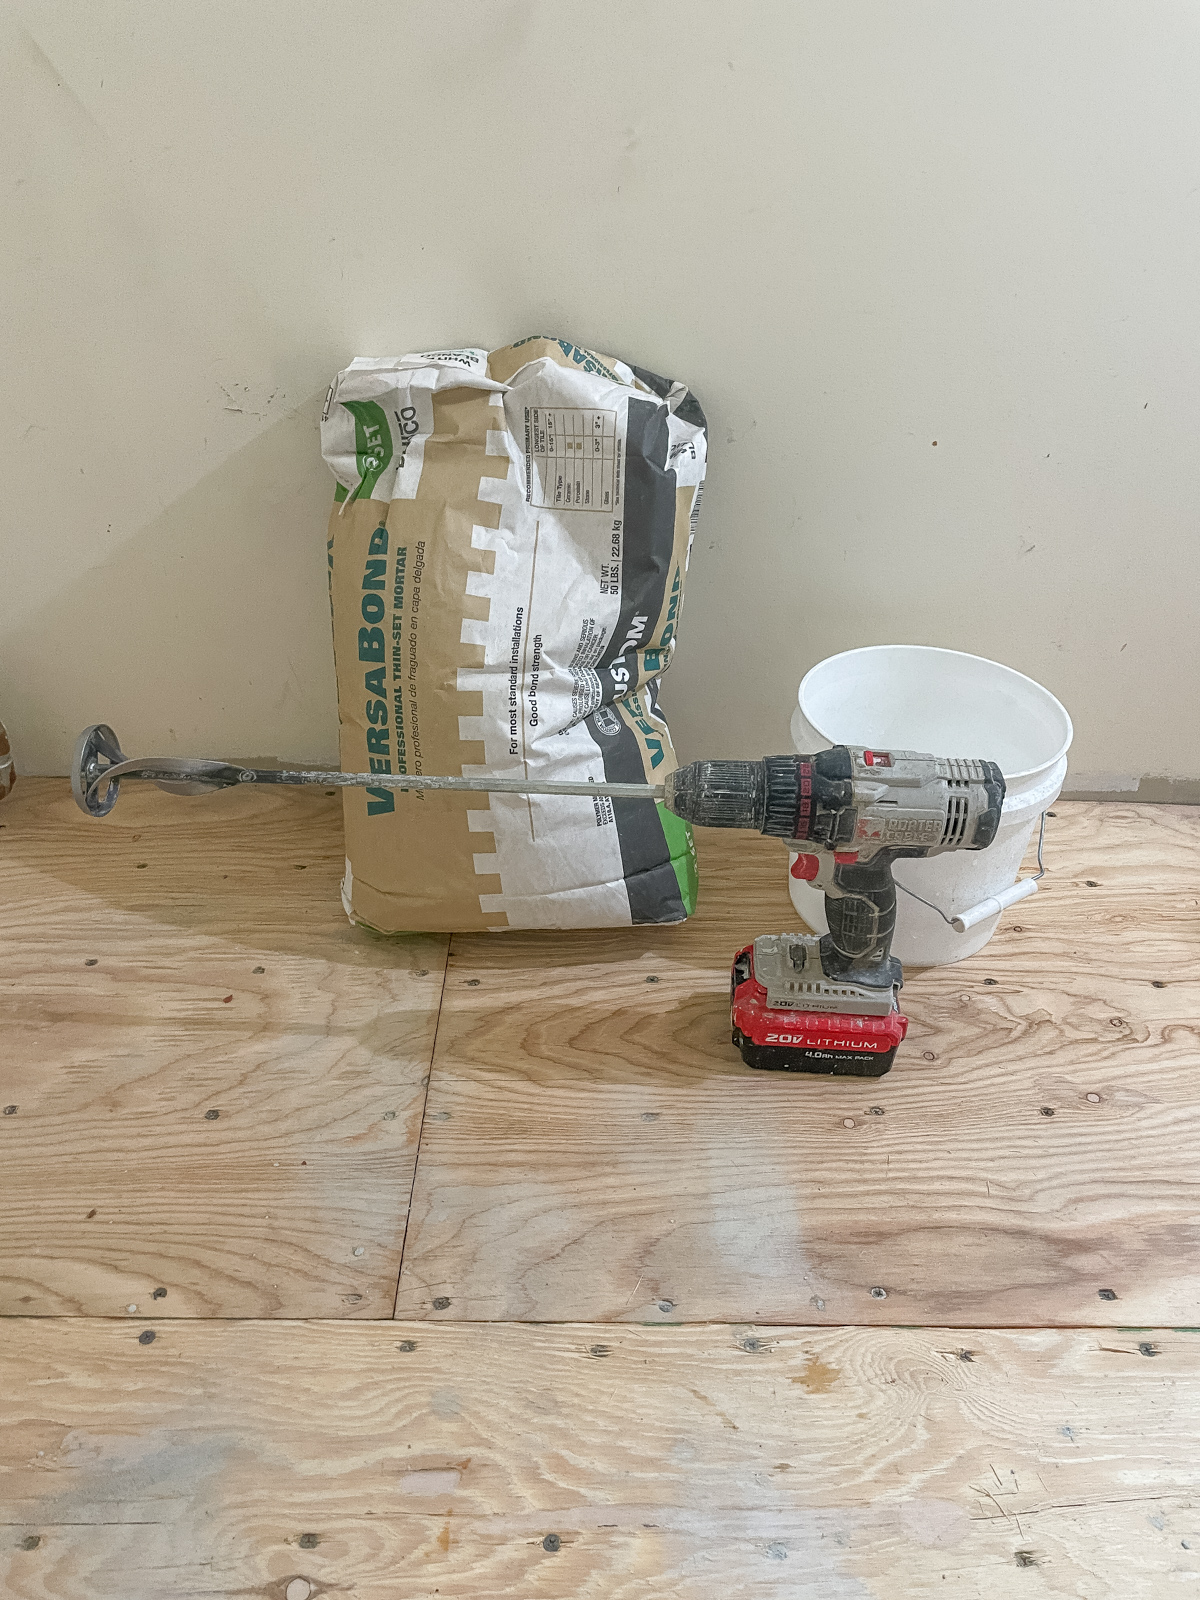
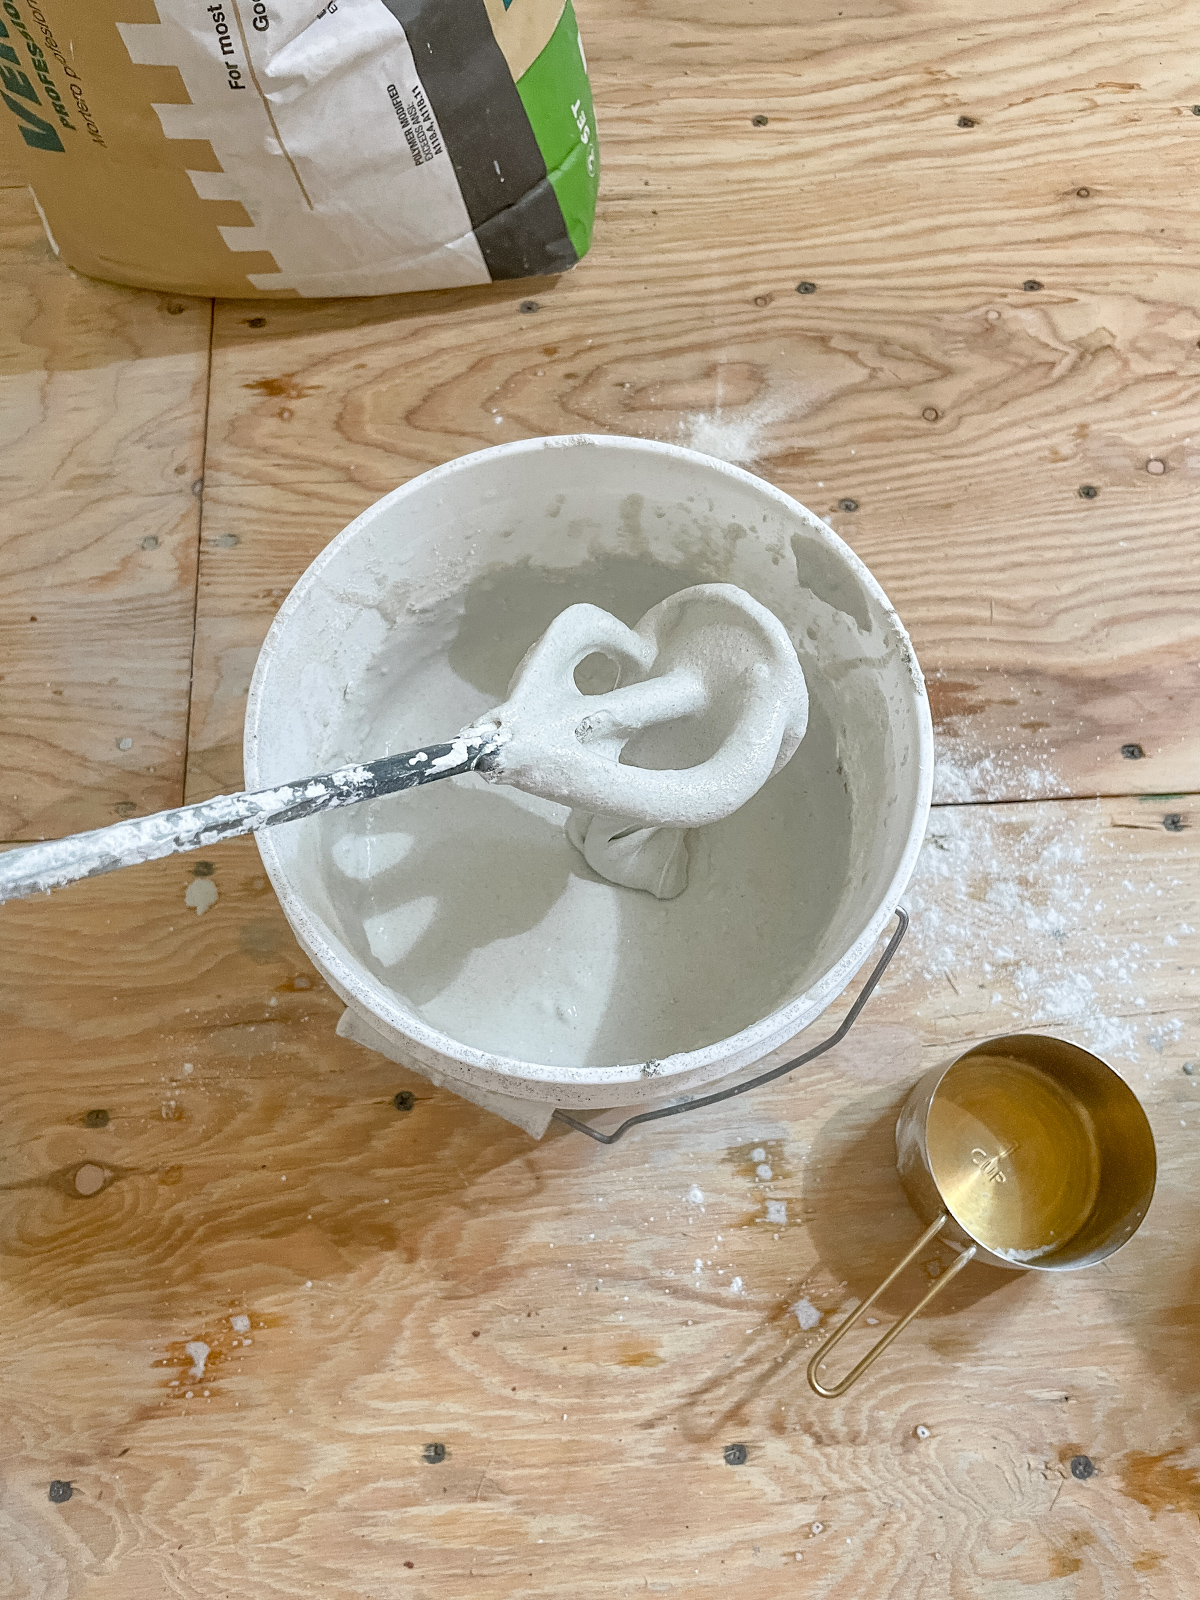
For the German Schmear I used white thinset mortar, a bucket, water, and a mixing arm attached to the drill. You can mix the mortar by hand but it will take you a while, and the mixing arm was pretty cheap. I mixed my mortar to about a peanut butter consistency and then added it to a mortar bag. A mortar bag looks like a giant frosting bag and it was really helpful for applying the mortar in between the grooves of the brick.
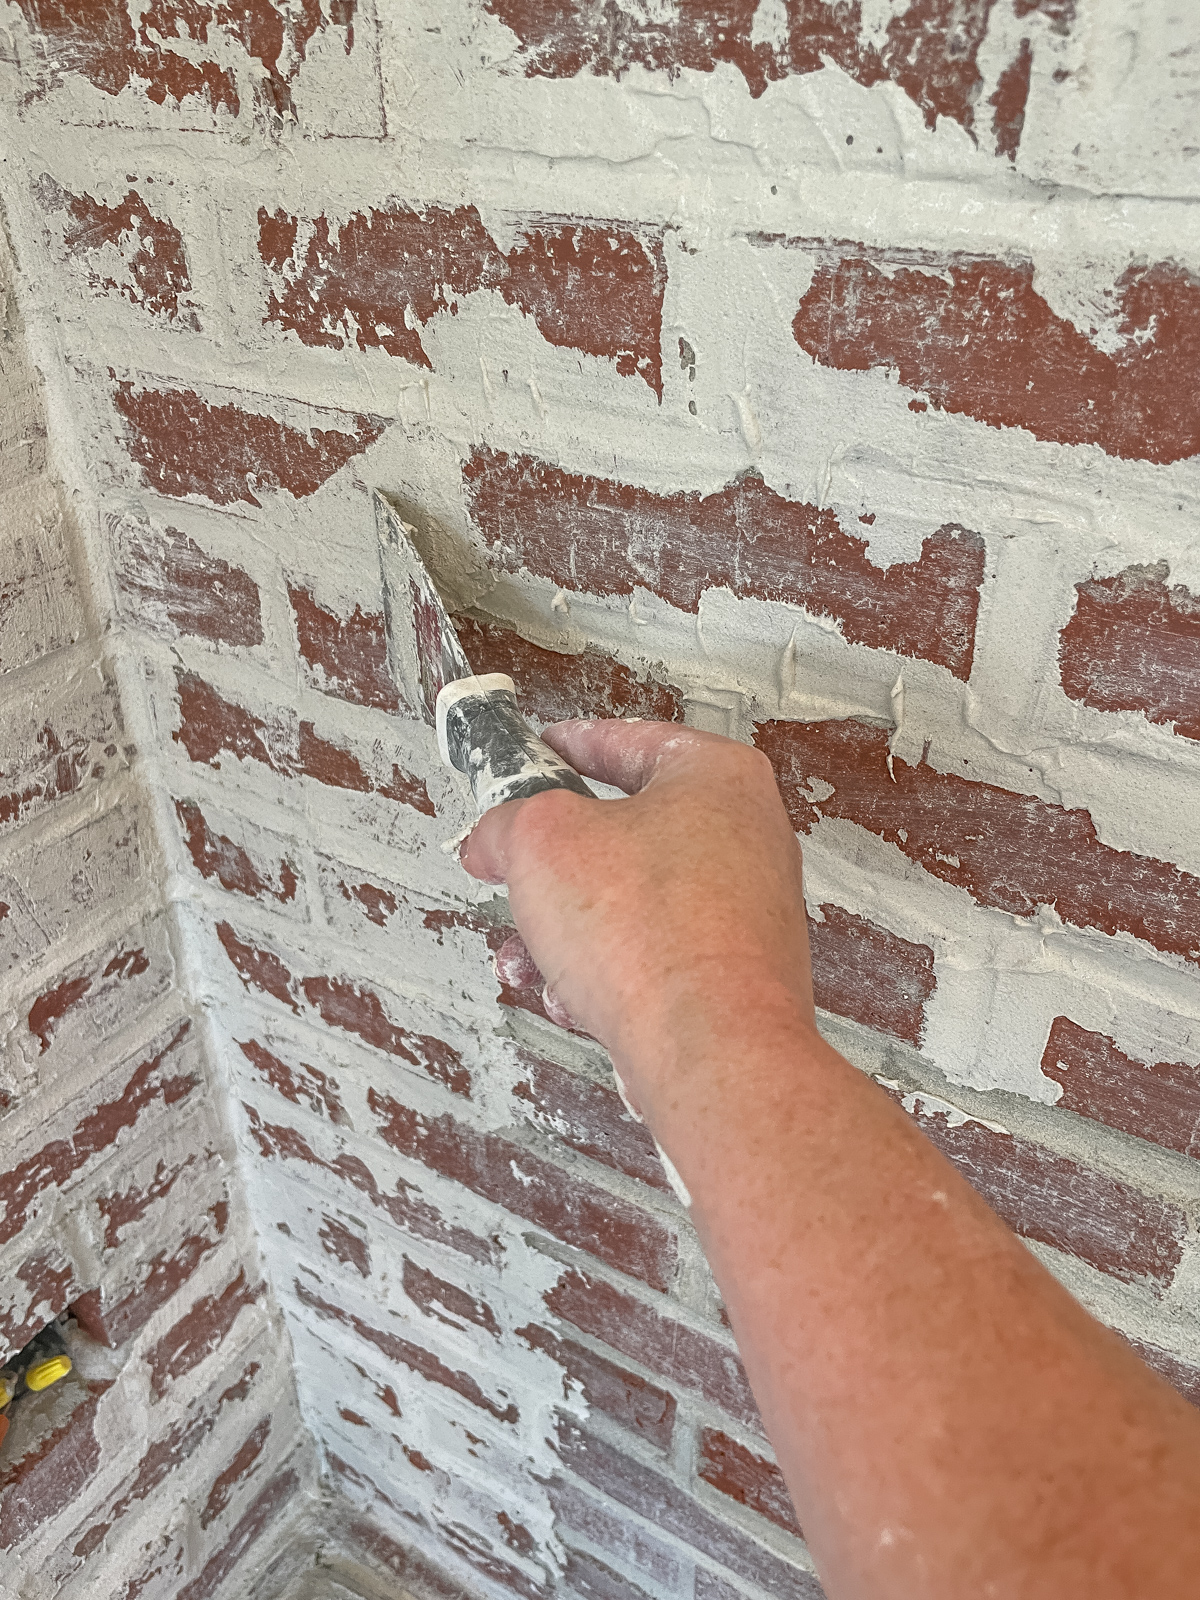
I watched a lot of German Schmear videos on Youtube, and many of them had different methods for applying it. Some looked like paint which wasn’t the look I was after. I wanted more texture. I started in the back corner of the brick and wasn’t happy with the look at all, that was when I was using a paint brush and wet sponge.
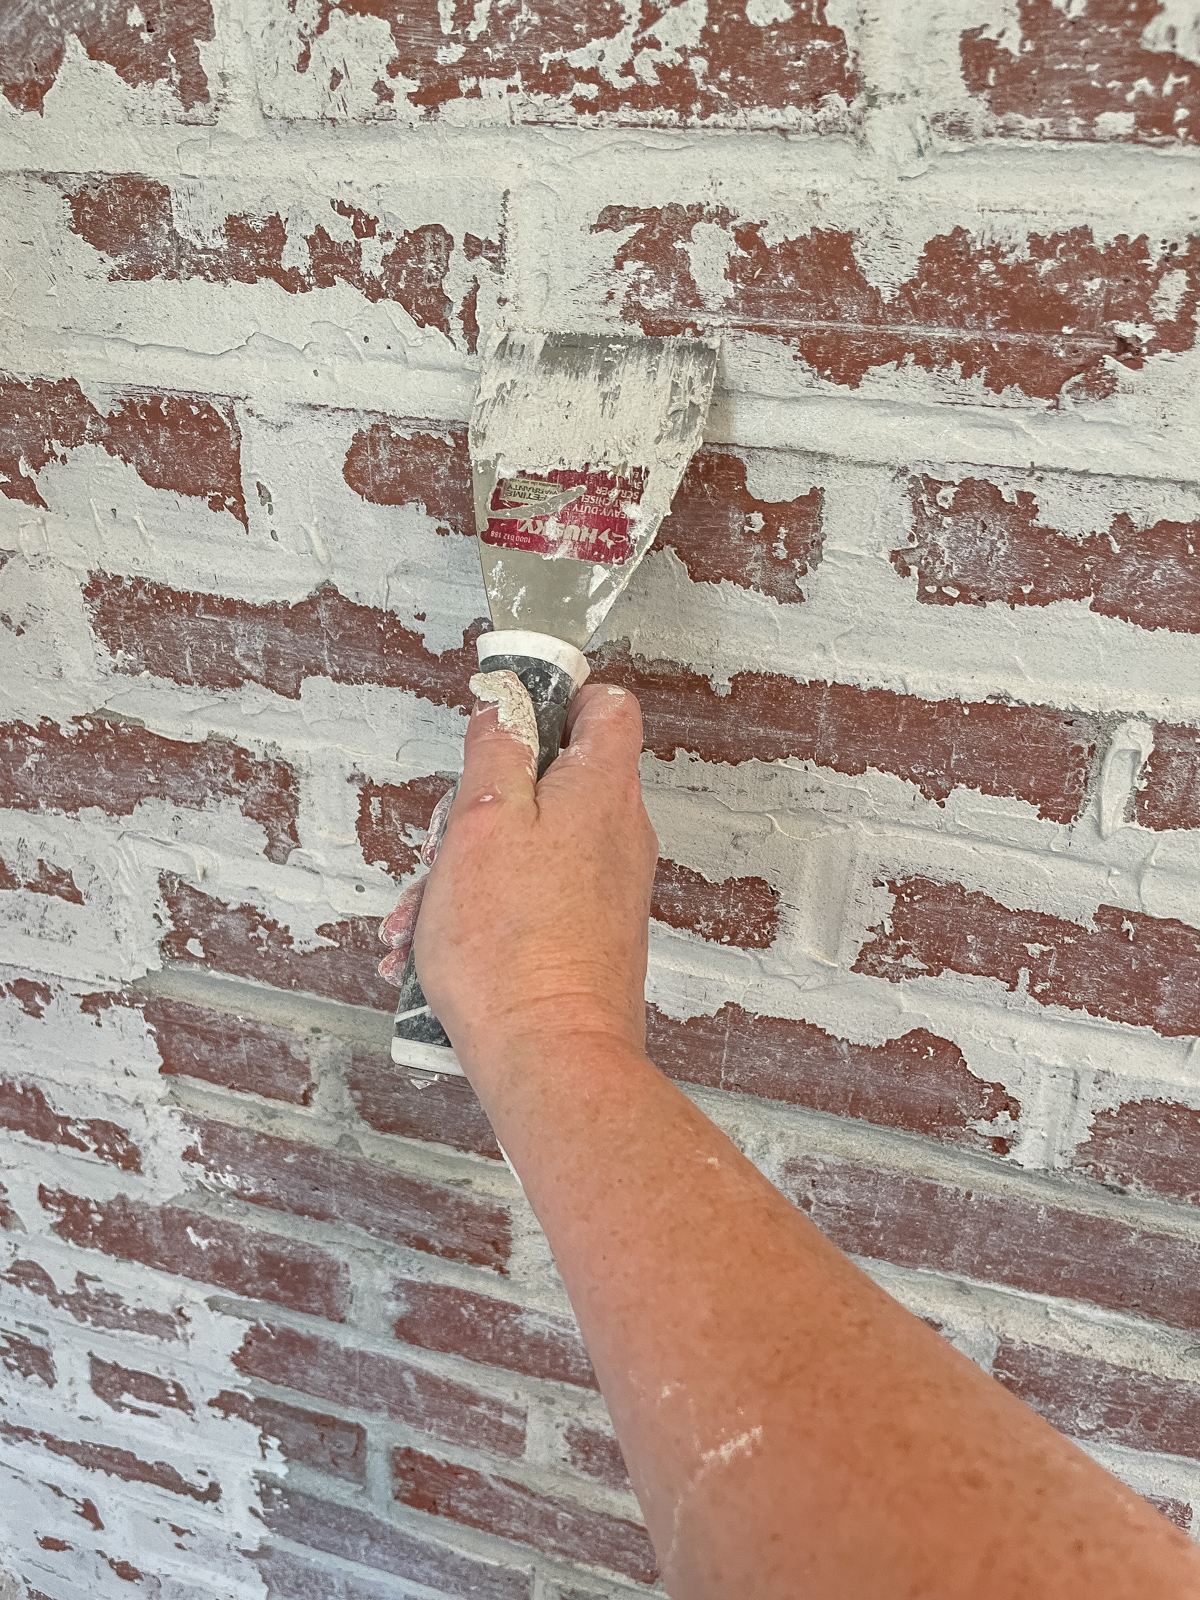
Then a found a metal scraper, experimented (again in spot that would be hidden) and finally found my technique. If you’re doing this project you’ll definitely want to play around and find the exact look you like.
Here’s exactly what I did. Using the mortar bag I filled in around the brick. Then using a metal scrapper I pushed the mortar up and down to force it into the grooves between the brick. Then I took the scraper and scrapped across and had a bucket nearby to offload the excess mortar. I touched up a few bricks here and there using the same motions if they looked like they needed more white, and if it was too white I used an old dry rag to dab it off. I found the wet sponge smeared the mortar around creating a hazy look which didn’t appeal to me.
And that was it, just repeat, repeat, repeat.

SUPPLIES I USED
Painters tape, drop clothes, or old towels to protect the walls & floor
White thinset mortar
Bucket
Drill with mixing arm attachment
Trowel or scraper (I liked the scraper best)
Old rags or a sponge to wipe up messes and touch up spots
For the wood mantle we used a 6×6 piece of pine. I sanded it and stained it with my favorite The Real Milk Paint Company Dark Half. It’s a blend of dark tung oil thinned out with citrus solvent. I love it and I’ve used it on so many things, our floors, dining room table, and our shelves in the kitchen.
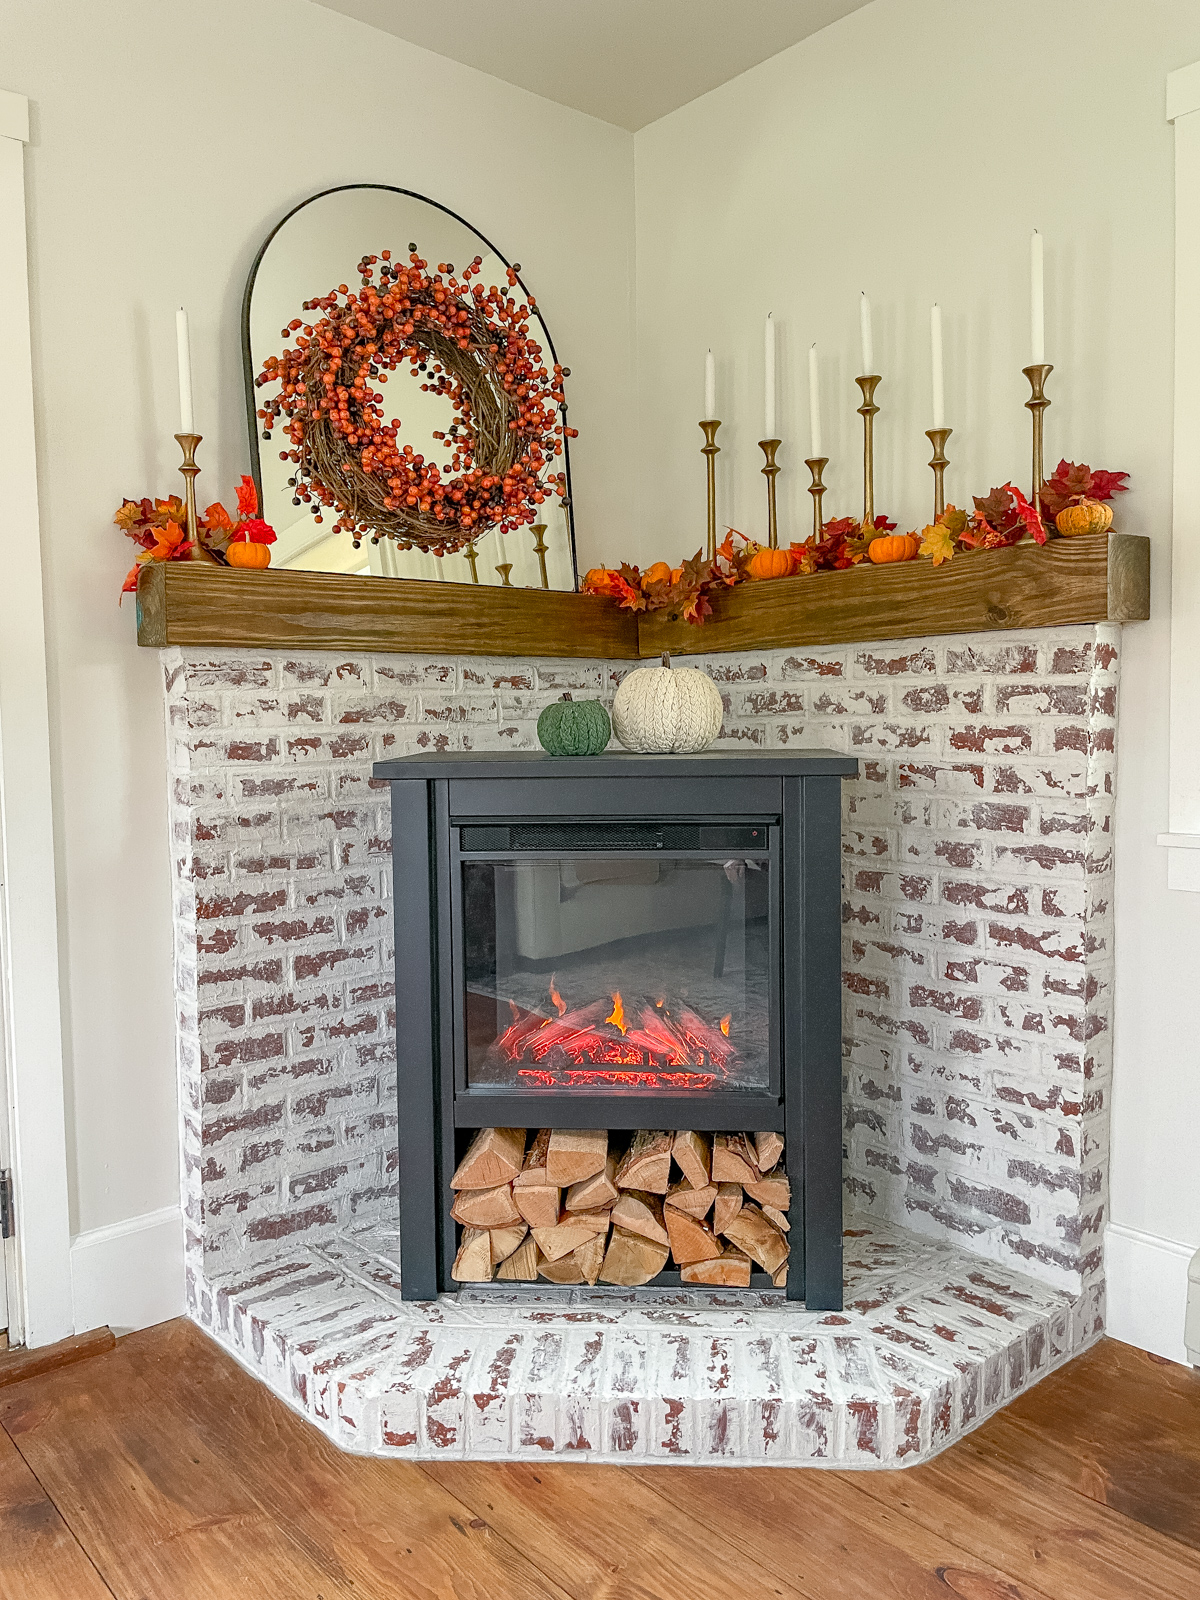
We’re all done, and decorated for fall. Just look at that happy little electric stove fireplace… it has a hearth home! My original plan was to install a faux tube to the ceiling but I decided I like it just the way it is. If you are interested in this fireplace it does come with a faux tube that connects to the wall. It’s a neat look but obviously wouldn’t work with our space.
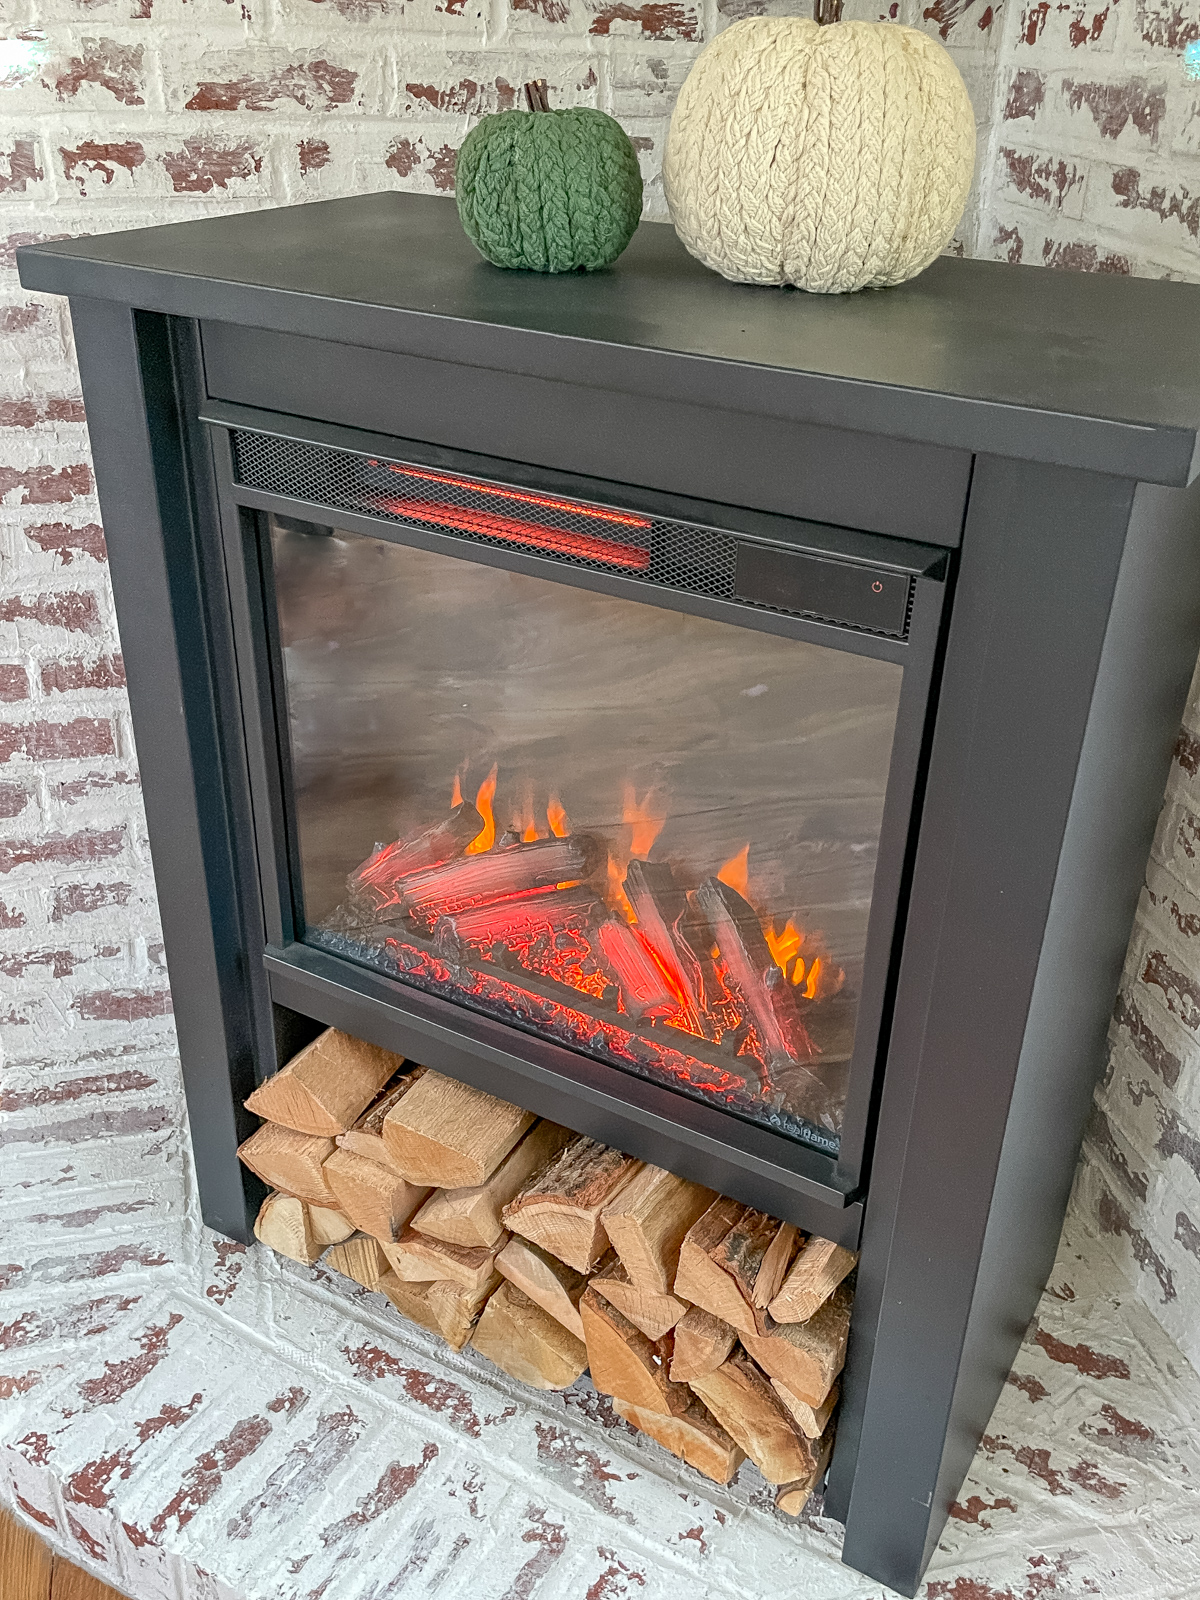
Another thing I love about this fireplace is the storage below to add your own wood, it gives it even more charm! There’s also a remote control with several different flame settings, and also this baby puts out some heat! It’s been a great purchase for us and it’s currently on sale as an early black friday deal!


Do you remember how tall your brick walls were? Our stove is 29 tall and the shield has to be 20 inches above that. Trying to get a visual.
Hey thanks for outlining how you did this? Hoping you’ll answer a few questions—first, is how did you anchor the brick to the walls? And second, did you do anything under the floor to make sure it would hold the weight? Thanks!!
Hi Carrie, sure I’d be happy to answer your questions. We didn’t anchor the brick into the walls because we built ours into a corner. Since there are two perpendicular sides providing support we didn’t feel like any additional support was necessary. If we were building this on a flat wall, though, we could have inserted long screws into the studs and left them protruding out about an inch into the mortar. It wouldn’t take many since the purpose isn’t to hold up the weight of bricks, but rather to bust keep them upright. The weight of the bricks is supported by the floor. Regarding adding support under the floor, we didn’t feel like it was necessary to do that either since the majority of the wight of the bricks is right up against the wall where the foundation support is located. If we were to build a heavy structure out in the middle of the room then it would make more sense to add support under the floor. Thanks for reading!