
We’ve been on a major DIY furniture kick lately, first our dining room table, a bench for our entry way, and now our DIY coffee table that I love love love!
When we first moved in I broke one of my big rules when it comes to designing and decorating a room, and that’s go slow. Designing a room can be very overwhelming, especially when starting from scratch like I was. So it’s important to go slowly, live with the space, shop around, and get ideas so you don’t make any mistakes.
But did I take my own advice? No.
When we sold our last house the new owners basically bought all our furniture, down to the mattresses. When we moved in we had nothing, just a U-Haul truck full of tools, dishes, clothes and other miscellaneous items. So I got online in a panic and started ordering furniture I liked for various rooms. That’s how I ended up with this gorgeous Crate and Barrel coffee table.
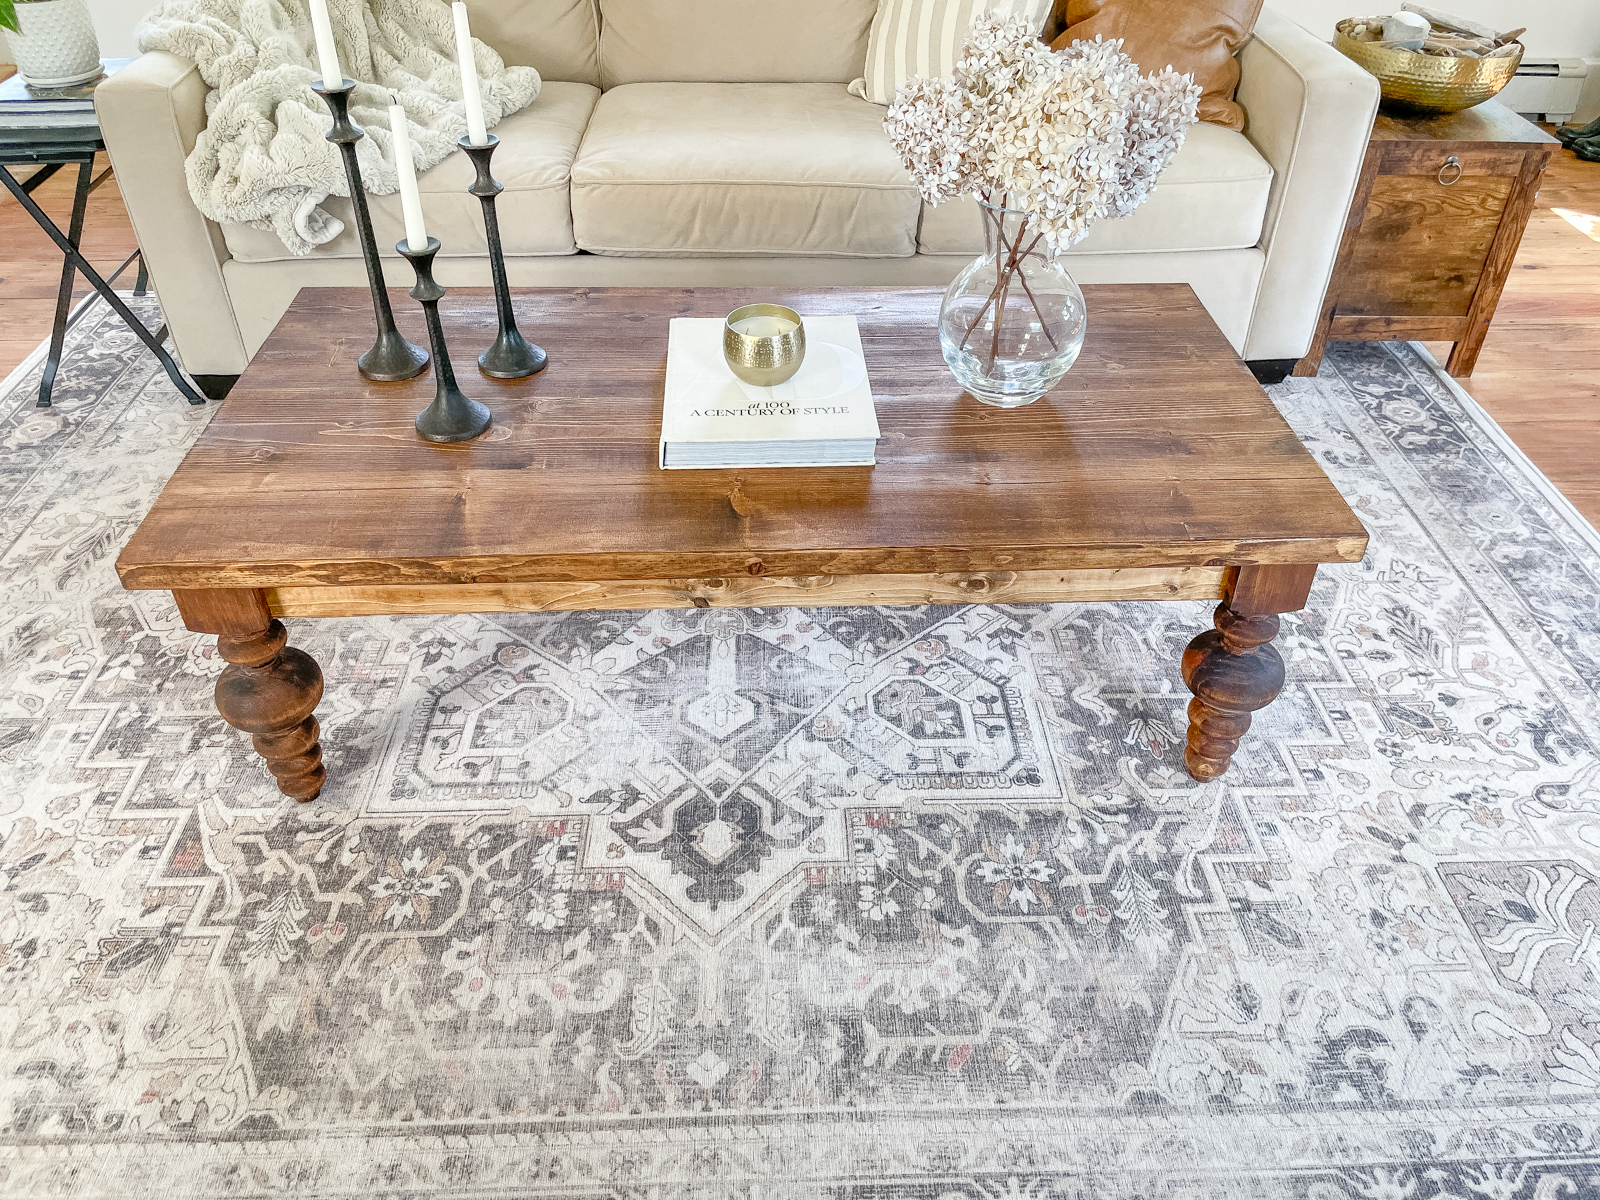
I’m not sure why I chose this coffee table, we live in a 1900 Colonial Farmhouse in Maine after all. I loved it at the time, lived with it for about a year, and decided it was a wrong choice for our living room. I listed it on Craigslist and it instantly sold. If you are interested in this coffee table it’s a good one, beautiful, heavy, and sturdy.
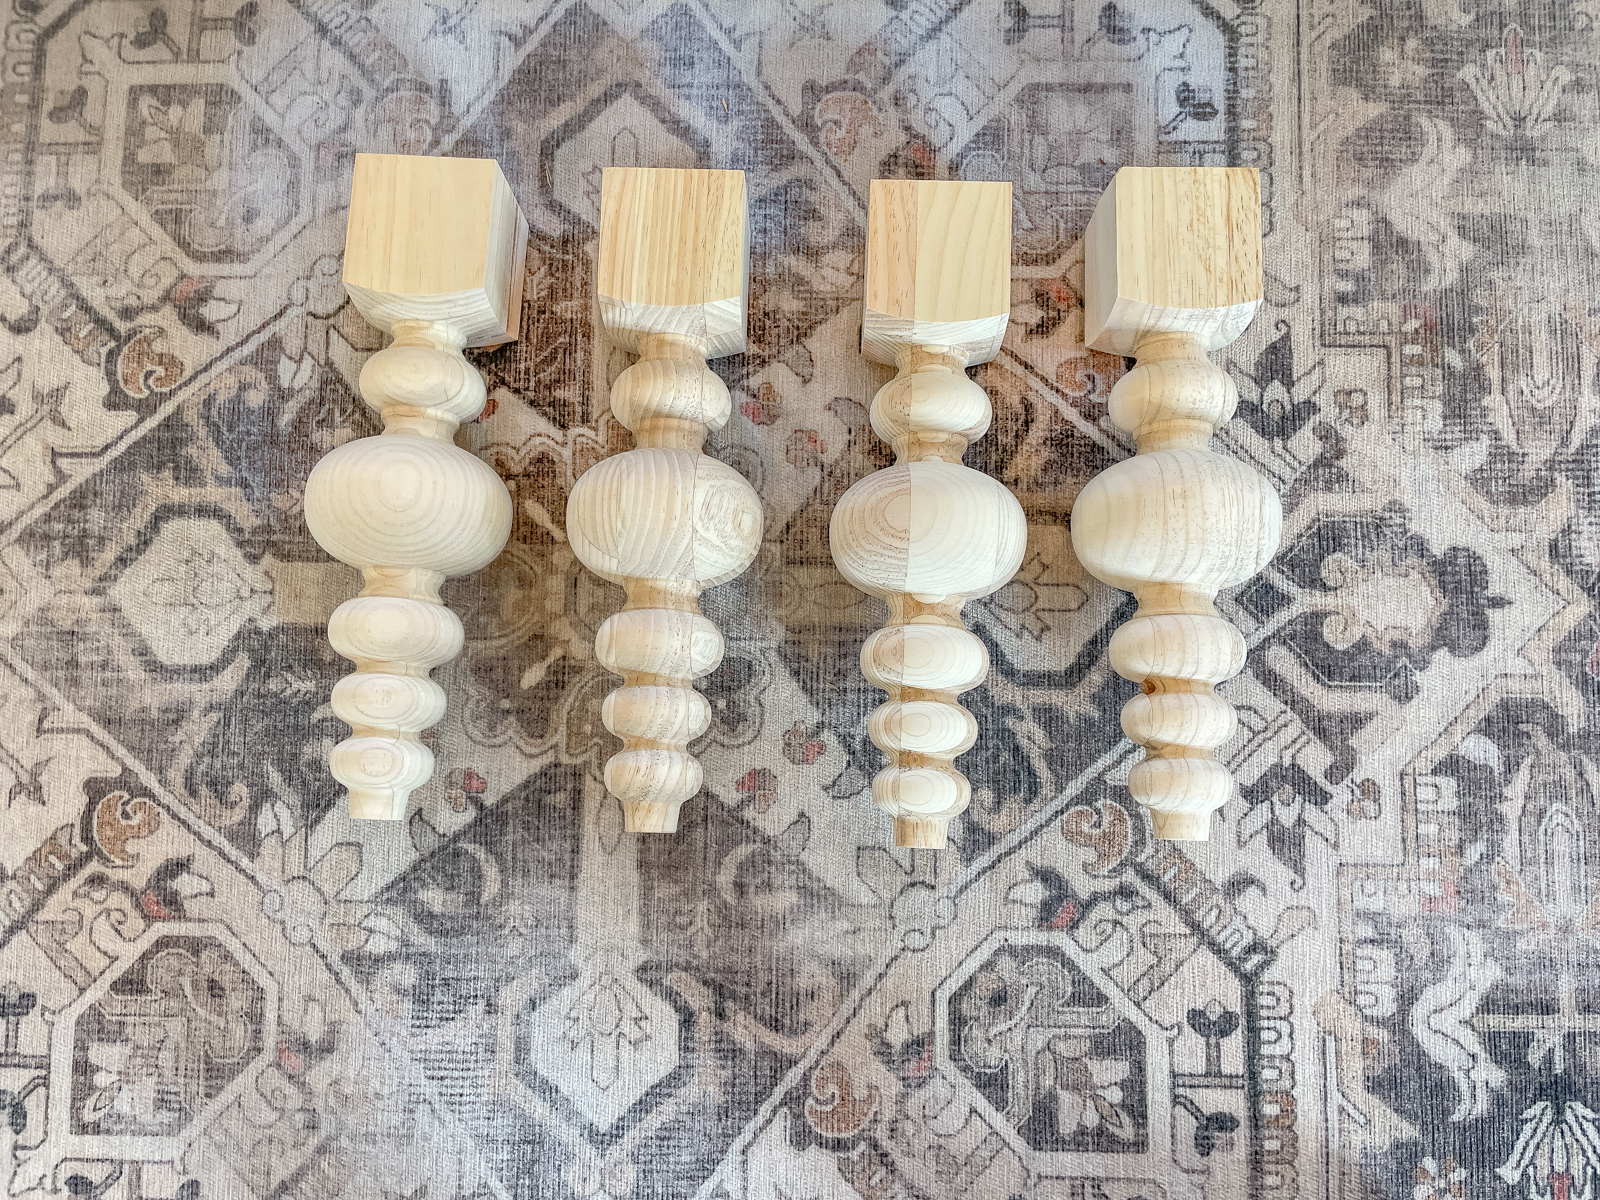
Ok, now that I’ve given you the back story, I was browsing Etsy one day when I saw these gorgeous pine coffee table legs and an idea was born. We successfully built our dining room table, and when I say “we” I mean my husband. I did sand it and stain it though. We never took photos so our table building adventure never made it to the blog.
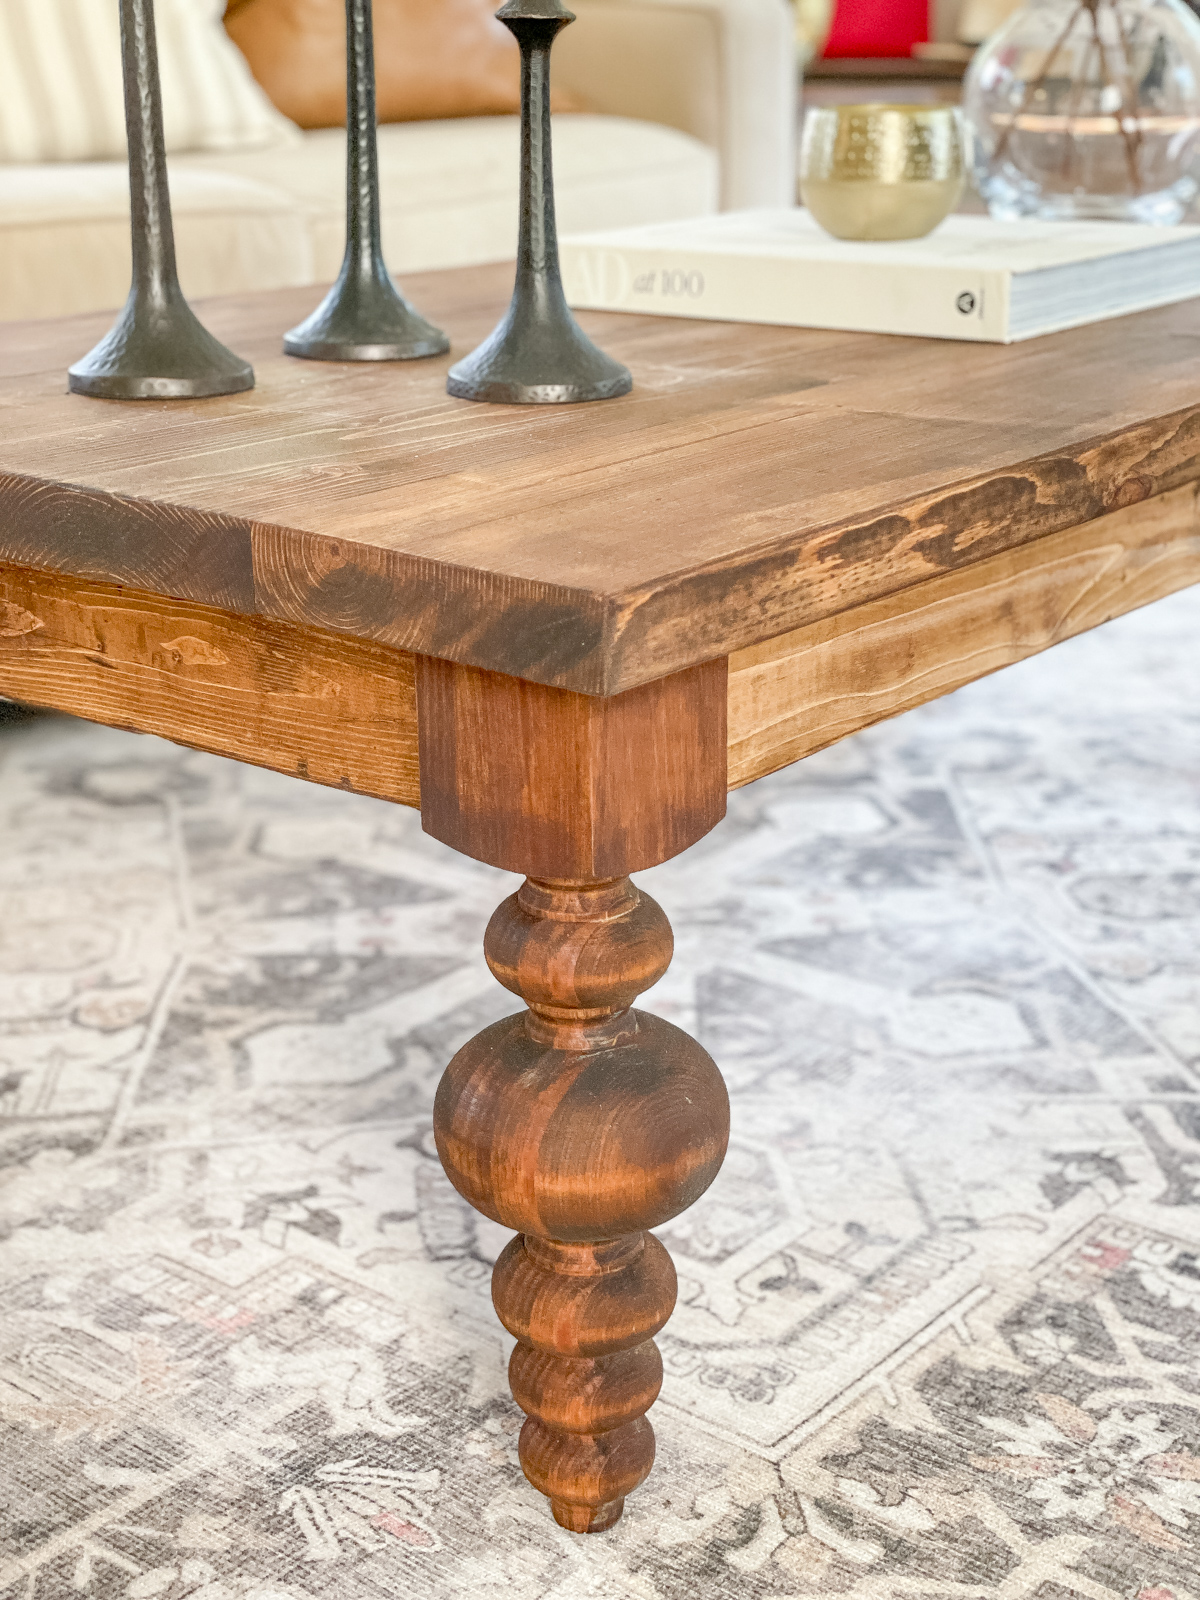
For this DIY coffee table we used the same technique as our dining room table. Once you have all your tools and materials it can be built in an afternoon -minus sanding and staining. To stain the coffee table I used Dark Half from The Real Milk Paint Co. It’s a blend of dark tung oil and citrus solvent that dries to a mat finish and is food safe. It’s the same stain we used on our kitchen floors and I love it.
TOOLS NEEDED
- Table saw
- Miter saw
- Drill
- Pocket Hole Jig
- 2 inch and 2 1/2 inch screws
- Sander and sandpaper (we used an orbital)
MATERIALS NEEDED
- Coffee table legs (we used these)
- 2x4x8 pine boards
- 2x10x8 pine boards
- Stain of choice (we used this one)
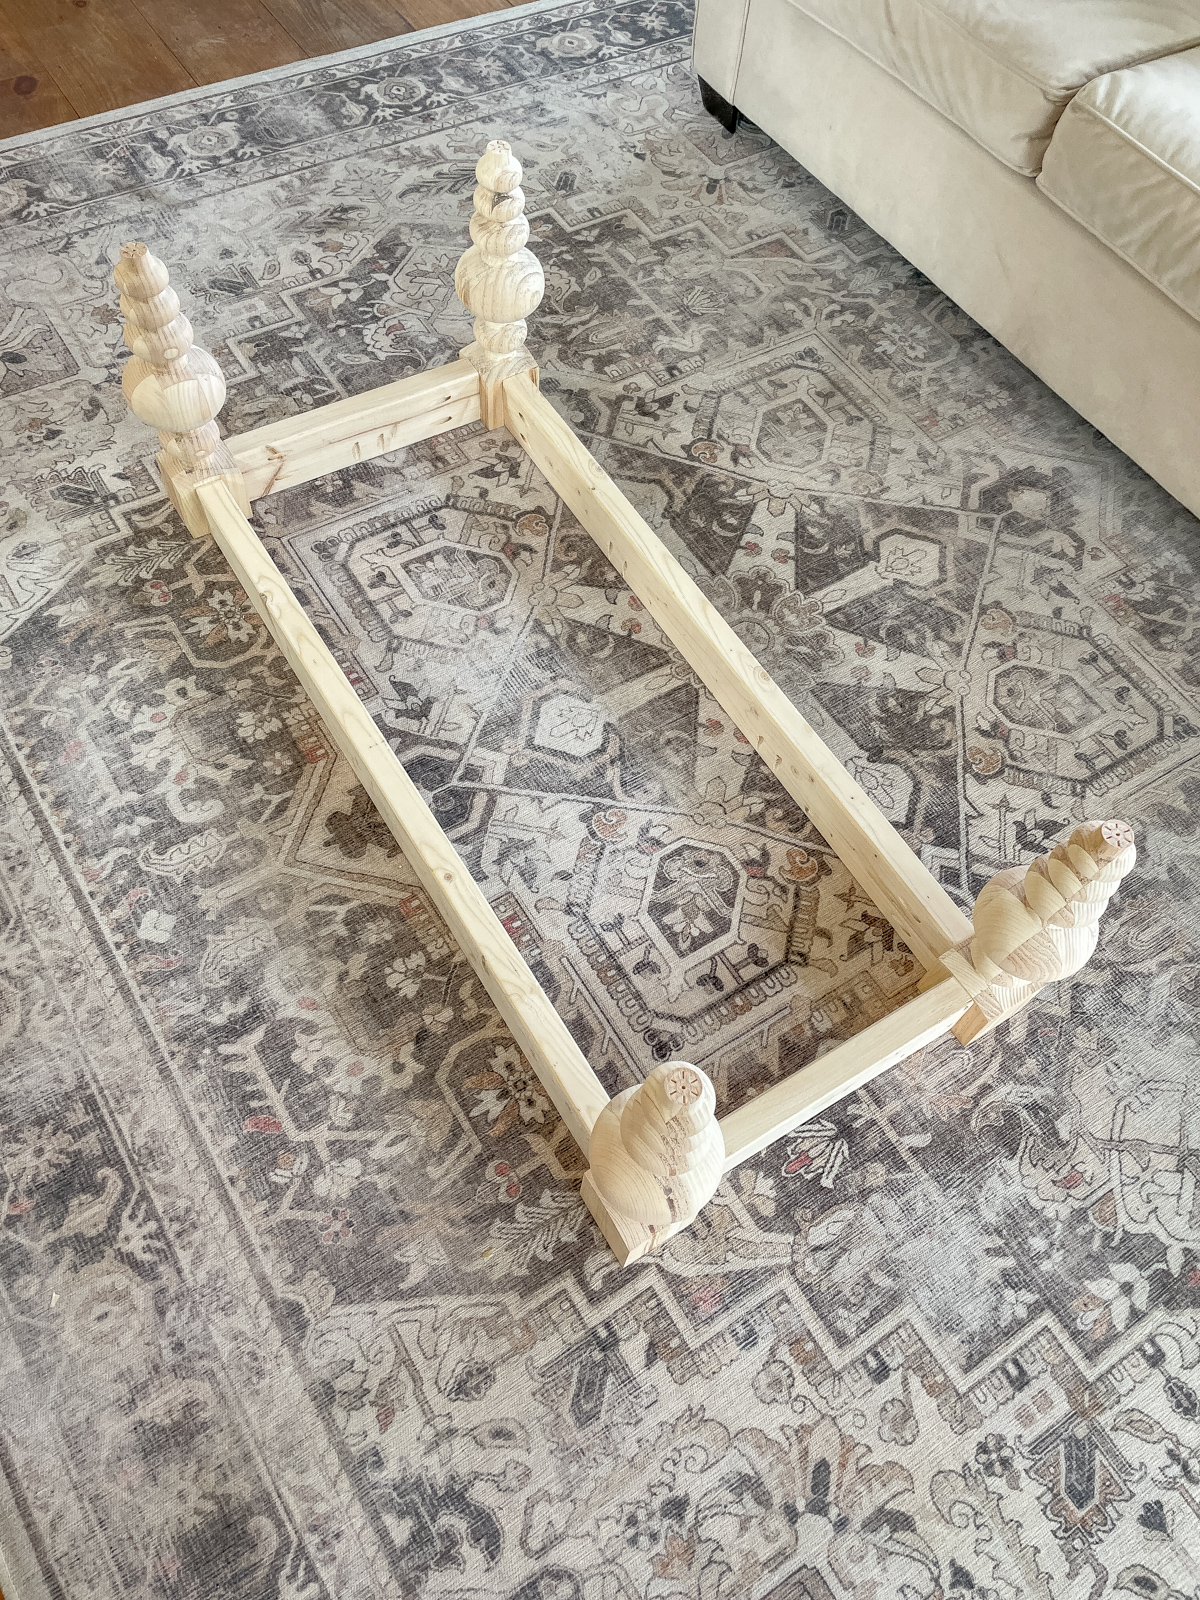
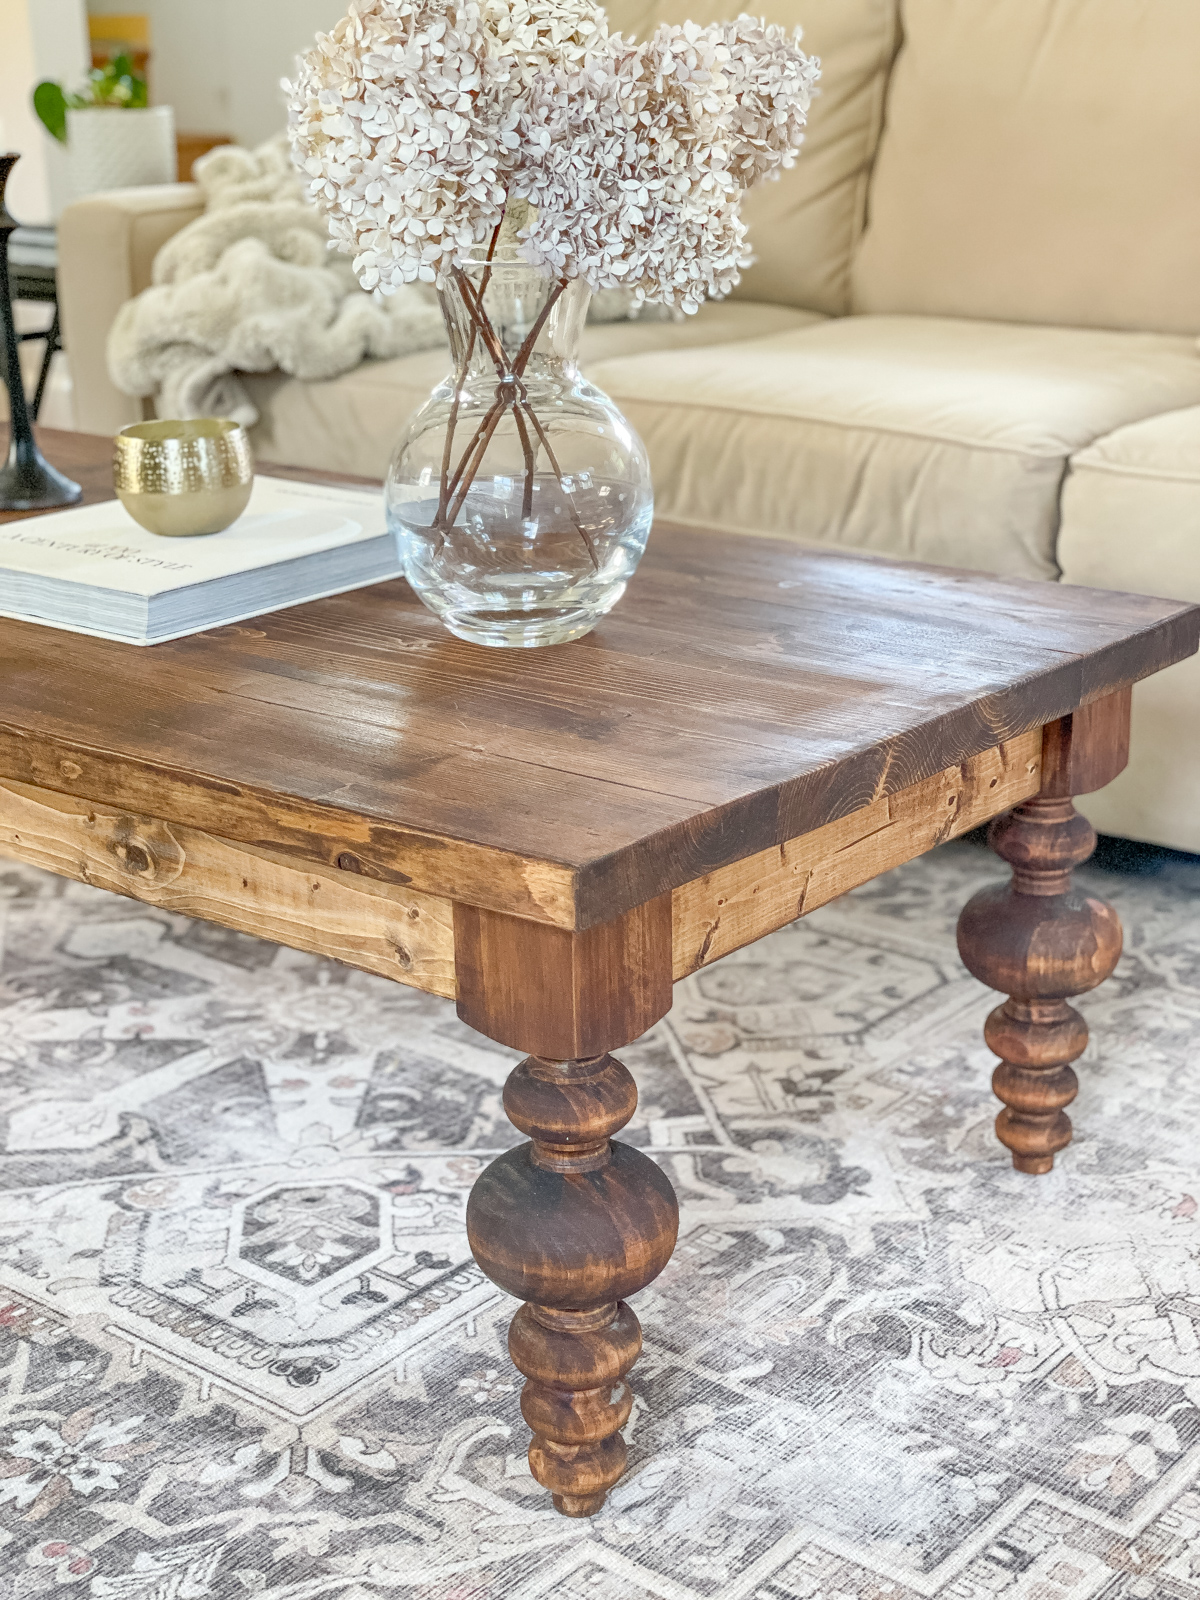
One thing I love our building our own furniture is how we can build it to our needs, and we built this coffee table a little larger than our previous one. So the first step in building your own coffee table is determining the size.
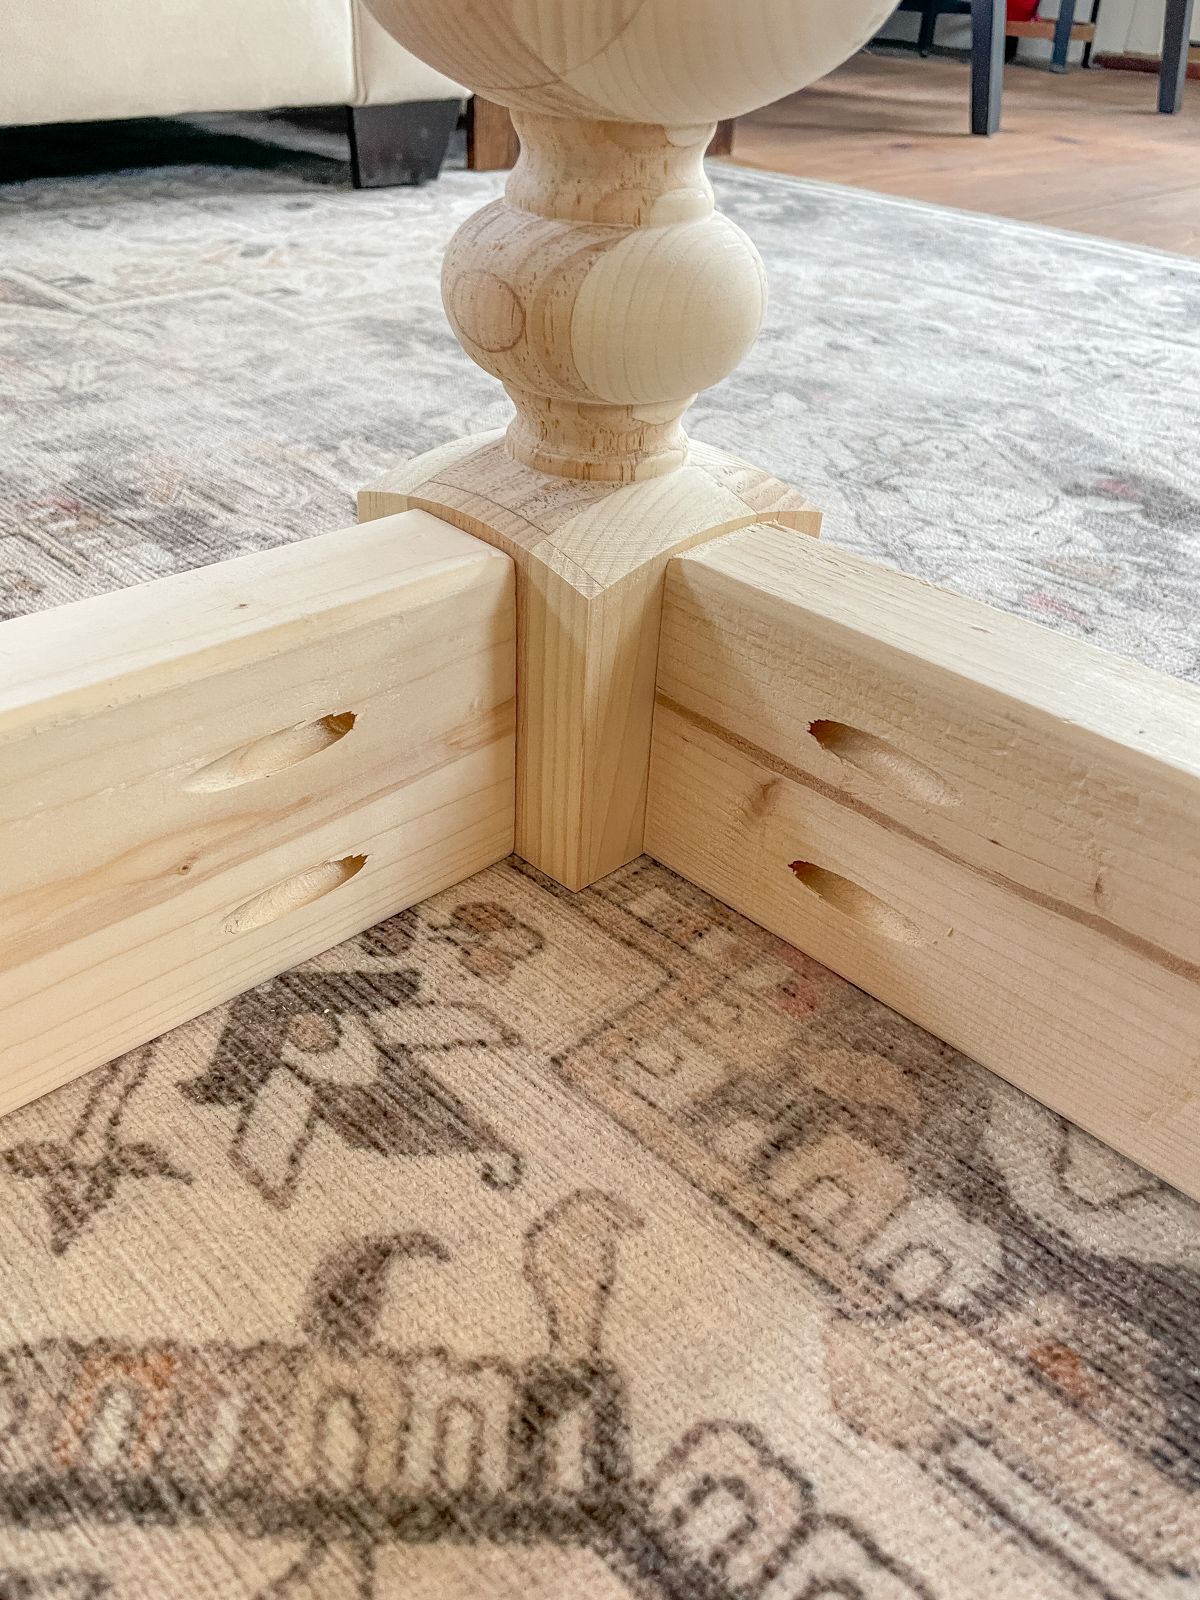
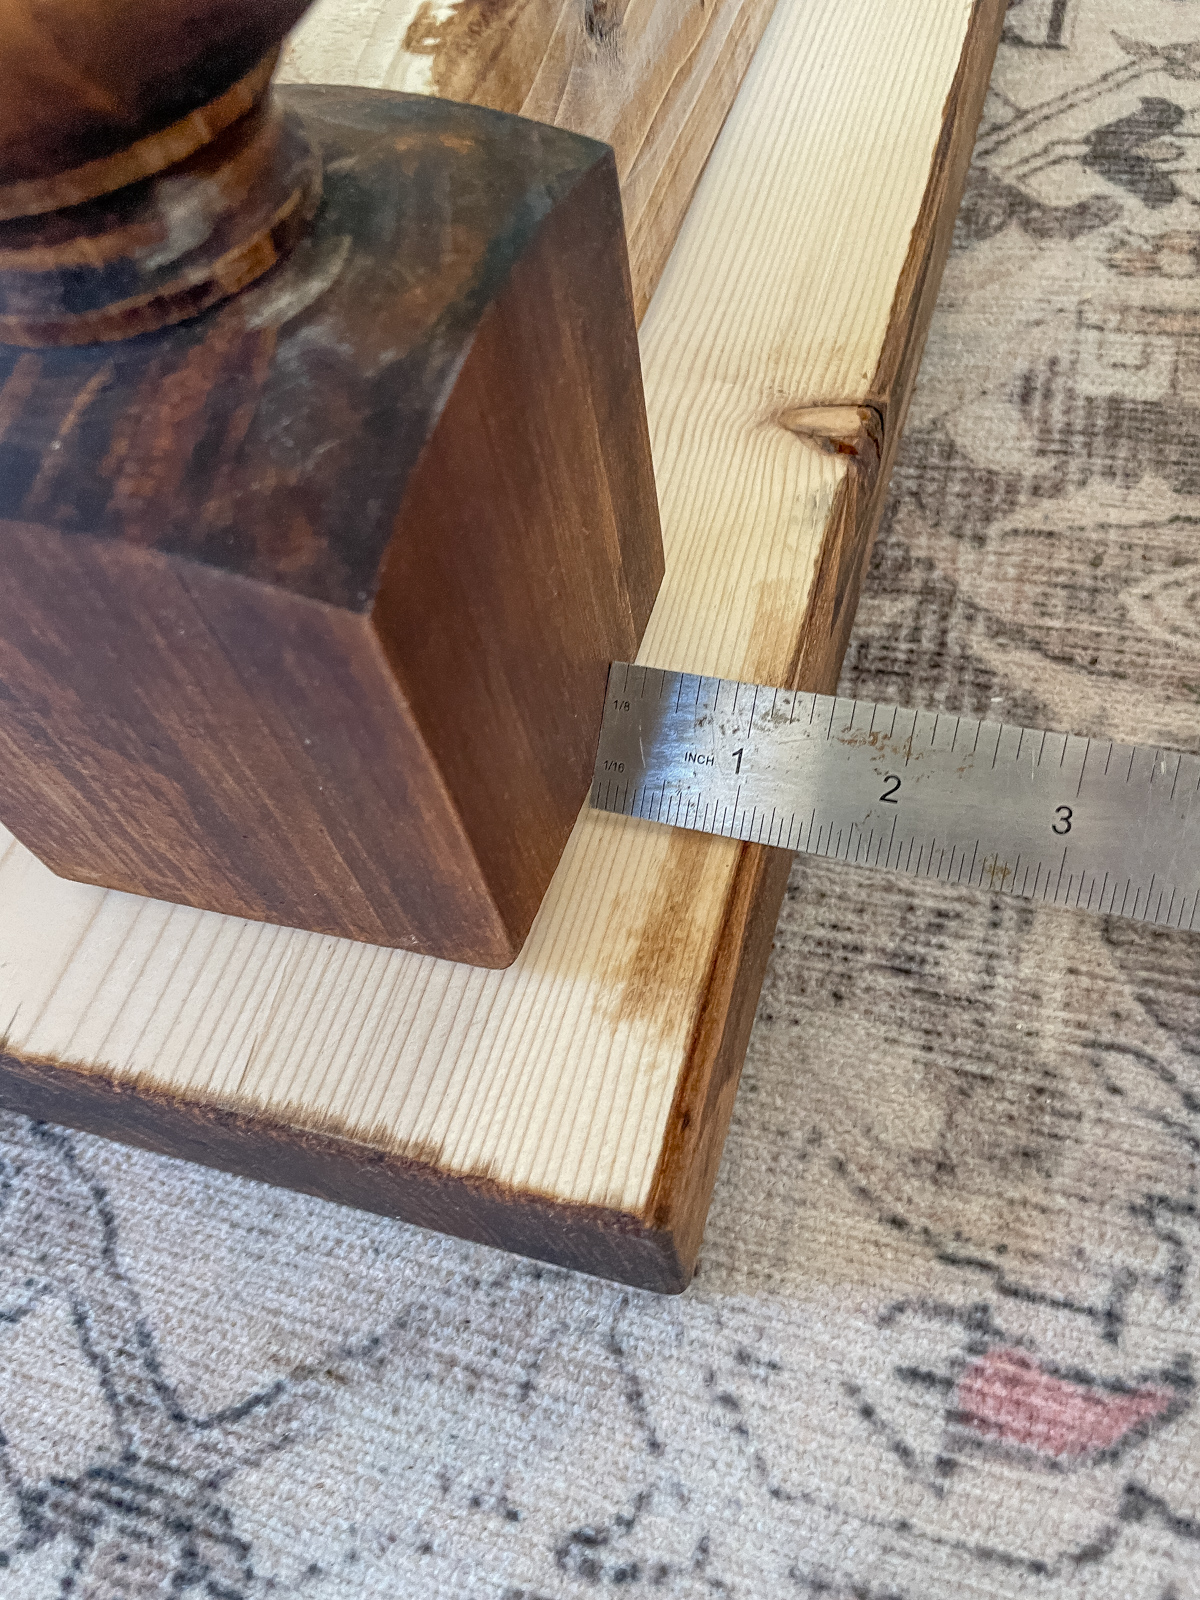
Our tabletop hangs over the frame about 1-1/4 inches from the legs. I think it’s a good look but I’d say anywhere from 1-2 inches from the legs. Any more and it throws the balance off… this happened on our dining room table and “we” rebuilt it.
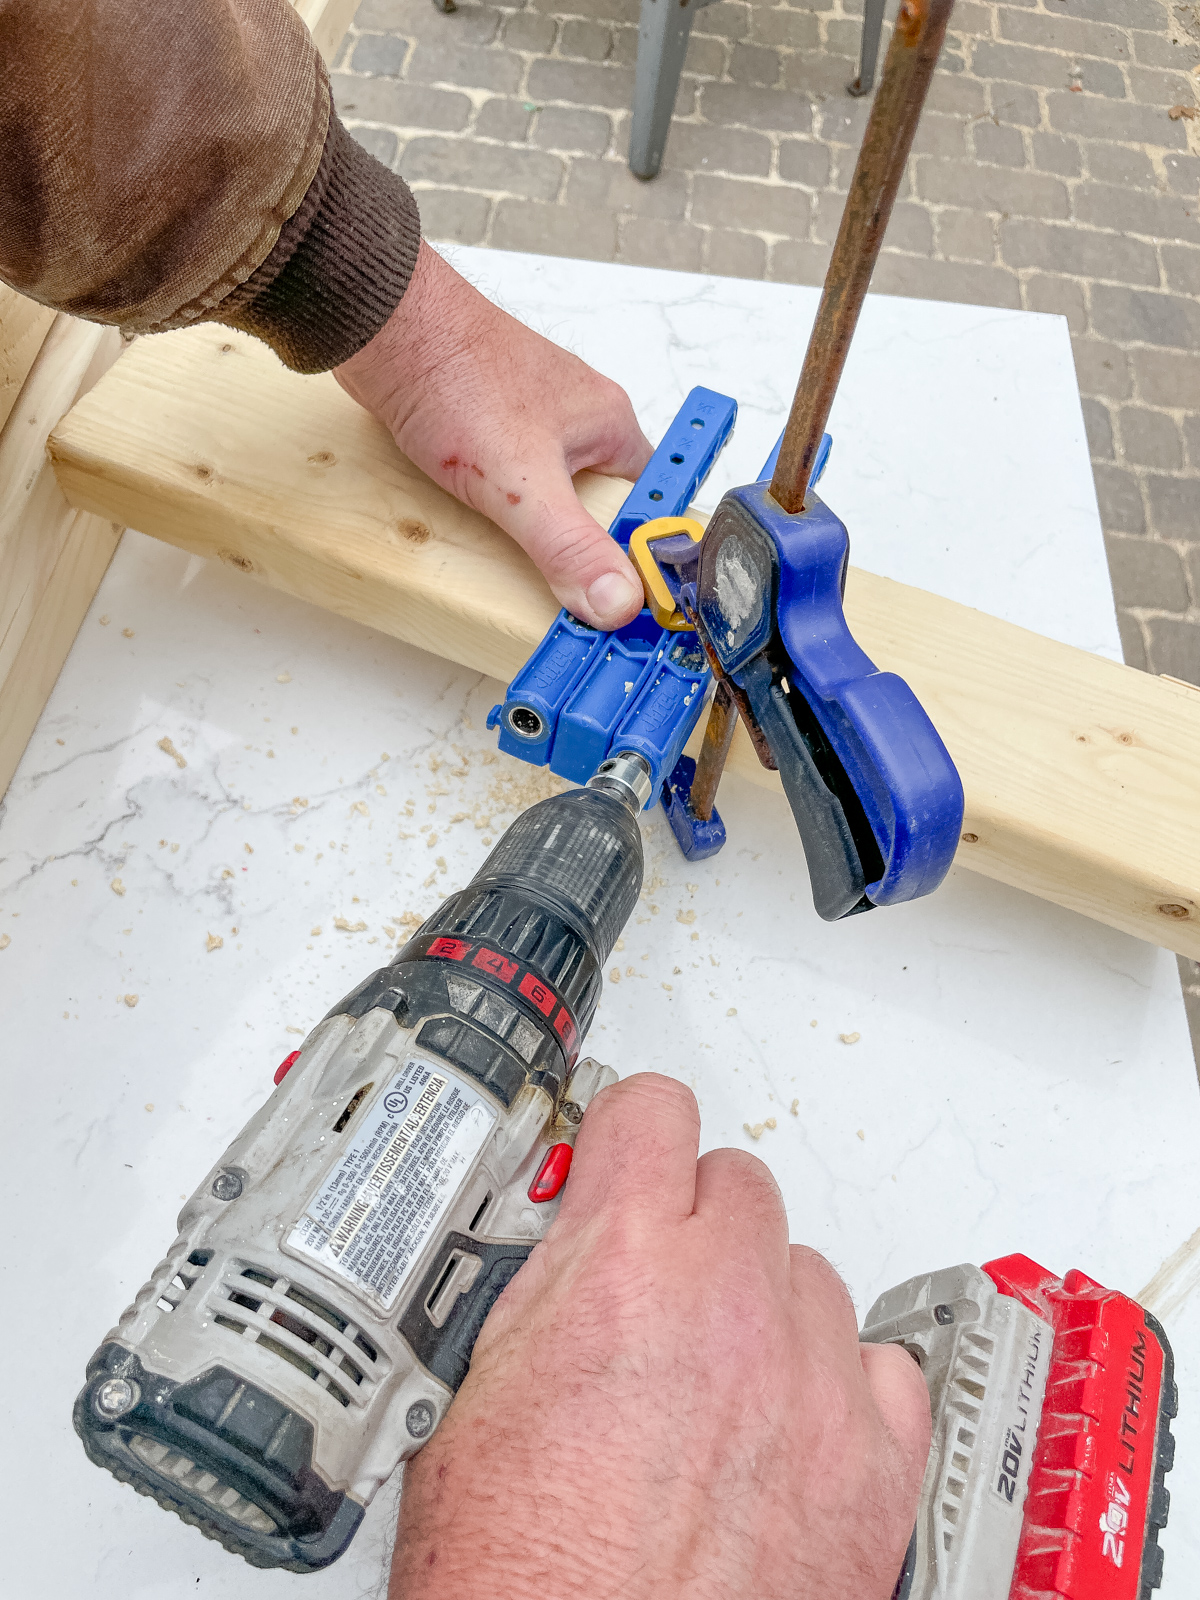
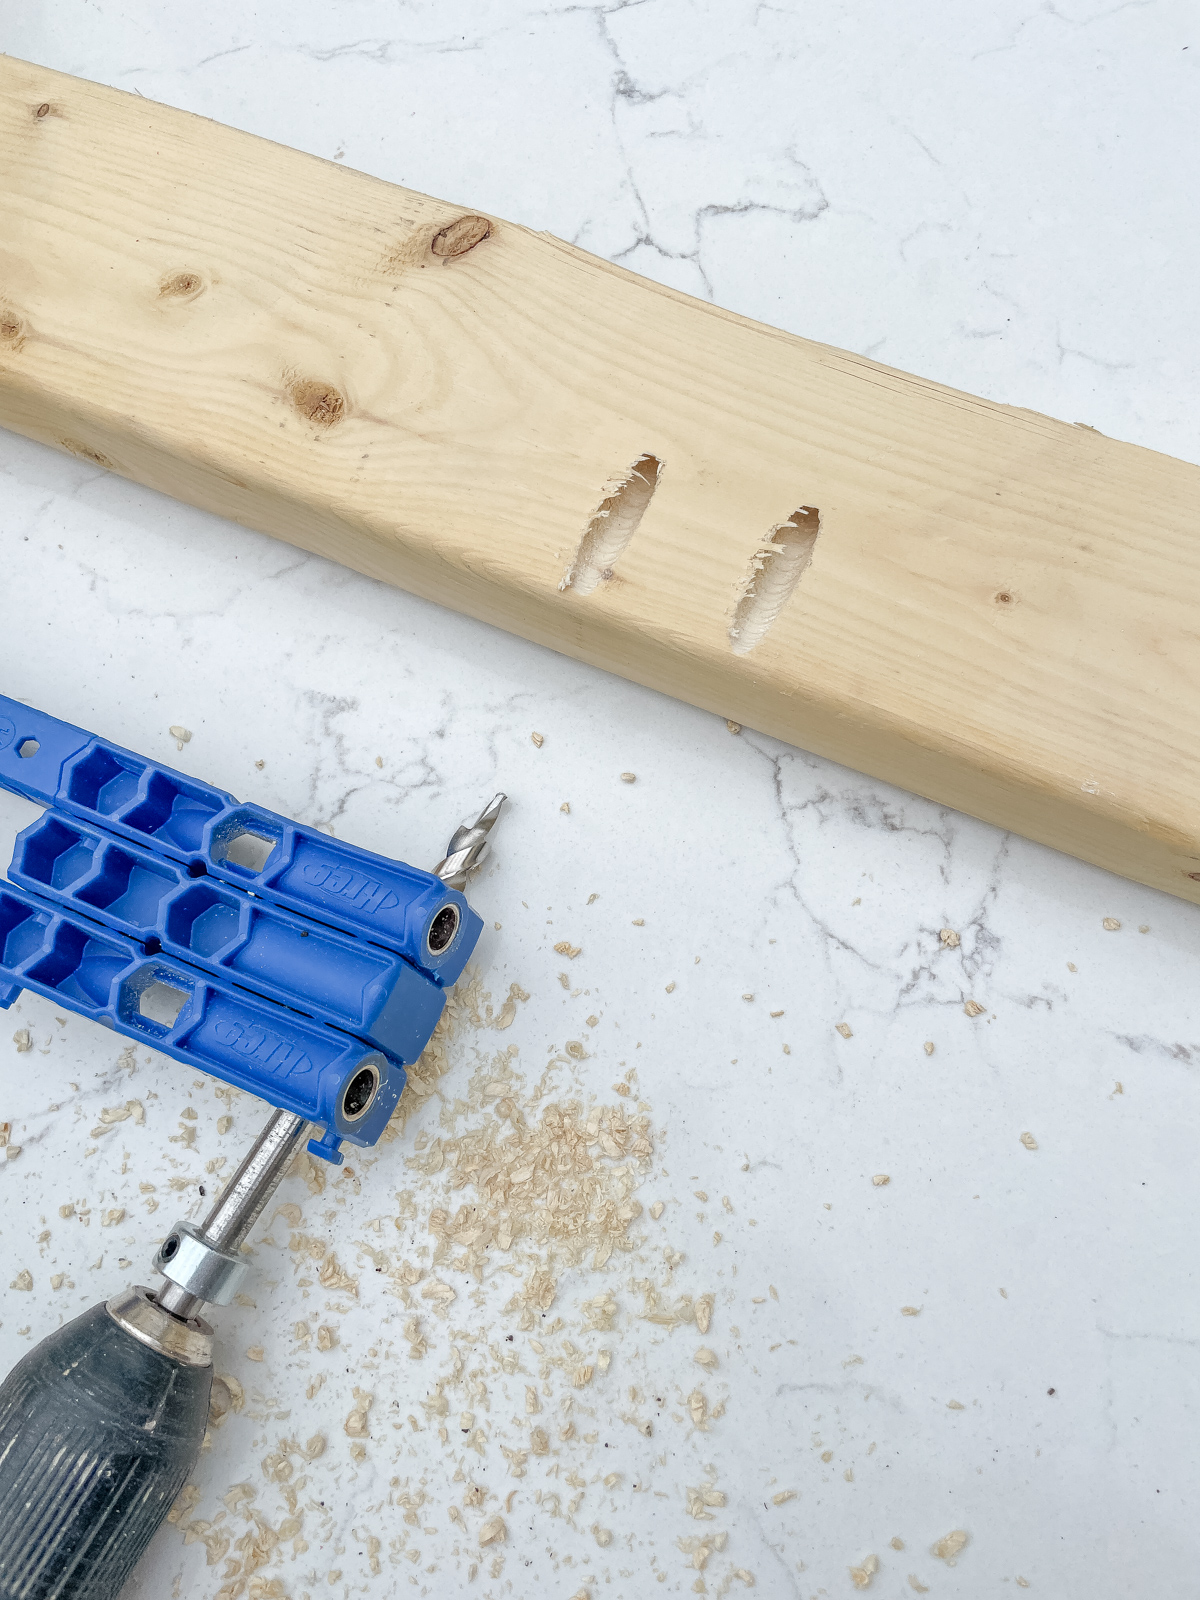
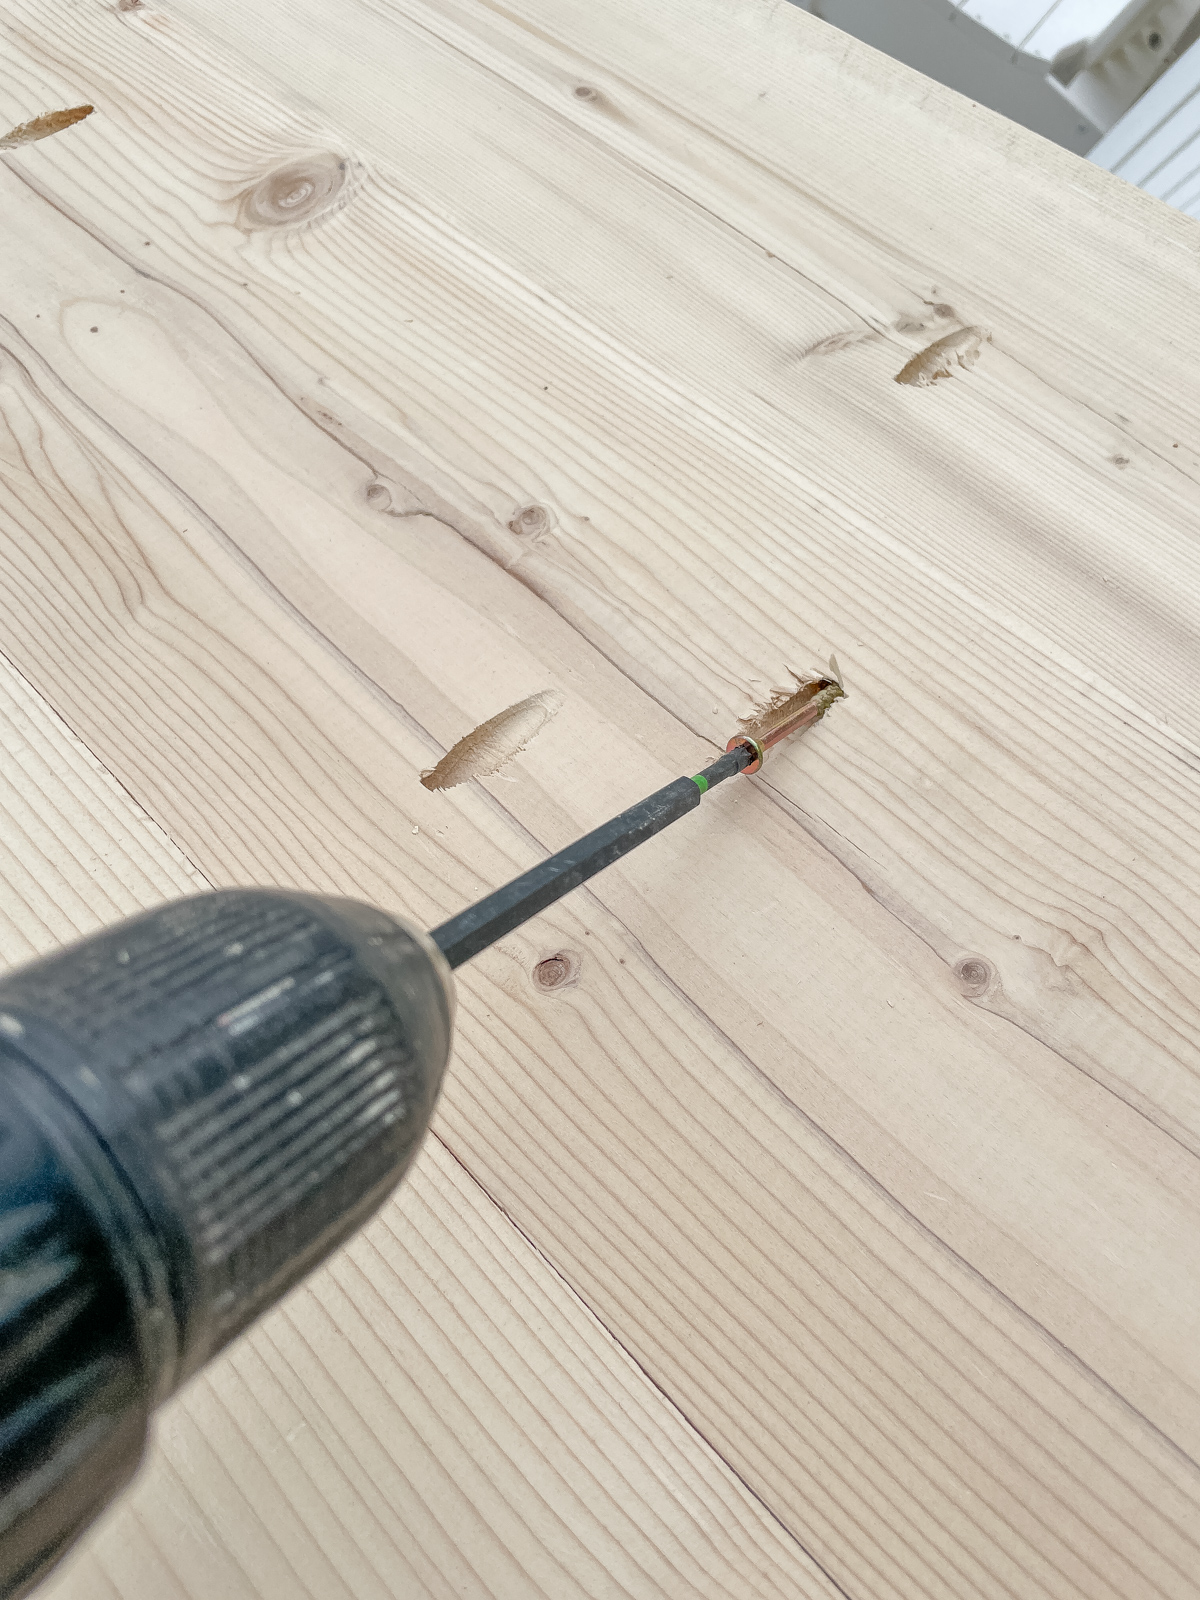
After determining the size of your table and cutting the 2×4’s to size you’ll use the pocket hole jig tool to drill the pocket holes. When the table top is ready to go on, attach it with screws at an angle.
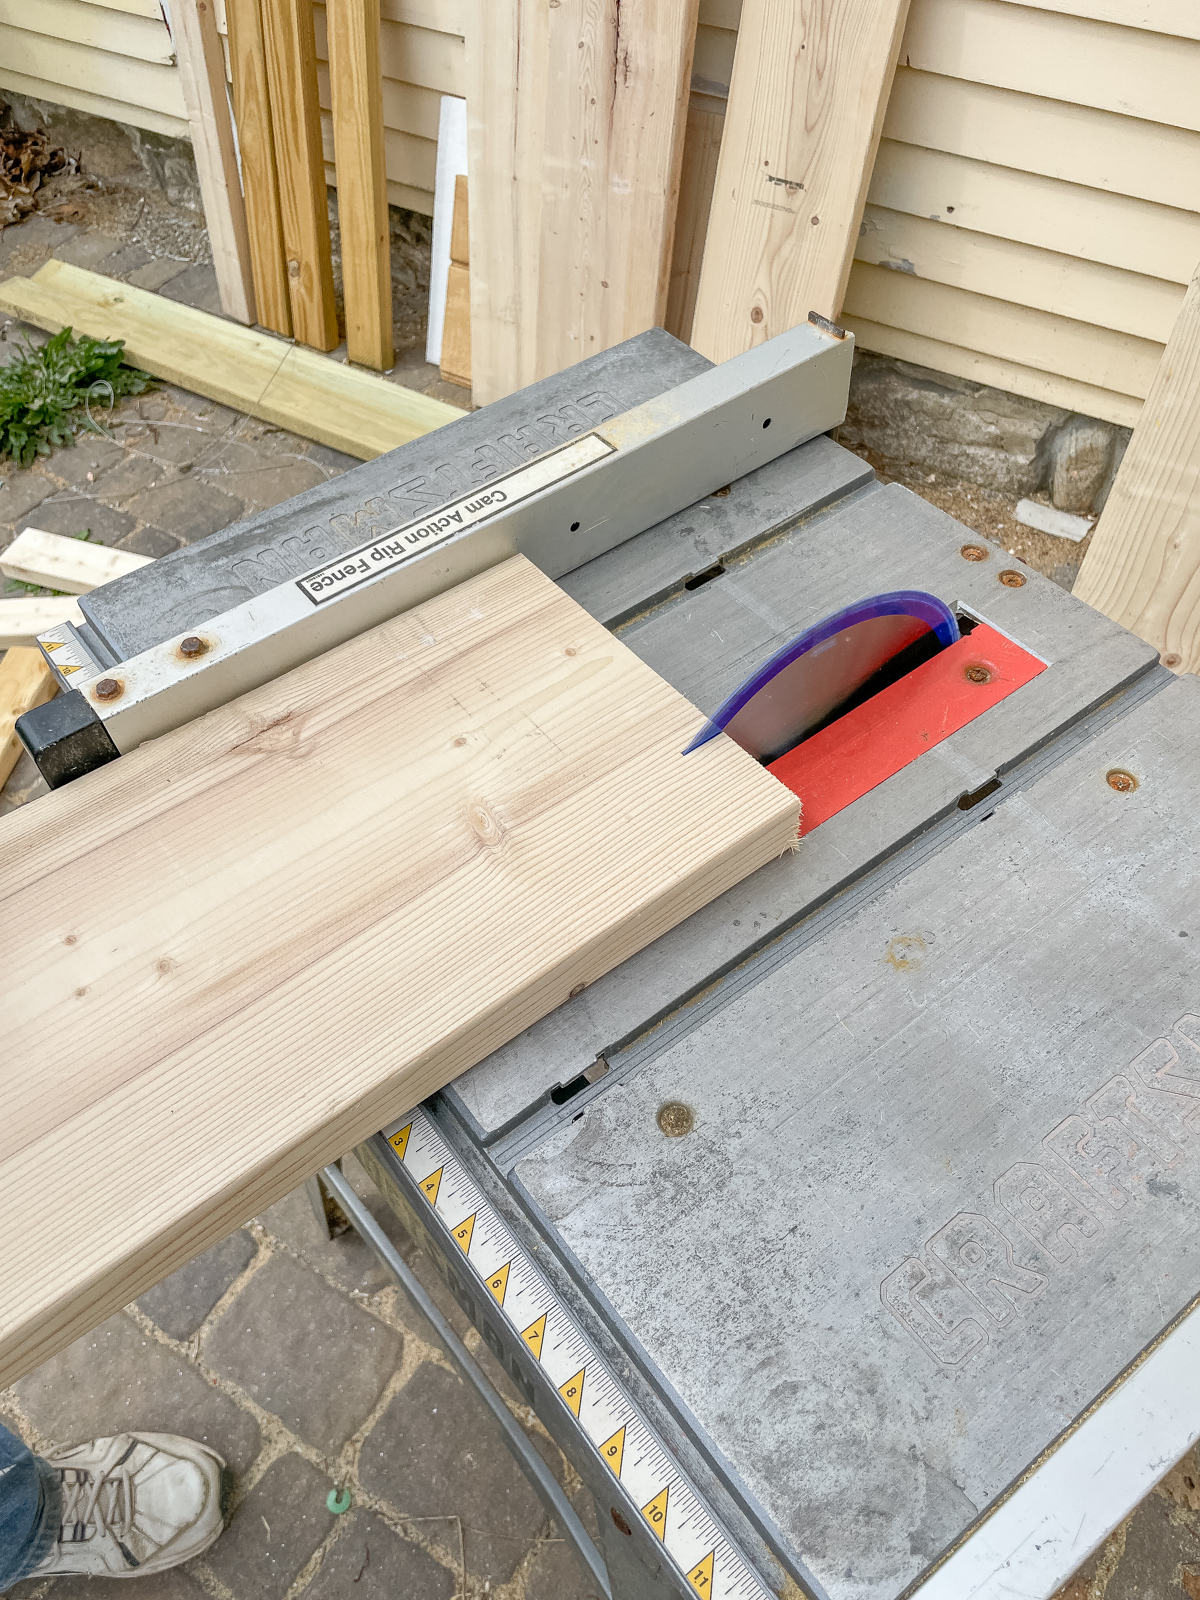
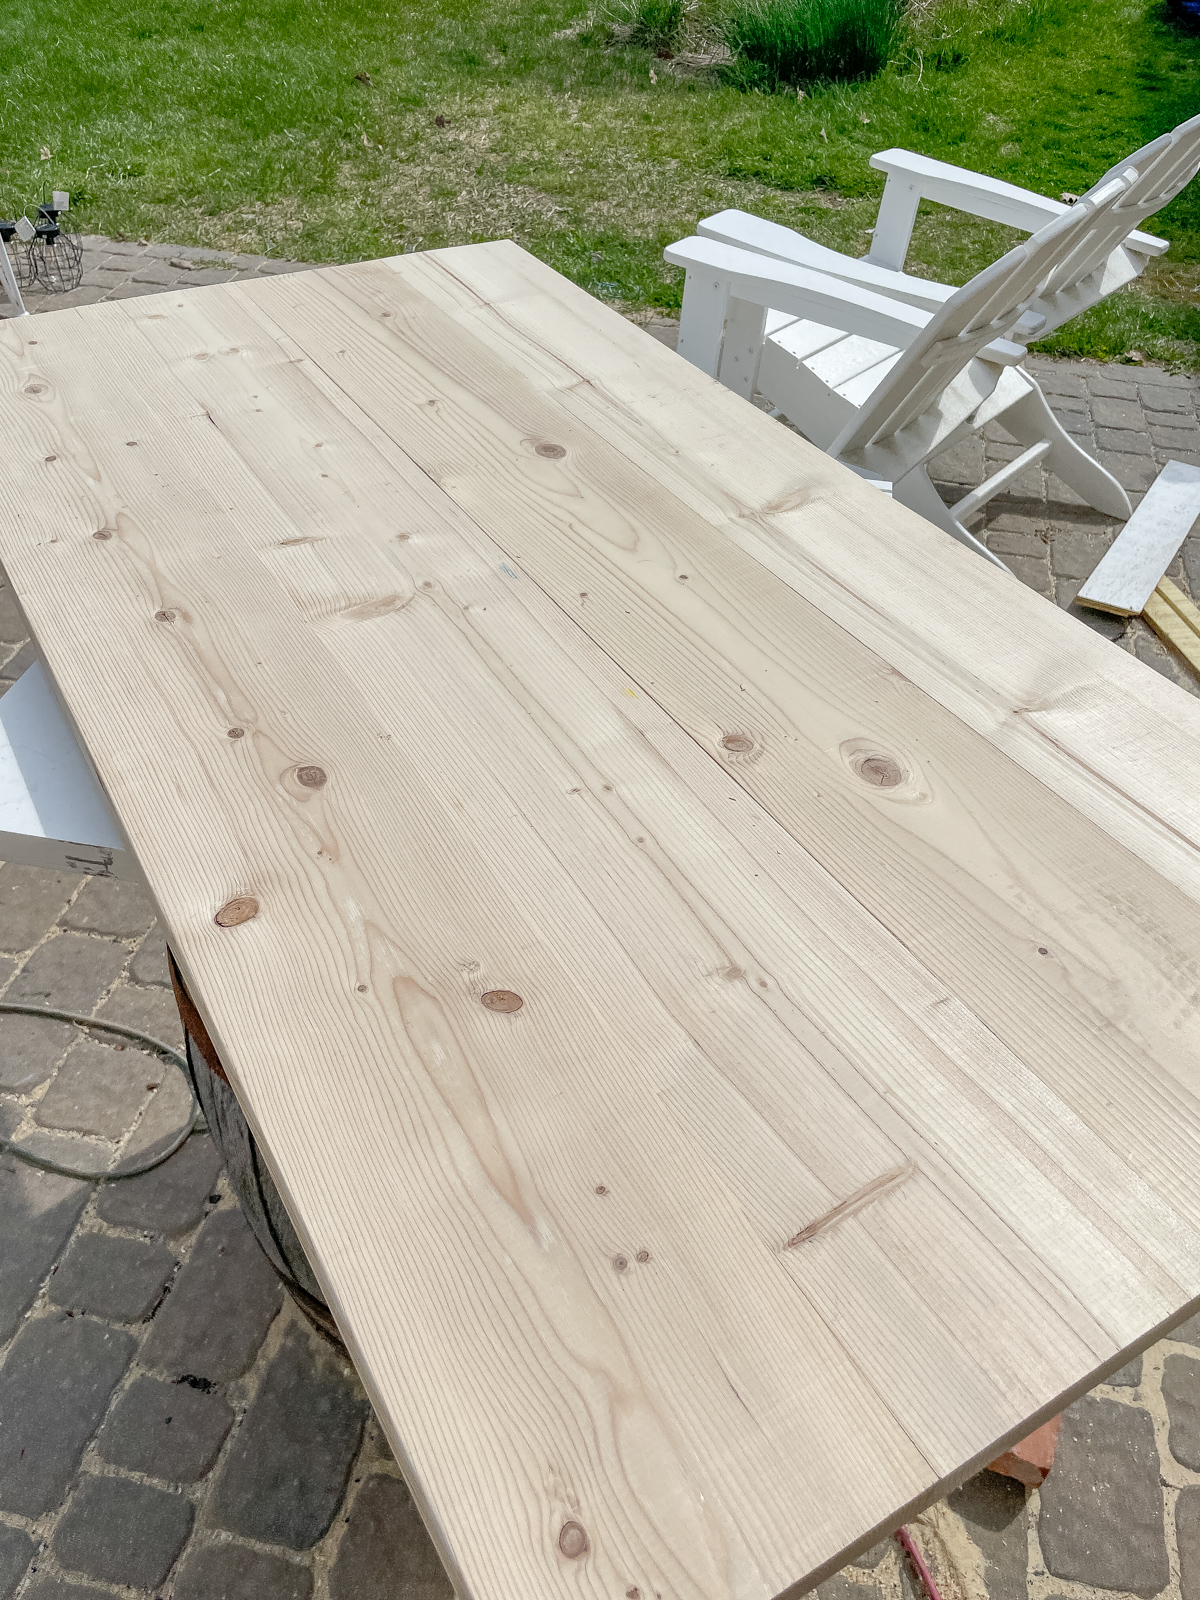
Now for the tabletop there is some math involved. We used 2×10 boards and ripped them down to remove the curved edges and create a seamless table top look. This is optional, you can attach the boards as is, our old dining room table (that we did not build) had the curved edges of the boards. I prefer the look of cutting the boards but it’s up to you. If you don’t remove the edges, though, you will be limited on choices of table width because your overall width will have to be an exact multiple of whole boards, get it?
Take the measurements of the tabletop size you want and cut them down to size. This is the math part. Our table top is 28×54, working with 2x10x8’s, we cut each board down to 7 inches wide to get the size we wanted.
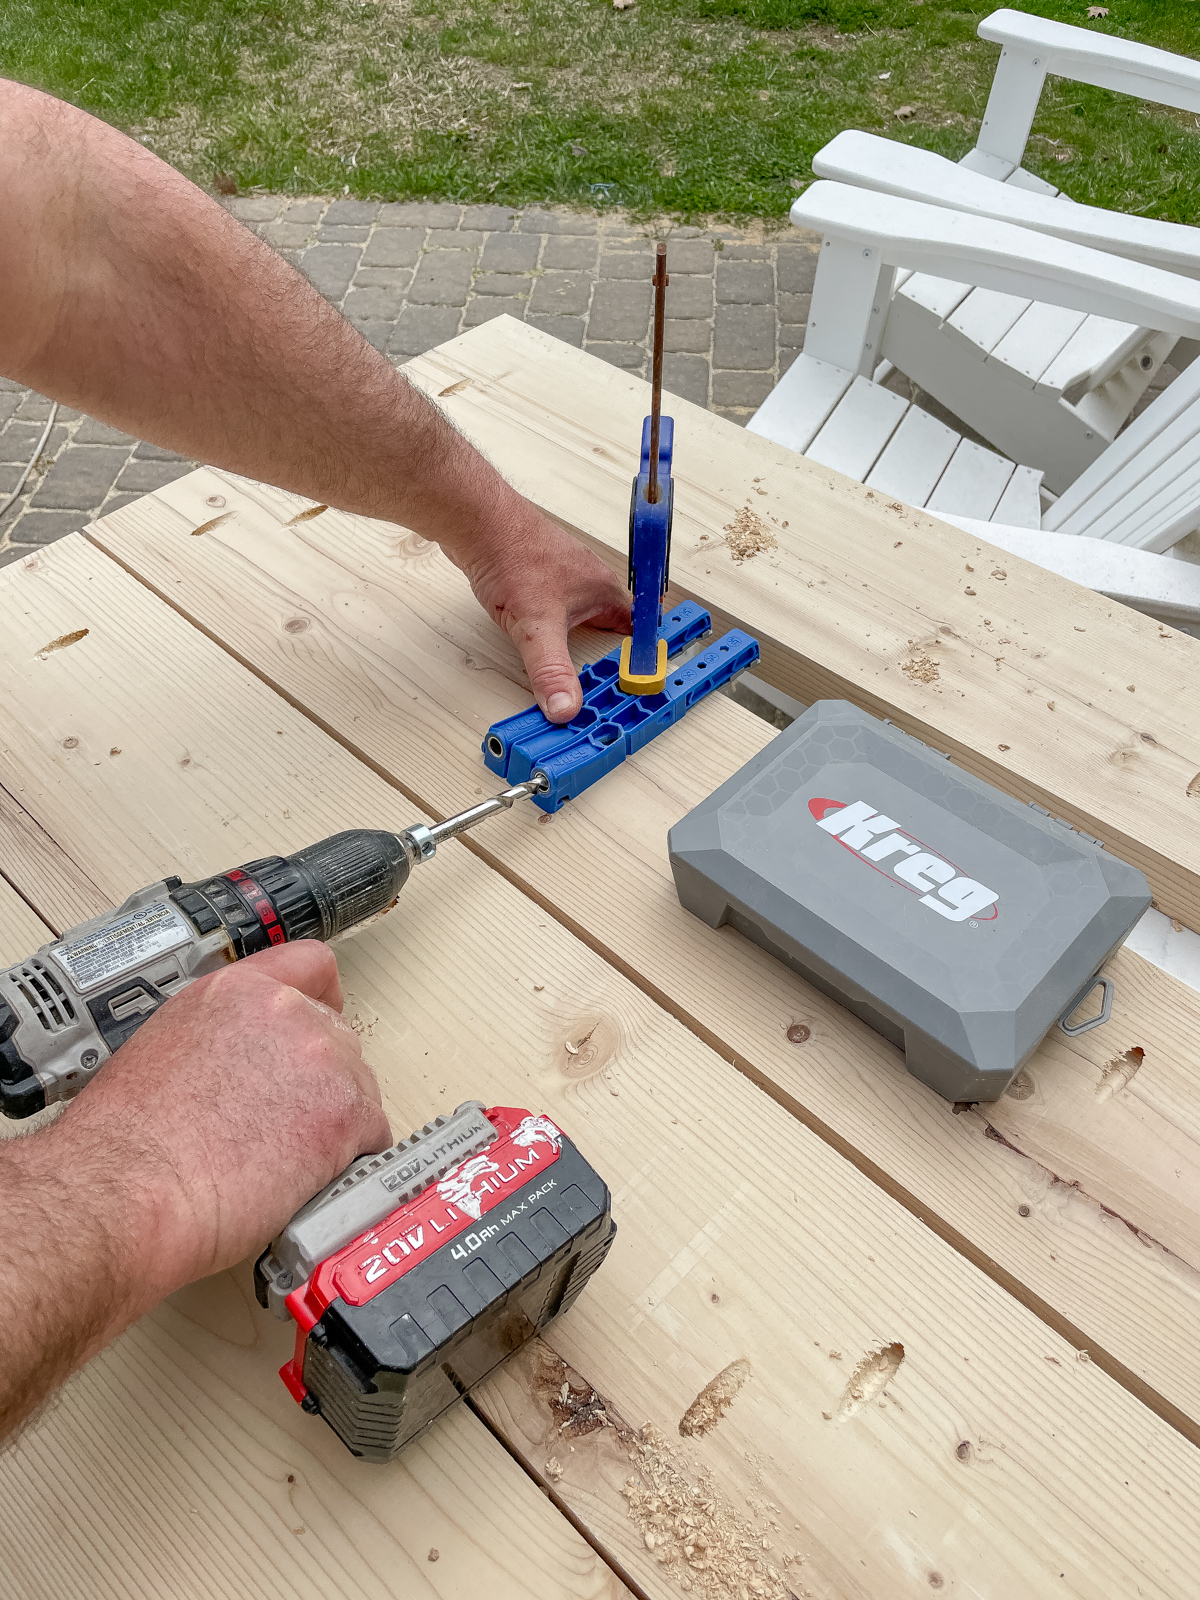
Then you’ll use the same pocket hole jig tool to make more holes about every 12 inches or so to attach the boards together. Make holes on both sides of the seams so that you can insert screws in each direction.
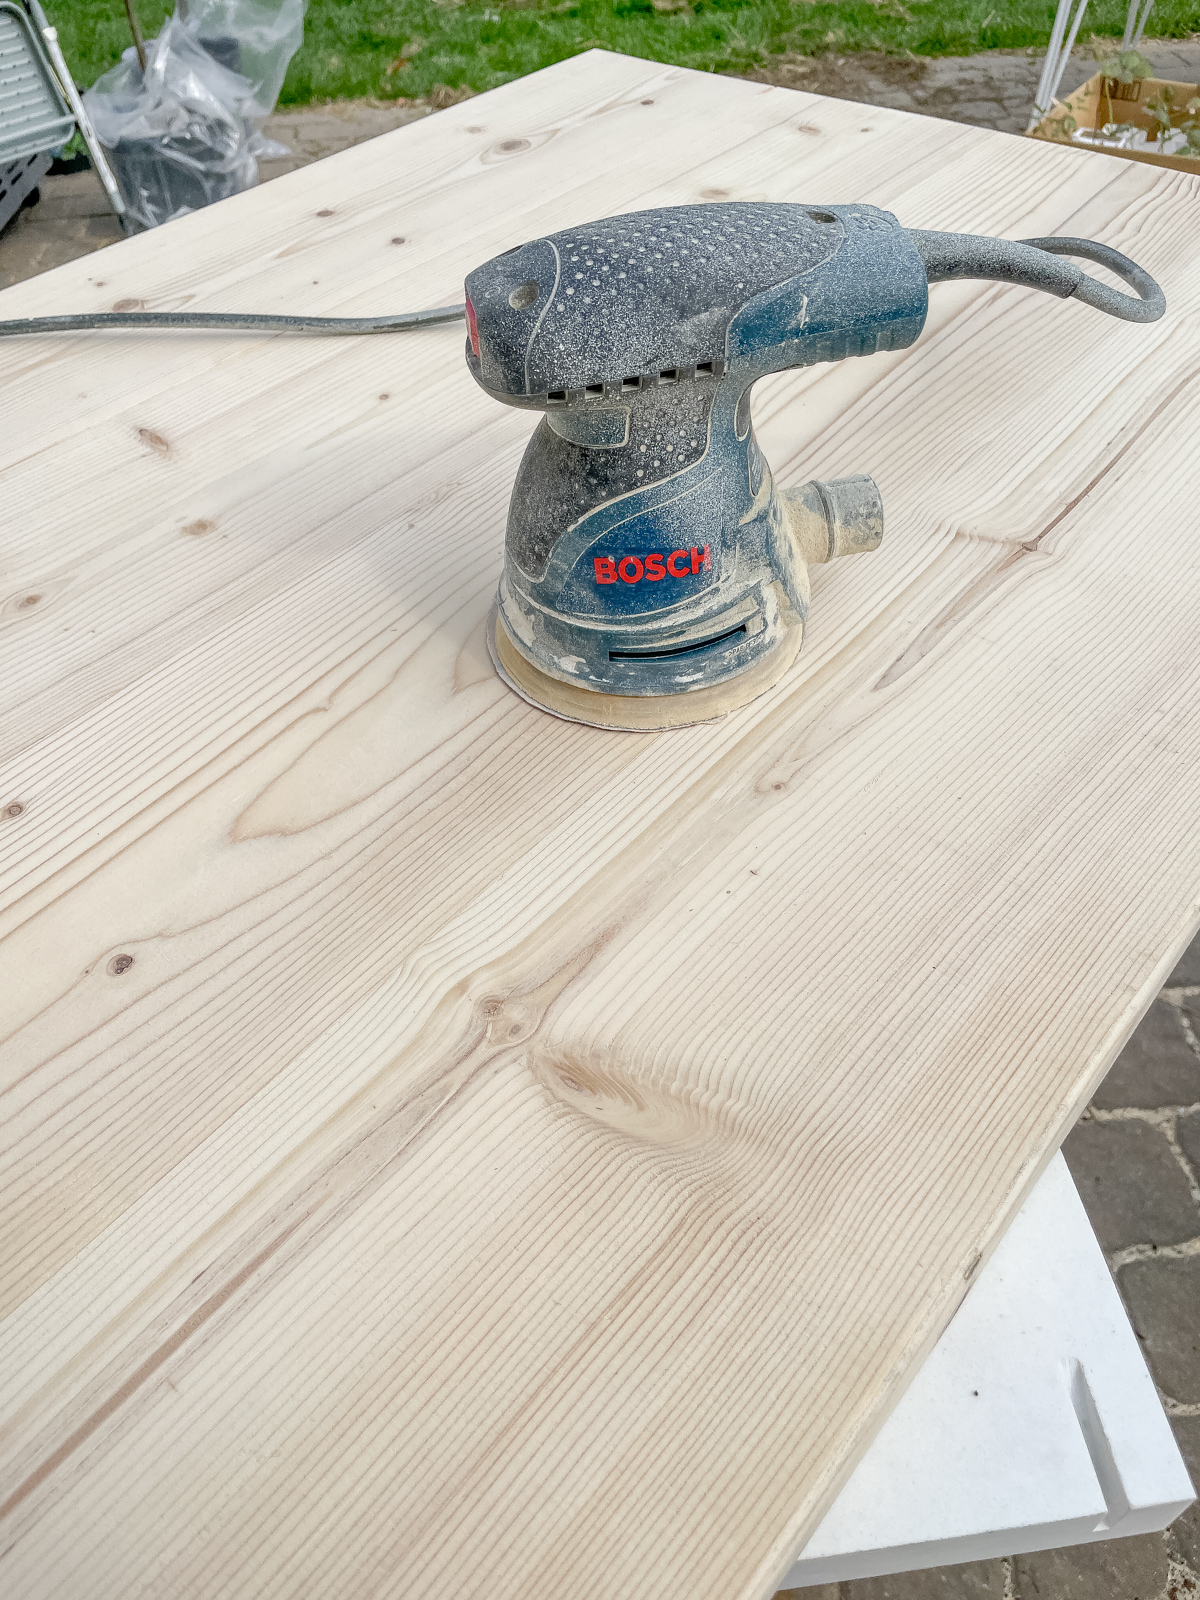
Once the coffee table top is one attached piece it’s time to sand. You can go ahead and attach the top to the base we just found it easier to work with the top separately.
We like using an orbital sander, it creates a nice smooth surface. We sanded all the boards that were slightly higher and smoothed the edges off. I don’t actually remember what sandpaper grit but if you use the same stain we used I have a tip farther down on how to get a baby smooth finish.
Our poor sander has lived a hard life.
Then we attached the coffee table, stained it, and of course forgot to take photos. 2 inch screws were used to join the table top boards and to attach the coffee table top to the frame. 2-1/2 inch screws were used to build the table frame.
I stained the entire table using Dark Half. I used an old rag to rub it on, and after about 10 minutes I wiped off any excess. Hours later when the oil stain looked dry I repeated the process one more time. I was happy with the color, and the wood appeared to not be absorbing anymore oil.

My tip on getting a super baby smooth finish it once the last layer of stain is dry to hand sand with a piece of 320-grit sandpaper. It gives the wood almost a glass like smoothness that I love. This is optional. If you do choose to do this step you may or may not want to apply another light coat of oil stain afterward.
About a week later I rubbed on a very light coat of Dark Half. So light I didn’t even need to wipe any excess. That’s all I did, I did not seal the coffee table. Our kitchen floors were done the same way and are extremely durable. It dries to a matte finish that is water resistant. Any scratches or dings can easily be touched up with more oil.
Below you can see the distance of the legs to the edge of the table. The 2×4’s are about 2 inches in.
I love the results and our grand total was $233.88. Obviously most of the expense were the legs but so worth it, they’re gorgeous! We already had the tools and the stain so I didn’t include it in the cost. Here’s our cost breakdown and for price reference it’s 2023 and we live in Mid-Coast Maine.
Coffee table legs $150
Two 2x4x8’s for the frame at $2.98 each = $5.96
Four 2x10x8’s for the top at $16.98 each = $67.92
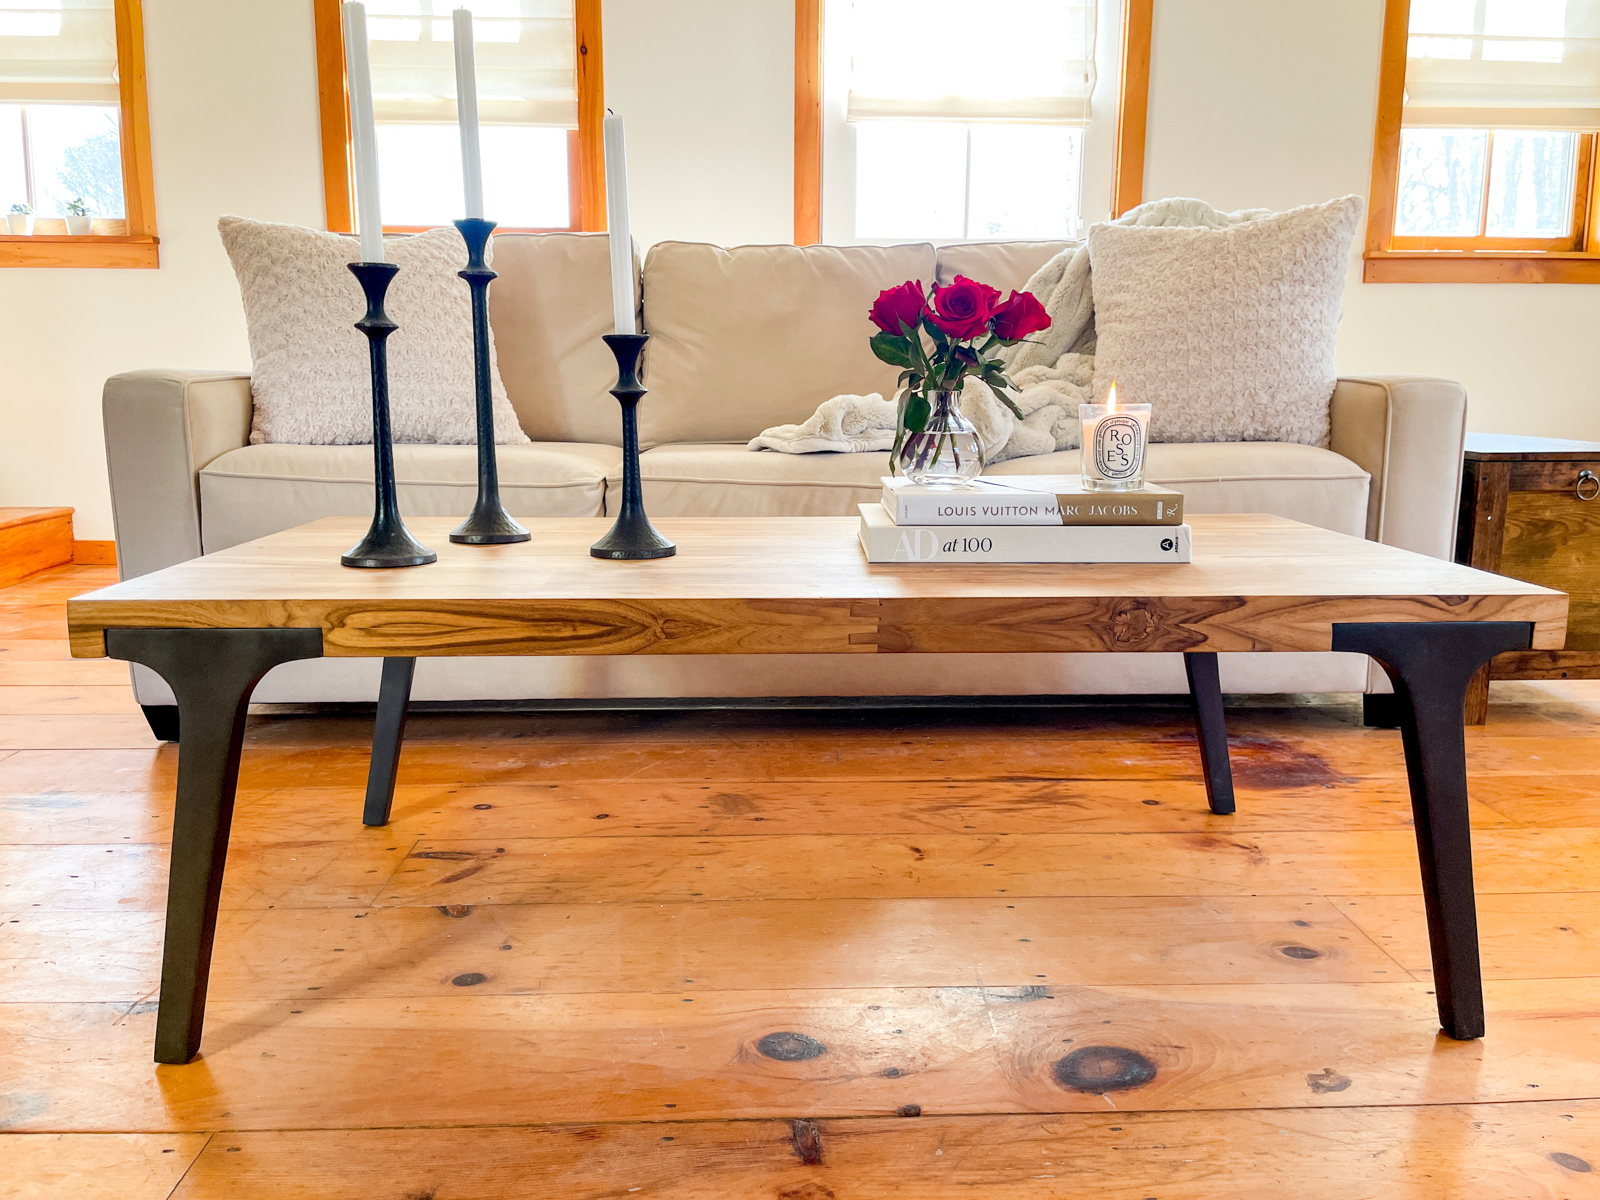
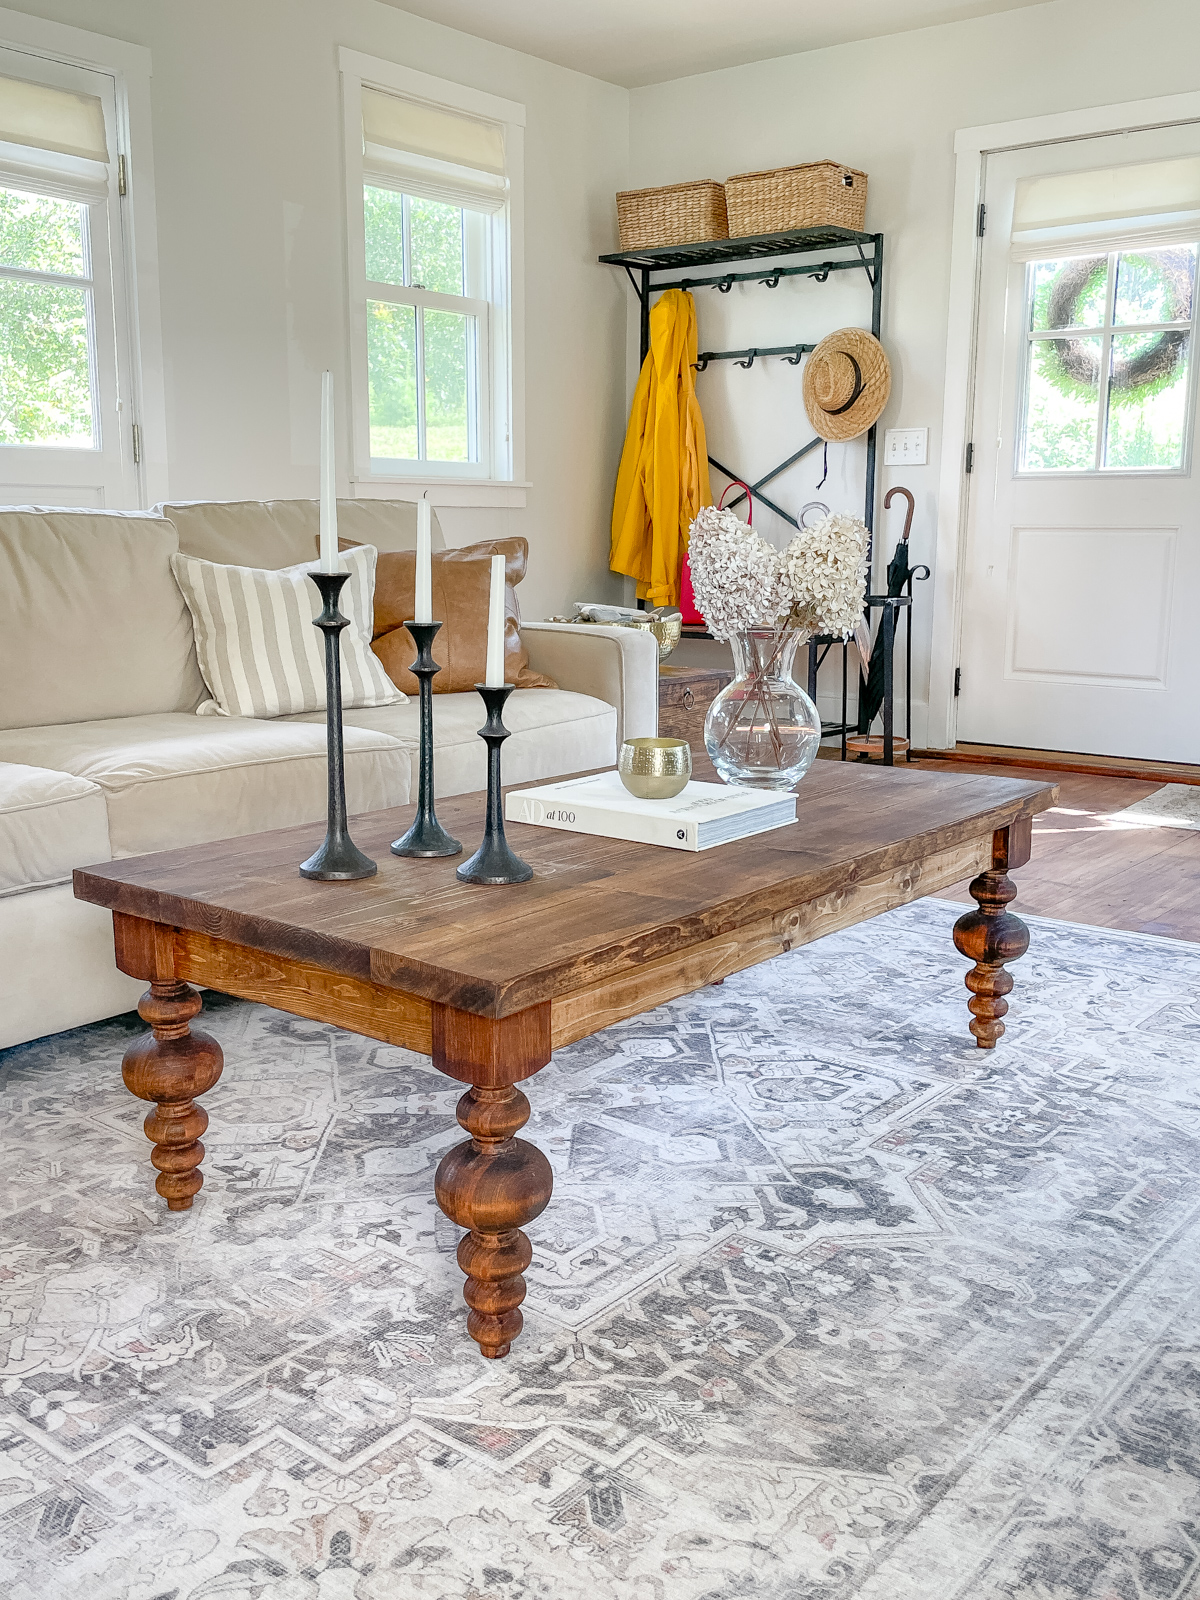
Now on to the living room update, not sure why I’m saying update since I haven’t had this space on the blog before. It feels like an update to me though. Honestly this room is always changing because it never feels quite right. It’s a difficult space to finish because it’s a long rectangular room, it’s where we enter our home so entryway clutter can be an issue. We also have a back staircase in the corner and need to keep a walkway clear to enter main house.
We did get rid of the orange wood. The room was so orange in the old coffee table photo! I painted the trim white, we installed new thick white baseboards to match the rest of the house. Refinished the floors (same stain as the kitchen and coffee table) and built our brick hearth.
Rug | Roman Shades | Sofa | Pillow | Hall Tree | Baskets
We did find a rug, from Ruggable, it’s washable! This room definitely needs a washable rug with all the traffic it gets and being right off our gravel driveway. I haven’t had to wash it yet, it’s going to be a beast because of it’s size! I have washed other washable rugs before with good results, I just don’t put them in the dryer, I air dry them.
Every change this room gets a little more “right” but it’s still not finished. I’m considering painting this room a warmer color so that may happen soon. Ok it was while uploading this photo I actually realized my sofa and coffee table aren’t centered. Old me would have redone this photo, but this is a new me. I live in Maine now… I collect sea glass and play with my chickens. I’m a lot more chill.
I’m still trying to get the chair placement and the right corner of the room finished. It’s a tricky area.
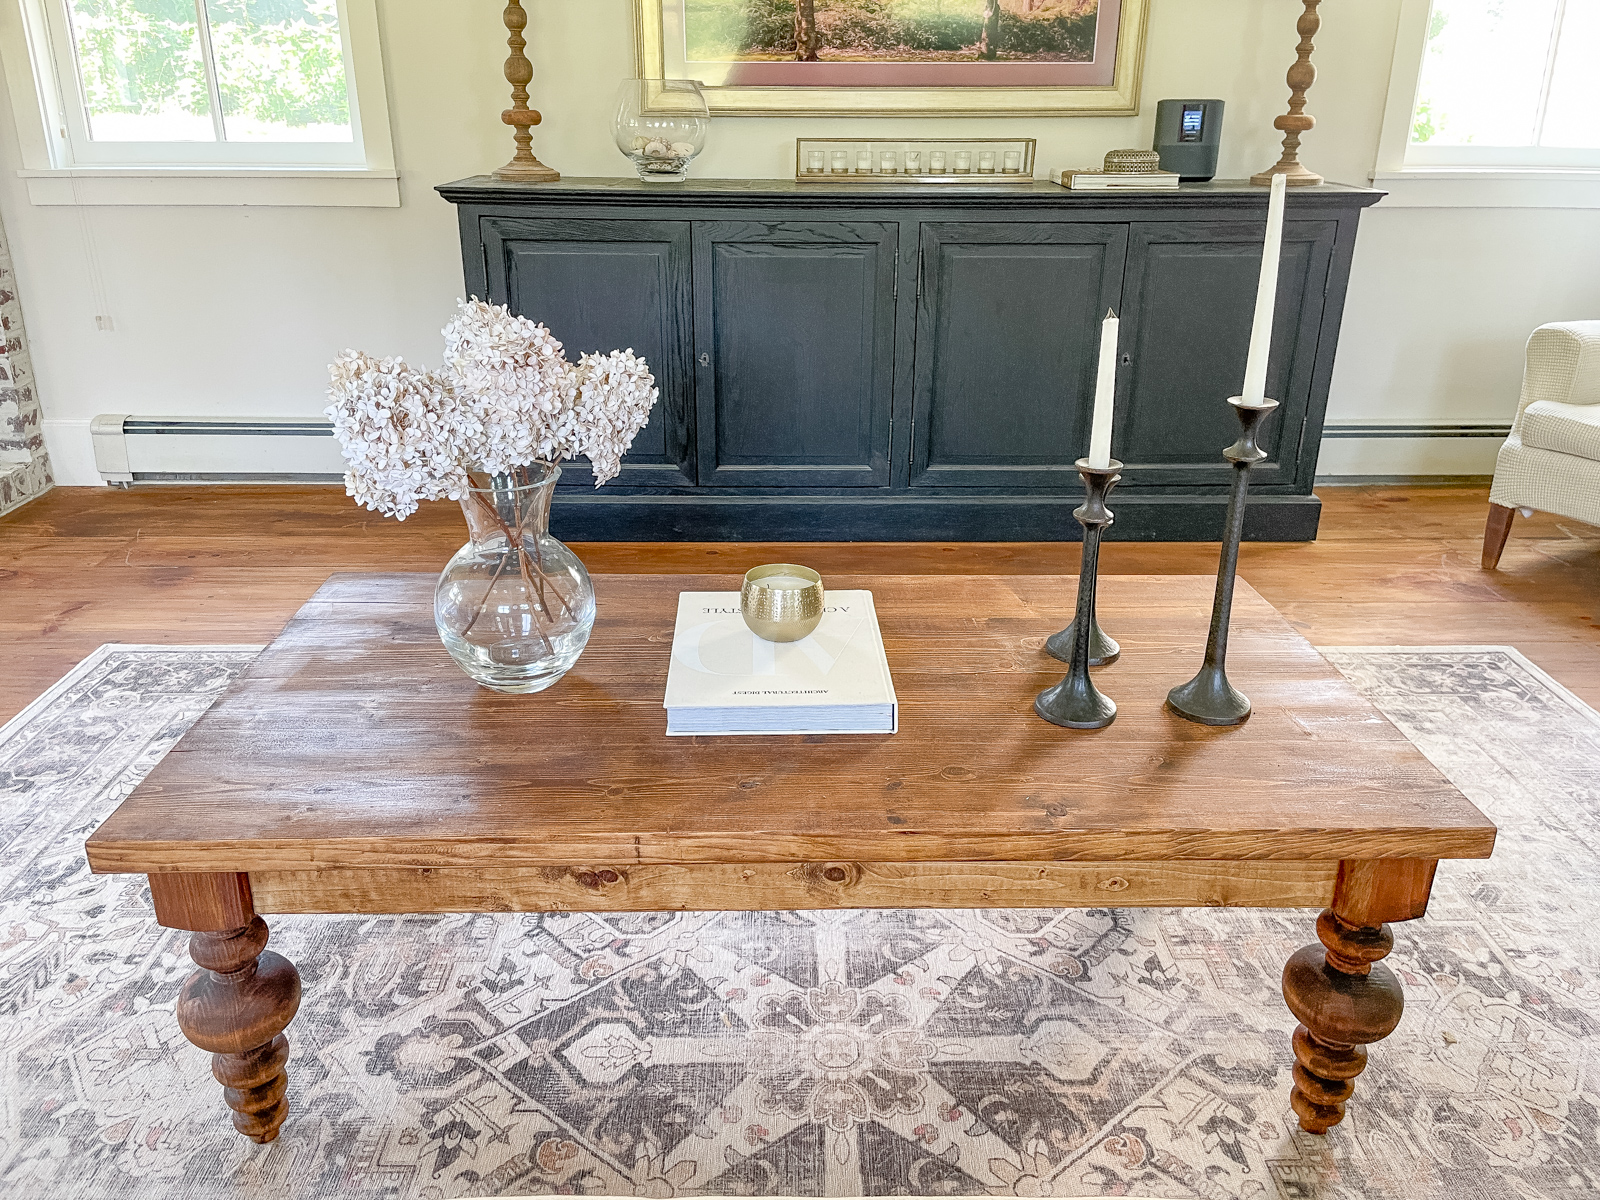
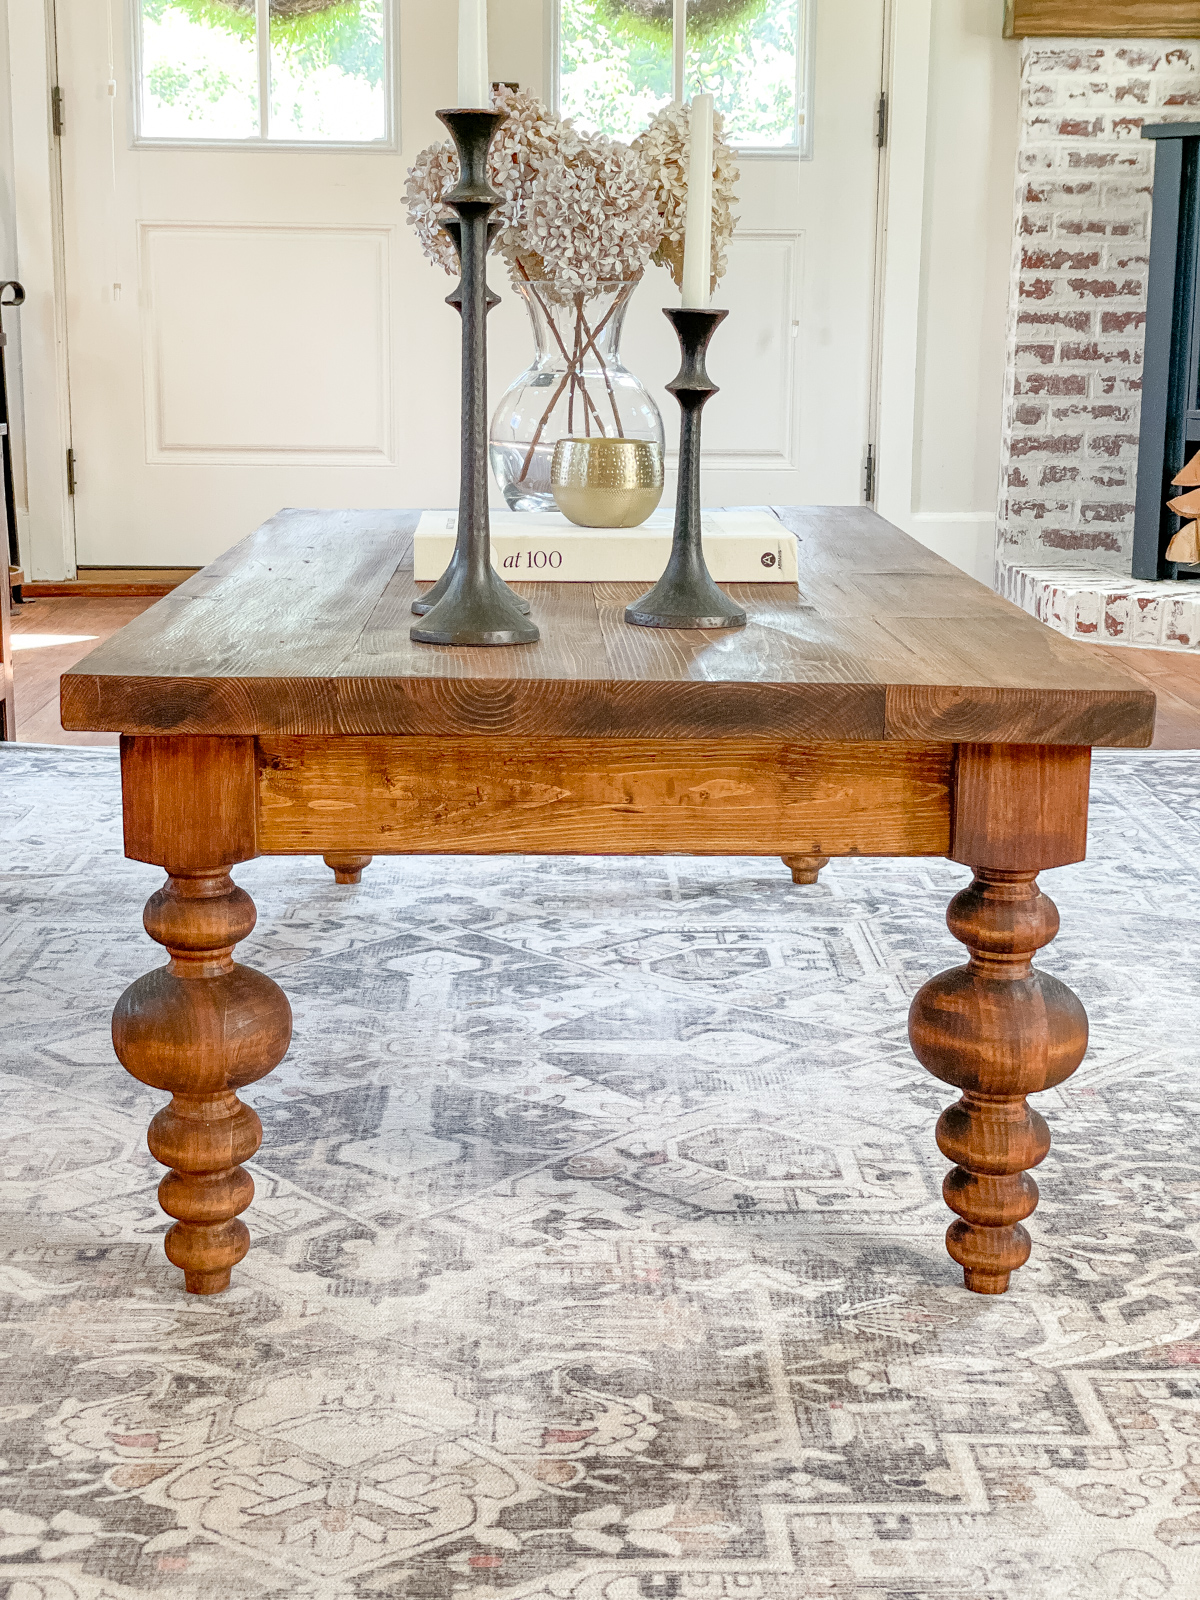
Candle Holders | Lamps | Book | Media Console | Tea Light Holder
Besides painting the room a different shade I’m in the process of sanding and painting the back stairs. We need baseboards along the stairs as you can see from the peek of orange (behind the plant).
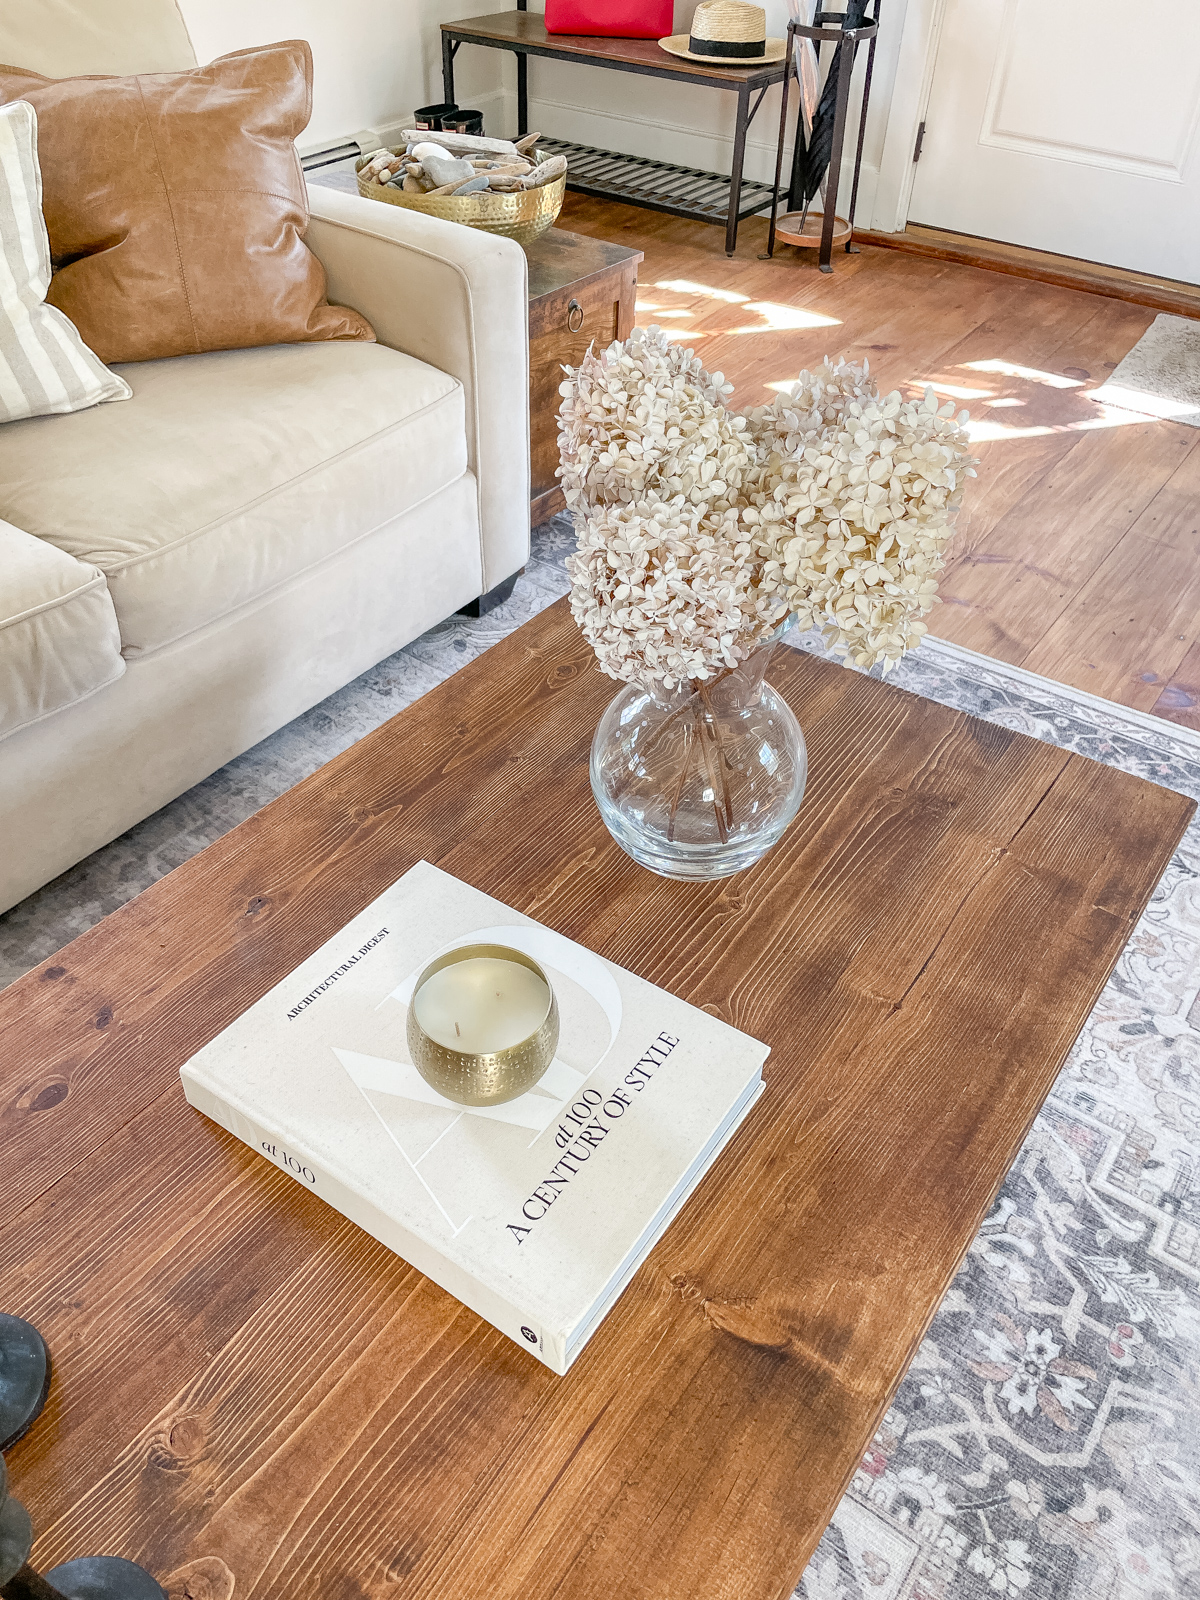
These are my hydrangeas I preserved from last year. They make me so happy! Our hydrangea is acting a bit weird this year but hopefully it will get it’s butt in gear and bloom so I can preserve more.
I’m also hoping to do a built-in bench and coat rack in the future for more of a finished look. One thing I am happy with is our coffee table! So happy we went the DIY route because it’s exactly what I wanted from the size down to the finish. Very soon I will have more rooms on the blog. Our 1 year kitchen in the making is almost complete!
