Colorado Home

DOWNSTAIRS BATHROOM REVEAL

White subway tile in bathroom

Our downstairs bathroom is finally done and I’m ecstatic to share the reveal with you today!  Ugh… this bathroom has driven us insane over the last few months.  When we moved in this was the first room we started working on.  Not only was this space a total disaster, it seems like everything went wrong during the remodeling process.  It took us over 5 months to finish, we even started referring to this bathroom as The Bathroom From Hell.   I’m happy to say the nightmare is finally over!

Let’s first see some of those ugly before photos!  Drum roll please…

Absolutely horrific!  The dead bird in the shower and paper towel holder over the sink added a great decorative touch.  Call me old fashioned but who needs paper towels in the bathroom?

When the cabin was for sale a pipe in the ceiling froze and caused the office tile ceiling to cave in.  It was easily fixable but my main issue was the height of the ceiling.   It was really low and gave a claustrophobic feel to the room.  So our first task was to raise the ceiling.

We found out that we could raise the ceiling by a foot, a foot doesn’t sound like much but it was necessary.  This is when the Hell part starts… before we could raise the ceiling we had raise the air duct, gas line, and water lines up into the rafters.  This is out of our league, so we hired “so called” professionals who were highly recommend at the time.  They charged us a high daily rate and spent over 3 weeks tinkering around without any sort of progress.  At the end of every day Brian would walk into the bathroom to check progress and just shake his head.  He was furious when he noticed a bunch of our plumbing pipes had been installed upside down.

I’ll spare you the rest of the gritty details, long story short we ended up getting some of our money back from the rip off workers and our ever so helpful construction handy man who we call Brian2 saved the day.  Everything that had been done over the last 3 weeks had to be ripped out and started over.

I could go into much more drama and detail but I won’t… I’m just happy about our gorgeous new bathroom!  As you can see below raising the ceiling by just a foot made all the difference in the world.

Bathtub niche ideas

I wanted the bathroom to have a fresh crisp look, with also a bit of rustic charm.  I knew I wanted white subway tile, it’s just so clean and versatile…  it goes with anything and everything!  So my next task was to find a floor tile to acheive my vision and balance the room.  This Laura Ashley tile from The Tile Shop was perfect, but wouldn’t you know when I went to order it we had a problem.  It was out of stock, and I mean really out of stock.  I was told it was having production problems and it could take up to a year to receive it.   I called the Texas location where we used to shop and they were able to find enough scrap pieces from a bunch of area stores and ship it to Denver for us.  Amazing!

Bathtub shower combo with subway tile

The width of the bathroom let us go with an extra wide bathtub which is amazing.  Then I realized all standard sized shower curtains were way too short.  Etsy again saved the day and I was able to have a custom sized shower curtain made.   It was such an easy fantastic transaction, I was even able to buy a custom sized liner… and it all arrived in less than 2 weeks.

The window serves as a natural resting spot for items in the shower, but we decided to add a recessed niche lower down for those taking a bath.

Bathroom shower soap niche ideas

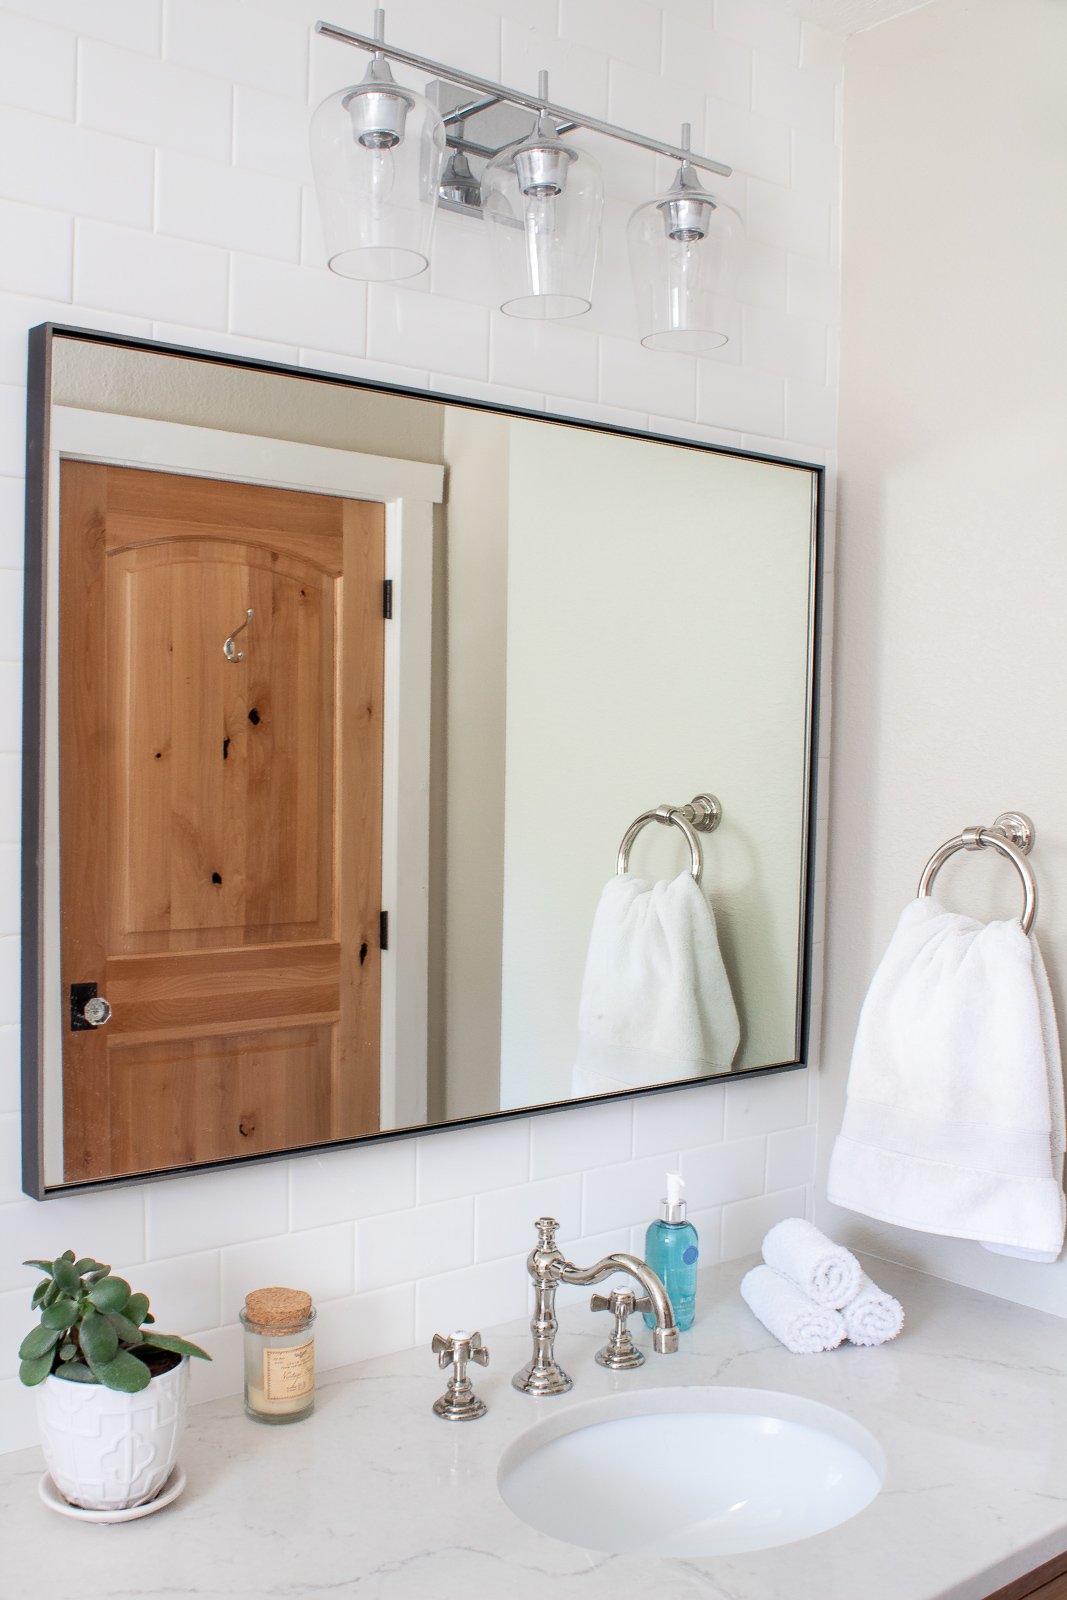
I love bold bathroom mirrors, but this time I felt like going with a clean minimalist look.  I think paired with the white subway tile wall it looks incredible.

wood bathroom vanity ideas

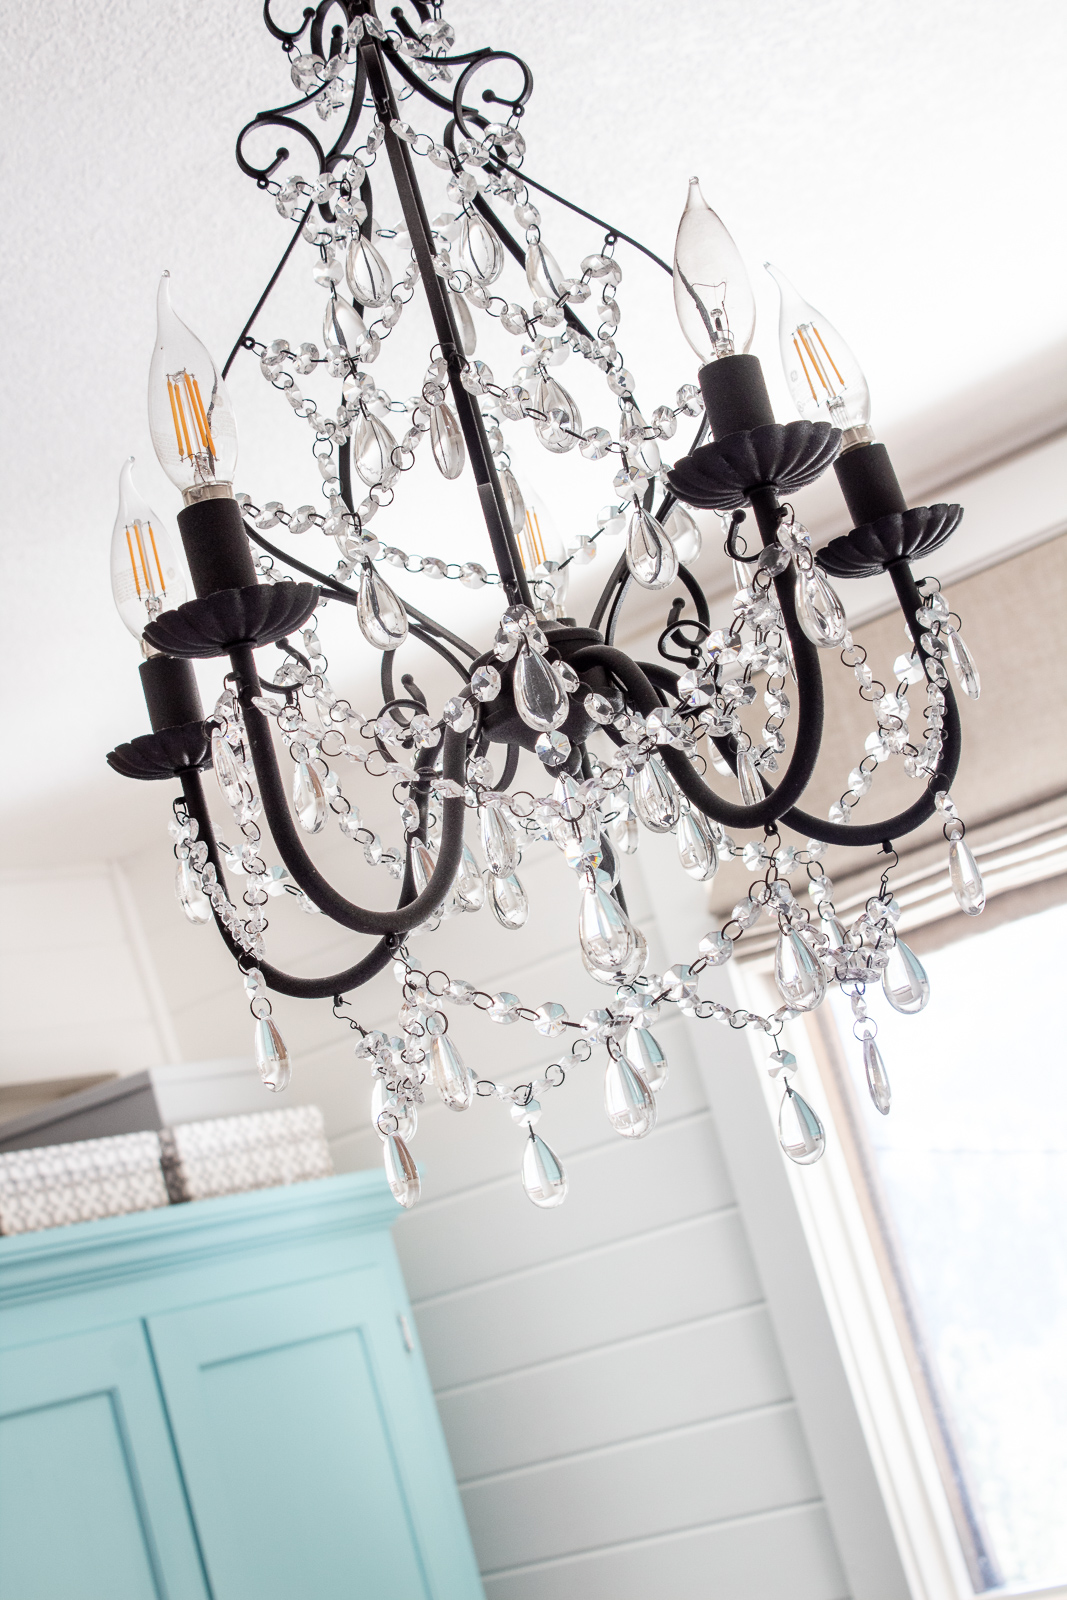
I know brass and gold metal in the bathroom is a trend that’s really taking off… and I love it to death but I can’t do it.  Bathroom and kitchen remodels are just way to expensive for me to get trendy.  I stuck with chrome and satin nickel to keep it safe.  I had a gift card reward from Neiman Marcus, and I wondered what on earth to do with it.  Luckily I stumbled upon this light, I don’t normally buy light fixtures at Neiman’s but it did work out in my favor.

bathroom remodeling ideas

When it came to the bathroom vanity I knew exactly what I wanted, I just couldn’t find it.  We ended up going with a custom built vanity from Etsy, I was able to get the perfect dimensions and all the features I wanted.  I wanted the look of a free standing vanity with drawers, no cabinets.

bathroom remodeling ideas

The top drawer is false, but the bottom drawer holds all the necessary items.  I added modern 12 inch drawer pulls to keep the vanity from looking too country.  The open bottom shelf is a great spot to add extra towels, and in the future I may add baskets to hold extra clutter.

White subway tile bathroom with wood vanity

This faucet… is it possible to love a faucet this much??  I am truly embarrassed by how much it costs but hear me out.  First of all I think every room needs one splurge item and this was it.  Second I had a lot of rewards from buying furniture so technically it was free, I paid just tax, if that.

I couldn’t find anything I truly loved at Lowe’s or Home Depot, the vintage look of this faucet won me over.  I just needed it… that is all.

bathroom remodeling ideas

Let’s get a close up, now that’s one sexy faucet!  If you look closely you can see me in my bathrobe with the camera tripod.  Haha.

bathroom remodeling ideas

The countertop is a remnant piece of quartz.  Any time we do small bathroom projects I like to go with remnant pieces, going this route can save you some serious money.

Chrome metal bathroom decor ideas

I’m not a big fan of traditional towel racks anymore.  It’s such a hassle to fold your towel and make it look nice and often times we need to fold more than 2 towels, so hooks it is!  We’re major hookers!  Sorry I couldn’t resist… but seriously we are total hookers.  Every room has multiple hooks, as well as all the back of all our doors.  Why fold when you can just hook?

hooks for towels instead of towel rack

If you have hooks in your home you know sometimes they pull out from the wall and it’s such a hassle.  We solved this problem by reinforcing the wall behind the hooks with a 2×4 before it was sheetrocked and textured.

I stumbled upon this whimsical animal wall art one day while on Etsy.  Can you tell I love Etsy?  I knew I had to have it somewhere in our house.  My first thought was in Ashley’s room but it ended up working perfectly in the bathroom.   Ashley was insistent on the Marie Antionette bunny.  There are so many cute animals to pick from at this Etsy store.

Benjamin Moore Ice Formations Paint

The original bathroom closet was huge, but awkwardly huge.  It didn’t fit the space so we rebuilt it to an appropriate size.  The air duct was raised but it does go through the tip top of the closet, as you can see how the wall to the right is at an angle.

The closet door is smaller than normal, we found a local custom door company that could make us a tiny door to match our other knotty alder doors.  I love this tiny door, it’s so cute… and it’s just fun to say tiny door.  Tiny door!

Modern cabin bathroom remodel

Such a transformation!  Bathroom from Hell is now Bathroom from Heaven!  I have all our bathroom details linked below.  Thanks for stopping by and viewing our bathroom remodel.

Walls are Ice Formations and ceiling and trim are Simply White both by Benjamin Moore.

Vanity | Floor tile | Faucet | LightTowel hooks | Towel ring | Toliet paper holder | Toliet | Towels | Bathtub | Wall art

Wall frames | Door knobs | Mirror | Shower curtain – custom sized in medium weight white linen


Laura

HOLIDAYS

GINGERBREAD CHEESECAKE DIP

Happy Holidays friends!  I have more gingerbread love to share with you!  This yummy Gingerbread Cheesecake Dip is a definite holiday winner and it’s so easy to make.  Easy is good this time of year, and gingerbread plus cheesecake is definitely good!

I love the Christmas season but I won’t lie… it makes me a tad frazzled.  So this time of year I’m always looking for recipes that are great for entertaining and that I can quickly throw together, and this recipe is perfect.  Nothing says Christmas cheer party time like a good creamy dessert dip!

Gingerbread Cheesecake Recipe

When you combine cinnamon, ginger, and nutmeg you really can’t go wrong, it’s Christmas comfort food!  This dip lets you get all the great holiday flavors and have fun dipping different ingredients for variety.  Lots of fun flavor combos to try!

Gingerbread Cheesecake Recipe

A quick tip, a single batch of this dip calls for 2 cups of Cool Whip, but I like to double a lot of my holiday recipes.  If you’re doubling this recipe use the entire 8 oz container of Cool Whip.  I’ve measured out an 8 oz container and it’s about 3 1/2 cups but it’s fine and doesn’t affect the flavor of the recipe.

You can also prepare this recipe a day or two in advance.  You could get a little liquid that separates in the dip but just give it a good stir to blend it and you’re good to go.

Gingerbread Cheesecake Recipe

Gingerbread Cheesecake Dip

Ingredients

  • 4 oz cream cheese, at room temperature
  • 1/2 cup vanilla yogurt
  • 1/4 cup packed brown sugar
  • 1/4 cup powdered sugar
  • 2 tbs molasses
  • 1 tsp ginger
  • 1 tsp cinnamon
  • 1/4 tsp nutmeg
  • 2 cups Cool Whip
  • Cookies, pretzels, graham crackers, or fruit for dipping

Instructions

  • Beat cream cheese, brown sugar, and powdered sugar together with an electric mixer until smooth.
  • Add molasses and mix until combined.
  • Add ginger, cinnamon, nutmeg, and yogurt. Mix until combined.
  • Add Cool Whip and mix until combined.
  • Chill in the refrigerator for an hour and serve.

Gingerbread Cheesecake Recipe

Get creative and have fun when it comes to dipping.  Pretzels, apples, cookies… it all tastes delicious!  So holiday easy!

If you’ve stumbled upon this gingerbread blog post and want more gingerbread love be sure to check out my Gingerbread Martinis, Gingerbread Sugar Scrub, and how to make Gingerbread Salt Dough Ornaments.  Yeah… we love our gingerbread around here!

Up next I’ll be giving you a holiday break and reveal our bathroom remodel!  Remember our crazy old cabin bathroom?  Literally everything went wrong in the remodel.  How can a simple bathroom remodel take 5 months?  I’m not sure but it did!


Laura

Colorado Home

A DAINTY COTTAGE BEDROOM FULL OF CHARM

tongue and groove white painted walls

Today I thought I’d give you a Christmas break and share another bedroom reveal with you!  My youngest daughter Ashley, who’s 15, has been so patient and kind with us during our remodel.  She has been with us through all the crazy ups and downs of our intense cabin work.  She has graciously slept with her mattress on the floor, without a door, and with a partial wall missing.  It has been a journey, but I’m happy to say her room is complete, and she loves it!  We spent all summer and most of the fall slowly working on this bedroom, but just last week I’m proud to say it all came together and was completely finished.

tongue and groove white painted walls

It’s hard to define the style of this bedroom. It’s a little bit farmhouse, a bit cottage, whimsical, and most of all it’s Ashley.  I had plenty of ideas for this room, but I made sure to have Ashley’s full input on what she wanted.  We had to compromise on a few things but overall I think we came up with a design plan that pleased us both.

Let’s see some ugly before photos!

Cottage style bedroom decor

Benjamin Moore Tranquil Blue

One thing Ashley was insistent on was tearing out the closet and having an armoire instead.  The closet was bulky and ugly so I gladly indulged her here.  The room is quite small so having an armoire saved space and added that charming look that she’s so fond of.  Her wardrobe is on the smaller side so this worked quite well.  We chose a storage bed with drawers in our bedroom and did the same in this room, so she has plenty of room for pajamas and other items, a shoe drawer, and even the ever so essential junk drawer.  Don’t we all need a junk drawer??  I think so.

We decided to add tongue and groove walls. Brian and I spent many many grueling days cutting, nailing, and caulking the boards.  It took me so long to paint this room I thought I was going to lose my mind.  I tried several different paint rollers and all left an undesirable texture on the walls.  So I had to paint every board by hand, and it took a good 3-4 coats!  So glad that’s over!

Small bedroom space saving solutions

Originally her room had a bathroom connected.  So if you were in the basement you would walk into her room to use the bathroom.  I’m not sure if her room was originally the master bedroom or what (for many reasons we decided to take the bedroom upstairs).  So we added a small hallway so we could enter the bathroom privately.  It worked out well, because if we hadn’t have taken down the closet for the armoire, I’m not sure we would have had room for this.

DIY floating nightstand ideas

When you have a storage bed with drawers, floating nightstands are the way to go.  For our master bedroom I ordered floating nightstands but I needed a quick last minute solution here.  After racking my brain I decided to use the old cabinet doors from our laundry room.  I painted them to blue to match the furniture and Brian found some brackets.  It was such an easy solution!

Farmhouse cottage bedroom decor

Instead of a desk we went with a bistro table and chairs.  It fits nicely into the corner of her room, and it’s so versatile.  She can read, do homework, or just relax and sip some tea at her little table.  Ashley loves her tea!  While pulling out my Christmas decor I found our birch branch tree and it adds a bit of whimsical charm.  I think we’re going to leave it up year round, it’s just so cute in her room!

I ordered the armoire unfinished as well as the table and chairs.  After a lot of back and forth we decided on Benjamin Moore Tranquil blue.  I stained the chair seats and table top with Varathane natural stain.

white shiplap walls

My sweet girl loves animals and all things nature.  One day I found this wooden cow print wall art on sale and surprised her with it, it’s on clearance so if you like it you can buy it now! I framed an elk photo we took last year and it adds a smile on her face everyday.  Ashley named the elk in the photo Honey.

country cottage bedroom

When you have small floating nightstands, you really can’t spare any space for a traditional lamp.  These sconces have a nice clean design that helps bring the room together and the pull chain makes it so easy to turn on and off.  We added a longer pull chain with a decorative crystal for the end, it’s the little things like that that makes such a difference!

modern farmhouse wall sconces

I just love pretty chandeliers, so found this smaller sized chandelier for a great price I jumped on it.

farmhouse cottage bedroom

The shades are from Restoration Hardware.  They’re the same ones from our master bedroom.  I have a love hate relationship with them.  Love the way they look but the cord is in the back and I find it incredibly awkward to open and close them.  You must reach behind the shade and it’s just odd.  Overall, I probably wouldn’t recommend them to anyone.

white tongue and groove bedroom walls

By the way, shout out to Ashley who installed her hardwood floor all by herself!  We added a rich chocolatey brown sheepskin rug for some color and warmth.  It’s soft and cozy, it feels incredible to walk on!

cottage bedroom

Walls and trim are Benjamin Moore in Simply White, furniture is Benjamin Moore in Tranquil Blue.

Upholstered storage bed – in Performance Everyday Velvet Buckwheat (read my review here) Pottery Barn Performance Everyday Velvet rocks!

Armoire | White quilt | Floral comforter | Sconces | Chandelier | Sheepskin rug | Table | Chairs | Birch tree | Cow print art  | Coat rack | Door knob | Wreath | Hardwood floor


country cottage bedroom makeover

This week I’ll also be sharing our downstair bathroom with you!  It was a total disaster complete with a caved in ceiling.  You won’t believe the transformation!


Laura

Cocktails & Drinks

GINGERBREAD MARTINIS

How to make gingerbread martinis

Happy December!  We’re officially into the Christmas season so why not celebrate with a festive holiday drink?  We love our gingerbread around here so I thought we would kick off the season with gingerbread martinis!  These martinis are so incredibly rich and indulgent… perfect for any event or party.  My recipe makes 2 cocktails but feel free to double it if you’re serving a larger group.

How to make gingerbread martinis

The gingerbread simple syrup is the secret ingredient here.  You can make a batch from start to finish in a little over 30 minutes.  My trick is to make up a batch of gingerbread simple syrup and keep it on hand in the refrigerator.  It will last several weeks in the refrigerator and you can whip up a drink in just minutes.

You’ll probably have some leftover gingerbread simple syrup, be sure to save it!  It tastes amazing in coffee and Haley loves to add it to hot cocoa.

Gingerbread martini recipe

I don’t really like strong martinis but if you’re tougher than me you can reduce the half and half from 1/2 cup to 1/4 cup and that should do it.  What makes this martini really shine is the fun garnish, don’t skip out on that!  The whip cream, gingerbread cookie, and crumbs make this drink oh so delicious.  It’s the holidays, so indulge!

Gingerbread martini recipe

Gingerbread Martinis

Servings: 2 cocktails

Ingredients

Ingredients for the cocktail:

  • 1/4 cup vodka
  • 1/4 cup Irish Cream
  • 2 tbs Kahlua
  • 2 tbs gingerbread simple syrup (recipe below)
  • 1 tsp molasses
  • 1/2 cup *half and half
  • whipped cream for topping
  • small gingerbread cookies, whole and crushed for garnish

Ingredients for the gingerbread simple syrup:

  • 1 cup sugar
  • 1 cup water
  • 5-10 whole cloves
  • 2 cinnamon sticks
  • 2 pieces fresh sliced ginger

Instructions

Instructions for the gingerbread simple syrup:

  • Add sugar, water, cloves, cinnamon, and ginger to a saucepan. Bring to a boil, whisking until sugar is completely dissolved. Lower temperature and simmer 5 minutes. Remove from the heat and let cool 20-30 minutes. Store in an airtight container in the refrigerator up to 2 weeks.

Instructions for the cocktail:

  • In a cocktail shaker combine vodka, Irish cream, Kahlua, gingerbread syrup, molasses, and half and half. Add ice and shake well. Pour into 4 chilled martini glasses and top with whipped cream, ginger bread crumbs, and a gingerbread cookie.
  • *For a stronger drink reduce the half and half to 1/4 cup.

Holiday Christmas cocktails

I think it’s really fun to have a themed cocktail every year for Christmas, and this gingerbread martini hit the spot!  It tastes like dessert.  We can’t get enough gingerbread in our house so expect another yummy recipe to come soon.  Gingerbread lovers be sure to check out my Gingerbread Sugar Scrub and how to make Gingerbread Salt Dough Ornaments, which are perfect gingerbread shaped!  ‘Tis the season for Christmas fun!

Laura

HOLIDAYS

HOW TO MAKE GINGERBREAD SUGAR SCRUB

How to make gingerbread sugar scrub

We are officially snowed in today, and with Thanksgiving just days away we’re already full of Christmas spirit!  The girls and I are big fans of anything gingerbread so we decided to give our favorite sugar scrub recipe a gingerbread twist.  ‘Tis the season for dry winter skin!  Living in the mountains is especially hard on our skin, so this delicious sugar scrub is the perfect solution to keep our skin silky smooth.

I’ll show you how quick and easy it is to make this scrub. You probably have most or all of the ingredients already on hand in your kitchen.

How to make gingerbread sugar scrub

Just a warning this gingerbread sugar scrub smells so good you might want to eat it!

How to make gingerbread sugar scrub

To preserve the texture of the scrub, it’s important to keep the coconut oil at room temperature and not to melt it.  This keeps the mix light and fluffy.  I decided to skip the essential oils this time and just use regular spices from our kitchen.

Use a spoon to soften the coconut oil a bit, add the spices, and mash it up to make a paste.  Then simply add the sugar and mix well.  Once the scrub is mixed together use your hands to blend and break up any coconut oil or sugar lumps.  It’s that simple!

How to make gingerbread sugar scrub

This sugar scrub makes an adorable Christmas gift too!  Why not share the gingerbread love?  Tie a pretty bow or gingerbread ornament to the jar and you’ve got a perfect holiday gift that’s quick to make and budget friendly.  Be sure and check the dollar stores for cute holiday jars.

We generally use our scrubs within 2-3 weeks but I have kept some for up to a month and the quality has been fine as long as water has been kept out of the jar.  This recipe makes about 2 1/2 cups, we were able to fill 2 small jars.

Gingerbread Sugar Scrub

Ingredients

  • 2 cups brown sugar, packed
  • 1/2 cup coconut oil
  • 2 tsp ginger
  • 2 tsp cinnamon
  • 1/2 tsp cloves
  • 1/2 tsp nutmeg

Instructions

  • In a medium size bowl add coconut oil and mix with a spoon until it softens up.  
  • Add spices to the coconut oil, mash and stir well to blend.  
  • Add brown sugar and mix again, using a spoon and your fingers to blend.
  • Store in a clean storage container and use within 2-3 weeks.

How to make gingerbread sugar scrub

I like to leave a jar of scrub by the sink and use it a few times a day.  It’s a lifesaver for our dry winter hands and gives us our gingerbread fix!  It has all the yummy goodness of gingerbread but it’s calorie free!

We’re just getting started with our gingerbread spiced fun so expect more on the blog soon.  As for now we’re off to play in our snow.  Have a Happy Thanksgiving!


Laura

HOLIDAYS

HOW TO MAKE WINE CORK BEAR ORNAMENTS

Calling all Christmas lovers and wine drinkers!  Feeling crafty??  Lately I’ve been so stressed out finishing home remodeling projects, especially Ashley’s room, it’s been a TON of work.  Over the weekend we actually made a lot of progress, but mentally I’m just over it.  Sometimes you just need to have a glass of wine and start crafting.  It’s the grown up equivalent of playing with toys, and I needed to play with my toys… my wine cork toys!

Once you gather your supplies you can make these wine cork bears pretty quickly.  I’m always saving wine corks, I think they’re so cute and I have the hardest time throwing them away.  If you’re not a big wine drinker and need corks I recommend stopping by local wineries or wine bars.  They’ll gladly give you a ton, I think I have enough wine corks for 2 years of craft projects!

How to make wine cork bear ornaments

I found all my supplies at Hobby Lobby.  It can be a little tedious to find these items, the jewelry making section and the sewing section are great places to search for supplies.  As for the faux fur you can have a small amount cut from the fabric department, but you can also find small rolls of faux fur over in the general crafting section which is what I used.

How to make wine cork bear ornaments

SUPPLIES NEEDED

Wine corks

Brown faux fur

Small brown pom poms

Brown pipe cleaners

Small eye pin hooks (check the jewelry making aisle)

Short gold pins (check the sewing aisle)

Thin nails without heads (about 2 inches long)

Small sequins in Christmas colors

Variety of beads in different sizes and Christmas colors

Hot glue

Thin ribbon for hanging

Assorted ribbon, scrap fabric, bells, and other items for decorating

How to make wine cork bear ornaments

Step 1: Screw in an eye hook near the end of the wine cork.  Cut a strip of faux fur to cover half of the wine cork.  Turn the fur over and cut a small slit with a pair of scissors so the eye hook will go through the fur.  Using hot glue or regular glue, attach the fabric around the cork.

Step 2:  Glue 2 pom poms for ears and another for a bear nose.

Step 3:  Take 2 short pins, thread with a small bead and sequin for eyes, and stick them into the cork where edge of the fur stops.

Step 4:  Cut 2 pieces of pipe cleaner and glue to the wine cork.  Place a bead at the end of the pipe cleaner and then bend it around to resemble a paw.

How to make wine cork bear ornaments

Step 5:  Glue a strip of fur wide enough to cover all around the wine cork, make sure the fur is glued just slightly past the top of the cork so the base will be hidden.  Once the body is securely glued bend down and adjust the arms.

Step 6:  To attach the head and body take a bead on a headless nail and secure into the body.  The bead acts as a base and lets the bear head swivel.

Step 7:  Stick the top part of the nail into the cork head.  If this is hard pull the nail out and reposition as needed, use gentle pressure to ensure the nail is firmly attached to both wine corks.  Add a dab of glue to secure.

Step 8: Tie a ribbon loop to the eye hook and then decorate your bear any way you like.

How to make wine cork bear ornaments

How to make wine cork bear ornaments

You can leave the back of the bear head exposed to show off the wine cork or glue on a piece of scrap fabric.  It’s up to you, I think both are cute!

How to make wine cork bear ornaments

Get creative and give each bear it’s own unique look, it will be so beary cute!!  If you can find white faux fur then why not make wine cork polar bears?

How to make wine cork bear ornaments

How to make wine cork bear ornaments

These little wine bear cuties are all ready for Christmas!  They make a fun afternoon project and look so cute hanging on our Christmas tree.  Also don’t forget these make cute gifts and would be adorable attached to a bottle of wine.   If you have fun with wine cork crafts as much as I do then start collecting now!  I definitely see more wine cork projects in my future!


Laura

Colorado Home

ENTRYWAY & STAIRS BEFORE & AFTER

Mountain Cabin Entryway with Stairs

Hey everyone, I’m so happy to be sitting on our new stairs!  This week has been crazy, we’re in a mad rush to finish some big projects before we have house guests and prepare for Thanksgiving.  Last week I showed you our living room makeover, and now I’m so excited to show you our stairs and entryway makeover!  Our small entryway and the stairs are the first thing you see when you enter.   They set the mood and tone of the home right when you walk in.  Because of this, remodeling this area of our home was high on my priority list.

I showed you a peak at this new space, but before I get too far ahead let’s see some ugly before photos.  Who doesn’t love ugly before photos?

Ugly cabin stairs before and after

Super ugly right?  These stairs caused a lot of stress trying to figure out what to do, the metal frame is welded into the house.  The floor company didn’t think it was possible to add a riser to the steps, but we eventually found a solution that worked.

tearing out concrete stairs

I spent hours and hours chiseling out the concrete and tile and then Brian rebuilt wooden risers and steps, making sure they were up to code.

tearing out concrete stairs

It was a ton of work but our stairs are completely transformed.  When it comes to stairs we’re pretty clumsy so I thought a nice cushy carpet was the way to go.  It’s supposed to be extremely stain resistant, so hopefully it will last a while.

Mountain Cabin Entryway with Stairs

I’m absolutely in love with our new craftsman style door, painted in Home Decorators Sophisticated Teal.  I wish I could show the outside a little more but it’s currently being painted and it’s all taped off.

Mountain Cabin Entryway with Stairs

Going with my favorite modern mountain theme I knew I wanted the space to look fresh and clean, yet with some rustic mountain charm.   On Etsy one day I stumbled upon a branch handrail that could be custom made to fit your space and I knew it would be the perfect touch for our space.  Because we needed over 13 feet we had to split up the handrail into 2 pieces, but I find that even more charming!

Tree branch stair handrail

The branch handrail feels so silky smooth to the touch, yet it has such a gorgeous weathered look with all the knots and natural cracks in the wood.  It’s such an upgrade from the old metal pipe handrail!  If you’re looking to add a unique piece to your home be sure and contact Crista, she does custom orders and her work is beautiful!

Mountain Cabin Entryway with Stairs

Those wondering Goldie Fawn made it just fine through the move and is bundled up with Brian’s scarf and ready for winter!

Mountain Cabin Entryway with Stairs

I’ve always loved decorating with mirrors and I decided to break up all the lines with 2 circular mirrors.  The mirrors bring light and sparkle to our space while reflecting our favorite view of the hills and trees.  It took a while to find clean looking brass mirrors in a variety of different sizes, but I finally found the perfect affordable ones.  I bought a 36 inch and a 24 inch mirror.

Mountain Mountain Cabin Entryway with Stairs

We decided to add a stained tongue and groove wall so the upstairs hallway and downstairs entry could have a bit more pizazz!  It’s so much better than that plain white wall.  This is actually the leftover wood from our ceiling, that worked out well huh?  These frames were from the dining area in our last home and they look so modern and gorgeous against the wooden wall.  I have such a thing for black and white photos, they look so crisp and clean.  These are our favorite wine photos we’ve taken over the years.

Mountain Cabin Entryway with Stairs

Mountain Cabin Entryway with Stairs

We added this light in the entryway, which is hard to see but pulls the space together beautifully!

Tree branch handrail

Mountain Cabin Entryway with Stairs

Such a transformation right?  I love decorating small spaces, they’re my favorite!  We’re in the final touches of finishing Ashley’s room, and it’s looking so cute!  I’ll be sharing it soon and then it’s all Christmas baby!

Branch handrail | Deer head | Light | Wall frames | Large round mirror | Small round mirror

Walls & trim are Simply White by Benjamin Moore. Metal stairs are Appalachian Brown by Benjamin Moore.  Front door is Sophisticated Teal from the Home Decorators Collection at Home Depot.

Laura

Breakfast

SPINACH PARMESAN POLENTA WITH BACON

Spinach Parmesan Polenta with Bacon

Happy Wednesday!  We’re shifting into holiday mode around here, and that means I have food on my mind!  I wanted to share with you this incredibly delicious spinach parmesan polenta with bacon recipe… and I’m happy to say we have a print button for my recipes now!  This has been on my to-do list for so long, but it’s finally done.  This should hopefully be easier to read and easier to print for reference.  Now I want to talk about polenta and my love for it.

So what do I have to say about polenta?  Only that I’m obsessed.  I can’t get enough of the sloppy goodness, any time I see it at a restaurant, no matter what, I order it.  Those unfamiliar with polenta, it’s like a rich liquid buttery cornbread, it’s heavenly and marries well with many different flavors.

Not to be confused with grits, don’t get me wrong I love grits when prepared well, but polenta ups the ante.  If you’re confused about the difference no worries… I’ll explain it.  Polenta is an Italian based dish, while grits are a southern delicacy.   Polenta is made from yellow corn while grits are from white corn.  Both are delicious, but what seals the deal for me is the course texture.  Like I said liquid cornbread!  It’s the best of both worlds.  There is nothing better than rich creamy polenta.  I think if more people ate delicious polenta everyone would be peaceful, happy, and the world would be a better place.  So there it is, eat more polenta and let’s have world peace!

Looking at these photos I’m getting sad.  You see these photos were taken days ago and now I’m all out of polenta.  Why??  I need more right now.  Eating this spinach parmesan polenta with bacon is so delicious and comforting… it’s like getting a hug from your grandma.  Perfection.

To ensure the polenta is extra creamy I prepare it stove top, and separate from the other ingredients.  Then it comes together for ultimate creamy deliciousness where I finish with a short bake in the oven.

Bacon lovers feel free to use more bacon!  Has anyone ever complained about too much bacon?  I think not.  After the polenta is finished baking I like to add a small handful of spinach leaves for garnish, nothing makes a dish pop like a sprinkle of green.

This dish makes an incredible breakfast or side dish to any meal.  Polenta, cream, cheese, and bacon.  You can’t go wrong!

Spinach Parmesan Polenta with Bacon

Servings: 8

Ingredients

  • 6 cups chicken broth or stock
  • 1 cup whole milk
  • 1 cup heavy cream
  • 2 cups polenta - I used Bob's Redmill
  • 8 slices bacon, chopped
  • 1 yellow onion, diced
  • 1 5 oz container fresh spinach
  • 2 tbsp butter
  • 1 1/2 cups shredded parmesan, divided
  • salt and pepper to taste

Instructions

  • Preheat oven to 375°
  • Combine chicken broth, milk, and heavy cream in a large pot and bring to a boil. Stir in polenta and reduce heat to low. Cover and simmer 20 minutes, stirring occasionally.
  • While the polenta is simmering, cook the bacon in a large skillet until done. Remove bacon from the pan and set aside. Leave about 2 tablespoons of bacon grease in the pan. Sautee the onions until soft and golden, add the spinach and cook until wilted.
  • When the polenta is finished cooking stir in butter and 1 cup of parmesan cheese. Add salt and pepper to taste.
  • Stir in the onion-spinach mixture and mix well. Pour into a greased 9x13 baking dish. Top with remaining 1/2 cup of parmesan cheese and bacon.
  • Bake 10-12 minutes until hot and bubbly. Garnish with spinach leaves and serve immediately.

Soon I’ll be sharing more delicious holiday recipes and other fun stuff.  Stay tuned!


Laura

Colorado Home

OUR MODERN MOUNTAIN LIVING ROOM

Finally after months and months our new, modern, mountain-inspired living room is complete!  I am absolutely thrilled with our new space and can’t wait to share everything with you!  I’m also showing you our little dining area update and our new deck, since the area is one big connected area.  Before I get too far ahead of myself let’s see what this room used to look like!  Ew… it was bad bad bad!!!

After a miserable summer I am so happy this space is complete!  We hired out the wood ceiling, wall texture, and the fireplace but everything else we did ourselves, and trust me there was PLENTY of work to keep us busy.  From painting to installing baseboards to the hardwood floor and just coordinating the room, it was a TON of work.  Don’t even get me started on stripping and grinding those stairs!  But I’m happy to say I love it and I’m so glad it’s over!

Modern Colorado Mountain Home Before and After

So many big changes happed in our living area.  For one we took out the door to the left of the fireplace, ripped out the heavy stone wall, and sealed up the living room closet door to have extra closet space in the master bedroom.  We also decided we didn’t want the hassle of carrying wood upstairs to the living area so we went with a gas fireplace.   You can see more before photos on our cabin reveal post and see some crazy in-process photos in cabin chaos and updates.

Cabin stone fireplace and cedar ceiling

We really loved and instantly missed our Texas stone fireplace so naturally when we went to pick out stone I was drawn to light stone.  I think we took the look of our old fireplace and gave it some rustic mountain charm.  If you’ve just stumbled upon this blog post and your curious about our old fireplace you can see photos here.

Modern Mountain Home Living Room

I spent hours and hours stripping the carpet glue off the stairs and Brian and I took turns smoothing down the uneven welded spots with a grinder.  I finished the stairs with several coats of rich brown paint and added texture to the stair steps so they would be safer and less slippery.

Modern Mountain Home Living Room

Living in the Colorado mountains I wanted our home to look light and bright but still have the warmth and character of wood with plenty of nature mixed in.  I didn’t want our home to look like a ski lodge so I was careful to balance wood and white, and I love the results.  It’s the best of both.  My little black bear is a foot stool, isn’t he so cute?

Modern Mountain Home Living Room

Since we’ve downsized in square footage I’m constantly looking for space saving ideas and storage.  Naturally I fell in love with this wine trunk.  It opens and has tons of storage for wine, glasses, and other entertaining pieces.  I had the hardest time finding art I liked for over the wine trunk.  Nothing felt right, what I was craving was texture and this french wine bottle holder fit the bill.

french wine rack

Having such an open living and dining room floor plan has been a bit of a challenge.  Large spaces are definitely tricky to decorate, but at the same time my goal was to save space and create the illusion of space.  I’ve always wanted to experiment with banquette seating and this was an ideal situation to try it.  I love how banquette seating creates a cozy environment and saves space.  It’s almost like an extension of our living room, not having a chandelier over the table I happily settled on sconce lighting for warm ambience.

Our dining area is basically a wall.  It had a small off center unbalanced window.  Obviously we aren’t lacking light so out it went!  I love how this mirror adds light, sparkle and panache! We added a dimmer switch for our sconce lights.  It’s incredibly cozy at night!  Going with banquette seating we had to switch out our old table.

Modern Mountain Dining Room

The legs on the edge of the table made it hard to slide in and out.  It took me forever to find the perfect pedestal table but I found it.  We kept our old chairs and it looks great.  Not only does our dining area save space we can comfortably fit 6-7 people in the small space.

cedar tongue and groove ceiling with chandelier

When designing a room I love mixing different elements together.  Rustic and modern, light and dark… it’s what I’m drawn too and it never lets me down.  I knew we would have a rustic cedar wood ceiling and I kept envisioning a crystal chandelier against the wood.  The contrast is everything I thought it would be.

Crystal orb chandelier cedar wood stained ceiling

Since our deck is right off the living room I thought I’d share it too.  Our deck subfloor was partially rotted and only covered with a black rubber roofing membrane.  Brian ripped out all the layers, scraping and sealing any rust, and finished with deck boards that I stained with Ready Seal Cedar.

Modern Colorado Mountain Home

I found this incredible weather proof affordable bistro earlier in the summer.  It’s held up great, no regrets!  The seat cushions have washable covers and they’re super comfortable!

Modern Colorado Mountain Home

Ok, I have a secret.  Do you wonder how to keep perfect potted evergreen shrubs on your patio and in extreme weather?  They’re fake!  These are the same potted evergreens from our Texas home.  They were perfect for the extreme Texas heat and they work perfectly in the extreme Colorado cold and there is no mess from water or droppings.  They look real, you can only tell they’re artificial if you start messing with them up close.  Put them in a pot with some pebbles and you’ll be amazed how real they look, and they come in a variety of sizes too!

Modern Colorado Mountain Home

With all the light we have a tricky room to photograph but even though the room looks a bit dark I wanted to share our view.  It’s incredible, I took this photo just as the sun was rising.  If you look carefully you can see bits of snow through the trees.  It’s beyond gorgeous.  However in the late afternoon the winter sun can be harsh so we have ordered curtains for the window and a large custom rod, they just haven’t arrived yet. The window will almost always stay open except for those times that the sun is brutal.

Of course our modern mountain home has plenty of animal inspired touches such as this antler bowl.  It works great with a fall display of pinecones and pumpkins but I’m looking forward to jazzing it up for Christmas and the spring and summer seasons too.

I knew I wanted a blue sofa, it was an incredibly risky decorating choice but I wanted it. I knew the room would be mostly neutral so I wanted a bright pop of color.  Our first sofa from Restoration Hardware the delivery guys cut the fabric with a razor opening the box.  It was a disaster but they made it right by letting us keep the damaged sofa and a month later sending us a completely new one. I really love the color and look, however I do have some concerns whether this sofa will last.  It doesn’t feel as sturdy as our Pottery Barn sofa (that’s currently in the basement) at all… I guess time will tell.

Modern Mountain Home Decor

I find it a bit difficult to keep our cowhide rug clean but I love the look!  After having the rug out about a month I realized something was off.  It wasn’t warming the space enough so I bought a seagrass rug that’s perfect for layering under the cowhide rug.  Don’t forget you can layer rugs to suit your space needs!

Modern Mountain Home Living Room

I really don’t put too much thought into my throw pillows.  I’ll just toss whatever pattern and sizes on the sofa but when I came across these leather pillows I knew I had to have them.  They give some masculine balance to our girly blue tufted sofa.  I’m so glad I found them!

So that’s our living room and dining before and after!  Do you like it?  I do but I’m just so relieved it’s over.  Do you have any idea what it’s like to have 100 home projects going on at once?  It’s brutal.

Sofa | Leather pillows | Coffee table | Antler bowl | Wood tray | Seagrass rug | Cowhide rug | Leather chair | Fur pillow | Floor lamp | Chandelier | Wine trunk cabinet | Wall wine rack | Wine opener | Wine barrel tray | Sconce over stairs | Outdoor bistro set | Outdoor faux tree | Vase | Dining chairs | Dining table | Leopard banquette | Dining room sconce lights | MirrorBlack bear foot stool | Wood floor | Frame TV | Metal reindeer

Walls are Simply White and stairs are Appalachian Brown by Benjamin Moore.

Soon I’ll be sharing our entryway and staircase remodel along with Ashley’s room and the downstairs bathroom.  We’ve been busy busy and looking forward to stopping all projects for a much need break during the holidays!

Laura

Crafts

HOW TO MAKE ORANGE CINNAMON CLOVE POTPOURRI

How to make orange cinnamon clove potpourri

I enjoy all the beautiful smells that come with the holiday season.  Right as the air turns chilly and the leaves start to change I love to fill our home with a rich spicy aroma.  Normally I burn a lot of candles this time of year, but with all the beautiful pinecones around our property I decided to make potpourri.  Making your own potpourri is a great way to keep your home smelling great while on a budget.  Today I’m excited to share with you how to make this orange cinnamon clove potpourri.

How to make orange cinnamon clove potpourri

Why orange, cinnamon, and clove you ask?  Because those are my favorite fall and winter scents!  Every time I enter the room with this lovely potpourri scent it reminds me of a cup of spiced apple cider.  It’s such a warm comforting smell!  Below I’ve listed supplies needed and I’ll show you how to prep the ingredients and assemble the potpourri.

SUPPLIES NEEDED

2-3 oranges sliced – preferably with a mandolin

20-25 pinecones depending on size

8-10 cinnamon sticks

a large handful of wood chips

*Pure Orange Oil

*Pure Clove Oil

*Pure Cinnamon Oil

Baking sheet with a cooling rack on top

A large bag to mix everything together

*I used Now Essential Oils which are very affordable and sold at Amazon and grocery stores such as Sprouts.

HOW TO PREP THE PINECONES

Pinecone potpourri

If you live nowhere near a pine tree and you purchase pinecones from a craft store then they are ready to use.  Hopefully, though, you can find your own pinecones outdoors, but if you collect your own you’ll need to prep them to kill off any mold or bugs and to burn off the sap.  If you do get sap on your hands, hand sanitizer works like a charm to take it off.  Place your pinecones on a baking sheet lined with foil or parchment paper to avoid getting sap stuck to your pans – trust me that’s not fun.  Bake at 200 for 30 minutes then let cool.  If your pinecones are wet they’ll need to bake longer.

HOW TO DRY ORANGES

How to dry oranges for potpourri

It’s fun to dry oranges for a variety of crafts, the oranges take a little longer to prep but it’s well worth it.  You’ll need 2-3 oranges sliced uniform and thin, using a mandolin is ideal.  Place a cooling rack over a baking sheet and lightly spray with cooking spray.  Arrange oranges in a single layer and bake at 200 for about 4 hours.  I live at high altitude so mine took a little over 4 1/2 hours.  You know they’re done when the center of the orange feels dry and stiff.  Let cool and store the dried oranges in an open container until ready to use.

How to dry oranges for crafts

HOW TO MAKE THE POTPOURRI

Once the pinecones and oranges are prepped place them in a medium to large sized bag and throw in a handful of wood chips.  This is optional but I love the visual texture it added.  I used leftover mesquite wood chips from our grill.  If you decide to use wood chips or twigs from outside be sure to prep and sterilize them the same way as the pinecones.

Next add a package of cinnamon sticks, or about 8.  Cinnamon sticks get expensive so I limited the quantity.  You can find them cheaper around the holidays or in the bulk food aisle.  Now it’s time for the good stuff, the essential oils!  Mmmm.  The amount you use is strictly up to you but I love strong smelling potpourri.  I sprinkled the oil directly into my bag with ingredients.  I did 20 shakes of orange oil, shook the bag, 20 shakes of clove oil, shook the bag, and then 5-6 shakes of cinnamon oil.

I say shakes not drops because several drops came out at once.  I prefer a more subtle cinnamon scent with stronger orange and clove, but the amount and ratio is up to you.  I used new 1 ounce bottles of oil and I used maybe 1/8 of the orange and clove and much less of the cinnamon.  You should have enough potpourri to fill 2 smaller containers or one larger one.

How to make orange cinnamon clove potpourri

You can use any brand of essential oil you like, but I used Now Essential oils which are affordable and easy to find at Amazon and some grocery stores like Sprouts.  You can also purchase a variety pack for around $40 it includes all the oils you need plus several extra oils to experiment with.

Just a warning, if you get any oils on your fingers, especially the cinnamon or clove, be sure and wash your hands.  Don’t be like me, forget and then accidentally touch your eye.  That was a bad experience!

Save money making your own holiday potpourri

How easy was that?  Haha… I’ve been watching Ina Garten lately so I’ve got all her catch phrases stuck in my head.  Seriously you gather and prep your ingredients…making this potpourri is so easy!

DIY holiday potpourri

Not only does this fresh potpourri make your house smell incredible, but it looks so festive on display, it’s perfect for the holiday season don’t you think so?  Even better you can gift your potpourri.  Simply place the potpourri in a clear bag, secure the top with a rubber band, and then add a bow or twine.  It makes a great Thanksgiving hostess gift or Christmas gift.

Make your own potpourri gift

As time goes by your potpourri will naturally lose a bit of scent.  You can easily freshen up your orange cinnamon clove potpourri by occasionally adding a few drops of oil.

Interested in more pinecone projects?  Check out my guide on how to bleach pinecones, my snowy berry pinecone wreath and my sugar plum fairy pinecone garland.  I definitely love my pinecones!


Laura

Cocktails & Drinks

CRANBERRY APPLE CIDER PUNCH

CRANBERRY APPLE CIDER PUNCH

Happy almost Halloween!  I actually had some fun Halloween ideas for the blog, the only problem is they stayed in my head and never made it on the computer.  Funny how that happens…. but hey, I’m ready to jump into fall and Thanksgiving!  I love a good holiday punch, so I decided to break out my punch bowl.  I spent days searching through unpacked moving boxes in the attic only to find no punch bowl.  Yay.

The silver lining is that I found this gorgeous modern punch bowl online and I now had a legit excuse to buy it.  So thanks to the new punch bowl I can show you how to make this easy cranberry apple cider punch.  I love how a good punch really sets the party mood.

CRANBERRY APPLE CIDER PUNCH

I know not everyone enjoys an alcoholic punch so I have a naughty and a nice version.  Have no fears, though, the naughty version isn’t strong at all.  It’s just the difference of adding ginger ale or champagne, totally your choice.  Whether you make the naughty or nice version your crowd will love this colorful punch.

To make a festive presentation I like to add a bag of frozen cranberries and slice a few apples with my mandolin.  The tart cranberries taste incredibly delicious against the sweetness of the punch.  I love to eat them in between sips, especially when they start to thaw out a bit – so good!  Keep all your ingredients chilled in the refrigerator and you can put this punch together at a moment’s notice.  Perfect for Thanksgiving or fall parties.

CRANBERRY APPLE CIDER PUNCH

I like how this punch bowl holds a lot but it has a smaller footprint, it’s not as wide as my last one.  Therefore it’s much easier to store.  I keep having an urge to put a goldfish in it.  Doesn’t it kind of look like a fancy goldfish bowl?  I’m still scratching my head where my old punch bowl is.  Did I break it?  Is it lost in a box somewhere or did I garage sale it and forget?  It’s a great mystery.

FALL PUNCH

Cranberry Apple Cider Punch

Ingredients

  • 2 quarts chilled apple cider
  • 1 quart quart chilled cranberry juice
  • 12 ounce container frozen pulp free orange juice concentrate, thawed
  • 2 bottles chilled brut champagne or a 2 liter bottle of chilled ginger ale
  • 2 cups frozen cranberries
  • 2 apples thinly sliced with a mandolin

Instructions

  • Mix apple cider, cranberry juice, and orange juice concentrate together in a large container and refrigerate until ready to use.
  • When you’re ready to serve the punch add the juice mixture to a large punch bowl, add ginger ale or champagne, and stir.
  •  Add the frozen cranberries and apple slices to the punch bowl for garnish and serve.


FALL PUNCH

I am so excited for the Thanksgiving and Christmas season, and now that things are starting to calm down with the house I’m ready to share some holiday fun.  Next up I’m making potpourri, your house will smell heavenly and it makes a perfect hostess or Christmas gift.  I should have that up real soon.  Happy almost Halloween!


Laura

Colorado Home

OUR SPACE-EFFICIENT MASTER BEDROOM REVEAL

Space efficient master bedroom decor

Hey friends I’m back and ready to reveal our space-efficient master bedroom!  First off all, in a June or July blog post I mentioned that I would soon have our bedroom up on the blog… well everything went wrong.  Yeah, I jinxed myself.  Our plan was to replace all the flooring in our house with hardwood floor and we decided to start with our bedroom.  Well, after our bedroom floor was completed we soon found out that our Home Depot floor was discontinued and we had bought the few last boxes.  Cue the meltdown.  We had everything timed perfectly… our 800 pound Pottery Barn bed had just been delivered on top of the new discontinued floor.  Talk about a nightmare…we somehow managed to remove the old floor and reinstall the new floor with our massive bed in the room.  Let’s just say it involved some heavy lifting, propping, and tilting.  Anyways…all drama aside I love our bedroom.  It’s incredibly small, but we put a lot of thought and care into maximizing our space as much as possible.  Every little detail was thought out.

But before I get too far ahead of myself let’s see some before photos.  This room is crazy small!

ugly bedroom before photos

ugly bedroom before photos

how to decorate a small bedroom

Clearly we had no room for a dresser or chest so I knew a storage bed was the way to go.  Our tiny bedroom could have benefitted from a queen size bed, but having all kinds of sleep issues I refused to give up my king.  So we went with the king size Raleigh Upholstered Square Tall Bed.  With 4 large spacious drawers built into the bed it’s a perfect solution for us.  We chose the same fabric as our old sofa, the Everyday Performance Velvet in buckwheat.  I mean that fabric is tough!  With this bed I can honestly say I don’t miss having a dresser at all.  I can walk to bed, pull the drawers out with my foot and put on my PJ’s.  That’s lazy girl happiness!

how to decorate a small bedroom

Space saving bedroom ideas

With our large king size bed taking up most of our bedroom space my attention quickly turned to the nightstands.  One afternoon while going over the room plans I suddenly realized there wasn’t enough space to have a traditional nightstand and have clearance for the bed drawers to open.  So that’s how the floating nightstand idea was born.  We taped off our space and knew every inch we had, I found a talented furniture maker on Etsy that was the perfect solution.  The drawer generously holds all our necessary nightstand essentials, I added the brass knobs for a little flair.

Floating nightstand charging station ideas

Having the furniture up off the floor visually opens up the room and tricks the eye to thinking it’s larger.  So our floating nightstands were definitely a win.

One of the many home trends I’ve been wanting to try was pendant lights in place of traditional nightstand lamps.  Our nightstands being 18 inches wide there is no room to waste, so pendant lights were a perfect solution regardless of trends.  Absolutely no space is wasted, we’ve got the full maximum space without the bulk of a lamp base.

When you have a small bedroom and plan on going with floating nightstands it’s extremely important to pay attention to plugs and charging stations.  We had plugs and our pendant light switches wired right under the nightstands.  You can’t see them unless you bend down and look for them.  I charge my iPad, phone, and laptop right inside my nightstand shelf and no cords can be seen.  It’s a clean look without cords flying around everywhere… so important for a space-saving bedroom.  Clutter is the enemy!

Small bedroom decor ideas

Summer days can get warm in Colorado, I knew I wanted a ceiling fan in our room but didn’t want the look of a traditional ceiling fan.  With a lot of research I found the perfect decorative solution.  When you want a ceiling fan with the look of a modern chandelier you get a fandelier.  It looks like a beautiful modern light but if you look closely it has fan blades and it puts out a lot of air.  We’ve been so impressed, this amazing fan kept us cool on the warmest summer nights.  No our ceiling fan isn’t dusty and dirty… if it looks that way on your computer you’ve probably got a virus and need to get that checked out.

Small bedroom decor ideas

The old gallery frames from our previous guest bedroom worked perfectly in the room.  I printed some images from my Trail Ridge post in black and white.  I have such a thing for black and white photos!  They’re just so versatile and timeless.

We kept the room light and bright with Benjamin Moore Simply White on the walls and trim, our knotty alder doors are clear coated with Minwax Satin, and I love how our glass doorknobs provide just the right amount of sparkle!  When our special order bedroom floor was discontinued we decided to go with a basic in-stock engineered wood floor.  We went with the ever so budget friendly Home Legends Wire Brush Natural Hickory.  It’s not a perfect floor but it’s easy to install, budget friendly, and looks amazing. We decided to finish our room with this cozy little rug from Pier One.

Small bedroom decor ideas

Small bedroom decor ideas

Not wanting to overwhelm the room, we kept accessories nice and clean and to a minimum.  Our Samsung Frame TV has great clean lines, a low profile, and lots of different art options to pick from.  I’ve been telling Brian how this TV will save us money… I constantly crave new art with every season, so this TV is a win!

Samsung Frame Smart Art TV

I put my faithful white duvet to work, it’s going on 10 years old!  I love white bedding, not just because it’s a clean look but it’s also versatile, and you can pretty much layer it with any color or pattern.  So in gearing up for fall and winter we went with this delicious red velvet quilt.  It’s so soft and warm, I love Pottery Barn quilts… they last forever!

Pottery Barn velvet quilt

I love the organic warmth from the teak wall art as well.

teak wood wall art

Inside our closets are mostly finished but still in the works.  We have tiny his and hers closets, the original closet area I kept for myself and Brian took the living area coat closet and made into his own.  Again we’ve really maximized our small closet space thanks to The Container Store Elfa Closet Solutions.  They go on sale every January and with this being our second home to use Elfa closets I plan on showing you my favorite Elfa tips and tricks in December.  Just in time for the sale!  Just right outside my closet door I added a brass hook to hang my outfit or bathrobe.  Make your OOTD work for you and double as room decor!

Space efficient bedroom decor ideas

Space efficient master bedroom decor

In the future I might tweak some things in our room, in fact I left room for improvement as I grow with this room.  Keeping things light and bright for now was my goal, especially to maximize space.  However in the future I could see possibly painting the room a warmer neutral shade and possibly adding a tongue and groove stained accent wall behind the bed.  For now I’m quite happy, but having future ideas if I get bored with the room in a few years is a great backup plan.

Bedroom decor ideas

See anything you love in this room?  I’ve got it all linked below.  I use affiliate links and receive a very very small commission if you make a purchase.   However you can rest assured any extra income I receive from my blog my daughter will suck all away, she just got accepted to UT and that means we’re now poor.

It’s been so great to be back blogging with ya!  I’ve got some fun fall blog posts coming up and as soon as we finish the living room floor and baseboards they will be up on the blog.  I’m thinking in another week or so??  Then again I don’t want to jinx myself.

Laura